# Build with Phron AI
Phron AI provides developers with the tools to build decentralized applications (dApps) seamlessly while understanding the current Phron AI Environemnt. With built-in AI computation, smart contract support, and interoperability, you can deploy AI-enhanced contracts and integrate machine learning models on-chain through the upcoming PhronZero. Start by setting up your development environment, exploring the SDKs, and deploying your first smart contract on the AI-driven testnet. Check out the docs for step-by-step guides and API references to accelerate your development.
# Quick Start
A quick dive to the required resources to begin building with Phron AI.
# Rust toolchain
Rust is a modern, type-safe, and high-performance programming language that offers a comprehensive set of features for developing complex systems. Its strong emphasis on safety and concurrency makes it a popular choice among developers. The language is supported by an active and vibrant community, which contributes to a growing ecosystem of reusable libraries known as crates.
### Learning Rust
If you’re looking to dive into blockchain or smart contracts development you’ll need to become well-acquainted with Rust. Understanding the Rust programming language, its compiler, and toolchain management is essential for effectively utilising Substrate.
For beginners, a great starting point is [The Rust Programming Language book](https://doc.rust-lang.org/book/), often referred to as "the book," which provides a thorough introduction to the language. Additionally, the Rust website offers a variety of resources under the [Learn Rust](https://www.rust-lang.org/learn) section that can help guide your learning journey. As you set up your development environment, there are several key points to consider.
### About the Rust Toolchain
The Rust toolchain comprises essential components, including the rustc compiler, the cargo package and build manager, and the rustup toolchain manager. It's important to note that multiple versions of Rust can coexist in your environment, with different release channels available: stable, beta, and nightly builds. The rustup program is crucial for managing these versions and ensuring that you can easily switch between different toolchain programs based on your project’s requirements.
The rustc compiler is designed to produce binaries for various architectures, known as targets. Each target is specified by a string that informs the compiler about the desired output format. This functionality is particularly significant for Substrate, which compiles to both a native Rust binary and a WebAssembly (Wasm) target.
# Install
Before you can begin developing, it’s essential to prepare your development environment by installing the necessary compiler and tools. Since Substrate—and most of the tools used for Substrate development—are built using the Rust programming language, the first step is to install Rust on your computer.
The installation process for Rust varies depending on your operating system. Below are the instructions for each platform:
* **Linux**
Here's an improved version of your Rust installation guide. I've organized the information more clearly, enhanced readability, and provided additional context where needed.
## Rust Installation Guide for Linux
## Before You Begin
### Prerequisites
Before installing Rust, ensure your system meets the following requirements:
1. **Check Documentation:** Refer to your operating system's documentation for information about installed packages and how to download and install any necessary packages.
2. **Required Packages:** At a minimum, you need the following packages:
`clang`
`curl`
`git`
`make`
3. **Cryptography Support:** Since blockchain development requires standard cryptography for generating public/private key pairs and validating transaction signatures, you also need a package that provides cryptography:
For Debian-based systems (like Ubuntu): `libssl-dev`
For Red Hat-based systems (like Fedora): `openssl-devel`
## Install Required Packages
To install the necessary packages, follow these steps:
1. **Open a Terminal:** Log on to your computer and open a terminal shell.
2. **Check Installed Packages:** Use the appropriate package management command for your Linux distribution to check installed packages.
3. **Install Missing Dependencies:** Run the following command to install the required packages. Adjust the command based on your distribution.
### Example for Ubuntu:
{% code overflow="wrap" %}
```bash
sudo apt install --assume-yes git clang curl libssl-dev protobuf-compiler
```
{% endcode %}
### Other Distributions:
* **Debian:**
{% code overflow="wrap" %}
```bash
sudo apt install --assume-yes git clang curl libssl-dev llvm libudev-dev make protobuf-compiler
```
{% endcode %}
* **Arch:**
```bash
sudo pacman -S git clang curl openssl protobuf
```
* **Fedora:**
```bash
sudo dnf install git clang curl openssl-devel protobuf-compiler
```
* **OpenSUSE:**
{% code overflow="wrap" %}
```bash
sudo zypper install git clang curl libopenssl-devel protobuf-compiler
```
{% endcode %}
> ### **Note:**
>
> Different distributions may use different package managers and package names. Ensure you adjust the commands accordingly.
## Install Rust
1. **Download and Install rustup:** Use the following command to download and install the Rust toolchain:
```bash
curl --proto '=https' --tlsv1.2 -sSf https://sh.rustup.rs | sh
```
* Follow the on-screen prompts to proceed with the default installation.
2. **Update Your Shell:** To ensure your current shell session recognizes Cargo (Rust's package manager), run:
```bash
source $HOME/.cargo/env
```
3. **Verify Installation:** Check that Rust is installed correctly by running:
```bash
rustc --version
```
## Configure Rust Toolchain
1. **Set Default Toolchain:** Configure the Rust toolchain to default to the latest stable version:
{% code overflow="wrap" %}
```bash
rustup default stable
rustup update
```
{% endcode %}
2. **Add Nightly Release and Targets:** If you need nightly features or WebAssembly support, add the nightly release and targets:
```bash
rustup update nightly
rustup target add wasm32-unknown-unknown --toolchain nightly
```
3. **Verify Configuration:** Check your development environment configuration:
```bash
rustup show
rustup +nightly show
```
You should see output similar to:
   # rustup show
   active toolchain
   ----------------
   stable-x86_64-unknown-linux-gnu (default)
   rustc 1.62.1 (e092d0b6b 2022-07-16)

   # rustup +nightly show
   active toolchain
   ----------------
   nightly-x86_64-unknown-linux-gnu (overridden by +toolchain on the    command line)
   rustc 1.65.0-nightly (34a6cae28 2022-08-09)
You have successfully installed the Rust toolchain on your Linux system! You can now start developing Rust applications. For more resources and documentation, visit [The Rust Programming Language](https://doc.rust-lang.org/book/).
* **macOS**
Here's an improved version of your documentation for installing Rust on macOS. You can copy this text into Google Docs to save it in .docx format.
## Rust Installation Guide for macOS
### Before You Install
Before setting up your development environment on macOS, ensure your computer meets the following requirements:
* **Operating System:** macOS 10.7 Lion or later
* **Processor Speed:** At least 2 GHz (3 GHz recommended)
* **Memory:** Minimum of 8 GB RAM (16 GB recommended)
* **Storage:** At least 10 GB of available storage
* **Internet Connection:** Broadband connection
* **Apple Silicon Support:** Ensure your setup supports Apple Silicon.
Additionally, **Protobuf** must be installed before the build process begins. To install it, run the following command:
```bash
brew install protobuf
```
## Install Homebrew
Homebrew is the recommended package manager for macOS. If you don't have it installed, follow these steps:
1. **Open Terminal:** Launch the Terminal application on your Mac.
2. **Install Homebrew:** Run the following command to download and install Homebrew:
{% code overflow="wrap" %}
```bash
/bin/bash -c "$(curl -fsSL https://raw.githubusercontent.com/Homebrew/install/master/install.sh)"
```
{% endcode %}
3. **Verify Installation:** Check that Homebrew is installed successfully by running:
```bash
brew --version
```
You should see output similar to:
### Installation of Rust and Dependencies
To set up Rust and its dependencies, follow these steps:
1. **Open Terminal:** Ensure you are in the Terminal application.
2. **Update Homebrew:** Make sure Homebrew is up to date by running:
```bash
brew update
```
3. **Install OpenSSL:** Install the OpenSSL package:
```bash
brew install openssl
```
4. **Install Rust:** Download the `rustup` installation program and use it to install Rust:
```bash
curl --proto '=https' --tlsv1.2 -sSf https://sh.rustup.rs | sh
```
5. **Follow Prompts:** Follow the on-screen prompts to complete the default installation.
6. **Update Shell:** Include Cargo in your current shell session:
```bash
source ~/.cargo/env
```
7. **Verify Installation:** Confirm that Rust is installed correctly by running:
```bash
rustc --version
```
## Configure the Rust Toolchain
1. **Set Default Toolchain:** Configure the Rust toolchain to use the latest stable version:
```bash
rustup default stable
rustup update
rustup target add wasm32-unknown-unknown
```
2. **Add Nightly Release and Targets:** To include nightly features and WebAssembly support, run:
```bash
rustup update nightly
rustup target add wasm32-unknown-unknown --toolchain nightly
```
3. **Verify Configuration:** Check your Rust environment configuration:
```bash
rustup show
rustup +nightly show
```
You should see output similar to:
   # rustup show
   active toolchain
   ----------------
   stable-x86_64-apple-darwin (default)
   rustc 1.61.0 (fe5b13d68 2022-05-18)

   # rustup +nightly show
   active toolchain
   ----------------
   nightly-x86_64-apple-darwin (overridden by +toolchain on the command line)
   rustc 1.63.0-nightly (e71440575 2022-06-02)
## Install CMake
To complete your setup, install CMake with the following command:
```bash
brew install cmake
```
# Developer CLI Tools
| [archive](https://docs.substrate.io/reference/command-line-tools/archive/) | Index and store all blocks, state, and transaction data for a Substrate-based chain in a relational SQL database. |
| -------------------------------------------------------------------------- | ----------------------------------------------------------------------------------------------------------------- |
| [sidecar](https://docs.substrate.io/reference/command-line-tools/sidecar/) | Use a REST service to interact with blockchain nodes built using FRAME. |
| [subkey](https://docs.substrate.io/reference/command-line-tools/subkey/) | Generate and manage public and private key pairs for accounts. |
| [subxt](https://docs.substrate.io/reference/command-line-tools/subxt/) | Submit extrinsics to a Substrate node using RPC. |
# Learn
# Why Substrate
### Substrate as a Strategic Foundation for PHRON
Substrate, a customizable blockchain framework, provides a robust foundation for PHRON. By leveraging its pre-built components, we can expedite development and ensure a solid technological basis for our project.
### Key Advantages of Substrate:
* Comprehensive Feature Set: Substrate offers a wide range of features, including peer-to-peer networking, consensus mechanisms, governance, and an Ethereum Virtual Machine (EVM), eliminating the need for redundant development.
* Tailored Customization: Substrate's modular architecture enables us to customize the framework to meet PHRON's specific requirements, ensuring compatibility with Ethereum.
* Performance and Efficiency: Rust, the programming language underlying Substrate, delivers performance comparable to C and C++, making it ideal for computationally intensive AI algorithms.
* Enhanced Security: Rust's strong memory safety guarantees help prevent common programming errors, bolstering the reliability and security of our AI systems.
* Concurrency and Parallelism: Substrate's concurrency primitives facilitate efficient utilization of multicore processors, optimizing the performance of AI algorithms.
* Rich Ecosystem: Substrate benefits from a thriving ecosystem of libraries and tools, including those specifically designed for machine learning and data processing, accelerating development and deployment.
### Leveraging Rust for AI Development:
Rust's combination of performance, memory safety, and concurrency features make it an exceptional choice for AI development. Its ability to handle complex algorithms efficiently, while ensuring reliability and security, is indispensable for AI applications that demand high performance and trustworthiness.
### Conclusion
By building PHRON on Substrate and utilizing Rust, we can establish a robust foundation for our AI-driven initiatives. The framework's comprehensive features, combined with Rust's performance and security, will empower us to develop efficient, secure, and scalable AI solutions.
# Ethereum Compatible
### Phron's EVM Compatibility: Bridging Ethereum and Beyond with Rust's Power
Phron's fully integrated Ethereum Virtual Machine (EVM) empowers developers to seamlessly deploy and execute smart contracts written in Solidity or other EVM-compatible languages. This compatibility leverages a robust Rust implementation of the EVM, built upon the well-established[ rust-ethereum/evm](https://github.com/rust-ethereum/evm) project. This choice of Rust ensures exceptional performance, memory safety, and security, making Phron a reliable platform for demanding smart contract applications.
### Key Benefits of Phron's EVM Integration with Rust's rust-ethereum/evm:
* Seamless Interoperability: Developers can leverage their existing Ethereum knowledge and codebase, minimizing the learning curve and accelerating development.
* Expanded Ecosystem: Phron benefits from a vast ecosystem of Ethereum tools, libraries, and developer communities, fostering innovation and collaboration.
* Enhanced Compatibility: Phron's EVM implementation adheres to Ethereum's security standards, providing a secure and reliable environment for smart contract execution.
* Advanced Performance: Rust's inherent efficiency provides a significant performance boost for running EVM bytecode compared to other languages.
* Exceptional Security: Rust's memory safety guarantees significantly reduce vulnerabilities often associated with traditional smart contract development languages.
### Key Differences Between PHRON and Ethereum
**Consensus Mechanisms:**
Phron employs a novel approach to consensus by combining Proof-of-Stake (PoS) and Directed Acyclic Graphs (DAGs) under the supervision of AI. The committee of validators, selected based on their overall performance and participation in the network chosen by SophiaAI protocol, is responsible for verifying the validity of transactions and blocks.
**Finality:**
PHRON and Ethereum have distinct approaches to finality mechanisms. Ethereum utilizes a checkpoint system wherein validators determine finality at designated block checkpoints, leading to an average delay of approximately 6.4 minutes for block finalization. In contrast, PHRON employs the AlephBFT finality gadget, which enables significantly faster finality, especially when enhanced by AI-driven processes.
When comparing finality mechanisms, AlephBFT offers advantages in terms of speed and efficiency. It is designed to achieve consensus quickly, making it particularly suitable for high-throughput environments. On the other hand, Ethereum’s GRANDPA (GHOST-based Recursive ANcestor Deriving Prefix Agreement) finality mechanism, while robust and secure, introduces latency due to its reliance on the checkpointing system.
Overall, the combination of AlephBFT and AI in PHRON allows for rapid and efficient block finalization, positioning it as a strong alternative to Ethereum's finality approach.
# Governance on PhronAI
### Participation[](https://developers.flow.com/networks/governance#participation)
Participating in the governance process can take three forms:
* Being elected as a council member on the governing committee
* Putting forth a proposal for the community to vote on
* Staking to receive voting rights
Votes will be weighted based on locked tokens. All tokens staked by node operators will be eligible for voting, but other users can lock up their tokens to be given voting power. Anyone will be able to stake a Flow token to vote on issues (even if they aren’t participating as a staked node).
### Token Holder Rights[](https://developers.flow.com/networks/governance#token-holder-rights)
Tokens may be staked for operation or governance rights which gives holders the right to participate in running a node and/or to participate in public votes.
### Process[](https://developers.flow.com/networks/governance#process)
Proposals can be brought forward on a public forum where they will be evaluated by the governing committee. All decisions are made publicly and any stakeholder has the opportunity to organize grassroots action to veto specific decisions or to vote in or remove council members.
To ensure the progress of the network, the elected council first assesses the proposal and selects an answer they agree to be the "default choice". Voters can freely vote how they choose, but having a well-considered default allows forward progress without being blocked by passive participants. All decisions are voted on by all participants and decisions made by the council must be ratified by a public vote on the network.
#### Timing[](https://developers.flow.com/networks/governance#timing)
Vote outcomes and upcoming votes will be published every Friday by 7am PT. All upcoming votes are available for review and voting for at least two weeks following their publication.
### Protocol Set Parameters[](https://developers.flow.com/networks/governance#protocol-set-parameters)
The following parameters will be set on the network on day 1 and will not be candidates for a public vote when the network first launches.
* The staking ratio preserved between each node type
* The maximum inflation rate
* The role of FLOW as the main reserve asset for collateralized secondary tokens (e.g. stablecoins)
* The mechanism through which transaction inclusion, computation, and storage fees are determined and paid for
### Early Governance of the Protocol[](https://developers.flow.com/networks/governance#early-governance-of-the-protocol)
Once governance is enabled, the community can participate in the following:
* Protocol upgrades, including things like: - the consensus algorithm - the low-level network communication structure - the execution environment - the number of seats available for each node type
* Management of Ecosystem Development Fund, including: - issuance of grants - bug & feature bounties
* Selecting council members
* Committee budgets for each of the operational arms of the Foundation, including the executive, technical, operational, legal, pricing, financial, and marketing branches.
* Management of legal affairs, including: - enforcing license and patent infringements - issuing takedown notices and copyright infringement - freezing accounts if illegal activity occurs - updating the community, security, contribution policies
During the Bootstrapping Phase, anyone may apply online to be set as a Validator by the Company. Approved Validators must then Stake a fixed minimum of FLOWs based on Validator type. Other FLOW holders may become “Delegators” when they dedicate or “Delegate” their FLOWs to approved Node Operators as a signal that they believe that Validator to be an effective and honest participant of the network. Staking and Delegation features are already enabled as of the Effective Date.
Each Validator makes an individual decision of which Protocol Version they choose to use. Since the value of blockchain networks is primarily due to the collectively verified execution state, there is a strong incentive for Validators to choose a Protocol Version that is compatible with the Protocol Version selected by the majority of other Validators. As a practical matter, the Protocol Version chosen by the overwhelming majority of Validators is likely to be the most recent Protocol Version produced and recommended by the Core Team, provided the proposed changes are not contentious. However, if a significant fraction of the community disagrees with any aspect of the most recent Protocol Version, they can band together to use a previous Protocol Version, or some other Protocol Version defined independently from the Core Team. This process of a “contentious forking” is rare, but does have several precedents in other networks (REF: Ethereum Classic, Bitcoin Cash).
The process by which the Core Team chooses the updates for each new Protocol Version follows the open process described above, using GitHub as an open discussion platform to gauge the priorities and needs of the entire Flow ecosystem. The proposed changes by the Core Team will be announced and discussed well before they are implemented, and any community member can propose their own changes or contribute code updates to implement any proposed changes. The details of a new Protocol Version are publicly available no less than 14 days before that version is formally recommended for use by Validators (a “Release”), with the complete implementation source code visible for no less than 7 days before a Release.
# Use
# Wallets
Cryptocurrency wallets are fundamental to the Web3 ecosystem, empowering users with full control over their assets. Phron provides its own native web wallet.
To set up a new **PHRON account** on the testnet, follow these steps:
1. **Visit the Testnet**: Go to [dev.phron.ai](https://dev.phron.ai).
2. **Select "Phron" Network**: In the top left corner of the page, ensure that "Phron" is selected as the active network.
At this point, you should see the interface where you can proceed with account creation and manage your testnet activities.
That's the default view of the **Phron web wallet**—a block explorer displaying the most recent blocks and events. To access all account-related actions, simply navigate to the [**Accounts**](https://dev.phron.ai/#/accounts) tab, where you can manage your wallet, stake funds, and interact with other features of the Phron network.
Please note that many functionalities of the **Phron web wallet** require at least one account with funds present in the [**Accounts**](https://dev.phron.ai/#/accounts) tab. Without a funded account, some tabs and menus may be inaccessible or hidden, limiting your ability to utilize certain features of the wallet effectively.
### Account actions
{% hint style="info" %}
Please note that an **account** on the blockchain is distinct from the **wallet** used to create it. An account serves as an entry in the public blockchain database, storing information about funds, transactions, staking, and more. In contrast, a wallet is a tool that holds a private key (or mnemonic seed phrase) associated with an account, enabling interaction with it.
Importantly, the same account can be accessed through multiple wallets as long as the same mnemonic seed is used. Therefore, if you already have an account created with another wallet and wish to start using the web wallet, there’s no need to create a new account and transfer all your coins. Instead, simply import your existing account into [**dev.phron.ai**](https://dev.phron.ai) using the steps outlined below.
{% endhint %}
To **create a new account**, please:
1. Proceed to the [Accounts](https://dev.phron.ai/#/accounts) tab.
2. Click on Add Account.
3. You'll see your mnemonic seed. Save it in multiple secure locations to ensure you have access to your wallet.
4. Follow the on-screen instructions:
1. Set a local name for your account.
2. Choose a local password (it's only relevant for using this account via the [dev.phron.ai](https://dev.phron.ai) web wallet).
3. At the final step, ensure you select the appropriate location to save your backup **.JSON files**. These files provide an additional method for wallet recovery in case you lose your mnemonic seed phrase. To recover your account using the **.JSON file**, you will need to enter the password you selected in the previous step. This added layer of security ensures that your funds remain protected while still being accessible in case of emergencies.
To **import an existing account using seed phrase**, please:
1. Proceed to the [Accounts](https://dev.phron.ai/#/accounts) tab.
2. Click on Add Account.
3. You'll see a random mnemonic seed. Replace it with the mnemonic seed of the account you wish to import
4. Follow the on-screen instructions (same as above)
To **import an existing account using .JSON backup**, please:
1. Proceed to the [Accounts](https://dev.phron.ai/#/accounts) tab.
2. Click on Restore JSON.
3. Upload your backup .JSON file and enter the associated password.
To **remove your account** from the web wallet, please:
1. Proceed to the [Accounts](https://dev.phron.ai/#/accounts) tab.
2. Next to the account you would like to remove, click 3 dots and select Forget this account.
3. Please note that this action happens purely on the client side and does not interact with the blockchain. Your account (together with all funds, staked coins, etc.) will stay on the chain unchanged. It will be only removed from the local list on the [Accounts](https://dev.phron.ai/#/accounts) tab. You can reimport it at any time using the procedures described above.
#### **Browser extensions**
An alternative way to manage your accounts accessible via the **phron.ai web wallet** is by using the **Phron Signer extension**, developed and maintained by the core team. This web browser extension securely stores your Phron blockchain accounts and allows you to use them seamlessly across the **phron.ai wallet** and other compatible websites, such as the **Staking Dashboard** and **Contracts UI**.
The process of **creating**, **importing**, or **removing** an account in the **Phron Signer extension** closely mirrors the steps described for the web wallet. The most important aspect to focus on is the **mnemonic seed phrase** linked to your account, as it ensures access and recovery across different platforms. Furthermore, the **backup .JSON files** generated by the web wallet are fully compatible with the browser extension, allowing for seamless account management between both tools.
Alternatively, [Polkadot{.js} extension](https://polkadot.js.org/extension/) works in a similar way.
## Phron AI DeWallet
### **Overview**
[**Phron AI DeWallet**](https://phron.ai/wallet) is a decentralized wallet designed to provide users with seamless control over their assets on Web3. The wallet offers a simple, user-friendly interface for managing cryptocurrencies, tokens, NFTs, and engaging in various blockchain transactions. Available for use in browsers like **Brave** and **Chrome**, Phron AI DeWallet supports transactions, token management, and staking directly from the browser.
**Key Features**
* **Decentralized Control**: Users maintain full ownership of their assets without relying on centralized intermediaries.
* **Multi-Asset Support**: Manage cryptocurrencies, tokens, and NFTs all in one place.
* **Ease of Use**: Intuitive design for both beginners and experienced blockchain users.
* **Cross-Platform**: Available on both **Brave** and **Chrome** browsers for smooth accessibility.
**Main Screens**
The wallet provides a streamlined interface divided into the following key screens:
1. **Login/Unlock Screen**
* **Welcome Back**: Upon opening the wallet, users are greeted with the login interface. You can unlock the wallet using a Google account or another supported method.
* **Security Options**: There are options for unlocking the wallet securely via biometric or password authentication.
2. **Transaction Screen**
* **Sending**: The transaction screen allows users to easily send cryptocurrencies or tokens.
* **Inputs**: Users can enter the recipient's address, the amount to be sent, and select the asset type (e.g., PHRN tokens).
* **Gas Fees**: The screen shows a breakdown of gas fees to be paid for the transaction, giving users full control over how much they wish to spend.
* **Confirmation**: Before sending, users can review the transaction details and confirm or reject.
3. **Accounts Screen**
* **Balance Overview**: This screen displays the user’s accounts and their balances in PHRN or other supported assets.
* **Asset Management**: The account screen allows users to easily access token balances, view recent transactions, and interact with their stored assets.
### **Supported Browsers**
[Phron AI DeWallet](https://phron.ai/wallet) is compatible with:
* **Brave Browser**
* **Chrome Browser**
**User Guide**
**1. Installing the Wallet**
* Visit the [Phron AI DeWallet](https://phron.ai/wallet) page and select the appropriate option for your browser (**Brave** or **Chrome**).
* Follow the installation instructions for your selected browser to add the extension.
**2. Creating/Importing an Account**
* After installation, launch the wallet and create a new account by generating a mnemonic seed phrase.
* Alternatively, import an existing account using your mnemonic seed or backup .JSON file.
**3. Sending Tokens**
* Go to the "Send" section in the wallet.
* Enter the recipient's wallet address, select the amount and asset type (e.g., PHRN).
* Confirm the transaction details, review the gas fees, and click **Send**.
**4. Viewing Assets**
* Navigate to the **Accounts** section to see a breakdown of all your assets.
* From here, you can manage your tokens, stake assets, or transfer funds.
**Security**
* **Private Key Storage**: Your private keys are stored securely within the wallet and never shared with any third-party service.
* **Backup**: Ensure you back up your mnemonic seed phrase and/or .JSON file for wallet recovery.
**Conclusion**
[Phron AI DeWallet](https://phron.ai/wallet) is designed to simplify the management of Web3 assets, providing a secure and intuitive interface for users to engage with the blockchain. With compatibility across multiple browsers and support for various assets, it offers an ideal solution for managing cryptocurrency in a decentralized manner.
### **Third-Party Wallets**
There are also a number of third-party wallets available in the Phron ecosystem**:**
* [Talisman](https://talisman.xyz/)
{% hint style="danger" %}
Please note that the **core team** is not responsible for the development or maintenance of third-party wallets and, therefore, cannot guarantee their security measures. It is important to use third-party wallets with caution and ensure they follow proper security practices.
{% endhint %}
# Explorer
The Phron Explorer is available through PhronScan and provides real-time information on all on-chain activities.
The **Phron explorer** is accessible through [**PhronScan**](https://testnet.phronscan.io), a high-precision Web3 service designed for **Substrate chains**. PhronScan offers real-time insights into various aspects of the network, including **Chain Data**, **Token Status**, **Latest Blocks**, **Transfers**, and **Validators**. Its user-friendly interface makes it easy to navigate and track important network activities.
# Bridge
### **Bridge User Guide: PhronAI, PHRToken, WrappedETH, and ETH**
This guide will walk you through the steps to bridge tokens between the PhronAI and Sepolia networks, converting PhronAI tokens to PHRToken (and vice versa) as well as WrappedETH on PhronAI to ETH on Sepolia (and vice versa).
#### **1. Connecting to the Bridge Platform**
* **Open the Bridge Interface**: Access the bridge platform and connect your multi-network wallet, such as MetaMask.
* **Select the Network**: Choose either **Sepolia** (for PHRToken/ETH) or **PhronAI** (for PhronAI/WrappedETH), depending on the direction of your transfer.
#### **2. Approve Token Transfers for Bridging**
1. **Choose Your Token**:
* For **PhronAI to PHRToken**, select the PhronAI token on the PhronAI network.
* For **WrappedETH to ETH**, select WrappedETH on the PhronAI network.
2. **Approve the Bridge Contract**:
* You must allow the bridge contract to access your tokens for transfer. This approval only needs to be done once per token type. Confirm the approval request in your wallet.
#### **3. Converting Tokens (Bridging Transactions)**
1. **Enter the Amount**: Specify the amount of the token you wish to bridge.
2. **Initiate the Transfer**:
* *For PhronAI to Sepolia*: Select “Transfer” to move PhronAI (or WrappedETH) to the Sepolia network. This locks the original tokens on PhronAI and mints PHRToken (or ETH) on Sepolia.
* *For Sepolia to PhronAI*: Select “Transfer” to move PHRToken (or ETH) to the PhronAI network. The bridge contract locks the tokens on Sepolia and releases the equivalent amount on PhronAI as PhronAI or WrappedETH.
#### **4. Monitoring the Transaction**
1. **Transaction History**: Check the “Transaction History” section on the bridge interface for updates on your transfer status.
2. **Claim Tokens**:
* For some transfers, you may need to click “Claim” once the transaction is confirmed on the destination network to complete the bridge process.
* Tokens will appear in your wallet once finality is achieved.
#### **5. Withdrawing Tokens (Optional)**
* You can reverse the process if you wish to return PHRToken to PhronAI or WrappedETH to ETH. Follow the same steps, choosing the correct token and network for the direction of transfer.
#### **Conversion Rates and Fees**
* **Conversion Rates**: All bridge conversions are 1:1, meaning that PhronAI always converts to an equivalent amount of PHRToken, and WrappedETH always converts to an equivalent amount of ETH.
* **Fees**: Gas fees and potential bridge fees apply depending on network congestion and platform requirements. Confirm fees in the bridge interface before transferring.
This guide covers all steps for securely converting tokens between PhronAI and Sepolia networks. For further assistance, refer to the bridge’s support documentation or explore transaction history via the Sepolia and PhronAI blockchain explorers.
# Staking
### Direct Nomination: A Personalized Staking Approach
Direct nomination, also known as standalone nomination, offers a personalized staking experience where you, as the user, act as the sole nominator. This approach provides you with complete control over your nominations, allowing you to select validators and adjust your stake without adhering to unbonding periods.
### Minimum Stake Requirement:
To embark on direct nomination, you'll need a substantial minimum stake, currently set at 100 PHR. Please note that this requirement may increase over time as the network evolves.
#### Steps to Become a Direct Nominator:
1. Access the Staking Tab: Navigate to the Staking tab within the interface.
2. Enable Stashed Mode: Ensure that the Stashed mode is activated in the top-left corner of the Accounts tab.
3. Initiate Nomination: Click the "Nominator" button to start the nomination process.
4. Configure Nomination Settings: In the pop-up window, select your Stash account, specify the desired amount of coins to bond, and choose your preferred reward destination.
5. Select Validator: Choose the validator you wish to nominate from the available options.
6. Authorize Transaction: Confirm your nomination by authorizing the transaction.
### Understanding the Nomination Process:
Once you submit your nomination, it will initially appear as a "Waiting nomination" in the Accounts tab. This status will transition to "Active nomination" at the beginning of the next era.
### The following options are available as destinations for your staking rewards:
* Stash account (increase the amount at stake) - the rewards are sent to your stash account and automatically included in your bonded stake, meaning they will increase your future rewards.
* Stash account (do not increase the amount at stake) - the rewards are sent to your stash account, but are not automatically bonded. They are available as transferable coins right away and do not contribute to future rewards, unless manually bonded.
* Specified payment account - the rewards are sent as transferable coins to some other account of your choice.
## Unstaking :
## Reducing Your Staked Coins While Remaining a Nominator
To decrease the amount of staked coins while continuing as a nominator, please follow these steps:
1. Access the Staking Tab: Navigate to the Staking tab of the mainnet and select the Accounts tab. Ensure that the "Stashed mode" is enabled in the top left corner. You will see a list of all your accounts participating in direct nominations.
2. Select the Account for Unbonding: For the account from which you wish to reduce your stake, click the three dots at the end of the line and select Unbond funds.
3. Specify the Amount: In the pop-up menu, choose the amount of coins you would like to unbond. Please note that you cannot reduce your stake below the minimum amount of 100 PHR.
4. Complete the Unbonding Process: Click Unbond and sign the transaction.
5. View the Updated Nomination: In the Accounts tab, your updated nomination will result in a new entry appearing in the bonded column. The amount you chose to unbond will be indicated with a clock icon. Hovering over this icon will display the number of eras remaining in the unbonding period.
6. Withdraw Unbonded Funds: After the unbonding period has concluded, click the three dots button again and select Withdraw unbonded funds. Note that this option will be available only if your account has funds that have completed the unbonding process.
7. Finalize the Withdrawal: Sign the transaction to transfer your unbonded coins.
***
### Unstaking All Your Coins and Ceasing to Be a Nominator
To unstake all your coins and stop being a nominator, follow these steps:
1. Access the Staking Tab: Navigate to the Staking tab of the mainnet and select the Accounts tab. Ensure that the "Stashed mode" is enabled in the top left corner. You will see a list of all your accounts participating in direct nominations.
2. Stop Nominating: For the account from which you wish to stop nominating, click the Stop button at the end of the line and sign the transaction in the pop-up window.
3. Unbond Funds: Click the three dots at the end of the line and select Unbond funds.
4. Select All Bonded: In the pop-up menu, select the All Bonded toggle to ensure that all your funds will undergo unbonding. Entering the full value without this toggle may not work due to fractional coins that are not displayed in the UI.
5. Complete the Unbonding Process: Click Unbond and sign the transaction.
6. View the Updated Nomination: In the Accounts tab, a clock icon will appear in the bonded column, indicating your modified nomination. Hovering over the clock will show the number of eras remaining in the unbonding period.
7. Withdraw Unbonded Funds: After the unbonding period has finished, click the three dots button again and select Withdraw unbonded funds. This option will be active only if the corresponding account has funds that have completed the unbonding process.
8. Finalize the Withdrawal: Sign the transaction to make your unbonded coins transferable.
# Menu Overview
Overview of the Staking UI on dev.phron.ai
If you're ready to start staking immediately, you can jump to the section **How to Start Staking With the Developer Wallet**. The following section provides a deeper dive into the various tabs and menus available on the staking platform: .
Most of the staking functionalities can be easily accessed through the **Staking** menu located under the **Network** tab.
Accessing the Staking Menu
{% hint style="info" %}
**Note**: The screenshots featured in this guide are taken from the Phron Testnet platform (available at [dev.phron.ai](https://dev.phron.ai)).
{% endhint %}
The **Staking** menu includes the following tabs: **Overview, Accounts, Payouts, Pools, Targets, Slashes, Validator Stats, Performance**, and **Suspensions**. Below, we provide an explanation of the contents and purpose of each tab.
### Overview
The Overview tab (testnet)
This tab provides key global staking data, including:
* The number of validators elected in the current era.
* The number of nominators in both the current and upcoming eras.
* The total percentage of **staked PHRON**, shown as a fraction of all PHRON in circulation.
* **Current yearly inflation**: Beginning on October 14th, 2024, 27 million coins will be emitted for the first year. This emission rate will reduce exponentially each year until the community-approved maximum supply of 520 million coins is reached.
* The current **session** number and **era** number.
The table displays a list of all current validators, including their total stake (split into their own stake and that from nominators), a list of nominators, and their current commission rate.
### Accounts
This tab displays a list of all your accounts involved in staking. Please note that an account will only appear here if it has been added in the **Accounts** tab or injected via a browser extension. From this tab, you can perform all staking-related actions, such as bonding or unbonding coins, as well as selecting or changing the validator you wish to nominate. To view the available actions for each account, click the three dots button at the end of the corresponding account line.
In the **Stashed** view, you can perform actions related to direct nomination, as well as actions for being a validator.
The Stashed view (testnet)
### Payouts
This tab displays a list of rewards that have been awarded (for eras that have ended) but not yet claimed (distributed to the validator and their nominators). Currently, this tab is not very useful, as the Foundation operates an automated service that triggers payouts to all nominators and validators whenever they are available (note that this does not apply to pools). Therefore, this tab will almost always be empty. This is expected, and seeing it empty does not mean you have never received any rewards. If you want to view your historical payouts, we recommend using [**PhronScan**](https://testnet.phronscan.io)—simply enter your account in the search bar to display your account details, including staking rewards.
### Targets
Targets tab on mainnet
In this tab, you can easily analyze all available validators. Validators with a blue arrow next to them are currently part of the era committee. You can sort the list by parameters such as **return**, **total stake**, and others.
### Slashes
One of the defense mechanisms protecting the Phron blockchain against malicious agents is a slashing mechanism that financially penalizes users for disrupting the network's operations. The **Slashes** tab allows you to view users who have engaged in dishonest behavior and had their funds slashed. However, it's important to note that there is currently no automatic slashing on Phron. At the time of writing, there have been no reported cases of malicious behavior from any validators, so you will likely find this tab empty.
### Validator stats
Validator stats on testnet
In this section, you can query the Account ID of any validator to view their basic statistics. This feature is primarily useful for validators, but as a nominator, you can also use it to assess the performance of your chosen validator, particularly to check for any recent sessions in which they may have underperformed. Below, you will find diagrams displaying:
* Rewards received in a given era and the average reward up to that era.
* Total stake for a given era.
* Validator commission in a given era.
The history accessible by this tab goes back 84 eras.
### Performance
Performance tab on mainnet
The **Performance** tab allows you to track the current session in real-time and analyze past sessions to see how many blocks each validator has created. This information is primarily of interest to validators, as the numbers do not directly indicate the rewards that validators or their nominators will receive. If you would like to explore this topic further, please refer to the **Elections and Rewards Math** section.
# How to Start Staking with the Phron Dashboard
This guide will outline how to stake via the Phron Dashboard
First, you need to hold PHRON, which you can currently acquire through one of the available exchanges.
Currently, there are two ways to stake on Phron:
1. **Direct Nomination**: This method requires a significant minimum stake of 2,000 PHRON (as of the time of writing). Keep in mind that this minimum may increase in the future. With direct nomination, you have full control over your nominations and can change them freely without undergoing the unbonding period (which lasts 14 days).
2. **Pooled Nomination**: In this method, you join an existing staking pool that combines a group of stakers. One of the benefits is that you can stake as little as 10 PHRON. Additionally, it can be convenient for users who prefer not to select their own validator, as the pool operator makes that choice for you. However, there are some downsides: currently, switching between pools requires going through the unbonding period, and the only way to auto-compound your rewards is to manually claim them and periodically add them to the pool.
#### **Staking via a nomination pool**
* Head to the [mainnet web wallet](https://phron.ai) and create one account as per this tutorial OR directly via one of the compatible extensions (listed below). You only need one account to join a nomination pool.
**If you already have an account, you can skip this process.**
* Next, you need to ensure that you are using a compatible browser extension. If you are already using one, you can skip this step. If not, you will need to install a compatible extension and restore your accounts. The available options (with linked tutorials) are:
* [polkadot{.js} extension](https://support.polkadot.network/support/solutions/articles/65000169952-how-to-restore-your-account-in-the-polkadot-extension)
* Subwallet
* Talisman
* [Enkrypt](https://www.enkrypt.com/)
* Navigate to the **Phron Dashboard** and click on the **Pools** tab.
* Click **Connect** in the top right corner of the page and select your browser extension. This will prompt a pop-up from the extension.
* In the pop-up, authorize the connection.
* Select **Imported Accounts** and choose your account.
* Click **Join**, which will take you to the **All Pools** section. Then, click **Join** next to your desired pool.
* Enter the amount you wish to bond to the pool and submit the transaction via the extension. Depending on your settings, you may need to enter your account password at this point.
{% hint style="warning" %}
### **NOTE!**
When you stake through a nomination pool, it is normal for your coins to be transferred out of your account. Your coins are sent and bonded to the pool, meaning they cannot be accessed by the pool operator. Once you unbond (a process that takes 14 days), you will be able to withdraw your coins from the pool.
{% endhint %}
Congratulations! You have successfully staked your coins through a nomination pool. The **Pool Status** in the **Pools** tab should now display as **Nominating** and **Earning Rewards**.
### Staking via Direct Nomination
Starting with release 12.0, controller accounts are deprecated for new stakers. When bonding funds, you will be required to set the controller account to be the same as the stash account.
With the release of 13.0, you will have the option to use Proxy Accounts.
* **Create an Account**: Visit the Mainnet web wallet and create an account following this tutorial or directly through one of the compatible extensions listed below. If you already have an account, you can skip this step. Make sure your account has enough PHRON to cover transaction fees.
* **Check Browser Extension Compatibility**: Ensure that you are using a compatible browser extension. If you are already using one, you can skip this step. If not, you will need to install a compatible extension and restore your accounts. The available options (with linked tutorials) are:
* [polkadot{.js} extension](https://support.polkadot.network/support/solutions/articles/65000169952-how-to-restore-your-account-in-the-polkadot-extension)
* Subwallet
* Talisman
* [Enkrypt](https://www.enkrypt.com/)
* **Access the PHRON Dashboard**: Navigate to the **Nominate** tab.
* **Connect Your Wallet**: Click **Connect** in the top right corner of the page and select your browser extension. This will prompt a pop-up from the extension. Authorize the connection in the pop-up.
* **Select Your Account**: Click on **Imported Accounts** and choose your stash account. If you are using proxy accounts, you can select either the proxy or proxied account, and the dashboard will import both for you. The proxy account will be used to sign staking transactions from this point forward.
* **Start Nominating**: Click **Start Nominating** and follow the prompts until you reach the summary. You will need to enter or select the following details:
* **Reward Destination**
* **Validator**
* **Amount to Stake**
* **Finalize Your Nomination**: Once you reach the summary, click **Start Nominating** and sign the transaction via the extension. Depending on your settings, you may need to enter your account password at this stage.
Congratulations! You have successfully made a direct nomination! Your status should now show as **Waiting for Active Nominations**. Once the next era begins, this status will change to **Nominating and Earning Rewards**.
# How to Change Nominations
Discover how to change your nominations while staking on Phron's secure blockchain, which incorporates privacy-enhancing technology.
Nominating a specific validator with your staked PHRON signifies your trust in their ability to act honestly and effectively produce blocks. As a nominator, it is your responsibility and in your best interest to ensure that your chosen validator is reliable and trustworthy. Always remember to do your own research.
If you decide to change your selected validator at any point, you can find step-by-step instructions below for both direct nominators and members of a nomination pool.
#### Direct nomination
1. **Access the Staking Tab**: Go to the **Staking** tab of the testnet, then navigate to the **Accounts** tab. Ensure that **Stashed mode** is enabled in the top left corner. You will see a list of all your accounts participating in direct nominations.
2. **Select the Account**: For the account from which you want to change the nomination, click on the three dots at the end of the line and select **Set Nominees**.
3. **View Current Nominations**: In the pop-up menu, you will see your currently selected validator in the **Nominated Accounts** column.
4. **Change Validator**: Click on the validator’s name to remove it from the nominated accounts.
5. **Choose a New Validator**: Find your new validator in the **Candidate Accounts** list and click on it. The name should now appear in the **Nominated Accounts** column.
6. **Finalize the Nomination**: Click the **Nominate** button and sign the transaction to complete the process.
In the **Accounts** tab, your newly modified nomination will change the status from **Active Nominations** to **Waiting Nominations**. Your choice will become active at the beginning of the next era.
Please note that you will continue to nominate your previous validator until the end of the current era. This ensures that switching to a new validator does not create any gaps in your nomination period, allowing you to receive rewards without interruption during the transition.
#### Nomination pools
Unlike the direct nomination mode, you cannot quickly switch to a different nomination pool and have the change take effect at the beginning of the next era. Instead, you must first leave your current pool, which requires waiting through a 14-day unbonding period, before joining the new pool.
For step-by-step instructions on how to do this, please refer to the sections related to nomination pools in **How to Stop Staking** and **How to Start Staking With the Developer Wallet**.
# How to Stop Staking
Follow these steps to stop staking on Aleph Zero, a secure blockchain with zk-proof technology.
Regardless of whether you are a direct nominator or a member of a nomination pool, you can decide to decrease your stake or withdraw from staking at any time. In either case, you will need to wait through the 14-day unbonding period before your coins are released and become transferable.
#### Direct nomination
**To decrease the amount of staked coins, but keep being a nominator please:**
1. **Access the Staking Tab**: Go to the Staking tab of the testnet and navigate to the Accounts tab. Ensure that Stashed mode is enabled in the top left corner. You will see a list of all your accounts participating in direct nominations.
2. **Select Your Account**: For the account from which you wish to reduce your stake, click the three dots at the end of the line and select **Unbond funds**.
3. **Specify the Amount**: In the pop-up menu, choose the amount of coins you would like to unbond. Please remember that you cannot decrease your stake below the minimum amount of 2,000 PHRON.
4. **Complete the Unbonding Process**: Click **Unbond** and sign the transaction.
5. **View Your Updated Nomination**: In the Accounts tab, your newly modified nomination will result in a new entry appearing in the bonded column. The amount you decided to unbond will be indicated with a clock icon. Hovering over the clock will show you how many eras are left in the unbonding period.
6. **Withdraw Unbonded Funds**: After the unbonding period is complete, click the three dots button again and select **Withdraw unbonded funds**. Note that this option is available only if your account has funds that have finished unbonding and are ready to be withdrawn.
7. **Finalize the Withdrawal**: Sign the transaction. Your unbonded coins are now transferable.
**To unstake all your coins and stop being a nominator please:**
* **Access the Staking Tab**: Navigate to the Staking tab of the testnet and select the Accounts tab. Ensure that **Stashed mode** is enabled in the top left corner. You will see a list of all your accounts participating in direct nominations.
* **Stop Nominating**: For the account from which you wish to stop nominating, click the **Stop** button at the end of the line and sign the transaction in the pop-up window.
* **Unbond Funds**:
* Click the three dots at the end of the line and select **Unbond funds**.
* In the pop-up menu, enable the **All Bonded** toggle to ensure all your funds will be subject to unbonding. Entering the full value without this toggle on may not work due to fractional coins that are not displayed in the UI.
* **Complete the Unbonding Process**: Click **Unbond** and sign the transaction.
* **Monitor the Unbonding Period**: In the Accounts tab, your modified nomination will now show a clock icon in the bonded column. Hovering over this icon will display how many eras are left in the unbonding period.
* **Withdraw Unbonded Funds**: After the unbonding period is complete, click the three dots button again and select **Withdraw unbonded funds**. This option will be available only when your account has funds that have finished unbonding and are ready for withdrawal.
* **Finalize the Withdrawal**: Sign the transaction. Your unbonded coins are now transferable.
#### Nomination pools
For members of nomination pools the procedure of decreasing the amount of staked coins is almost the same as the one for completely leaving the pool. Please follow the steps below:
#### Unbonding Funds from the Nomination Pool
1. **Access the Staking Tab**: Navigate to the **Staking** tab of the testnet. Ensure that the **Pooled mode** is enabled in the top left corner.
2. **View Your Accounts**: In the **Accounts** section, you'll see a list of all your accounts participating in the nomination pools.
3. **Select the Account**: For the account from which you want to reduce your stake, click on the three dots at the end of the line, then select **Unbond funds**.
4. **Choose the Amount to Unbond**:
* In the pop-up menu, specify the amount of coins you wish to unbond.
* **Important**: You must maintain a minimum balance of **10 PHRON** to remain a member of the nomination pool. If you intend to leave the pool entirely, toggle on the **All Bonded** option to unbond the entire amount. This ensures that you account for any fractional coins that may not be visible in the UI.
5. **Confirm the Unbonding**: Click **Unbond** and sign the transaction to initiate the process.
6. **Monitor the Unbonding Status**: In the **Accounts** tab, you'll notice a clock icon appearing in the **Bonded** column next to the amount you chose to unbond. Hovering over the clock will display the number of eras remaining in the unbonding period.
7. **Withdraw Unbonded Funds**: After the unbonding period is complete:
* Click the three dots button again and select **Withdraw Unbonded**. Note that this option will only be available if your account has unbonded funds ready for withdrawal.
* Sign the transaction to transfer your unbonded coins back to your account.
# Staking Rewards
This document provides a comprehensive explanation of the PHRON node staking process, focusing on how rewards are calculated, distributed, and influenced by key factors such as Annual Percentage Rate (APR) and total node participation. By detailing these mechanisms, this guide will help node operators understand the staking process and optimize their rewards over time.
## 1. Node Overview
* **Node Name: Zeus**\
The node's name, Zeus, serves solely as a label and does not influence the staking or reward calculation processes.
* **Tokens Required:**\
A minimum of 200,000 PHR tokens is required to set up and operate a Zeus node. These tokens remain locked within the node for the entire duration of its operation unless otherwise modified by the validator.
* **Price at Public Sale:**\
During the public sale, 200,000 PHR tokens were valued at $14,200, which equates to a price of approximately $0.071 per PHR token.
* **Total Number of Nodes:**\
The total number of available nodes in this scenario is 500, and the rewards pool is equally divided across these nodes unless a portion of stake is opened for nominators.
* **Total Supply of PHRON:**\
The total supply of PHRON tokens is 2.1 billion.
## 2. Staking Rewards Structure
Staking rewards are distributed on a monthly basis, with both the APR and the total number of PHRON rewards decreasing over time. Node operators receive rewards in proportion to the performance and duration of their staked tokens, and they can open up part of their stake for nominators to participate..
**2.1 Key Factors Affecting Rewards:**
1. **APR (Annual Percentage Rate):**
* The APR represents the annual return on the staked PHRON tokens.
* The APR begins at a higher rate and gradually declines over time, meaning the annualized return decreases as more time passes.
* For instance, if the APR is 13.79%, the annualized return for stakers is 13.79% of their staked tokens, although this return is distributed monthly.
2. **Total Rewards (PHRON):**
* Each month, a predetermined number of PHRON tokens is allocated for distribution to all stakers.
* The total amount of rewards diminishes over time, aligning with the reduction in APR.
3. **Distribution Among Validators and Nominators:**
* Validators can choose to stake up to 75% of the required node tokens and leave the 25% open for nominators. This allows nominators to stake additional tokens and share rewards proportionally based on their contribution.
## Rewards System Explained:
This section outlines the PHRON node rewards distribution mechanism, focusing on how rewards are allocated between validators and nominators, and the new flexibility provided to validators in managing their stake.
### **1. 100% Rewards Distribution to Validators and Nominators**
In the system, 100% of the rewards generated by node staking are distributed to validators (also referred to as node operators) and nominators. This ensures that all participants contributing to the node's operation receive their fair share of the rewards.
* Validators: Validators are responsible for maintaining the integrity of the blockchain by validating transactions and blocks. Their contribution is critical to the network’s security and performance.
* Nominators: Nominators support validators by staking their own tokens on the validators they trust to act correctly and honestly within the network.
The total rewards generated in each staking cycle are proportionally divided between the validator and any nominators, depending on the percentage of stake each party holds.
### **2. Flexibility in Node Staking for Validators and Nominators**
In addition to managing the technical aspects of the node, validators now have the flexibility to open a portion of their node's stake requirement for public participation from nominators. Specifically, validators can set up their nodes to allow up to 25% of the required stake to be filled by nominators.
**Example Scenario:**
Consider the case where a validator is required to stake 200,000 PHRON tokens to operate a node. The validator has the option to modify their stake as follows:
* The validator can choose to personally stake 75% of the node’s required tokens (150,000 PHRON).
* This leaves 25% of the required stake (50,000 PHRON) open for nominators to contribute.
By allowing nominators to contribute, the validator enables other users to participate in the network while still maintaining control over the majority of the node's stake.
### **3. Staking Flexibility for Validators: Retrieving Tokens**
Once nominators begin to stake on a validator’s node, the validator has the option to retrieve the extra tokens staked by nominators if they wish. This feature provides the validator with flexibility over the node’s total staked amount:
* If the validator decides to retrieve the extra tokens (e.g., the tokens staked by the nominators), the validator will hold a larger percentage of the total stake and, consequently, will receive a higher share of the rewards.
* If the validator does not retrieve the tokens, the total stake will remain as is, and rewards will be distributed based on the percentage each party holds.
### **4. Rewards Distribution Based on Stake Percentages**
The staking rewards are distributed proportionally based on the percentage of total stake held by the validator and the nominators. This ensures a fair and transparent system, where both validators and nominators are rewarded according to their contribution.
### **Example of Reward Distribution:**
Assume the following distribution on a node:
* Validator holds 85% of the total staked PHRON.
* Nominator 1 has contributed 5%.
* Nominator 2 has contributed 10%.
The rewards generated by the node will be allocated based on these percentages:
* The validator, holding 85% of the total stake, will receive 85% of the total rewards.
* Nominator 1, holding 5% of the total stake, will receive 5% of the total rewards.
* Nominator 2, holding 10% of the total stake, will receive 10% of the total rewards.
This proportional rewards distribution model ensures that all participants—whether they are validators or nominators—are rewarded in alignment with their respective stakes.
### **5. Benefits of the Flexible Staking Mechanism**
The flexibility offered by this model benefits both validators and nominators:
* For Validators: Validators can control the majority of the stake while allowing nominators to contribute the remaining portion. This allows validators to operate their nodes with a lower personal stake if needed while still retaining the option to reclaim the tokens contributed by nominators.
* For Nominators: Nominators, who may not have enough tokens to operate a node independently, are now able to contribute to an existing validator's node and earn rewards in proportion to their stake.
This system provides an inclusive and adaptable framework, encouraging wider participation in the network while maintaining the integrity and control of validators over their nodes.
### Examples:
Example of Month 1 Rewards:
* APR for Month 1: 13.7927%
* Total Rewards for Month 1: 24,137,262.43 PHR Tokens.
### Calculation:
* The total reward of 24,137,262.43 PHR is distributed evenly among 500 nodes.
* Rewards per node for Month 1:\
Reward per node = 24,137,262.43 / 500 = 48,274.52
Thus, each Zeuss node would receive 48,274.52 PHR tokens as rewards in Month 1.
### Example of Month 2 Rewards:
* APR for Month 2: 13.1005%
* Total Rewards for Month 2: 45,851,763.07 PHR Tokens.
### Calculation:
* The total reward of 45,851,763.07 PHR is distributed evenly among 500 nodes.
* Rewards per node for Month 2:\
Reward per node = 45,851,763.07 / 500 = 91,703.53 PHR
Thus, each Zeuss node would receive 91,703.53 PHR tokens as rewards in Month 2.
Accumulated Rewards Over Time
Lets Calculate the total accumulated rewards for a node over a period of 6 months.
Month
APR(%)
Total Rewards (PHRON)
Rewards per Node (PHRON)
1
13.79%
24,137,262.43
48,274.52
2
13.10%
45,851,763.07
91,703.53
3
12.55%
65,891,034.48
131,782.07
4
12.09%
84,661,707.04
169,323.41
5
11.70%
102,416,527.58
204,833.06
6
11.36%
119,326,661.82
238,653.32
### Total Rewards for the first 6 months would be:
48,274.52 + 91,703.53 + 131,782.07 + 169,323.41 + 204,833.06 + 238,653.32
\= 884,569.91 PHRON tokens.
### Long Term Projections:
If a node is staked for 12 months, the total rewards can be projected as:
Month
APR(%)
Total Rewards (PHRON)
Rewards per Node (PHRON)
7
11.06%
135,515,183.25
271,030.37
8
10.79%
151,074,585.82
302,149.17
9
10.54%
166,076,782.61
332,153.57
10
10.32%
180,579,208.34
361,158.42
11
10.11%
194,628,744.71
389,257.49
12
9.92%
208,264,354.83
416,528.71
### Total Rewards for the first 6 months would be:
271,030.37 + 302,149.17 + 332,153.57 + 361,158.42 + 389,257.49 + 416,528.71
\= 2,072,277 PHRON tokens.
Validators and Nominators: Flexible Staking Example
Validators can open up to 25% of their node’s stake for external nominators to participate. For example:
* Validator holds 85% of the node’s stake.
* Nominator 1 contributes 5%.
* Nominator 2 contributes 10%
### Rewards will be distributed proportionally:
* Validator receives 85% of total rewards.
* Nominator 1 receives 5%
Nominator 2 receives 10%
# Validate
## Becoming a Validator on the PHRON Network
To become a validator on the PHRON network, you must bond a minimum of 10,000 PHRON and meet the specified hardware requirements. For detailed information on validating, please refer to our comprehensive documentation. Validators play a critical role in the network by running nodes that verify the accuracy of transactions on PHRON. They are integral to the decentralized governance of the chain and are supported by nominators who delegate their stakes to validators they trust. Rewards assigned to a validator are shared proportionally between the validator and their nominators based on their respective stakes. In the event of malicious behavior, both the validator's and nominators' staked coins are subject to slashing.
### Monitoring Your Validator
To stay informed about your validator’s performance, including notifications for when your validator stops producing blocks, you can subscribe to the PHRON Alerts via Telegram. For more information, please visit our dedicated page.
### Transitioning from Nomination to Validation
If you are starting as a validator and wish to include PHRON currently nominated to another validator, you may not need to unbond and wait for the unbonding period to conclude. Below are various scenarios you might encounter, along with steps to minimize the amount of PHRON that needs to be unbonded (using standard web wallets on Testnet or Mainnet):
#### Case 1: Nomination of X ≥ 8,667 PHRON from a Single Account (acc\_1) to Use Entire Amount as Validator Stake
**Solution:** This is the simplest scenario. Select your account and click "Stop" to cease nomination. Then follow the standard procedure to generate and set your session keys. Afterward, click "Validate." The changes will take effect at the start of the next era, with no unbonding required.
#### Case 2: Nomination of X ≥ 8,667 PHRON from a Single Account (acc\_1) to Use a Smaller Amount Y < X as Validator Stake
**Solution:** Select your account and click "Stop" to stop nominating. Then click "Unbond funds" to adjust your total bond to Y. Follow the standard steps to generate and set your session keys, and then click "Validate." The changes will take effect with the start of the next era. You will unbond X - Y PHRON, which will be available after the unbonding period.
#### Case 3: Nomination of X < 8,667 PHRON from a Single Account (acc\_1) and Desire to Add Stake to Reach Y ≥ 8,667 and Become a Validator
**Solution:** Select your account and click "Stop" to cease nomination. Then click "Bond more funds" to increase your total bond to Y. Follow the standard steps to generate and set your session keys, then click "Validate." The changes will take effect at the start of the next era.
#### Case 4: Nomination of a Total of X ≥ 8,667 PHRON from Multiple Accounts and Desire to Become a Validator
**Solution:** In this case, you will need to unbond from all but one account and wait for the unbonding period to conclude. It is advisable to retain the account with the largest amount bonded. Once the unbonding period for the remaining accounts is complete, consolidate your funds into that account and proceed according to Case 3.
***
This streamlined process ensures that you can efficiently transition from being a nominator to a validator, maximizing your participation in the PHRON network while minimizing the amount of PHRON that needs to be unbonded.
# Dashboard
### **Key Features**
**A. Accounts Management**
* Creating Accounts: Use the “Accounts” tab to generate new accounts. This feature supports the creation of both single and multi-signature accounts for enhanced security.
* Importing Accounts: Import existing accounts using JSON files or mnemonic phrases, allowing for seamless transitions between different environments.
* Account Actions: Easily send tokens, check balances, and view transaction history. The dashboard supports batch transactions, allowing you to send tokens to multiple recipients in one go.
**B. Network Interaction**
* Block Explorer: Under the "Network" tab, you can explore blocks, extrinsics, and events on the blockchain. Each block displays detailed information, including block hashes, timestamp, author, and included extrinsics.
* Latest Transactions: Access a real-time feed of recent transactions and their statuses, with filter options for transaction type and status (e.g., pending, completed, failed).
**C. Staking**
* Staking Overview: Access the "Staking" tab for a comprehensive view of your staking activities, including active nominations, reward history, and unbonding status.
* Nominating Validators: Nominate validators by assessing their performance metrics, such as total stake, commission rates, and historical uptime percentages. You can also view detailed validator profiles, including their reward distribution strategies.
**D. Governance**
* Proposals and Referenda: Track current proposals, referenda, and voting activities in the "Governance" section. Each proposal includes details such as the proposer, status, and voting results.
* Submitting Proposals: If you're involved in governance, you can submit proposals directly through the dashboard, utilizing built-in templates for standard proposal types.
**E. Developer Tools**
* RPC Calls: Access the raw RPC interface for advanced interactions with the blockchain. You can test various methods, view responses, and troubleshoot issues using the console feature.
* Sign & Send Transactions: Use the dashboard to manually sign and send transactions, providing detailed options for configuring gas limits, nonce values, and other transaction parameters.
**4. Customization and Settings**
* User Preferences: Adjust the dashboard settings to suit your preferences, including language, themes (light/dark mode), and connection settings for different networks (e.g., mainnet, testnet).
* Extensions: Leverage browser extensions such as the PHRON wallet for enhanced security and convenience in managing your accounts, enabling easy signing of transactions.
**5. Resources and Support**
* **Documentation:** Utilize the official PHRON documentation for in-depth guides, API references, and examples of using the SDK for application development.
* **Community:** Engage with the PHRON community through forums, Discord channels, and GitHub repositories for support, collaboration, and sharing of best practices.
# Telemetry
# Build with PhronAI
# SDKs and Tools
APIs, SDKs and Tools
# Ethereum
Ethereum
# Contracts
### Common-good Contracts
The following contracts addresses have been established:
### Precompiled Contracts
There are a set of precompiled contracts included on Phron that are categorized by address and based on the origin network. If you were to convert the precompiled addresses to decimal format, and break them into categories by numeric value, the categories are as follows:
* **0-1023** - Ethereum MainNet precompiles
* **1024-2047** - precompiles that are not in Ethereum and not Phron specific
* **2048-4095** - Phron specific precompiles
#### Ethereum MainNet Precompiles
# Libraries
# Ethers.js
## Ethers.js JavaScript Library
### Introduction
The [Ethers.js](https://docs.ethers.org/v6) library provides a set of tools to interact with Ethereum Nodes with JavaScript, similar to Web3.js. Phron has an Ethereum-like API available that is fully compatible with Ethereum-style JSON-RPC invocations. Therefore, developers can leverage this compatibility and use the Ethers.js library to interact with a Phron node as if they were doing so on Ethereum. For more information on Ethers.js, check their [documentation site](https://docs.ethers.org/v6).
In this guide, you'll learn how to use the Ethers.js library to send a transaction and deploy a contract on Phron.
### Checking Prerequisites
For the examples in this guide, you will need to have the following:
* An account with funds. You can get DEV tokens for testing on Phron once every 24 hours from the Phron Faucet
* To test out the examples in this guide on Phron, you will need to have your own endpoint and API key, which you can get from one of the supported Endpoint Providers
> ### Note
>
> The examples in this guide assume you have a MacOS or Ubuntu 22.04-based environment and will need to be adapted accordingly for Windows.
### Installing Ethers.js
To get started, you'll need to start a basic JavaScript project. First, create a directory to store all of the files you'll be creating throughout this guide and initialize the project with the following command:
```bash
mkdir ethers-examples && cd ethers-examples && npm init --y
```
For this guide, you'll need to install the Ethers.js library and the Solidity compiler. To install both NPM packages, you can run the following command:
```bash
npm install ethers solc@0.8.0
```
### Setting up the Ethers Provider
Throughout this guide, you'll be creating a bunch of scripts that provide different functionality such as sending a transaction, deploying a contract, and interacting with a deployed contract. In most of these scripts you'll need to create an [Ethers provider](https://docs.ethers.org/v6/api/providers/) to interact with the network.
To configure your project for Phron, you will need to have your own endpoint and API key, which you can get from one of the supported Endpoint Providers.
To create a provider, you can take the following steps:
1. Import the `ethers` library
2. Define the `providerRPC` object, which can include the network configurations for any of the networks you want to send a transaction on. You'll include the `name`, `rpc`, and `chainId` for each network
3. Create the `provider` using the `ethers.JsonRpcProvider` method
```javascript
// 1. Import ethers
const ethers = require('ethers');
// 2. Define network configurations
const providerRPC = {
phron: {
name: 'phron',
rpc: 'INSERT_RPC_API_ENDPOINT', // Insert your RPC URL here
chainId: 7744, // 0x504 in hex,
},
};
// 3. Create ethers provider
const provider = new ethers.JsonRpcProvider(providerRPC.phron.rpc, {
chainId: providerRPC.phron.chainId,
name: providerRPC.phron.name,
});
```
Save this code snippet as you'll need it for the scripts that are used in the following sections.
### Send a Transaction
During this section, you'll be creating a couple of scripts. The first one will be to check the balances of your accounts before trying to send a transaction. The second script will actually send the transaction.
You can also use the balance script to check the account balances after the transaction has been sent.
#### Check Balances Script
You'll only need one file to check the balances of both addresses before and after the transaction is sent. To get started, you can create a `balances.js` file by running:
```bash
touch balances.js
```
Next, you will create the script for this file and complete the following steps:
1. Set up the Ethers provider
2. Define the `addressFrom` and `addressTo` variables
3. Create the asynchronous `balances` function which wraps the `provider.getBalance` method
4. Use the `provider.getBalance` function to fetch the balances for the `addressFrom` and `addressTo` addresses. You can also leverage the `ethers.formatEther` function to transform the balance into a more readable number in ETH
5. Lastly, run the `balances` function
```javascript
// 1. Add the Ethers provider logic here:
// {...}
// 2. Create address variables
const addressFrom = 'INSERT_FROM_ADDRESS';
const addressTo = 'INSERT_TO_ADDRESS';
// 3. Create balances function
const balances = async () => {
// 4. Fetch balances
const balanceFrom = ethers.formatEther(await provider.getBalance(addressFrom));
const balanceTo = ethers.formatEther(await provider.getBalance(addressTo));
console.log(`The balance of ${addressFrom} is: ${balanceFrom} DEV`);
console.log(`The balance of ${addressTo} is: ${balanceTo} DEV`);
};
// 5. Call the balances function
balances();
```
View the complete script
```javascript
// Import ethers
const ethers = require('ethers');
// Define network configurations
const providerRPC = {
development: {
name: 'phron-development',
rpc: 'http://localhost:9944',
chainId: 7744,
},
phron: {
name: 'phron',
rpc: 'https://testnet.phron.ai',
chainId: 7744,
},
};
// Create ethers provider
const provider = new ethers.JsonRpcProvider(providerRPC.phron.rpc, {
chainId: providerRPC.phron.chainId,
name: providerRPC.phron.name,
}); // Change to correct network
// Define addresses
const addressFrom = 'INSERT_FROM_ADDRESS';
const addressTo = 'INSERT_TO_ADDRESS';
// Create balances function
const balances = async () => {
// Fetch balances
const balanceFrom = ethers.formatEther(
await provider.getBalance(addressFrom)
);
const balanceTo = ethers.formatEther(await provider.getBalance(addressTo));
console.log(`The balance of ${addressFrom} is: ${balanceFrom} DEV`);
console.log(`The balance of ${addressTo} is: ${balanceTo} DEV`);
};
// Call the balances function
balances();
```
To run the script and fetch the account balances, you can run the following command:
```bash
node balances.js
```
If successful, the balances for the origin and receiving address will be displayed in your terminal in DEV.
#### Send Transaction Script
You'll only need one file for executing a transaction between accounts. For this example, you'll be transferring 1 DEV token from an origin address (from which you hold the private key) to another address. To get started, you can create a `transaction.js` file by running:
```bash
touch transaction.js
```
Next, you will create the script for this file and complete the following steps:
1. Set up the Ethers provider
2. Define the `privateKey` and the `addressTo` variables. The private key is required to create a wallet instance. **Note: This is for example purposes only. Never store your private keys in a JavaScript file**
3. Create a wallet using the `privateKey` and `provider` from the previous steps. The wallet instance is used to sign transactions
4. Create the asynchronous `send` function which wraps the transaction object and the `wallet.sendTransaction` method
5. Create the transaction object which only requires the recipient's address and the amount to send. Note that `ethers.parseEther` can be used, which handles the necessary unit conversions from Ether to Wei - similar to using `ethers.parseUnits(value, 'ether')`
6. Send the transaction using the `wallet.sendTransaction` method and then use `await` to wait until the transaction is processed and the transaction receipt is returned
7. Lastly, run the `send` function
{% code overflow="wrap" %}
```javascript
// 1. Add the Ethers provider logic here:
// {...}
// 2. Create account variables
const accountFrom = {
privateKey: 'INSERT_YOUR_PRIVATE_KEY',
};
const addressTo = 'INSERT_TO_ADDRESS';
// 3. Create wallet
let wallet = new ethers.Wallet(accountFrom.privateKey, provider);
// 4. Create send function
const send = async () => {
console.log(`Attempting to send transaction from ${wallet.address} to ${addressTo}`);
// 5. Create tx object
const tx = {
to: addressTo,
value: ethers.parseEther('1'),
};
// 6. Sign and send tx - wait for receipt
const createReceipt = await wallet.sendTransaction(tx);
await createReceipt.wait();
console.log(`Transaction successful with hash: ${createReceipt.hash}`);
};
// 7. Call the send function
send();
```
{% endcode %}
View the complete script
{% code overflow="wrap" %}
```javascript
// Import ethers
const ethers = require('ethers');
// Define network configurations
const providerRPC = {
development: {
name: 'phron-development',
rpc: 'http://localhost:9944',
chainId: 7744,
},
phronbase: {
name: 'phron',
rpc: 'https://testnet.phron.ai',
chainId: 7744,
},
};
// Create ethers provider
const provider = new ethers.JsonRpcProvider(providerRPC.phron.rpc, {
chainId: providerRPC.phron.chainId,
name: providerRPC.phron.name,
}); // Change to correct network
// Define accounts and wallet
const accountFrom = {
privateKey: 'INSERT_YOUR_PRIVATE_KEY',
};
const addressTo = 'INSERT_TO_ADDRESS';
const wallet = new ethers.Wallet(accountFrom.privateKey, provider);
// Create send function
const send = async () => {
console.log(
`Attempting to send transaction from ${wallet.address} to ${addressTo}`
);
// Create transaction
const tx = {
to: addressTo,
value: ethers.parseEther('1'),
};
// Send transaction and get hash
const createReceipt = await wallet.sendTransaction(tx);
await createReceipt.wait();
console.log(`Transaction successful with hash: ${createReceipt.hash}`);
};
// Call the send function
send();
```
{% endcode %}
To run the script, you can run the following command in your terminal:
```bash
node transaction.js
```
If the transaction was succesful, in your terminal you'll see the transaction hash has been printed out.
You can also use the `balances.js` script to check that the balances for the origin and receiving accounts have changed. The entire workflow would look like this:
{% code overflow="wrap" %}
```bash
node balances.jsThe balance of 0x3B939FeaD1557C741Ff06492FD0127bd287A421e is: 3604.673685275447543445 DEVThe balance of 0xFFA0352d300cdd8aCdA5c947D87CbCc3f0B3485A is: 0 DEVnode transaction.jsAttempting to send transaction from 0x3B939FeaD1557C741Ff06492FD0127bd287A421e to 0xFFA0352d300cdd8aCdA5c947D87CbCc3f0B3485ATransaction successful with hash: 0x01e42c627fe79b1d5649a64d39fceec34aba3904e37d768e74ec71fcd62b897fnode balances.jsThe balance of 0x3B939FeaD1557C741Ff06492FD0127bd287A421e is: 3603.673682650447543445 DEVThe balance of 0xFFA0352d300cdd8aCdA5c947D87CbCc3f0B3485A is: 1.0 DEV
```
{% endcode %}
### Deploy a Contract
The contract you'll be compiling and deploying in the next couple of sections is a simple incrementer contract, arbitrarily named `Incrementer.sol`. You can get started by creating a file for the contract:
```bash
touch Incrementer.sol
```
Next, you can add the Solidity code to the file:
```solidity
// SPDX-License-Identifier: MIT
pragma solidity ^0.8.0;
contract Incrementer {
uint256 public number;
constructor(uint256 _initialNumber) {
number = _initialNumber;
}
function increment(uint256 _value) public {
number = number + _value;
}
function reset() public {
number = 0;
}
}
```
The `constructor` function, which runs when the contract is deployed, sets the initial value of the number variable stored on-chain (the default is `0`). The `increment` function adds the `_value` provided to the current number, but a transaction needs to be sent, which modifies the stored data. Lastly, the `reset` function resets the stored value to zero.
> ### Note
>
> This contract is a simple example for illustration purposes only and does not handle values wrapping around.
#### Compile Contract Script
In this section, you'll create a script that uses the Solidity compiler to output the bytecode and interface (ABI) for the `Incrementer.sol` contract. To get started, you can create a `compile.js` file by running:
```bash
touch compile.js
```
Next, you will create the script for this file and complete the following steps:
1. Import the `fs` and `solc` packages
2. Using the `fs.readFileSync` function, you'll read and save the file contents of `Incrementer.sol` to `source`
3. Build the `input` object for the Solidity compiler by specifying the `language`, `sources`, and `settings` to be used
4. Using the `input` object, you can compile the contract using `solc.compile`
5. Extract the compiled contract file and export it to be used in the deployment script
```javascript
// 1. Import packages
const fs = require('fs');
const solc = require('solc');
// 2. Get path and load contract
const source = fs.readFileSync('Incrementer.sol', 'utf8');
// 3. Create input object
const input = {
language: 'Solidity',
sources: {
'Incrementer.sol': {
content: source,
},
},
settings: {
outputSelection: {
'*': {
'*': ['*'],
},
},
},
};
// 4. Compile the contract
const tempFile = JSON.parse(solc.compile(JSON.stringify(input)));
const contractFile = tempFile.contracts['Incrementer.sol']['Incrementer'];
// 5. Export contract data
module.exports = contractFile;
```
#### Deploy Contract Script
With the script for compiling the `Incrementer.sol` contract in place, you can then use the results to send a signed transaction that deploys it. To do so, you can create a file for the deployment script called `deploy.js`:
```bash
touch deploy.js
```
Next, you will create the script for this file and complete the following steps:
1. Import the contract file from `compile.js`
2. Set up the Ethers provider
3. Define the `privateKey` for the origin account. The private key is required to create a wallet instance. **Note: This is for example purposes only. Never store your private keys in a JavaScript file**
4. Create a wallet using the `privateKey` and `provider` from the previous steps. The wallet instance is used to sign transactions
5. Load the contract `bytecode` and `abi` for the compiled contract
6. Create a contract instance with signer using the `ethers.ContractFactory` function, providing the `abi`, `bytecode`, and `wallet` as parameters
7. Create the asynchronous `deploy` function that will be used to deploy the contract
8. Within the `deploy` function, use the `incrementer` contract instance to call `deploy` and pass in the initial value. For this example, you can set the initial value to `5`. This will send the transaction for contract deployment. To wait for a transaction receipt you can use the `deployed` method of the contract deployment transaction
9. Lastly, run the `deploy` function
```javascript
// 1. Import the contract file
const contractFile = require('./compile');
// 2. Add the Ethers provider logic here:
// {...}
// 3. Create account variables
const accountFrom = {
privateKey: 'INSERT_YOUR_PRIVATE_KEY',
};
// 4. Create wallet
let wallet = new ethers.Wallet(accountFrom.privateKey, provider);
// 5. Load contract information
const bytecode = contractFile.evm.bytecode.object;
const abi = contractFile.abi;
// 6. Create contract instance with signer
const incrementer = new ethers.ContractFactory(abi, bytecode, wallet);
// 7. Create deploy function
const deploy = async () => {
console.log(`Attempting to deploy from account: ${wallet.address}`);
// 8. Send tx (initial value set to 5) and wait for receipt
const contract = await incrementer.deploy(5);
const txReceipt = await contract.deploymentTransaction().wait();
console.log(`Contract deployed at address: ${txReceipt.contractAddress}`);
};
// 9. Call the deploy function
deploy();
```
View the complete script
```javascript
// Import ethers and compile
const ethers = require('ethers');
const contractFile = require('./compile');
// Define network configurations
const providerRPC = {
development: {
name: 'phron-development',
rpc: 'http://localhost:9944',
chainId: 7744,
},
phronbase: {
name: 'phron',
rpc: 'https://testnet.phron.ai',
chainId: 7744,
},
};
// Create ethers provider
const provider = new ethers.JsonRpcProvider(providerRPC.phron.rpc, {
chainId: providerRPC.phron.chainId,
name: providerRPC.phron.name,
}); // Change to correct network
// Define accounts and wallet
const accountFrom = {
privateKey: 'INSERT_YOUR_PRIVATE_KEY',
};
let wallet = new ethers.Wallet(accountFrom.privateKey, provider);
// Load contract info
const bytecode = contractFile.evm.bytecode.object;
const abi = contractFile.abi;
// Create contract instance with signer
const incrementer = new ethers.ContractFactory(abi, bytecode, wallet);
// Create deploy function
const deploy = async () => {
console.log(`Attempting to deploy from account: ${wallet.address}`);
// Send tx (initial value set to 5) and wait for receipt
const contract = await incrementer.deploy(5);
const txReceipt = await contract.deploymentTransaction().wait();
console.log(`Contract deployed at address: ${txReceipt.contractAddress}`);
};
// Call the deploy function
deploy();
```
To run the script, you can enter the following command into your terminal:
```bash
node deploy.js
```
If successful, the contract's address will be displayed in the terminal.
{% code overflow="wrap" %}
```bash
node deploy.jsAttempting to deploy from account: 0x3B939FeaD1557C741Ff06492FD0127bd287A421eContract deployed at address: 0x2B9c71fc2730B7353Dd3865ae26881Fa38FE598A
```
{% endcode %}
#### Read Contract Data (Call Methods)
Call methods are the type of interaction that don't modify the contract's storage (change variables), meaning no transaction needs to be sent. They simply read various storage variables of the deployed contract.
To get started, you can create a file and name it `get.js`:
```bash
touch get.js
```
Then you can take the following steps to create the script:
1. Import the `abi` from the `compile.js` file
2. Set up the Ethers provider
3. Create the `contractAddress` variable using the address of the deployed contract
4. Create an instance of the contract using the `ethers.Contract` function and passing in the `contractAddress`, `abi`, and `provider`
5. Create the asynchronous `get` function
6. Use the contract instance to call one of the contract's methods and pass in any inputs if necessary. For this example, you will call the `number` method which doesn't require any inputs. You can use `await` which will return the value requested once the request promise resolves
7. Lastly, call the `get` function
```javascript
// 1. Import the ABI
const { abi } = require('./compile');
// 2. Add the Ethers provider logic here:
// {...}
// 3. Contract address variable
const contractAddress = 'INSERT_CONTRACT_ADDRESS';
// 4. Create contract instance
const incrementer = new ethers.Contract(contractAddress, abi, provider);
// 5. Create get function
const get = async () => {
console.log(`Making a call to contract at address: ${contractAddress}`);
// 6. Call contract
const data = await incrementer.number();
console.log(`The current number stored is: ${data}`);
};
// 7. Call get function
get();
```
View the complete script
```javascript
// Import ethers and compile
const ethers = require('ethers');
const { abi } = require('./compile');
// Define network configurations
const providerRPC = {
development: {
name: 'phron-development',
rpc: 'http://localhost:9944',
chainId: 7744,
},
phronbase: {
name: 'phron',
rpc: 'https://testnet.phron.ai',
chainId: 7744,
},
};
const provider = new ethers.JsonRpcProvider(providerRPC.phron.rpc, {
chainId: providerRPC.phron.chainId,
name: providerRPC.phron.name,
}); // Change to correct network
// Contract address variable
const contractAddress = 'INSERT_CONTRACT_ADDRESS';
// Create contract instance
const incrementer = new ethers.Contract(contractAddress, abi, provider);
// Create get function
const get = async () => {
console.log(`Making a call to contract at address: ${contractAddress}`);
// Call contract
const data = await incrementer.number();
console.log(`The current number stored is: ${data}`);
};
// Call get function
get();
```
To run the script, you can enter the following command in your terminal:
```bash
node get.js
```
If successful, the value will be displayed in the terminal.
#### Interact with Contract (Send Methods)
Send methods are the type of interaction that modify the contract's storage (change variables), meaning a transaction needs to be signed and sent. In this section, you'll create two scripts: one to increment and one to reset the incrementer. To get started, you can create a file for each script and name them `increment.js` and `reset.js`:
```bash
touch increment.js reset.js
```
Open the `increment.js` file and take the following steps to create the script:
1. Import the `abi` from the `compile.js` file
2. Set up the Ethers provider
3. Define the `privateKey` for the origin account, the `contractAddress` of the deployed contract, and the `_value` to increment by. The private key is required to create a wallet instance. **Note: This is for example purposes only. Never store your private keys in a JavaScript file**
4. Create a wallet using the `privateKey` and `provider` from the previous steps. The wallet instance is used to sign transactions
5. Create an instance of the contract using the `ethers.Contract` function and passing in the `contractAddress`, `abi`, and `provider`
6. Create the asynchronous `increment` function
7. Use the contract instance to call one of the contract's methods and pass in any inputs if necessary. For this example, you will call the `increment` method which requires the value to increment by as an input. You can use `await` which will return the value requested once the request promise resolves
8. Lastly, call the `increment` function
```javascript
// 1. Import the contract ABI
const { abi } = require('./compile');
// 2. Add the Ethers provider logic here:
// {...}
// 3. Create variables
const accountFrom = {
privateKey: 'INSERT_YOUR_PRIVATE_KEY',
};
const contractAddress = 'INSERT_CONTRACT_ADDRESS';
const _value = 3;
// 4. Create wallet
let wallet = new ethers.Wallet(accountFrom.privateKey, provider);
// 5. Create contract instance with signer
const incrementer = new ethers.Contract(contractAddress, abi, wallet);
// 6. Create increment function
const increment = async () => {
console.log(
`Calling the increment by ${_value} function in contract at address: ${contractAddress}`
);
// 7. Sign and send tx and wait for receipt
const createReceipt = await incrementer.increment(_value);
await createReceipt.wait();
console.log(`Tx successful with hash: ${createReceipt.hash}`);
};
// 8. Call the increment function
increment();
```
View the complete script
```javascript
// Import ethers and compile
const ethers = require('ethers');
const { abi } = require('./compile');
// Define network configurations
const providerRPC = {
development: {
name: 'phron-development',
rpc: 'http://localhost:9944',
chainId: 7744,
},
phronbase: {
name: 'phron',
rpc: 'https://testnet.phron.ai',
chainId: 7744,
},
};
// Create ethers provider
const provider = new ethers.JsonRpcProvider(providerRPC.phron.rpc, {
chainId: providerRPC.phron.chainId,
name: providerRPC.phron.name,
}); // Change to correct network
// Create variables
const accountFrom = {
privateKey: 'INSERT_YOUR_PRIVATE_KEY',
};
const contractAddress = 'INSERT_CONTRACT_ADDRESS';
const _value = 3;
// Create wallet
let wallet = new ethers.Wallet(accountFrom.privateKey, provider);
// Create contract instance with signer
const incrementer = new ethers.Contract(contractAddress, abi, wallet);
// Create reset function
const increment = async () => {
console.log(
`Calling the increment by ${_value} function in contract at address: ${contractAddress}`
);
// Sign and send tx and wait for receipt
const createReceipt = await incrementer.increment(_value);
await createReceipt.wait();
console.log(`Tx successful with hash: ${createReceipt.hash}`);
};
// Call the reset function
increment();
```
To run the script, you can enter the following command in your terminal:
```bash
node increment.js
```
If successful, the transaction hash will be displayed in the terminal. You can use the `get.js` script alongside the `increment.js` script to make sure that value is changing as expected:
{% code overflow="wrap" %}
```bash
node get.jsMaking a call to contract at address: 0x2B9c71fc2730B7353Dd3865ae26881Fa38FE598AThe current number stored is: 5node increment.jsCalling the increment by 3 function in contract at address: 0x2B9c71fc2730B7353Dd3865ae26881Fa38FE598ATx successful with hash: 0xc7fe935db03cfacf56c5649cd79a566d1a7b68417f904f0095a1b1c203875bf2node get.jsMaking a call to contract at address: 0x2B9c71fc2730B7353Dd3865ae26881Fa38FE598AThe current number stored is: 8
```
{% endcode %}
Next you can open the `reset.js` file and take the following steps to create the script:
1. Import the `abi` from the `compile.js` file
2. Set up the Ethers provider
3. Define the `privateKey` for the origin account and the `contractAddress` of the deployed contract. The private key is required to create a wallet instance. **Note: This is for example purposes only. Never store your private keys in a JavaScript file**
4. Create a wallet using the `privateKey` and `provider` from the previous steps. The wallet instance is used to sign transactions
5. Create an instance of the contract using the `ethers.Contract` function and passing in the `contractAddress`, `abi`, and `provider`
6. Create the asynchronous `reset` function
7. Use the contract instance to call one of the contract's methods and pass in any inputs if necessary. For this example, you will call the `reset` method which doesn't require any inputs. You can use `await` which will return the value requested once the request promise resolves
8. Lastly, call the `reset` function
```javascript
// 1. Import the contract ABI
const { abi } = require('./compile');
// 2. Add the Ethers provider logic here:
// {...}
// 3. Create variables
const accountFrom = {
privateKey: 'INSERT_YOUR_PRIVATE_KEY',
};
const contractAddress = 'INSERT_CONTRACT_ADDRESS';
// 4. Create wallet
let wallet = new ethers.Wallet(accountFrom.privateKey, provider);
// 5. Create contract instance with signer
const incrementer = new ethers.Contract(contractAddress, abi, wallet);
// 6. Create reset function
const reset = async () => {
console.log(
`Calling the reset function in contract at address: ${contractAddress}`
);
// 7. sign and send tx and wait for receipt
const createReceipt = await incrementer.reset();
await createReceipt.wait();
console.log(`Tx successful with hash: ${createReceipt.hash}`);
};
// 8. Call the reset function
reset();
```
View the complete script
```javascript
// Import ethers and compile
const ethers = require('ethers');
const { abi } = require('./compile');
// Define network configurations
const providerRPC = {
development: {
name: 'phron-development',
rpc: 'http://localhost:9944',
chainId: 7744,
},
phron: {
name: 'phron',
rpc: 'https://testnet.phron.ai',
chainId: 7744,
},
};
// Create ethers provider
const provider = new ethers.JsonRpcProvider(providerRPC.phron.rpc, {
chainId: providerRPC.phron.chainId,
name: providerRPC.phron.name,
}); // Change to correct network
// Create variables
const accountFrom = {
privateKey: 'INSERT_YOUR_PRIVATE_KEY',
};
const contractAddress = 'INSERT_CONTRACT_ADDRESS';
// Create wallet
let wallet = new ethers.Wallet(accountFrom.privateKey, provider);
// Create contract instance with signer
const incrementer = new ethers.Contract(contractAddress, abi, wallet);
// Create reset function
const reset = async () => {
console.log(
`Calling the reset function in contract at address: ${contractAddress}`
);
// Sign and send tx and wait for receipt
const createReceipt = await incrementer.reset();
await createReceipt.wait();
console.log(`Tx successful with hash: ${createReceipt.hash}`);
};
// Call the reset function
reset();
```
To run the script, you can enter the following command in your terminal:
```bash
node reset.js
```
If successful, the transaction hash will be displayed in the terminal. You can use the `get.js` script alongside the `reset.js` script to make sure that value is changing as expected:
{% code overflow="wrap" %}
```bash
node get.jsMaking a call to contract at address: 0x2B9c71fc2730B7353Dd3865ae26881Fa38FE598AThe current number stored is: 8node reset.jsCalling the reset function in contract at address: 0x2B9c71fc2730B7353Dd3865ae26881Fa38FE598ATx successful with hash: 0xc452d21d8c2be6b81aadab7414103d68149c94a6399149ab8b79a58f0a3b5db7node get.jsMaking a call to contract at address: 0x2B9c71fc2730B7353Dd3865ae26881Fa38FE598AThe current number stored is: 0
```
{% endcode %}
This tutorial is for educational purposes only. As such, any contracts or code created in this tutorial should not be used in production.The information presented herein has been provided by third parties and is made available solely for general information purposes. Phron does not endorse any project listed and described on the Phron Doc Website (). Phron does not warrant the accuracy, completeness or usefulness of this information. Any reliance you place on such information is strictly at your own risk. Phron disclaims all liability and responsibility arising from any reliance placed on this information by you or by anyone who may be informed of any of its contents. All statements and/or opinions expressed in these materials are solely the responsibility of the person or entity providing those materials and do not necessarily represent the opinion of Phron. The information should not be construed as professional or financial advice of any kind. Advice from a suitably qualified professional should always be sought in relation to any particular matter or circumstance. The information herein may link to or integrate with other websites operated or content provided by third parties, and such other websites may link to this website. Phron has no control over any such other websites or their content and will have no liability arising out of or related to such websites or their content. The existence of any such link does not constitute an endorsement of such websites, the content of the websites, or the operators of the websites. These links are being provided to you only as a convenience and you release and hold Phron harmless from any and all liability arising from your use of this information or the information provided by any third-party website or service.
# Ethers.rs
## Ethers.rs Rust Library
### Introduction
The [Ethers.rs](https://ethers.rs/) library provides a set of tools to interact with Ethereum Nodes via the Rust programming language that works similar to Ethers.js. Phron has an Ethereum-like API available that is fully compatible with Ethereum-style JSON-RPC invocations. Therefore, developers can leverage this compatibility and use the Ethers.rs library to interact with a Phron node as if they were doing so on Ethereum. You can read more about how to use Ethers.rs on their [official crate documentation](https://docs.rs/crate/ethers/latest).
In this guide, you'll learn how to use the Ethers.rs library to send a transaction and deploy a contract on Phron.
### Checking Prerequisites
For the examples in this guide, you will need to have the following:
* An account with funds. You can get DEV tokens for testing on Phron once every 24 hours from the Phron Faucet
* To test out the examples in this guide on Phron, you will need to have your own endpoint and API key, which you can get from one of the supported Endpoint Providers
* Have [Rust installed](https://www.rust-lang.org/tools/install) on your device
* Have [solc installed](https://docs.soliditylang.org/en/v0.8.9/installing-solidity.html) on your device. Using [solc-select](https://github.com/crytic/solc-select) is recommended by the Ethers.rs package
> ### Note
>
> The examples in this guide assumes you have a MacOS or Ubuntu 20.04-based environment and will need to be adapted accordingly for Windows.
### Create a Rust Project
To get started, you can create a new Rust project with the Cargo tool:
```bash
cargo init ethers-examples && cd ethers-examples
```
For this guide, you'll need to install the Ethers.rs library among others. To tell the Rust project to install it, you must edit the `Cargo.toml` file that's included with the document to include it under dependencies:
```rust
[package]
name = "ethers-examples"
version = "0.1.0"
edition = "2021"
[dependencies]
ethers = "1.0.2"
ethers-solc = "1.0.2"
tokio = { version = "1", features = ["full"] }
serde_json = "1.0.89"
serde = "1.0.149"
```
This example is using the `ethers` and `ethers-solc` crate versions `1.0.2` for RPC interactions and Solidity compiling. It also includes the `tokio` crate to run asynchronous Rust environments, since interacting with RPCs requires asynchronous code. Finally, it includes the `serde_json` and `serde` crates to help serialize/deserialize this example's code.
If this is your first time using `solc-select`, you'll need to install and configure the Solidity version using the following commands:
```bash
solc-select install 0.8.17 && solc-select use 0.8.17
```
### Setting up the Ethers Provider and Client
Throughout this guide, you'll be writing multiple functions that provide different functionality such as sending a transaction, deploying a contract, and interacting with a deployed contract. In most of these scripts you'll need to use an [Ethers provider](https://docs.rs/ethers-providers/latest/ethers_providers/index.html) or an [Ethers signer client](https://docs.rs/ethers/1.0.2/ethers/middleware/struct.SignerMiddleware.html) to interact with the network.
To configure your project for Phron, you will need to have your own endpoint and API key, which you can get from one of the supported Endpoint Providers.
There are multiple ways to create a provider and signer, but the easiest way is through `try_from`. In the `src/main.rs` file, you can take the following steps:
1. Import `Provider` and `Http` from the `ethers` crate
2. Add a `Client` type for convenience, which will be used once you start to create the functions for sending a transaction and deploying a contract
3. Add a `tokio` attribute above `async fn main()` for asynchronous excution
4. Use `try_from` to attempt to instantiate a JSON-RPC provider object from an RPC endpoint
5. Use a private key to create a wallet object (the private key will be used to sign transactions). **Note: This is for example purposes only. Never store your private keys in a plain Rust file**
6. Wrap the provider and wallet together into a client by providing them to a `SignerMiddleware` object
```rust
// 1. Import ethers crate
use ethers::providers::{Provider, Http};
// 2. Add client type
type Client = SignerMiddleware, Wallet>;
// 3. Add annotation
#[tokio::main]
async fn main() -> Result<(), Box> {
// 4. Use try_from with RPC endpoint
let provider = Provider::::try_from(
"INSERT_RPC_API_ENDPOINT"
)?;
// 5. Use a private key to create a wallet
// Do not include the private key in plain text in any production code
// This is just for demonstration purposes
// Do not include '0x' at the start of the private key
let wallet: LocalWallet = "INSERT_YOUR_PRIVATE_KEY"
.parse::()?
.with_chain_id(Chain::Phron);
// 6. Wrap the provider and wallet together to create a signer client
let client = SignerMiddleware::new(provider.clone(), wallet.clone());
Ok(())
}
```
### Send a Transaction
During this section, you'll be creating a couple of functions, which will be contained in the same `main.rs` file to avoid additional complexity from implementing modules. The first function will be to check the balances of your accounts before trying to send a transaction. The second function will actually send the transaction. To run each of these functions, you will edit the `main` function and run the `main.rs` script.
You should already have your provider and client set up in `main.rs` in the way described in the previous section. In order to send a transaction, you'll need to add a few more lines of code:
1. Add `use ethers::{utils, prelude::*};` to your imports, which will provide you access to utility functions and the prelude imports all of the necessary data types and traits
2. As you'll be sending a transaction from one address to another, you can specify the sending and receiving addresses in the `main` function. **Note: the `address_from` value should correspond to the private key that is used in the `main` function**
```rust
// ...
// 1. Add to imports
use ethers::{utils, prelude::*};
// ...
#[tokio::main]
async fn main() -> Result<(), Box> {
// ...
// 2. Add from and to address
let address_from = "YOUR_FROM_ADDRESS".parse::()?
let address_to = "YOUR_TO_ADDRESS".parse::()?
}
```
#### Check Balances Function
Next, you will create the function for getting the sending and receiving accounts' balances by completing the following steps:
1. Create a new asynchronous function named `print_balances` that takes a provider object's reference and the sending and receiving addresses as input
2. Use the `provider` object's `get_balance` function to get the balances of the sending and receiving addresses of the transaction
3. Print the resultant balances for the sending and receiving addresses
4. Call the `print_balances` function in the `main` function
{% code overflow="wrap" %}
```rust
// ...
// 1. Create an asynchronous function that takes a provider reference and from and to address as input
async fn print_balances(provider: &Provider, address_from: Address, address_to: Address) -> Result<(), Box> {
// 2. Use the get_balance function
let balance_from = provider.get_balance(address_from, None).await?;
let balance_to = provider.get_balance(address_to, None).await?;
// 3. Print the resultant balance
println!("{} has {}", address_from, balance_from);
println!("{} has {}", address_to, balance_to);
Ok(())
}
#[tokio::main]
async fn main() -> Result<(), Box> {
// ...
// 4. Call print_balances function in main
print_balances(&provider).await?;
Ok(())
}
```
{% endcode %}
#### Send Transaction Script
For this example, you'll be transferring 1 DEV from an origin address (of which you hold the private key) to another address.
1. Create a new asynchronous function named `send_transaction` that takes a client object's reference and the sending and receiving addresses as input
2. Create the transaction object, and include the `to`, `value`, and `from`. When writing the `value` input, use the `ethers::utils::parse_ether` function
3. Use the `client` object to send the transaction
4. Print the transaction after it is confirmed
5. Call the `send_transaction` function in the `main` function
```rust
// ...
// 1. Define an asynchronous function that takes a client provider and the from and to addresses as input
async fn send_transaction(client: &Client, address_from: Address, address_to: Address) -> Result<(), Box> {
println!(
"Beginning transfer of 1 native currency from {} to {}.",
address_from, address_to
);
// 2. Create a TransactionRequest object
let tx = TransactionRequest::new()
.to(address_to)
.value(U256::from(utils::parse_ether(1)?))
.from(address_from);
// 3. Send the transaction with the client
let tx = client.send_transaction(tx, None).await?.await?;
// 4. Print out the result
println!("Transaction Receipt: {}", serde_json::to_string(&tx)?);
Ok(())
}
#[tokio::main]
async fn main() -> Result<(), Box> {
// ...
// 5. Call send_transaction function in main
send_transaction(&client, address_from, address_to).await?;
Ok(())
}
```
View the complete script
{% code overflow="wrap" %}
```rust
use ethers::providers::{Provider, Http};
use ethers::{utils, prelude::*};
type Client = SignerMiddleware, Wallet>;
#[tokio::main]
async fn main() -> Result<(), Box> {
let provider: Provider = Provider::::try_from("https://testnet.phron.ai")?; // Change to correct network
// Do not include the private key in plain text in any production code. This is just for demonstration purposes
let wallet: LocalWallet = "INSERT_PRIVATE_KEY"
.parse::()?
.with_chain_id(Chain::Phron); // Change to correct network
let client = SignerMiddleware::new(provider.clone(), wallet.clone());
let address_from = "INSERT_FROM_ADDRESS".parse::()?;
let address_to = "INSERT_TO_ADDRESS".parse::()?;
send_transaction(&client, &address_from, &address_to).await?;
print_balances(&provider, &address_from, &address_to).await?;
Ok(())
}
// Print the balance of a wallet
async fn print_balances(provider: &Provider, address_from: &Address, address_to: &Address) -> Result<(), Box> {
let balance_from = provider.get_balance(address_from.clone(), None).await?;
let balance_to = provider.get_balance(address_to.clone(), None).await?;
println!("{} has {}", address_from, balance_from);
println!("{} has {}", address_to, balance_to);
Ok(())
}
// Sends some native currency
async fn send_transaction(client: &Client, address_from: &Address, address_to: &Address) -> Result<(), Box> {
println!(
"Beginning transfer of 1 native currency {} to {}.",
address_from, address_to
);
let tx = TransactionRequest::new()
.to(address_to.clone())
.value(U256::from(utils::parse_ether(1)?))
.from(address_from.clone());
let tx = client.send_transaction(tx, None).await?.await?;
println!("Transaction Receipt: {}", serde_json::to_string(&tx)?);
Ok(())
}
```
{% endcode %}
To run the script, which will send the transaction and then check the balances once the transaction has been sent, you can run the following command:
```bash
cargo run
```
If the transaction was succesful, in your terminal you'll see the transaction details printed out along with the balance of your address.
{% code overflow="wrap" %}
```bash
cargo runCompiling ethers-examples v0.1.0 (/Users/phron/workspace/ethers-examples)Finished dev [unoptimized + debuginfo] target(s) in 32.76sRunning `target/debug/ethers-examples`Beginning transfer of 1 native currency 0x3b93…421e to 0xe773…8dde.Transaction Receipt: {"transactionHash":"0x6f2338c63286f8b27951ddb6748191149d82647b44a00465f1f776624f490ce9","transactionIndex":"0x0","blockHash":"0x8234eb2083e649ab45c7c5fcdf2026d8f47676f7e29305023d1d00cc349ba215","blockNumber":"0x7ac12d","from":"0x3b939fead1557c741ff06492fd0127bd287a421e","to":"0xe773f740828a968c8a9e1e8e05db486937768dde","cumulativeGasUsed":"0x5208","gasUsed":"0x5208","contractAddress":null,"logs":[],"status":"0x1","logsBloom":"0x00000000000000000000000000000000000000000000000000000000000000000000000000000000000000000000000000000000000000000000000000000000000000000000000000000000000000000000000000000000000000000000000000000000000000000000000000000000000000000000000000000000000000000000000000000000000000000000000000000000000000000000000000000000000000000000000000000000000000000000000000000000000000000000000000000000000000000000000000000000000000000000000000000000000000000000000000000000000000000000000000000000000000000000000000000000000000000000000000000000","type":"0x0","effectiveGasPrice":"0x7735940"}0x3b93…421e has 36017039844708655891250xe773…8dde has 1000000000000000000
```
{% endcode %}
### Deploy a Contract
The contract you'll be compiling and deploying in the next couple of sections is a simple incrementer contract, arbitrarily named `Incrementer.sol`. You can get started by creating a file for the contract:
```bash
touch Incrementer.sol
```
Next, you can add the Solidity code to the file:
```solidity
// SPDX-License-Identifier: MIT
pragma solidity ^0.8.0;
contract Incrementer {
uint256 public number;
constructor(uint256 _initialNumber) {
number = _initialNumber;
}
function increment(uint256 _value) public {
number = number + _value;
}
function reset() public {
number = 0;
}
}
```
The `constructor` function, which runs when the contract is deployed, sets the initial value of the number variable stored on-chain (the default is `0`). The `increment` function adds the `_value` provided to the current number, but a transaction needs to be sent, which modifies the stored data. Lastly, the `reset` function resets the stored value to zero.
> ### Note
>
> This contract is a simple example for illustration purposes only and does not handle values wrapping around.
During the rest of this section, you'll be creating a couple of functions, which will be contained in the `main.rs` file to avoid additional complexity from implementing modules. The first function will be to compile and deploy the contract. The remaining functions will interact with the deployed contract.
You should already have your provider and client set up in `main.rs` in the way described in the Setting up the Ethers Provider and Client section.
Before getting started with the contract deployment, you'll need to add a few more imports to your `main.rs` file:
```rust
use ethers_solc::Solc;
use ethers::{prelude::*};
use std::{path::Path, sync::Arc};
```
The `ethers_solc` import will be used to compile the smart contract. The `prelude` from Ethers imports some necessary data types and traits. Lastly, the `std` imports will enables you to store your smart contracts and wrap the client into an `Arc` type for thread safety.
#### Compile and Deploy Contract Script
This example function will compile and deploy the `Incrementer.sol` smart contract you created in the previous section. The `Incrementer.sol` smart contract should be in the root directory. In the `main.rs` file, you can take the following steps:
1. Create a new asynchronous function named `compile_deploy_contract` that takes a client object's reference as input, and returns an address in the form of `H160`
2. Define a variable named `source` as the path for the directory that hosts all of the smart contracts that should be compiled, which is the root directory
3. Use the `Solc` crate to compile all of the smart contracts in the root directory
4. Get the ABI and bytecode from the compiled result, searching for the `Incrementer.sol` contract
5. Create a contract factory for the smart contract using the ABI, bytecode, and client. The client must be wrapped into an `Arc` type for thread safety
6. Use the factory to deploy. For this example, the value `5` is used as the initial value in the constructor
7. Print out the address after the deployment
8. Return the address
9. Call the `compile_deploy_contract` function in `main`
{% code overflow="wrap" %}
```rust
// ...
// 1. Define an asynchronous function that takes a client provider as input and returns H160
async fn compile_deploy_contract(client: &Client) -> Result> {
// 2. Define a path as the directory that hosts the smart contracts in the project
let source = Path::new(&env!("CARGO_MANIFEST_DIR"));
// 3. Compile all of the smart contracts
let compiled = Solc::default()
.compile_source(source)
.expect("Could not compile contracts");
// 4. Get ABI & Bytecode for Incrementer.sol
let (abi, bytecode, _runtime_bytecode) = compiled
.find("Incrementer")
.expect("could not find contract")
.into_parts_or_default();
// 5. Create a contract factory which will be used to deploy instances of the contract
let factory = ContractFactory::new(abi, bytecode, Arc::new(client.clone()));
// 6. Deploy
let contract = factory.deploy(U256::from(5))?.send().await?;
// 7. Print out the address
let addr = contract.address();
println!("Incrementer.sol has been deployed to {:?}", addr);
// 8. Return the address
Ok(addr)
}
#[tokio::main]
async fn main() -> Result<(), Box> {
// ...
// 9. Call compile_deploy_contract function in main
let addr = compile_deploy_contract(&client).await?;
Ok(())
}
```
{% endcode %}
#### Read Contract Data (Call Methods)
Call methods are the type of interaction that don't modify the contract's storage (change variables), meaning no transaction needs to be sent. They simply read various storage variables of the deployed contract.
Rust is typesafe, which is why the ABI for the `Incrementer.sol` contract is required to generate a typesafe Rust struct. For this example, you should create a new file in the root of the Cargo project called `Incrementer_ABI.json`:
```bash
touch Incrementer_ABI.json
```
The ABI for `Incrementer.sol` is below, which should be copied and pasted into the `Incrementer_ABI.json` file:
```json
[
{
"inputs": [
{
"internalType": "uint256",
"name": "_value",
"type": "uint256"
}
],
"name": "increment",
"outputs": [],
"stateMutability": "nonpayable",
"type": "function"
},
{
"inputs": [],
"name": "number",
"outputs": [
{
"internalType": "uint256",
"name": "",
"type": "uint256"
}
],
"stateMutability": "view",
"type": "function"
},
{
"inputs": [],
"name": "reset",
"outputs": [],
"stateMutability": "nonpayable",
"type": "function"
}
]
```
Then you can take the following steps to create a function that reads and returns the `number` method of the `Incrementer.sol` contract:
1. Generate a type-safe interface for the `Incrementer` smart contract with the `abigen` macro
2. Create a new asynchronous function named `read_number` that takes a client object's reference and a contract address reference as input, and returns a U256
3. Create a new instance of the `Incrementer` object generated by the abigen macro with the client and contract address values
4. Call the `number` function in the new `Incrementer` object
5. Print out the resultant value
6. Return the resultant value
7. Call the `read_number` function in `main`
{% code overflow="wrap" %}
```solidity
// ...
// 1. Generate a type-safe interface for the Incrementer smart contract
abigen!(
Incrementer,
"./Incrementer_ABI.json",
event_derives(serde::Deserialize, serde::Serialize)
);
// 2. Define an asynchronous function that takes a client provider and address as input and returns a U256
async fn read_number(client: &Client, contract_addr: &H160) -> Result> {
// 3. Create contract instance
let contract = Incrementer::new(contract_addr.clone(), Arc::new(client.clone()));
// 4. Call contract's number function
let value = contract.number().call().await?;
// 5. Print out number
println!("Incrementer's number is {}", value);
// 6. Return the number
Ok(value)
}
// ...
#[tokio::main]
async fn main() -> Result<(), Box> {
// ...
// 7. Call read_number function in main
read_number(&client, &addr).await?;
Ok(())
}
```
{% endcode %}
View the complete script
{% code overflow="wrap" %}
```rust
use ethers::providers::{Provider, Http};
use ethers::{prelude::*};
use ethers_solc::Solc;
use std::{path::Path, sync::Arc};
type Client = SignerMiddleware, Wallet>;
#[tokio::main]
async fn main() -> Result<(), Box> {
let provider: Provider = Provider::::try_from("https://testnet.phron.ai")?; // Change to correct network
// Do not include the private key in plain text in any production code. This is just for demonstration purposes
// Do not include '0x' at the start of the private key
let wallet: LocalWallet = "INSERT_PRIVATE_KEY"
.parse::()?
.with_chain_id(Chain::Phron);
let client = SignerMiddleware::new(provider.clone(), wallet.clone());
// Deploy contract and read initial incrementer value
let addr = compile_deploy_contract(&client).await?;
read_number(&client, &addr).await?;
// Increment and read the incremented number
increment_number(&client, &addr).await?;
read_number(&client, &addr).await?;
// Reset the incremented number and read it
reset(&client, &addr).await?;
read_number(&client, &addr).await?;
Ok(())
}
// Need to install solc for this tutorial: https://github.com/crytic/solc-select
async fn compile_deploy_contract(client: &Client) -> Result> {
// Incrementer.sol is located in the root directory
let source = Path::new(&env!("INSERT_CARGO_MANIFEST_DIR"));
// Compile it
let compiled = Solc::default()
.compile_source(source)
.expect("Could not compile contracts");
// Get ABI & Bytecode for Incrementer.sol
let (abi, bytecode, _runtime_bytecode) = compiled
.find("Incrementer")
.expect("could not find contract")
.into_parts_or_default();
// Create a contract factory which will be used to deploy instances of the contract
let factory = ContractFactory::new(abi, bytecode, Arc::new(client.clone()));
// Deploy
let contract = factory.deploy(U256::from(5))?.send().await?;
let addr = contract.address();
println!("Incrementer.sol has been deployed to {:?}", addr);
Ok(addr)
}
// Generates a type-safe interface for the Incrementer smart contract
abigen!(
Incrementer,
"./Incrementer_ABI.json",
event_derives(serde::Deserialize, serde::Serialize)
);
async fn read_number(client: &Client, contract_addr: &H160) -> Result> {
// Create contract instance
let contract = Incrementer::new(contract_addr.clone(), Arc::new(client.clone()));
// Call contract's number function
let value = contract.number().call().await?;
// Print out value
println!("Incrementer's number is {}", value);
Ok(value)
}
async fn increment_number(client: &Client, contract_addr: &H160) -> Result<(), Box> {
println!("Incrementing number...");
// Create contract instance
let contract = Incrementer::new(contract_addr.clone(), Arc::new(client.clone()));
// Send contract transaction
let tx = contract.increment(U256::from(5)).send().await?.await?;
println!("Transaction Receipt: {}", serde_json::to_string(&tx)?);
Ok(())
}
async fn reset(client: &Client, contract_addr: &H160) -> Result<(), Box> {
println!("Resetting number...");
// Create contract instance
let contract = Incrementer::new(contract_addr.clone(), Arc::new(client.clone()));
// Send contract transaction
let tx = contract.reset().send().await?.await?;
println!("Transaction Receipt: {}", serde_json::to_string(&tx)?);
Ok(())
}
```
{% endcode %}
To run the script, which will deploy the contract and return the current value stored in the `Incrementer` contract, you can enter the following command into your terminal:
```bash
cargo run
```
If successful, you'll see the deployed contract's address and initial value set, which should be `5`, displayed in the terminal.
{% code overflow="wrap" %}
```bash
cargo runCompiling ethers-examples v0.1.0 (/Users/phron/workspace/ethers-examples)Finished dev [unoptimized + debuginfo] target(s) in 1.09sRunning `/Users/phron/workspace/ethers-examples/target/debug/ethers-examples`Incrementer.sol has been deployed to 0xeb8a4d5c7cd56c65c9dbd25f793b50a2c917bb5dIncrementer's number is 5
```
{% endcode %}
#### Interact with Contract (Send Methods)
Send methods are the type of interaction that modify the contract's storage (change variables), meaning a transaction needs to be signed and sent. In this section, you'll create two functions: one to increment and one to reset the incrementer. This section will also require the `Incrementer_ABI.json` file initialized when reading from the smart contract.
Take the following steps to create the function to increment:
1. Ensure that the abigen macro is called for the `Incrementer_ABI.json` somewhere in the `main.rs` file (if it is already in the `main.rs` file, you do not have to have a second one)
2. Create a new asynchronous function named `increment_number` that takes a client object's reference and an address as input
3. Create a new instance of the `Incrementer` object generated by the abigen macro with the client and contract address values
4. Call the `increment` function in the new `Incrementer` object by including a `U256` object as input. In this instance, the value provided is `5`
5. Call the `read_number` function in `main`
{% code overflow="wrap" %}
```solidity
// ...
// 1. Generate a type-safe interface for the Incrementer smart contract
abigen!(
Incrementer,
"./Incrementer_ABI.json",
event_derives(serde::Deserialize, serde::Serialize)
);
// 2. Define an asynchronous function that takes a client provider and address as input
async fn increment_number(client: &Client, contract_addr: &H160) -> Result<(), Box> {
println!("Incrementing number...");
// 3. Create contract instance
let contract = Incrementer::new(contract_addr.clone(), Arc::new(client.clone()));
// 4. Send contract transaction
let tx = contract.increment(U256::from(5)).send().await?.await?;
println!("Transaction Receipt: {}", serde_json::to_string(&tx)?);
Ok(())
}
// ...
#[tokio::main]
async fn main() -> Result<(), Box> {
// ...
// 5. Call increment_number function in main
increment_number(&client, &addr).await?;
Ok(())
}
```
{% endcode %}
View the complete script
{% code overflow="wrap" %}
```rust
use ethers::providers::{Provider, Http};
use ethers::{prelude::*};
use ethers_solc::Solc;
use std::{path::Path, sync::Arc};
type Client = SignerMiddleware, Wallet>;
#[tokio::main]
async fn main() -> Result<(), Box> {
let provider: Provider = Provider::::try_from("https://testnet.phron.ai")?; // Change to correct network
// Do not include the private key in plain text in any production code. This is just for demonstration purposes
// Do not include '0x' at the start of the private key
let wallet: LocalWallet = "INSERT_PRIVATE_KEY"
.parse::()?
.with_chain_id(Chain::Phron);
let client = SignerMiddleware::new(provider.clone(), wallet.clone());
// Deploy contract and read initial incrementer value
let addr = compile_deploy_contract(&client).await?;
read_number(&client, &addr).await?;
// Increment and read the incremented number
increment_number(&client, &addr).await?;
read_number(&client, &addr).await?;
// Reset the incremented number and read it
reset(&client, &addr).await?;
read_number(&client, &addr).await?;
Ok(())
}
// Need to install solc for this tutorial: https://github.com/crytic/solc-select
async fn compile_deploy_contract(client: &Client) -> Result> {
// Incrementer.sol is located in the root directory
let source = Path::new(&env!("INSERT_CARGO_MANIFEST_DIR"));
// Compile it
let compiled = Solc::default()
.compile_source(source)
.expect("Could not compile contracts");
// Get ABI & Bytecode for Incrementer.sol
let (abi, bytecode, _runtime_bytecode) = compiled
.find("Incrementer")
.expect("could not find contract")
.into_parts_or_default();
// Create a contract factory which will be used to deploy instances of the contract
let factory = ContractFactory::new(abi, bytecode, Arc::new(client.clone()));
// Deploy
let contract = factory.deploy(U256::from(5))?.send().await?;
let addr = contract.address();
println!("Incrementer.sol has been deployed to {:?}", addr);
Ok(addr)
}
// Generates a type-safe interface for the Incrementer smart contract
abigen!(
Incrementer,
"./Incrementer_ABI.json",
event_derives(serde::Deserialize, serde::Serialize)
);
async fn read_number(client: &Client, contract_addr: &H160) -> Result> {
// Create contract instance
let contract = Incrementer::new(contract_addr.clone(), Arc::new(client.clone()));
// Call contract's number function
let value = contract.number().call().await?;
// Print out value
println!("Incrementer's number is {}", value);
Ok(value)
}
async fn increment_number(client: &Client, contract_addr: &H160) -> Result<(), Box> {
println!("Incrementing number...");
// Create contract instance
let contract = Incrementer::new(contract_addr.clone(), Arc::new(client.clone()));
// Send contract transaction
let tx = contract.increment(U256::from(5)).send().await?.await?;
println!("Transaction Receipt: {}", serde_json::to_string(&tx)?);
Ok(())
}
async fn reset(client: &Client, contract_addr: &H160) -> Result<(), Box> {
println!("Resetting number...");
// Create contract instance
let contract = Incrementer::new(contract_addr.clone(), Arc::new(client.clone()));
// Send contract transaction
let tx = contract.reset().send().await?.await?;
println!("Transaction Receipt: {}", serde_json::to_string(&tx)?);
Ok(())
}
```
{% endcode %}
To run the script, you can enter the following command into your terminal:
```bash
cargo run
```
If successful, the transaction receipt will be displayed in the terminal. You can use the `read_number` function in the `main` function to make sure that value is changing as expected. If you're using the `read_number` function after incrementing, you'll also see the incremented number, which should be `10`.
{% code overflow="wrap" %}
```bash
cargo runCompiling ethers-examples v0.1.0 (/Users/phron/workspace/ethers-examples)Finished dev [unoptimized + debuginfo] target(s) in 1.09sRunning `/Users/phron/workspace/ethers-examples/target/debug/ethers-examples`Incrementer.sol has been deployed to 0xeb8a4d5c7cd56c65c9dbd25f793b50a2c917bb5dIncrementer's number is 5Incrementing number...Transaction Receipt: {"transactionHash":"0x6f5c204e74b96b6cf6057512ba142ad727718646d4ebb7abe8bbabada198dafb","transactionIndex":"0x0","blockHash":"0x635a8a234b30c6ee907198ddda3a1478ae52c6adbcc4a67353dd9597ee626950","blockNumber":"0x7ac238","from":"0x3b939fead1557c741ff06492fd0127bd287a421e","to":"0xeb8a4d5c7cd56c65c9dbd25f793b50a2c917bb5d","cumulativeGasUsed":"0x68a6","gasUsed":"0x68a6","contractAddress":null,"logs":[],"status":"0x1","logsBloom":"0x00000000000000000000000000000000000000000000000000000000000000000000000000000000000000000000000000000000000000000000000000000000000000000000000000000000000000000000000000000000000000000000000000000000000000000000000000000000000000000000000000000000000000000000000000000000000000000000000000000000000000000000000000000000000000000000000000000000000000000000000000000000000000000000000000000000000000000000000000000000000000000000000000000000000000000000000000000000000000000000000000000000000000000000000000000000000000000000000000000000000","type":"0x2","effectiveGasPrice":"0xba43b740"}Incrementer's number is 10
```
{% endcode %}
Next you can interact with the `reset` function:
1. Ensure that the abigen macro is called for the `Incrementer_ABI.json` somewhere in the `main.rs` file (if it is already in the `main.rs` file, you do not have to have a second one)
2. Create a new asynchronous function named `reset` that takes a client object's reference and an address as input
3. Create a new instance of the `Incrementer` object generated by the abigen macro with the client and contract address values
4. Call the `reset` function in the new `Incrementer` object
5. Call the `reset` function in `main`
{% code overflow="wrap" %}
```rust
// ...
// 1. Generate a type-safe interface for the Incrementer smart contract
abigen!(
Incrementer,
"./Incrementer_ABI.json",
event_derives(serde::Deserialize, serde::Serialize)
);
// 2. Define an asynchronous function that takes a client provider and address as input
async fn reset(client: &Client, contract_addr: &H160) -> Result<(), Box> {
println!("Resetting number...");
// 3. Create contract instance
let contract = Incrementer::new(contract_addr.clone(), Arc::new(client.clone()));
// 4. Send contract transaction
let tx = contract.reset().send().await?.await?;
println!("Transaction Receipt: {}", serde_json::to_string(&tx)?);
Ok(())
}
// ...
#[tokio::main]
async fn main() -> Result<(), Box> {
// ...
// 5. Call reset function in main
reset(&client, &addr).await?;
Ok(())
}
```
{% endcode %}
If successful, the transaction receipt will be displayed in the terminal. You can use the `read_number` function in the `main` function to make sure that value is changing as expected. If you're using the `read_number` function after resetting the number, you should see `0` printed to the terminal.
{% code overflow="wrap" %}
```bash
cargo runCompiling ethers-examples v0.1.0 (/Users/phron/workspace/ethers-examples)Finished dev [unoptimized + debuginfo] target(s) in 1.09sRunning `/Users/phron/workspace/ethers-examples/target/debug/ethers-examples`Incrementer.sol has been deployed to 0xeb8a4d5c7cd56c65c9dbd25f793b50a2c917bb5dIncrementer's number is 5Incrementing number...Transaction Receipt: {"transactionHash":"0x6f5c204e74b96b6cf6057512ba142ad727718646d4ebb7abe8bbabada198dafb","transactionIndex":"0x0","blockHash":"0x635a8a234b30c6ee907198ddda3a1478ae52c6adbcc4a67353dd9597ee626950","blockNumber":"0x7ac238","from":"0x3b939fead1557c741ff06492fd0127bd287a421e","to":"0xeb8a4d5c7cd56c65c9dbd25f793b50a2c917bb5d","cumulativeGasUsed":"0x68a6","gasUsed":"0x68a6","contractAddress":null,"logs":[],"status":"0x1","logsBloom":"0x00000000000000000000000000000000000000000000000000000000000000000000000000000000000000000000000000000000000000000000000000000000000000000000000000000000000000000000000000000000000000000000000000000000000000000000000000000000000000000000000000000000000000000000000000000000000000000000000000000000000000000000000000000000000000000000000000000000000000000000000000000000000000000000000000000000000000000000000000000000000000000000000000000000000000000000000000000000000000000000000000000000000000000000000000000000000000000000000000000000000","type":"0x2","effectiveGasPrice":"0xba43b740"}Incrementer's number is 10Resetting number...Transaction Receipt: {"transactionHash":"0xf1010597c6ab3d3cfcd6e8e68bf2eddf4ed38eb93a3052591c88b675ed1e83a4","transactionIndex":"0x0","blockHash":"0x5d4c09abf104cbd88e80487c170d8709aae7475ca84c1f3396f3e35222fbe87f","blockNumber":"0x7ac23b","from":"0x3b939fead1557c741ff06492fd0127bd287a421e","to":"0xeb8a4d5c7cd56c65c9dbd25f793b50a2c917bb5d","cumulativeGasUsed":"0x53c4","gasUsed":"0x53c4","contractAddress":null,"logs":[],"status":"0x1","logsBloom":"0x000000000000000000000000000000000000000000000000000000000000000000000000000000000000000000000000000000000000000000000000000000000000000000000000000000000000000000000000000000000000000000000000000000000000000000000000000000000000000000000000000000000000000000000000000000000000000000000000000000000000000000000000000000000000000000000000000000000000000000000000000000000000000000000000000000000000000000000000000000000000000000000000000000000000000000000000000000000000000000000000000000000000000000000000000000000","type":"0x2","effectiveGasPrice":"0xba43b740"}Incrementer's number is 0
```
{% endcode %}
View the complete script
{% code overflow="wrap" %}
```rust
use ethers::providers::{Provider, Http};
use ethers::{prelude::*};
use ethers_solc::Solc;
use std::{path::Path, sync::Arc};
type Client = SignerMiddleware, Wallet>;
#[tokio::main]
async fn main() -> Result<(), Box> {
let provider: Provider = Provider::::try_from("https://testnet.phron.ai")?; // Change to correct network
// Do not include the private key in plain text in any production code. This is just for demonstration purposes
// Do not include '0x' at the start of the private key
let wallet: LocalWallet = "INSERT_PRIVATE_KEY"
.parse::()?
.with_chain_id(Chain::Phron);
let client = SignerMiddleware::new(provider.clone(), wallet.clone());
// Deploy contract and read initial incrementer value
let addr = compile_deploy_contract(&client).await?;
read_number(&client, &addr).await?;
// Increment and read the incremented number
increment_number(&client, &addr).await?;
read_number(&client, &addr).await?;
// Reset the incremented number and read it
reset(&client, &addr).await?;
read_number(&client, &addr).await?;
Ok(())
}
// Need to install solc for this tutorial: https://github.com/crytic/solc-select
async fn compile_deploy_contract(client: &Client) -> Result> {
// Incrementer.sol is located in the root directory
let source = Path::new(&env!("INSERT_CARGO_MANIFEST_DIR"));
// Compile it
let compiled = Solc::default()
.compile_source(source)
.expect("Could not compile contracts");
// Get ABI & Bytecode for Incrementer.sol
let (abi, bytecode, _runtime_bytecode) = compiled
.find("Incrementer")
.expect("could not find contract")
.into_parts_or_default();
// Create a contract factory which will be used to deploy instances of the contract
let factory = ContractFactory::new(abi, bytecode, Arc::new(client.clone()));
// Deploy
let contract = factory.deploy(U256::from(5))?.send().await?;
let addr = contract.address();
println!("Incrementer.sol has been deployed to {:?}", addr);
Ok(addr)
}
// Generates a type-safe interface for the Incrementer smart contract
abigen!(
Incrementer,
"./Incrementer_ABI.json",
event_derives(serde::Deserialize, serde::Serialize)
);
async fn read_number(client: &Client, contract_addr: &H160) -> Result> {
// Create contract instance
let contract = Incrementer::new(contract_addr.clone(), Arc::new(client.clone()));
// Call contract's number function
let value = contract.number().call().await?;
// Print out value
println!("Incrementer's number is {}", value);
Ok(value)
}
async fn increment_number(client: &Client, contract_addr: &H160) -> Result<(), Box> {
println!("Incrementing number...");
// Create contract instance
let contract = Incrementer::new(contract_addr.clone(), Arc::new(client.clone()));
// Send contract transaction
let tx = contract.increment(U256::from(5)).send().await?.await?;
println!("Transaction Receipt: {}", serde_json::to_string(&tx)?);
Ok(())
}
async fn reset(client: &Client, contract_addr: &H160) -> Result<(), Box> {
println!("Resetting number...");
// Create contract instance
let contract = Incrementer::new(contract_addr.clone(), Arc::new(client.clone()));
// Send contract transaction
let tx = contract.reset().send().await?.await?;
println!("Transaction Receipt: {}", serde_json::to_string(&tx)?);
Ok(())
}
```
{% endcode %}
This tutorial is for educational purposes only. As such, any contracts or code created in this tutorial should not be used in production.The information presented herein has been provided by third parties and is made available solely for general information purposes. Phron does not endorse any project listed and described on the Phron Doc Website (). Phron does not warrant the accuracy, completeness or usefulness of this information. Any reliance you place on such information is strictly at your own risk. Phron disclaims all liability and responsibility arising from any reliance placed on this information by you or by anyone who may be informed of any of its contents. All statements and/or opinions expressed in these materials are solely the responsibility of the person or entity providing those materials and do not necessarily represent the opinion of Phron. The information should not be construed as professional or financial advice of any kind. Advice from a suitably qualified professional should always be sought in relation to any particular matter or circumstance. The information herein may link to or integrate with other websites operated or content provided by third parties, and such other websites may link to this website. Phron has no control over any such other websites or their content and will have no liability arising out of or related to such websites or their content. The existence of any such link does not constitute an endorsement of such websites, the content of the websites, or the operators of the websites. These links are being provided to you only as a convenience and you release and hold Phron harmless from any and all liability arising from your use of this information or the information provided by any third-party website or service.
# Web3.js
## Web3.js JavaScript Library
### Introduction
[Web3.js](https://web3js.readthedocs.io/) is a set of libraries that allow developers to interact with Ethereum nodes using HTTP, IPC, or WebSocket protocols with JavaScript. Phron has an Ethereum-like API available that is fully compatible with Ethereum-style JSON-RPC invocations. Therefore, developers can leverage this compatibility and use the Web3.js library to interact with a Phron node as if they were doing so on Ethereum.
In this guide, you'll learn how to use the Web3.js library to send a transaction and deploy a contract on Phron.
### Checking Prerequisites
For the examples in this guide, you will need to have the following:
* An account with funds. You can get DEV tokens for testing on Phron once every 24 hours from the Phron Faucet
* To test out the examples in this guide on Phron, you will need to have your own endpoint and API key, which you can get from one of the supported Endpoint Providers
> ### Note
>
> The examples in this guide assume you have a MacOS or Ubuntu 22.04-based environment and will need to be adapted accordingly for Windows.
### Installing Web3.js
To get started, you'll need to start a basic JavaScript project. First, create a directory to store all of the files you'll be creating throughout this guide, and initialize the project with the following command:
```bash
mkdir web3-examples && cd web3-examples && npm init --y
```
For this guide, you'll need to install the Web3.js library and the Solidity compiler. To install both NPM packages, you can run the following command:
```bash
npm install web3 solc@0.8.0
```
### Setup Web3.js with Phron
You can configure Web3.js to work with any of the Phron networks. To configure your project for Phron, you will need to have your own endpoint and API key, which you can get from one of the supported Endpoint Providers.
The simplest way to get started with each of the networks is as follows:
```javascript
const { Web3 } = require('web3');
// Create Web3 instance
const web3 = new Web3('INSERT_RPC_API_ENDPOINT'); // Insert your RPC URL here
```
Save this code snippet, as you'll need it for the scripts that are used in the following sections.
### Send a Transaction
During this section, you'll be creating a couple of scripts. The first one will be to check the balances of your accounts before trying to send a transaction. The second script will actually send the transaction.
You can also use the balance script to check the account balances after the transaction has been sent.
#### Check Balances Script
You'll only need one file to check the balances of both addresses before and after the transaction is sent. To get started, you can create a `balances.js` file by running:
```bash
touch balances.js
```
Next, you will create the script for this file and complete the following steps:
1. Set up the Web3 provider
2. Define the `addressFrom` and `addressTo` variables
3. Create the asynchronous `balances` function, which wraps the `web3.eth.getBalance` method
4. Use the `web3.eth.getBalance` function to fetch the balances for the `addressFrom` and `addressTo` addresses. You can also leverage the `web3.utils.fromWei` function to transform the balance into a more readable number in DEV
5. Lastly, run the `balances` function
```javascript
// 1. Add the Web3 provider logic
// {...}
// 2. Create address variables
const addressFrom = 'INSERT_FROM_ADDRESS';
const addressTo = 'INSERT_TO_ADDRESS';
// 3. Create balances function
const balances = async () => {
// 4. Fetch balance info
const balanceFrom = web3.utils.fromWei(
await web3.eth.getBalance(addressFrom),
'ether'
);
const balanceTo = web3.utils.fromWei(
await web3.eth.getBalance(addressTo),
'ether'
);
console.log(`The balance of ${addressFrom} is: ${balanceFrom} DEV`);
console.log(`The balance of ${addressTo} is: ${balanceTo} DEV`);
};
// 5. Call balances function
balances();
```
View the complete script
```javascript
const { Web3 } = require('web3');
// 1. Add the Web3 provider logic here:
const providerRPC = {
development: 'http://localhost:9944',
phron: 'https://testnet.phron.ai',
};
const web3 = new Web3(providerRPC.phron); // Change to correct network
// 2. Create address variables
const addressFrom = 'INSERT_FROM_ADDRESS';
const addressTo = 'INSERT_TO_ADDRESS';
// 3. Create balances function
const balances = async () => {
// 4. Fetch balance info
const balanceFrom = web3.utils.fromWei(await web3.eth.getBalance(addressFrom), 'ether');
const balanceTo = web3.utils.fromWei(await web3.eth.getBalance(addressTo), 'ether');
console.log(`The balance of ${addressFrom} is: ${balanceFrom} DEV`);
console.log(`The balance of ${addressTo} is: ${balanceTo} DEV`);
};
// 5. Call balances function
balances();
```
To run the script and fetch the account balances, you can run the following command:
```bash
node balances.js
```
If successful, the balances for the origin and receiving address will be displayed in your terminal in DEV.
#### Send Transaction Script
You'll only need one file to execute a transaction between accounts. For this example, you'll be transferring 1 DEV token from an origin address (from which you hold the private key) to another address. To get started, you can create a `transaction.js` file by running:
```bash
touch transaction.js
```
Next, you will create the script for this file and complete the following steps:
1. Set up the Web3 provider
2. Define the `accountFrom`, including the `privateKey`, and the `addressTo` variables. The private key is required to create a wallet instance. **Note: This is for example purposes only. Never store your private keys in a JavaScript file**
3. Create the asynchronous `send` function, which wraps the transaction object, and the sign and send transaction functions
4. Create and sign the transaction using the `web3.eth.accounts.signTransaction` function. Pass in the `gas`, `addressTo`, `value`, `gasPrice`, and `nonce` for the transaction along with the sender's `privateKey`
5. Send the signed transaction using the `web3.eth.sendSignedTransaction` method and pass in the raw transaction. Then use `await` to wait until the transaction is processed and the transaction receipt is returned
6. Lastly, run the `send` function
```javascript
// 1. Add the Web3 provider logic
// {...}
// 2. Create account variables
const accountFrom = {
privateKey: 'INSERT_YOUR_PRIVATE_KEY',
address: 'INSERT_PUBLIC_ADDRESS_OF_PK',
};
const addressTo = 'INSERT_TO_ADDRESS'; // Change addressTo
// 3. Create send function
const send = async () => {
console.log(
`Attempting to send transaction from ${accountFrom.address} to ${addressTo}`
);
// 4. Sign transaction with PK
const createTransaction = await web3.eth.accounts.signTransaction(
{
gas: 21000,
to: addressTo,
value: web3.utils.toWei('1', 'ether'),
gasPrice: await web3.eth.getGasPrice(),
nonce: await web3.eth.getTransactionCount(accountFrom.address),
},
accountFrom.privateKey
);
// 5. Send transaction and wait for receipt
const createReceipt = await web3.eth.sendSignedTransaction(
createTransaction.rawTransaction
);
console.log(
`Transaction successful with hash: ${createReceipt.transactionHash}`
);
};
// 6. Call send function
send();
```
View the complete script
```javascript
const { Web3 } = require('web3');
// 1. Add the Web3 provider logic
const providerRPC = {
development: 'http://localhost:9944',
phron: 'https://testnet.phron.ai',
};
const web3 = new Web3(providerRPC.phron); // Change to correct network
// 2. Create account variables
const accountFrom = {
privateKey: 'INSERT_YOUR_PRIVATE_KEY',
address: 'INSERT_PUBLIC_ADDRESS_OF_PK',
};
const addressTo = 'INSERT_TO_ADDRESS';
// 3. Create send function
const send = async () => {
console.log(
`Attempting to send transaction from ${accountFrom.address} to ${addressTo}`
);
// 4. Sign transaction with PK
const createTransaction = await web3.eth.accounts.signTransaction(
{
gas: 21000,
to: addressTo,
value: web3.utils.toWei('1', 'ether'),
gasPrice: await web3.eth.getGasPrice(),
nonce: await web3.eth.getTransactionCount(accountFrom.address),
},
accountFrom.privateKey
);
// 5. Send transaction and wait for receipt
const createReceipt = await web3.eth.sendSignedTransaction(
createTransaction.rawTransaction
);
console.log(
`Transaction successful with hash: ${createReceipt.transactionHash}`
);
};
// 6. Call send function
send();
```
To run the script, you can run the following command in your terminal:
```bash
node transaction.js
```
If the transaction was successful, in your terminal, you'll see the transaction hash has been printed out.
You can also use the `balances.js` script to check that the balances for the origin and receiving accounts have changed. The entire workflow would look like this:
{% code overflow="wrap" %}
```bash
node balances.jsThe balance of 0x3B939FeaD1557C741Ff06492FD0127bd287A421e is: 3603.67979115380310679 DEVThe balance of 0xe29A0699e079FeBEe94A02f35C31B026f90F6040 is: 0. DEVnode transaction.jsAttempting to send transaction from 0x3B939FeaD1557C741Ff06492FD0127bd287A421e to 0xe29A0699e079FeBEe94A02f35C31B026f90F6040Transaction successful with hash: 0xf1d628ed12c5f40e03e29aa2c23c8c09680ee595c60607c7363a81c0be8ef3cbnode balances.jsThe balance of 0x3B939FeaD1557C741Ff06492FD0127bd287A421e is: 3602.67978852880310679 DEVThe balance of 0xe29A0699e079FeBEe94A02f35C31B026f90F6040 is: 1 DEV
```
{% endcode %}
#### Common Errors When Sending Transactions
When sending a transaction with Web3.js, it is important that you have all of the required data for the transaction. You'll need to provide the `from` address or the `nonce` of the sender, the `gas` or `gasLimit`, and the `gasPrice`.
If you do not specify the `from` address or the `nonce` of the sender, you may receive the following error:
{% code overflow="wrap" %}
```bash
UnableToPopulateNonceError: Invalid value given "UnableToPopulateNonceError". Error: unable to populate nonce, no from address available.
```
{% endcode %}
To fix this, simply add either the `from` or `nonce` field to the transaction object.
If you do not specify the gas correctly, you may receive the following error:
{% code overflow="wrap" %}
```bash
MissingGasError: Invalid value given "gas: 0x5208, gasPrice: undefined, maxPriorityFeePerGas: undefined, maxFeePerGas: undefined". Error: "gas" is missing.
```
{% endcode %}
To resolve this error, you'll need to make sure that you've provided a `gasPrice` for the transaction. You can use `await web3.eth.getGasPrice()` to programmatically get this value.
### Deploy a Contract
The contract you'll be compiling and deploying in the next couple of sections is a simple incrementer contract, arbitrarily named `Incrementer.sol`. You can get started by creating a file for the contract:
```bash
touch Incrementer.sol
```
Next, you can add the Solidity code to the file:
```solidity
// SPDX-License-Identifier: MIT
pragma solidity ^0.8.0;
contract Incrementer {
uint256 public number;
constructor(uint256 _initialNumber) {
number = _initialNumber;
}
function increment(uint256 _value) public {
number = number + _value;
}
function reset() public {
number = 0;
}
}
```
The `constructor` function, which runs when the contract is deployed, sets the initial value of the number variable stored on-chain (the default is `0`). The `increment` function adds the `_value` provided to the current number, but a transaction needs to be sent, which modifies the stored data. Lastly, the `reset` function resets the stored value to zero.
> ### Note
>
> This contract is a simple example for illustration purposes only and does not handle values wrapping around.
#### Compile Contract Script
In this section, you'll create a script that uses the Solidity compiler to output the bytecode and interface (ABI) for the `Incrementer.sol` contract. To get started, you can create a `compile.js` file by running:
```bash
touch compile.js
```
Next, you will create the script for this file and complete the following steps:
1. Import the `fs` and `solc` packages
2. Using the `fs.readFileSync` function, you'll read and save the file contents of `Incrementer.sol` to `source`
3. Build the `input` object for the Solidity compiler by specifying the `language`, `sources`, and `settings` to be used
4. Using the `input` object, you can compile the contract using `solc.compile`
5. Extract the compiled contract file and export it to be used in the deployment script
```javascript
// 1. Import packages
const fs = require('fs');
const solc = require('solc');
// 2. Get path and load contract
const source = fs.readFileSync('Incrementer.sol', 'utf8');
// 3. Create input object
const input = {
language: 'Solidity',
sources: {
'Incrementer.sol': {
content: source,
},
},
settings: {
outputSelection: {
'*': {
'*': ['*'],
},
},
},
};
// 4. Compile the contract
const tempFile = JSON.parse(solc.compile(JSON.stringify(input)));
const contractFile = tempFile.contracts['Incrementer.sol']['Incrementer'];
// 5. Export contract data
module.exports = contractFile;
```
#### Deploy Contract Script
With the script for compiling the `Incrementer.sol` contract in place, you can then use the results to send a signed transaction that deploys it. To do so, you can create a file for the deployment script called `deploy.js`:
```bash
touch deploy.js
```
Next, you will create the script for this file and complete the following steps:
1. Import the contract file from `compile.js`
2. Set up the Web3 provider
3. Define the `accountFrom`, including the `privateKey`, and the `addressTo` variables. The private key is required to create a wallet instance. **Note: This is for example purposes only. Never store your private keys in a JavaScript file**
4. Save the `bytecode` and `abi` for the compiled contract
5. Create the asynchronous `deploy` function that will be used to deploy the contract
6. Create the contract instance using the `web3.eth.Contract` function
7. Create the constructor and pass in the `bytecode` and the initial value for the incrementer. For this example, you can set the initial value to `5`
8. Create and sign the transaction using the `web3.eth.accounts.signTransaction` function. Pass in the `data`, `gas`, `gasPrice`, and `nonce` for the transaction along with the sender's `privateKey`
9. Send the signed transaction using the `web3.eth.sendSignedTransaction` method and pass in the raw transaction. Then use `await` to wait until the transaction is processed and the transaction receipt is returned
10. Lastly, run the `deploy` function
```javascript
// 1. Import the contract file
const contractFile = require('./compile');
// 2. Add the Web3 provider logic
// {...}
// 3. Create address variables
const accountFrom = {
privateKey: 'INSERT_YOUR_PRIVATE_KEY',
address: 'INSERT_PUBLIC_ADDRESS_OF_PK',
};
// 4. Get the bytecode and API
const bytecode = contractFile.evm.bytecode.object;
const abi = contractFile.abi;
// 5. Create deploy function
const deploy = async () => {
console.log(`Attempting to deploy from account ${accountFrom.address}`);
// 6. Create contract instance
const incrementer = new web3.eth.Contract(abi);
// 7. Create constructor transaction
const incrementerTx = incrementer.deploy({
data: bytecode,
arguments: [5],
});
// 8. Sign transaction with PK
const createTransaction = await web3.eth.accounts.signTransaction(
{
data: incrementerTx.encodeABI(),
gas: await incrementerTx.estimateGas(),
gasPrice: await web3.eth.getGasPrice(),
nonce: await web3.eth.getTransactionCount(accountFrom.address),
},
accountFrom.privateKey
);
// 9. Send transaction and wait for receipt
const createReceipt = await web3.eth.sendSignedTransaction(
createTransaction.rawTransaction
);
console.log(`Contract deployed at address: ${createReceipt.contractAddress}`);
};
// 10. Call deploy function
deploy();
```
View the complete script
```javascript
// 1. Import web3 and the contract file
const { Web3 } = require('web3');
const contractFile = require('./compile');
// 2. Add the Web3 provider logic
const providerRPC = {
development: 'http://localhost:9944',
phron: 'https://testnet.phron.ai',
};
const web3 = new Web3(providerRPC.phron); // Change to correct network
// 3. Create address variables
const accountFrom = {
privateKey: 'INSERT_YOUR_PRIVATE_KEY',
address: 'INSERT_PUBLIC_ADDRESS_OF_PK',
};
// 4. Get the bytecode and API
const bytecode = contractFile.evm.bytecode.object;
const abi = contractFile.abi;
// 5. Create deploy function
const deploy = async () => {
console.log(`Attempting to deploy from account ${accountFrom.address}`);
// 6. Create contract instance
const incrementer = new web3.eth.Contract(abi);
// 7. Create constructor transaction
const incrementerTx = incrementer.deploy({
data: bytecode,
arguments: [5],
});
// 8. Sign transaction with PK
const createTransaction = await web3.eth.accounts.signTransaction(
{
data: incrementerTx.encodeABI(),
gas: await incrementerTx.estimateGas(),
gasPrice: await web3.eth.getGasPrice(),
nonce: await web3.eth.getTransactionCount(accountFrom.address),
},
accountFrom.privateKey
);
// 9. Send transaction and wait for receipt
const createReceipt = await web3.eth.sendSignedTransaction(
createTransaction.rawTransaction
);
console.log(`Contract deployed at address: ${createReceipt.contractAddress}`);
};
// 10. Call deploy function
deploy();
```
To run the script, you can enter the following command into your terminal:
```bash
node deploy.js
```
If successful, the contract's address will be displayed in the terminal.
{% code overflow="wrap" %}
```bash
node deploy.jsAttempting to deploy from account 0x3B939FeaD1557C741Ff06492FD0127bd287A421eContract deployed at address: 0x6dcb33a7f6235e74fd553b50c96f900707142892
```
{% endcode %}
#### Read Contract Data (Call Methods)
Call methods are the type of interaction that doesn't modify the contract's storage (change variables), meaning no transaction needs to be sent. They simply read various storage variables of the deployed contract.
To get started, you can create a file and name it `get.js`:
```bash
touch get.js
```
Then you can take the following steps to create the script:
1. Import the `abi` from the `compile.js` file
2. Set up the Web3 provider
3. Create the `contractAddress` variable using the address of the deployed contract
4. Create an instance of the contract using the `web3.eth.Contract` function and passing in the `abi` and `contractAddress`
5. Create the asynchronous `get` function
6. Use the contract instance to call one of the contract's methods and pass in any inputs if necessary. For this example, you will call the `number` method which doesn't require any inputs. You can use `await`, which will return the value requested once the request promise resolves
7. Lastly, call the `get` function
```javascript
// 1. Import the contract ABI
const { abi } = require('./compile');
// 2. Add the Web3 provider logic
// {...}
// 3. Create address variables
const contractAddress = 'INSERT_CONTRACT_ADDRESS';
// 4. Create contract instance
const incrementer = new web3.eth.Contract(abi, contractAddress);
// 5. Create get function
const get = async () => {
console.log(`Making a call to contract at address: ${contractAddress}`);
// 6. Call contract
const data = await incrementer.methods.number().call();
console.log(`The current number stored is: ${data}`);
};
// 7. Call get function
get();
```
View the complete script
```javascript
// 1. Import Web3js and the contract ABI
const { Web3 } = require('web3');
const { abi } = require('./compile');
// 2. Add the Web3 provider logic
const providerRPC = {
development: 'http://localhost:9944',
phron: 'https://testnet.phron.ai',
};
const web3 = new Web3(providerRPC.phron); // Change to correct network
// 3. Create address variables
const contractAddress = 'INSERT_CONTRACT_ADDRESS';
// 4. Create contract instance
const incrementer = new web3.eth.Contract(abi, contractAddress);
// 5. Create get function
const get = async () => {
console.log(`Making a call to contract at address: ${contractAddress}`);
// 6. Call contract
const data = await incrementer.methods.number().call();
console.log(`The current number stored is: ${data}`);
};
// 7. Call get function
get();
```
To run the script, you can enter the following command in your terminal:
```bash
node get.js
```
If successful, the value will be displayed in the terminal.
#### Interact with Contract (Send Methods)
Send methods are the type of interaction that modifies the contract's storage (change variables), meaning a transaction needs to be signed and sent. In this section, you'll create two scripts: one to increment and one to reset the incrementer. To get started, you can create a file for each script and name them `increment.js` and `reset.js`:
```bash
touch increment.js reset.js
```
Open the `increment.js` file and take the following steps to create the script:
1. Import the `abi` from the `compile.js` file
2. Set up the Web3 provider
3. Define the `privateKey` for the origin account, the `contractAddress` of the deployed contract, and the `_value` to increment by. The private key is required to create a wallet instance. **Note: This is for example purposes only. Never store your private keys in a JavaScript file**
4. Create an instance of the contract using the `web3.eth.Contract` function and passing in the `abi` and `contractAddress`
5. Use the contract instance to build the increment transaction using the `methods.increment` function and passing in the `_value` as an input
6. Create the asynchronous `increment` function
7. Use the contract instance and the increment transaction you previously created to sign the transaction with the sender's private key. You'll use the `web3.eth.accounts.signTransaction` function and specify the `to` address, `data`, `gas`, `gasPrice`, and `nonce` for the transaction
8. Send the signed transaction using the `web3.eth.sendSignedTransaction` method and pass in the raw transaction. Then use `await` to wait until the transaction is processed and the transaction receipt is returned
9. Lastly, call the `increment` function
```javascript
// 1. Import the contract ABI
const { abi } = require('./compile');
// 2. Add the Web3 provider logic
// {...}
// 3. Create variables
const accountFrom = {
privateKey: 'INSERT_YOUR_PRIVATE_KEY',
address: 'INSERT_PUBLIC_ADDRESS_OF_PK',
};
const contractAddress = 'INSERT_CONTRACT_ADDRESS';
const _value = 3;
// 4. Create contract instance
const incrementer = new web3.eth.Contract(abi, contractAddress);
// 5. Build the increment transaction
const incrementTx = incrementer.methods.increment(_value);
// 6. Create increment function
const increment = async () => {
console.log(
`Calling the increment by ${_value} function in contract at address: ${contractAddress}`
);
// 7. Sign transaction with PK
const createTransaction = await web3.eth.accounts.signTransaction(
{
to: contractAddress,
data: incrementTx.encodeABI(),
gas: await incrementTx.estimateGas(),
gasPrice: await web3.eth.getGasPrice(),
nonce: await web3.eth.getTransactionCount(accountFrom.address),
},
accountFrom.privateKey
);
// 8. Send transaction and wait for receipt
const createReceipt = await web3.eth.sendSignedTransaction(
createTransaction.rawTransaction
);
console.log(`Tx successful with hash: ${createReceipt.transactionHash}`);
};
// 9. Call increment function
increment();
```
View the complete script
```javascript
// 1. Import Web3js and the contract ABI
const { Web3 } = require('web3');
const { abi } = require('./compile');
// 2. Add the Web3 provider logic
const providerRPC = {
development: 'http://localhost:9944',
phron: 'https://testnet.phron.ai',
};
const web3 = new Web3(providerRPC.phron); // Change to correct network
// 3. Create variables
const accountFrom = {
privateKey: 'INSERT_YOUR_PRIVATE_KEY',
address: 'INSERT_PUBLIC_ADDRESS_OF_PK',
};
const contractAddress = 'INSERT_CONTRACT_ADDRESS';
const _value = 3;
// 4. Create contract instance
const incrementer = new web3.eth.Contract(abi, contractAddress);
// 5. Build increment transaction
const incrementTx = incrementer.methods.increment(_value);
// 6. Create increment function
const increment = async () => {
console.log(
`Calling the increment by ${_value} function in contract at address: ${contractAddress}`
);
// 7. Sign transaction with PK
const createTransaction = await web3.eth.accounts.signTransaction(
{
to: contractAddress,
data: incrementTx.encodeABI(),
gas: await incrementTx.estimateGas(),
gasPrice: await web3.eth.getGasPrice(),
nonce: await web3.eth.getTransactionCount(accountFrom.address),
},
accountFrom.privateKey
);
// 8. Send transaction and wait for receipt
const createReceipt = await web3.eth.sendSignedTransaction(
createTransaction.rawTransaction
);
console.log(`Tx successful with hash: ${createReceipt.transactionHash}`);
};
// 9. Call increment function
increment();
```
To run the script, you can enter the following command in your terminal:
```bash
node increment.js
```
If successful, the transaction hash will be displayed in the terminal. You can use the `get.js` script alongside the `increment.js` script to make sure that value is changing as expected:
{% code overflow="wrap" %}
```bash
node get.jsMaking a call to contract at address: 0x6dcb33a7f6235e74fd553b50c96f900707142892The current number stored is: 5node increment.jsCalling the increment by 3 function in contract at address: 0x6dcb33a7f6235e74fd553b50c96f900707142892Tx successful with hash: 0xb03d1426376e7efc49d8b6c69aaf91e548578db7fd4a9ba575dbd8030821f6a3node get.jsMaking a call to contract at address: 0x6dcb33a7f6235e74fd553b50c96f900707142892The current number stored is: 8
```
{% endcode %}
Next, you can open the `reset.js` file and take the following steps to create the script:
1. Import the `abi` from the `compile.js` file
2. Set up the Web3 provider
3. Define the `privateKey` for the origin account and the `contractAddress` of the deployed contract. The private key is required to create a wallet instance. **Note: This is for example purposes only. Never store your private keys in a JavaScript file**
4. Create an instance of the contract using the `web3.eth.Contract` function and passing in the `abi` and `contractAddress`
5. Use the contract instance to build the reset transaction using the `methods.reset` function
6. Create the asynchronous `reset` function
7. Use the contract instance and the reset transaction you previously created to sign the transaction with the sender's private key. You'll use the `web3.eth.accounts.signTransaction` function and specify the `to` address, `data`, `gas`, `gasPrice`, and `nonce` for the transaction
8. Send the signed transaction using the `web3.eth.sendSignedTransaction` method and pass in the raw transaction. Then use `await` to wait until the transaction is processed and the transaction receipt is returned
9. Lastly, call the `reset` function
```javascript
// 1. Import the contract ABI
const { abi } = require('./compile');
// 2. Add the Web3 provider logic
// {...}
// 3. Create variables
const accountFrom = {
privateKey: 'INSERT_YOUR_PRIVATE_KEY',
address: 'INSERT_PUBLIC_ADDRESS_OF_PK',
};
const contractAddress = 'INSERT_CONTRACT_ADDRESS';
// 4. Create a contract instance
const incrementer = new web3.eth.Contract(abi, contractAddress);
// 5. Build reset transaction
const resetTx = incrementer.methods.reset();
// 6. Create reset function
const reset = async () => {
console.log(
`Calling the reset function in contract at address: ${contractAddress}`
);
// 7. Sign transaction with PK
const createTransaction = await web3.eth.accounts.signTransaction(
{
to: contractAddress,
data: resetTx.encodeABI(),
gas: await resetTx.estimateGas(),
gasPrice: await web3.eth.getGasPrice(),
nonce: await web3.eth.getTransactionCount(accountFrom.address),
},
accountFrom.privateKey
);
// 8. Send transaction and wait for receipt
const createReceipt = await web3.eth.sendSignedTransaction(
createTransaction.rawTransaction
);
console.log(`Tx successful with hash: ${createReceipt.transactionHash}`);
};
// 9. Call reset function
reset();
```
View the complete script
```javascript
// 1. Import Web3js and the contract ABI
const { Web3 } = require('web3');
const { abi } = require('./compile');
// 2. Add the Web3 provider logic
const providerRPC = {
development: 'http://localhost:9944',
phron: 'https://testnet.phron.ai',
};
const web3 = new Web3(providerRPC.phron); // Change to correct network
// 3. Create variables
const accountFrom = {
privateKey: 'INSERT_YOUR_PRIVATE_KEY',
address: 'INSERT_PUBLIC_ADDRESS_OF_PK',
};
const contractAddress = 'INSERT_CONTRACT_ADDRESS';
// 4. Create contract instance
const incrementer = new web3.eth.Contract(abi, contractAddress);
// 5. Build reset transaction
const resetTx = incrementer.methods.reset();
// 6. Create reset function
const reset = async () => {
console.log(`Calling the reset function in contract at address: ${contractAddress}`);
// 7. Sign transaction with PK
const createTransaction = await web3.eth.accounts.signTransaction(
{
to: contractAddress,
data: resetTx.encodeABI(),
gas: await resetTx.estimateGas(),
gasPrice: await web3.eth.getGasPrice(),
nonce: await web3.eth.getTransactionCount(accountFrom.address),
},
accountFrom.privateKey
);
// 8. Send transaction and wait for receipt
const createReceipt = await web3.eth.sendSignedTransaction(createTransaction.rawTransaction);
console.log(`Tx successful with hash: ${createReceipt.transactionHash}`);
};
// 9. Call reset function
reset();
```
To run the script, you can enter the following command in your terminal:
```bash
node reset.js
```
If successful, the transaction hash will be displayed in the terminal. You can use the `get.js` script alongside the `reset.js` script to make sure that value is changing as expected:
{% code overflow="wrap" %}
```bash
node get.jsMaking a call to contract at address: 0x6dcb33a7f6235e74fd553b50c96f900707142892The current number stored is: 8node reset.jsCalling the reset function in contract at address: 0x6dcb33a7f6235e74fd553b50c96f900707142892Tx successful with hash: 0x557e908ca4da05d5af50983dbc116fbf8049bb2e86b9ec1e9f7d3f516b8a4c55node get.jsMaking a call to contract at address: 0x6dcb33a7f6235e74fd553b50c96f900707142892The current number stored is: 0
```
{% endcode %}
This tutorial is for educational purposes only. As such, any contracts or code created in this tutorial should not be used in production.The information presented herein has been provided by third parties and is made available solely for general information purposes. Phron does not endorse any project listed and described on the Phron Doc Website (). Phron does not warrant the accuracy, completeness or usefulness of this information. Any reliance you place on such information is strictly at your own risk. Phron disclaims all liability and responsibility arising from any reliance placed on this information by you or by anyone who may be informed of any of its contents. All statements and/or opinions expressed in these materials are solely the responsibility of the person or entity providing those materials and do not necessarily represent the opinion of Phron. The information should not be construed as professional or financial advice of any kind. Advice from a suitably qualified professional should always be sought in relation to any particular matter or circumstance. The information herein may link to or integrate with other websites operated or content provided by third parties, and such other websites may link to this website. Phron has no control over any such other websites or their content and will have no liability arising out of or related to such websites or their content. The existence of any such link does not constitute an endorsement of such websites, the content of the websites, or the operators of the websites. These links are being provided to you only as a convenience and you release and hold Phron harmless from any and all liability arising from your use of this information or the information provided by any third-party website or service.
# Web3.py
## Web3.py Python Library
### Introduction
[Web3.py](https://web3py.readthedocs.io/) is a set of libraries that allow developers to interact with Ethereum nodes using HTTP, IPC, or WebSocket protocols with Python. Phron has an Ethereum-like API available that is fully compatible with Ethereum-style JSON-RPC invocations. Therefore, developers can leverage this compatibility and use the Web3.py library to interact with a Phron python3 as if they were doing so on Ethereum.
In this guide, you'll learn how to use the Web3.py library to send a transaction and deploy a contract on Phron.
### Checking Prerequisites
For the examples in this guide, you will need to have the following:
* An account with funds. You can get DEV tokens for testing on Phron once every 24 hours from the Phron Faucet
* To test out the examples in this guide on Phron, you will need to have your own endpoint and API key, which you can get from one of the supported Endpoint Providers
> ### Note
>
> The examples in this guide assume you have a MacOS or Ubuntu 22.04-based environment and will need to be adapted accordingly for Windows.
### Create a Python Project
To get started, you can create a directory to store all of the files you'll be creating throughout this guide:
```bash
mkdir web3-examples && cd web3-examples
```
For this guide, you'll need to install the Web3.py library and the Solidity compiler. To install both packages, you can run the following command:
```bash
pip3 install web3 py-solc-x solc-select
```
### Setup Web3.py with Phron
Throughout this guide, you'll be creating a bunch of scripts that provide different functionalities, such as sending a transaction, deploying a contract, and interacting with a deployed contract. In most of these scripts, you'll need to create a [Web3.py provider](https://web3py.readthedocs.io/en/stable/providers.html) to interact with the network.
To configure your project for Phron, you will need to have your own endpoint and API key, which you can get from one of the supported Endpoint Providers.
To create a provider, you can take the following steps:
1. Import the `web3` library
2. Create the `web3` provider using the `Web3(Web3.HTTPProvider())` method and providing the endpoint URL
```python
# 1. Import web3.py
from web3 import Web3
# 2. Create web3.py provider
web3 = Web3(Web3.HTTPProvider("INSERT_RPC_API_ENDPOINT")) # Insert your RPC URL here
```
Save this code snippet, as you'll need it for the scripts that are used in the following sections.
### Send a Transaction
During this section, you'll be creating a couple of scripts. The first one will be to check the balances of your accounts before trying to send a transaction. The second script will actually send the transaction.
You can also use the balance script to check the account balances after the transaction has been sent.
#### Check Balances Script
You'll only need one file to check the balances of both addresses before and after the transaction is sent. To get started, you can create a `balances.py` file by running:
```bash
touch balances.py
```
Next, you will create the script for this file and complete the following steps:
1. Set up the Web3 provider
2. Define the `address_from` and `address_to` variables
3. Get the balance for the accounts using the `web3.eth.get_balance` function and format the results using the `web3.from_wei`
```python
from web3 import Web3
# 1. Add the Web3 provider logic here:
provider_rpc = {
"development": "http://localhost:9944",
"phron": "https://testnet.phron.ai",
}
web3 = Web3(Web3.HTTPProvider(provider_rpc["phron"])) # Change to correct network
# 2. Create address variables
address_from = 'INSERT_FROM_ADDRESS'
address_to = 'INSERT_TO_ADDRESS'
# 3. Fetch balance data
balance_from = web3.from_wei(
web3.eth.get_balance(Web3.to_checksum_address(address_from)), "ether"
)
balance_to = web3.from_wei(
web3.eth.get_balance(Web3.to_checksum_address(address_to)), "ether"
)
print(f"The balance of { address_from } is: { balance_from } DEV")
print(f"The balance of { address_to } is: { balance_to } DEV")
```
To run the script and fetch the account balances, you can run the following command:
```bash
python3 balances.py
```
If successful, the balances for the origin and receiving address will be displayed in your terminal in ETH.
#### Send Transaction Script
You'll only need one file for executing a transaction between accounts. For this example, you'll be transferring 1 DEV token from an origin address (from which you hold the private key) to another address. To get started, you can create a `transaction.py` file by running:
```bash
touch transaction.py
```
Next, you will create the script for this file and complete the following steps:
1. Add imports, including Web3.py and the `rpc_gas_price_strategy`, which will be used in the following steps to get the gas price used for the transaction
2. Set up the Web3 provider
3. Define the `account_from`, including the `private_key`, and the `address_to` variables. The private key is required to sign the transaction. **Note: This is for example purposes only. Never store your private keys in a Python file**
4. Use the [Web3.py Gas Price API](https://web3py.readthedocs.io/en/stable/gas_price.html) to set a gas price strategy. For this example, you'll use the imported `rpc_gas_price_strategy`
5. Create and sign the transaction using the `web3.eth.account.sign_transaction` function. Pass in the `nonce` `gas`, `gasPrice`, `to`, and `value` for the transaction along with the sender's `private_key`. To get the `nonce` you can use the `web3.eth.get_transaction_count` function and pass in the sender's address. To predetermine the `gasPrice` you'll use the `web3.eth.generate_gas_price` function. For the `value`, you can format the amount to send from an easily readable format to Wei using the `web3.to_wei` function
6. Using the signed transaction, you can then send it using the `web3.eth.send_raw_transaction` function and wait for the transaction receipt by using the `web3.eth.wait_for_transaction_receipt` function
```python
# 1. Add imports
from web3.gas_strategies.rpc import rpc_gas_price_strategy
from web3 import Web3
# 2. Add the Web3 provider logic here:
provider_rpc = {
"development": "http://localhost:9944",
"phron": "https://testnet.phron.ai",
}
web3 = Web3(Web3.HTTPProvider(provider_rpc["phron"])) # Change to correct network
# 3. Create address variables
account_from = {
'private_key': 'INSERT_YOUR_PRIVATE_KEY',
'address': 'INSERT_PUBLIC_ADDRESS_OF_PK',
}
address_to = 'INSERT_TO_ADDRESS'
print(
f'Attempting to send transaction from { account_from["address"] } to { address_to }'
)
# 4. Set the gas price strategy
web3.eth.set_gas_price_strategy(rpc_gas_price_strategy)
# 5. Sign tx with PK
tx_create = web3.eth.account.sign_transaction(
{
"nonce": web3.eth.get_transaction_count(
Web3.to_checksum_address(account_from["address"])
),
"gasPrice": web3.eth.generate_gas_price(),
"gas": 21000,
"to": Web3.to_checksum_address(address_to),
"value": web3.to_wei("1", "ether"),
},
account_from["private_key"],
)
# 6. Send tx and wait for receipt
tx_hash = web3.eth.send_raw_transaction(tx_create.rawTransaction)
tx_receipt = web3.eth.wait_for_transaction_receipt(tx_hash)
print(f"Transaction successful with hash: { tx_receipt.transactionHash.hex() }")
```
To run the script, you can run the following command in your terminal:
```bash
python3 transaction.py
```
If the transaction was succesful, in your terminal you'll see the transaction hash has been printed out.
You can also use the `balances.py` script to check that the balances for the origin and receiving accounts have changed. The entire workflow would look like this:
{% code overflow="wrap" fullWidth="false" %}
```bash
python3 balances.pyThe balance of 0x3B939FeaD1557C741Ff06492FD0127bd287A421e is: 3563.79 DEVThe balance of 0x9Bf5Ae10540a1ab9B363bEA02A9406E6b2efA9af is: 0 DEVpython3 transaction.pyAttempting to send transaction from 0x3B939FeaD1557C741Ff06492FD0127bd287A421e to 0x9Bf5Ae10540a1ab9B363bEA02A9406E6b2efA9afTransaction successful with hash: 0xac70452510657ed43c27510578d3ce4b3b880d4cca1a24ade1497c6e0ee7f5d6python3 balances.pyThe balance of 0x3B939FeaD1557C741Ff06492FD0127bd287A421e is: 3562.79 DEVThe balance of 0x9Bf5Ae10540a1ab9B363bEA02A9406E6b2efA9af is: 1 DEV
```
{% endcode %}
### Deploy a Contract
The contract you'll be compiling and deploying in the next couple of sections is a simple incrementer contract, arbitrarily named `Incrementer.sol`. You can get started by creating a file for the contract:
```bash
touch Incrementer.sol
```
Next, you can add the Solidity code to the file:
```solidity
// SPDX-License-Identifier: MIT
pragma solidity ^0.8.0;
contract Incrementer {
uint256 public number;
constructor(uint256 _initialNumber) {
number = _initialNumber;
}
function increment(uint256 _value) public {
number = number + _value;
}
function reset() public {
number = 0;
}
}
```
The `constructor` function, which runs when the contract is deployed, sets the initial value of the number variable stored on-chain (the default is `0`). The `increment` function adds the `_value` provided to the current number, but a transaction needs to be sent, which modifies the stored data. Lastly, the `reset` function resets the stored value to zero.
> ### Note
>
> This contract is a simple example for illustration purposes only and does not handle values wrapping around.
#### Compile Contract Script
In this section, you'll create a script that uses the Solidity compiler to output the bytecode and interface (ABI) for the `Incrementer.sol` contract. To get started, you can create a `compile.py` file by running:
```bash
touch compile.py
```
Next, you will create the script for this file and complete the following steps:
1. Import the `solcx` package
2. **Optional** - If you haven't already installed the Solidity compiler, you can do so with by using the `solcx.install_solc` function
3. Compile the `Incrementer.sol` function using the `solcx.compile_files` function
4. Export the contract's ABI and bytecode
```solidity
# 1. Import solcx
import solcx
# 2. If you haven't already installed the Solidity compiler, uncomment the following line
# solcx.install_solc()
# 3. Compile contract
temp_file = solcx.compile_files(
'Incrementer.sol',
output_values=['abi', 'bin'],
# solc_version='0.8.19'
)
# 4. Export contract data
abi = temp_file['Incrementer.sol:Incrementer']['abi']
bytecode = temp_file['Incrementer.sol:Incrementer']['bin']
```
> ### Note
>
> If you see an error stating that `Solc is not installed`, uncomment step 2 described in the code snippet.
#### Deploy Contract Script
With the script for compiling the `Incrementer.sol` contract in place, you can then use the results to send a signed transaction that deploys it. To do so, you can create a file for the deployment script called `deploy.py`:
```bash
touch deploy.py
```
Next, you will create the script for this file and complete the following steps:
1. Add imports, including Web3.py and the ABI and bytecode of the `Incrementer.sol` contract
2. Set up the Web3 provider
3. Define the `account_from`, including the `private_key`. The private key is required to sign the transaction. **Note: This is for example purposes only. Never store your private keys in a Python file**
4. Create a contract instance using the `web3.eth.contract` function and passing in the ABI and bytecode of the contract
5. Build a constructor transaction using the contract instance and passing in the value to increment by. For this example, you can use `5`. You'll then use the `build_transaction` function to pass in the transaction information including the `from` address and the `nonce` for the sender. To get the `nonce` you can use the `web3.eth.get_transaction_count` function
6. Sign the transaction using the `web3.eth.account.sign_transaction` function and pass in the constructor transaction and the `private_key` of the sender
7. Using the signed transaction, you can then send it using the `web3.eth.send_raw_transaction` function and wait for the transaction receipt by using the `web3.eth.wait_for_transaction_receipt` function
```solidity
# 1. Add imports
from compile import abi, bytecode
from web3 import Web3
# 2. Add the Web3 provider logic here:
provider_rpc = {
"development": "http://localhost:9944",
"phron": "https://testnet.phron.ai",
}
web3 = Web3(Web3.HTTPProvider(provider_rpc["phron"])) # Change to correct network
# 3. Create address variable
account_from = {
'private_key': 'INSERT_YOUR_PRIVATE_KEY',
'address': 'INSERT_PUBLIC_ADDRESS_OF_PK',
}
print(f'Attempting to deploy from account: { account_from["address"] }')
# 4. Create contract instance
Incrementer = web3.eth.contract(abi=abi, bytecode=bytecode)
# 5. Build constructor tx
construct_txn = Incrementer.constructor(5).build_transaction(
{
"from": Web3.to_checksum_address(account_from["address"]),
"nonce": web3.eth.get_transaction_count(
Web3.to_checksum_address(account_from["address"])
),
}
)
# 6. Sign tx with PK
tx_create = web3.eth.account.sign_transaction(
construct_txn, account_from["private_key"]
)
# 7. Send tx and wait for receipt
tx_hash = web3.eth.send_raw_transaction(tx_create.rawTransaction)
tx_receipt = web3.eth.wait_for_transaction_receipt(tx_hash)
print(f"Contract deployed at address: { tx_receipt.contractAddress }")
```
To run the script, you can enter the following command into your terminal:
```
python3 deploy.py
```
If successful, the contract's address will be displayed in the terminal.
{% code overflow="wrap" %}
```bash
python3 deploy.pyAttempting to deploy from account: 0x3B939FeaD1557C741Ff06492FD0127bd287A421eContract deployed at address: 0xFef3cFb8eE1FE727b3848E551ae5DC8903237B08
```
{% endcode %}
#### Read Contract Data (Call Methods)
Call methods are the type of interaction that don't modify the contract's storage (change variables), meaning no transaction needs to be sent. They simply read various storage variables of the deployed contract.
To get started, you can create a file and name it `get.py`:
```bash
touch get.py
```
Then you can take the following steps to create the script:
1. Add imports, including Web3.py and the ABI of the `Incrementer.sol` contract
2. Set up the Web3 provider
3. Define the `contract_address` of the deployed contract
4. Create a contract instance using the `web3.eth.contract` function and passing in the ABI and address of the deployed contract
5. Using the contract instance, you can then call the `number` function
```solidity
# 1. Import the ABI
from compile import abi
from web3 import Web3
# 2. Add the Web3 provider logic here:
provider_rpc = {
"development": "http://localhost:9944",
"phron": "https://testnet.phron.ai",
}
web3 = Web3(Web3.HTTPProvider(provider_rpc["phron"])) # Change to correct network
# 3. Create address variable
contract_address = 'INSERT_CONTRACT_ADDRESS'
print(f"Making a call to contract at address: { contract_address }")
# 4. Create contract instance
Incrementer = web3.eth.contract(address=contract_address, abi=abi)
# 5. Call Contract
number = Incrementer.functions.number().call()
print(f"The current number stored is: { number } ")
```
To run the script, you can enter the following command in your terminal:
```bash
python3 get.py
```
If successful, the value will be displayed in the terminal.
#### Interact with Contract (Send Methods)
Send methods are the type of interaction that modify the contract's storage (change variables), meaning a transaction needs to be signed and sent. In this section, you'll create two scripts: one to increment and one to reset the incrementer. To get started, you can create a file for each script and name them `increment.py` and `reset.py`:
```bash
touch increment.py reset.py
```
Open the `increment.py` file and take the following steps to create the script:
1. Add imports, including Web3.py and the ABI of the `Incrementer.sol` contract
2. Set up the Web3 provider
3. Define the `account_from`, including the `private_key`, the `contract_address` of the deployed contract, and the `value` to increment by. The private key is required to sign the transaction. **Note: This is for example purposes only. Never store your private keys in a Python file**
4. Create a contract instance using the `web3.eth.contract` function and passing in the ABI and address of the deployed contract
5. Build the increment transaction using the contract instance and passing in the value to increment by. You'll then use the `build_transaction` function to pass in the transaction information including the `from` address and the `nonce` for the sender. To get the `nonce` you can use the `web3.eth.get_transaction_count` function
6. Sign the transaction using the `web3.eth.account.sign_transaction` function and pass in the increment transaction and the `private_key` of the sender
7. Using the signed transaction, you can then send it using the `web3.eth.send_raw_transaction` function and wait for the transaction receipt by using the `web3.eth.wait_for_transaction_receipt` function
```solidity
# 1. Add imports
from compile import abi
from web3 import Web3
# 2. Add the Web3 provider logic here:
provider_rpc = {
"development": "http://localhost:9944",
"phron": "https://testnet.phron.ai",
}
web3 = Web3(Web3.HTTPProvider(provider_rpc["phron"])) # Change to correct network
# 3. Create variables
account_from = {
'private_key': 'INSERT_YOUR_PRIVATE_KEY',
'address': 'INSERT_PUBLIC_ADDRESS_OF_PK',
}
contract_address = 'INSERT_CONTRACT_ADDRESS'
value = 3
print(
f"Calling the increment by { value } function in contract at address: { contract_address }"
)
# 4. Create contract instance
Incrementer = web3.eth.contract(address=contract_address, abi=abi)
# 5. Build increment tx
increment_tx = Incrementer.functions.increment(value).build_transaction(
{
"from": Web3.to_checksum_address(account_from["address"]),
"nonce": web3.eth.get_transaction_count(
Web3.to_checksum_address(account_from["address"])
),
}
)
# 6. Sign tx with PK
tx_create = web3.eth.account.sign_transaction(increment_tx, account_from["private_key"])
# 7. Send tx and wait for receipt
tx_hash = web3.eth.send_raw_transaction(tx_create.rawTransaction)
tx_receipt = web3.eth.wait_for_transaction_receipt(tx_hash)
print(f"Tx successful with hash: { tx_receipt.transactionHash.hex() }")
```
To run the script, you can enter the following command in your terminal:
```
python3 increment.py
```
If successful, the transaction hash will be displayed in the terminal. You can use the `get.py` script alongside the `increment.py` script to make sure that value is changing as expected:
{% code overflow="wrap" %}
```bash
python get.pyMaking a call to contract at address: 0xFef3cFb8eE1FE727b3848E551ae5DC8903237B08The current number stored is: 5python increment.pyCalling the increment by 3 function in contract at address: 0xFef3cFb8eE1FE727b3848E551ae5DC8903237B08Tx successful with hash: 0x47757fd97e3ef8db973e335d1f2d19c46b37d0dbd53fea1636ec559ccf119a13python get.pyMaking a call to contract at address: 0xFef3cFb8eE1FE727b3848E551ae5DC8903237B08The current number stored is: 8
```
{% endcode %}
Next you can open the `reset.py` file and take the following steps to create the script:
1. Add imports, including Web3.py and the ABI of the `Incrementer.sol` contract
2. Set up the Web3 provider
3. Define the `account_from`, including the `private_key`, and the `contract_address` of the deployed contract. The private key is required to sign the transaction. **Note: This is for example purposes only. Never store your private keys in a Python file**
4. Create a contract instance using the `web3.eth.contract` function and passing in the ABI and address of the deployed contract
5. Build the reset transaction using the contract instance. You'll then use the `build_transaction` function to pass in the transaction information including the `from` address and the `nonce` for the sender. To get the `nonce` you can use the `web3.eth.get_transaction_count` function
6. Sign the transaction using the `web3.eth.account.sign_transaction` function and pass in the reset transaction and the `private_key` of the sender
7. Using the signed transaction, you can then send it using the `web3.eth.send_raw_transaction` function and wait for the transaction receipt by using the `web3.eth.wait_for_transaction_receipt` function
```solidity
# 1. Add imports
from compile import abi
from web3 import Web3
# 2. Add the Web3 provider logic here:
provider_rpc = {
"development": "http://localhost:9944",
"phron": "https://testnet.phron.ai",
}
web3 = Web3(Web3.HTTPProvider(provider_rpc["phron"])) # Change to correct network
# 3. Create variables
account_from = {
'private_key': 'INSERT_YOUR_PRIVATE_KEY',
'address': 'INSERT_PUBLIC_ADDRESS_OF_PK',
}
contract_address = 'INSERT_CONTRACT_ADDRESS'
print(f"Calling the reset function in contract at address: { contract_address }")
# 4. Create contract instance
Incrementer = web3.eth.contract(address=contract_address, abi=abi)
# 5. Build reset tx
reset_tx = Incrementer.functions.reset().build_transaction(
{
"from": Web3.to_checksum_address(account_from["address"]),
"nonce": web3.eth.get_transaction_count(
Web3.to_checksum_address(account_from["address"])
),
}
)
# 6. Sign tx with PK
tx_create = web3.eth.account.sign_transaction(reset_tx, account_from["private_key"])
# 7. Send tx and wait for receipt
tx_hash = web3.eth.send_raw_transaction(tx_create.rawTransaction)
tx_receipt = web3.eth.wait_for_transaction_receipt(tx_hash)
print(f"Tx successful with hash: { tx_receipt.transactionHash.hex() }")
```
To run the script, you can enter the following command in your terminal:
```
python3 reset.py
```
If successful, the transaction hash will be displayed in the terminal. You can use the `get.py` script alongside the `reset.py` script to make sure that value is changing as expected:
{% code overflow="wrap" %}
```bash
python get.pyMaking a call to contract at address: 0xFef3cFb8eE1FE727b3848E551ae5DC8903237B08The current number stored is: 8python reset.pyCalling the reset function in contract at address: 0xFef3cFb8eE1FE727b3848E551ae5DC8903237B08Tx successful with hash: 0x152f07430b524838da848b44d58577db252681fba6fbeaf117b2f9d432e301b2python get.pyMaking a call to contract at address: 0xFef3cFb8eE1FE727b3848E551ae5DC8903237B08The current number stored is: 0
```
{% endcode %}
This tutorial is for educational purposes only. As such, any contracts or code created in this tutorial should not be used in production.The information presented herein has been provided by third parties and is made available solely for general information purposes. Phron does not endorse any project listed and described on the Phron Doc Website (). Phron does not warrant the accuracy, completeness or usefulness of this information. Any reliance you place on such information is strictly at your own risk. Phron disclaims all liability and responsibility arising from any reliance placed on this information by you or by anyone who may be informed of any of its contents. All statements and/or opinions expressed in these materials are solely the responsibility of the person or entity providing those materials and do not necessarily represent the opinion of Phron. The information should not be construed as professional or financial advice of any kind. Advice from a suitably qualified professional should always be sought in relation to any particular matter or circumstance. The information herein may link to or integrate with other websites operated or content provided by third parties, and such other websites may link to this website. Phron has no control over any such other websites or their content and will have no liability arising out of or related to such websites or their content. The existence of any such link does not constitute an endorsement of such websites, the content of the websites, or the operators of the websites. These links are being provided to you only as a convenience and you release and hold Phron harmless from any and all liability arising from your use of this information or the information provided by any third-party website or service.
# Dev Environments
# OpenZeppelin
# Overview
## OpenZeppelin
### Introduction
[OpenZeppelin](https://www.openzeppelin.com/) is well known in the Ethereum developer community as their set of audited smart contracts and libraries are a standard in the industry. For example, most of the tutorials that show developers how to deploy an ERC-20 token use OpenZeppelin contracts.
You can find more information about OpenZeppelin on their [documentation site](https://docs.openzeppelin.com/).
As part of its Ethereum compatibility features, OpenZeppelin products can be seamlessly used on Phron. This page will provide information on different OpenZeppelin solutions that you can test.
### OpenZeppelin on Phron
Currently, the following OpenZeppelin products/solutions work on the different networks available on Phron:
| **Product** | Phron |
| --------------------- | ----- |
| Contracts & libraries | ✓ |
| Contracts Wizard | ✓ |
| Defender | ✓ |
You will find a corresponding tutorial for each product in the following links:
* **Contracts Wizard** — where you'll find a guide on how to use OpenZeppelin web-based wizard to create different token contracts with different functionalities
* **Contracts & libraries** — where you'll find tutorials to deploy the most common token contracts using OpenZeppelin's templates: ERC-20, ERC-721 and ERC-1155
* **Defender** — where you'll find a guide on how to use OpenZeppelin Defender to manage your smart contracts in the Phron TestNet. This guide can also be adapted for Phron
This tutorial is for educational purposes only. As such, any contracts or code created in this tutorial should not be used in production.The information presented herein has been provided by third parties and is made available solely for general information purposes. Phron does not endorse any project listed and described on the Phron Doc Website (). Phron does not warrant the accuracy, completeness or usefulness of this information. Any reliance you place on such information is strictly at your own risk. Phron disclaims all liability and responsibility arising from any reliance placed on this information by you or by anyone who may be informed of any of its contents. All statements and/or opinions expressed in these materials are solely the responsibility of the person or entity providing those materials and do not necessarily represent the opinion of Phron. The information should not be construed as professional or financial advice of any kind. Advice from a suitably qualified professional should always be sought in relation to any particular matter or circumstance. The information herein may link to or integrate with other websites operated or content provided by third parties, and such other websites may link to this website. Phron has no control over any such other websites or their content and will have no liability arising out of or related to such websites or their content. The existence of any such link does not constitute an endorsement of such websites, the content of the websites, or the operators of the websites. These links are being provided to you only as a convenience and you release and hold Phron harmless from any and all liability arising from your use of this information or the information provided by any third-party website or service.
# Contract Wizard
## Using OpenZeppelin Contracts and Remix To Deploy To Phron
### Introduction
[OpenZeppelin](https://www.openzeppelin.com/) contracts and libraries have become a standard in the industry. They help developers minimize risk, as their open-source code templates are battle-tested for Ethereum and other blockchains. Their code includes the most used implementations of ERC standards and add-ons and often appears in guides and tutorials around the community.
Because Phron is fully Ethereum compatible, all of OpenZeppelin's contracts and libraries can be implemented without any changes.
This guide is divided into two sections. The first part describes the OpenZeppelin Contracts Wizard, a great online tool to help you create smart contracts using OpenZeppelin code. The second section provides a step-by-step guide on how you can deploy these contracts using [Remix](https://remix.ethereum.org/) on Phron.
### OpenZeppelin Contract Wizard
OpenZeppelin has developed an online web-based interactive contract generator tool that is probably the easiest and fastest way to write your smart contract using OpenZeppelin code, called [Contracts Wizard](https://docs.openzeppelin.com/contracts/5.x/wizard).
Currently, the Contracts Wizard support the following ERC standards:
* [**ERC-20**](https://ethereum.org/en/developers/docs/standards/tokens/erc-20) — a fungible token standard that follows [EIP-20](https://eips.ethereum.org/EIPS/eip-20). Fungible means that all tokens are equivalent and interchangeable that is, of equal value. One typical example of fungible tokens is fiat currencies, where each equal-denomination bill has the same value
* [**ERC-721**](https://ethereum.org/en/developers/docs/standards/tokens/erc-721) — a non-fungible token contract that follows [EIP-721](https://eips.ethereum.org/EIPS/eip-721). Non-fungible means that each token is different, and therefore, unique. An ERC-721 token can represent ownership of that unique item, whether it is a collectible item in a game, real estate, and so on
* [**ERC-1155**](https://docs.openzeppelin.com/contracts/5.x/erc1155) — also known as the multi-token contract, because it can represent both fungible and non-fungible tokens in a single smart contract. It follows [EIP-1155](https://eips.ethereum.org/EIPS/eip-1155)
The wizard is comprised of the following sections:
1. **Token standard selection** — shows all the different standards supported by the wizard
2. **Settings** — provides the baseline settings for each token standard, such as token name, symbol, pre-mint (token supply when the contract is deployed), and URI (for non-fungible tokens)
3. **Features** — list of all features available for each token standard. You can find more information about the different features in the following links:
* [ERC-20](https://docs.openzeppelin.com/contracts/5.x/api/token/erc20)
* [ERC-721](https://docs.openzeppelin.com/contracts/5.x/api/token/erc721)
* [ERC-1155](https://docs.openzeppelin.com/contracts/5.x/api/token/erc1155)
4. **Access Control** — list of all the available [access control mechanisms](https://docs.openzeppelin.com/contracts/5.x/access-control) for each token standard
5. **Interactive code display** — shows the smart contract code with the configuration as set by the user
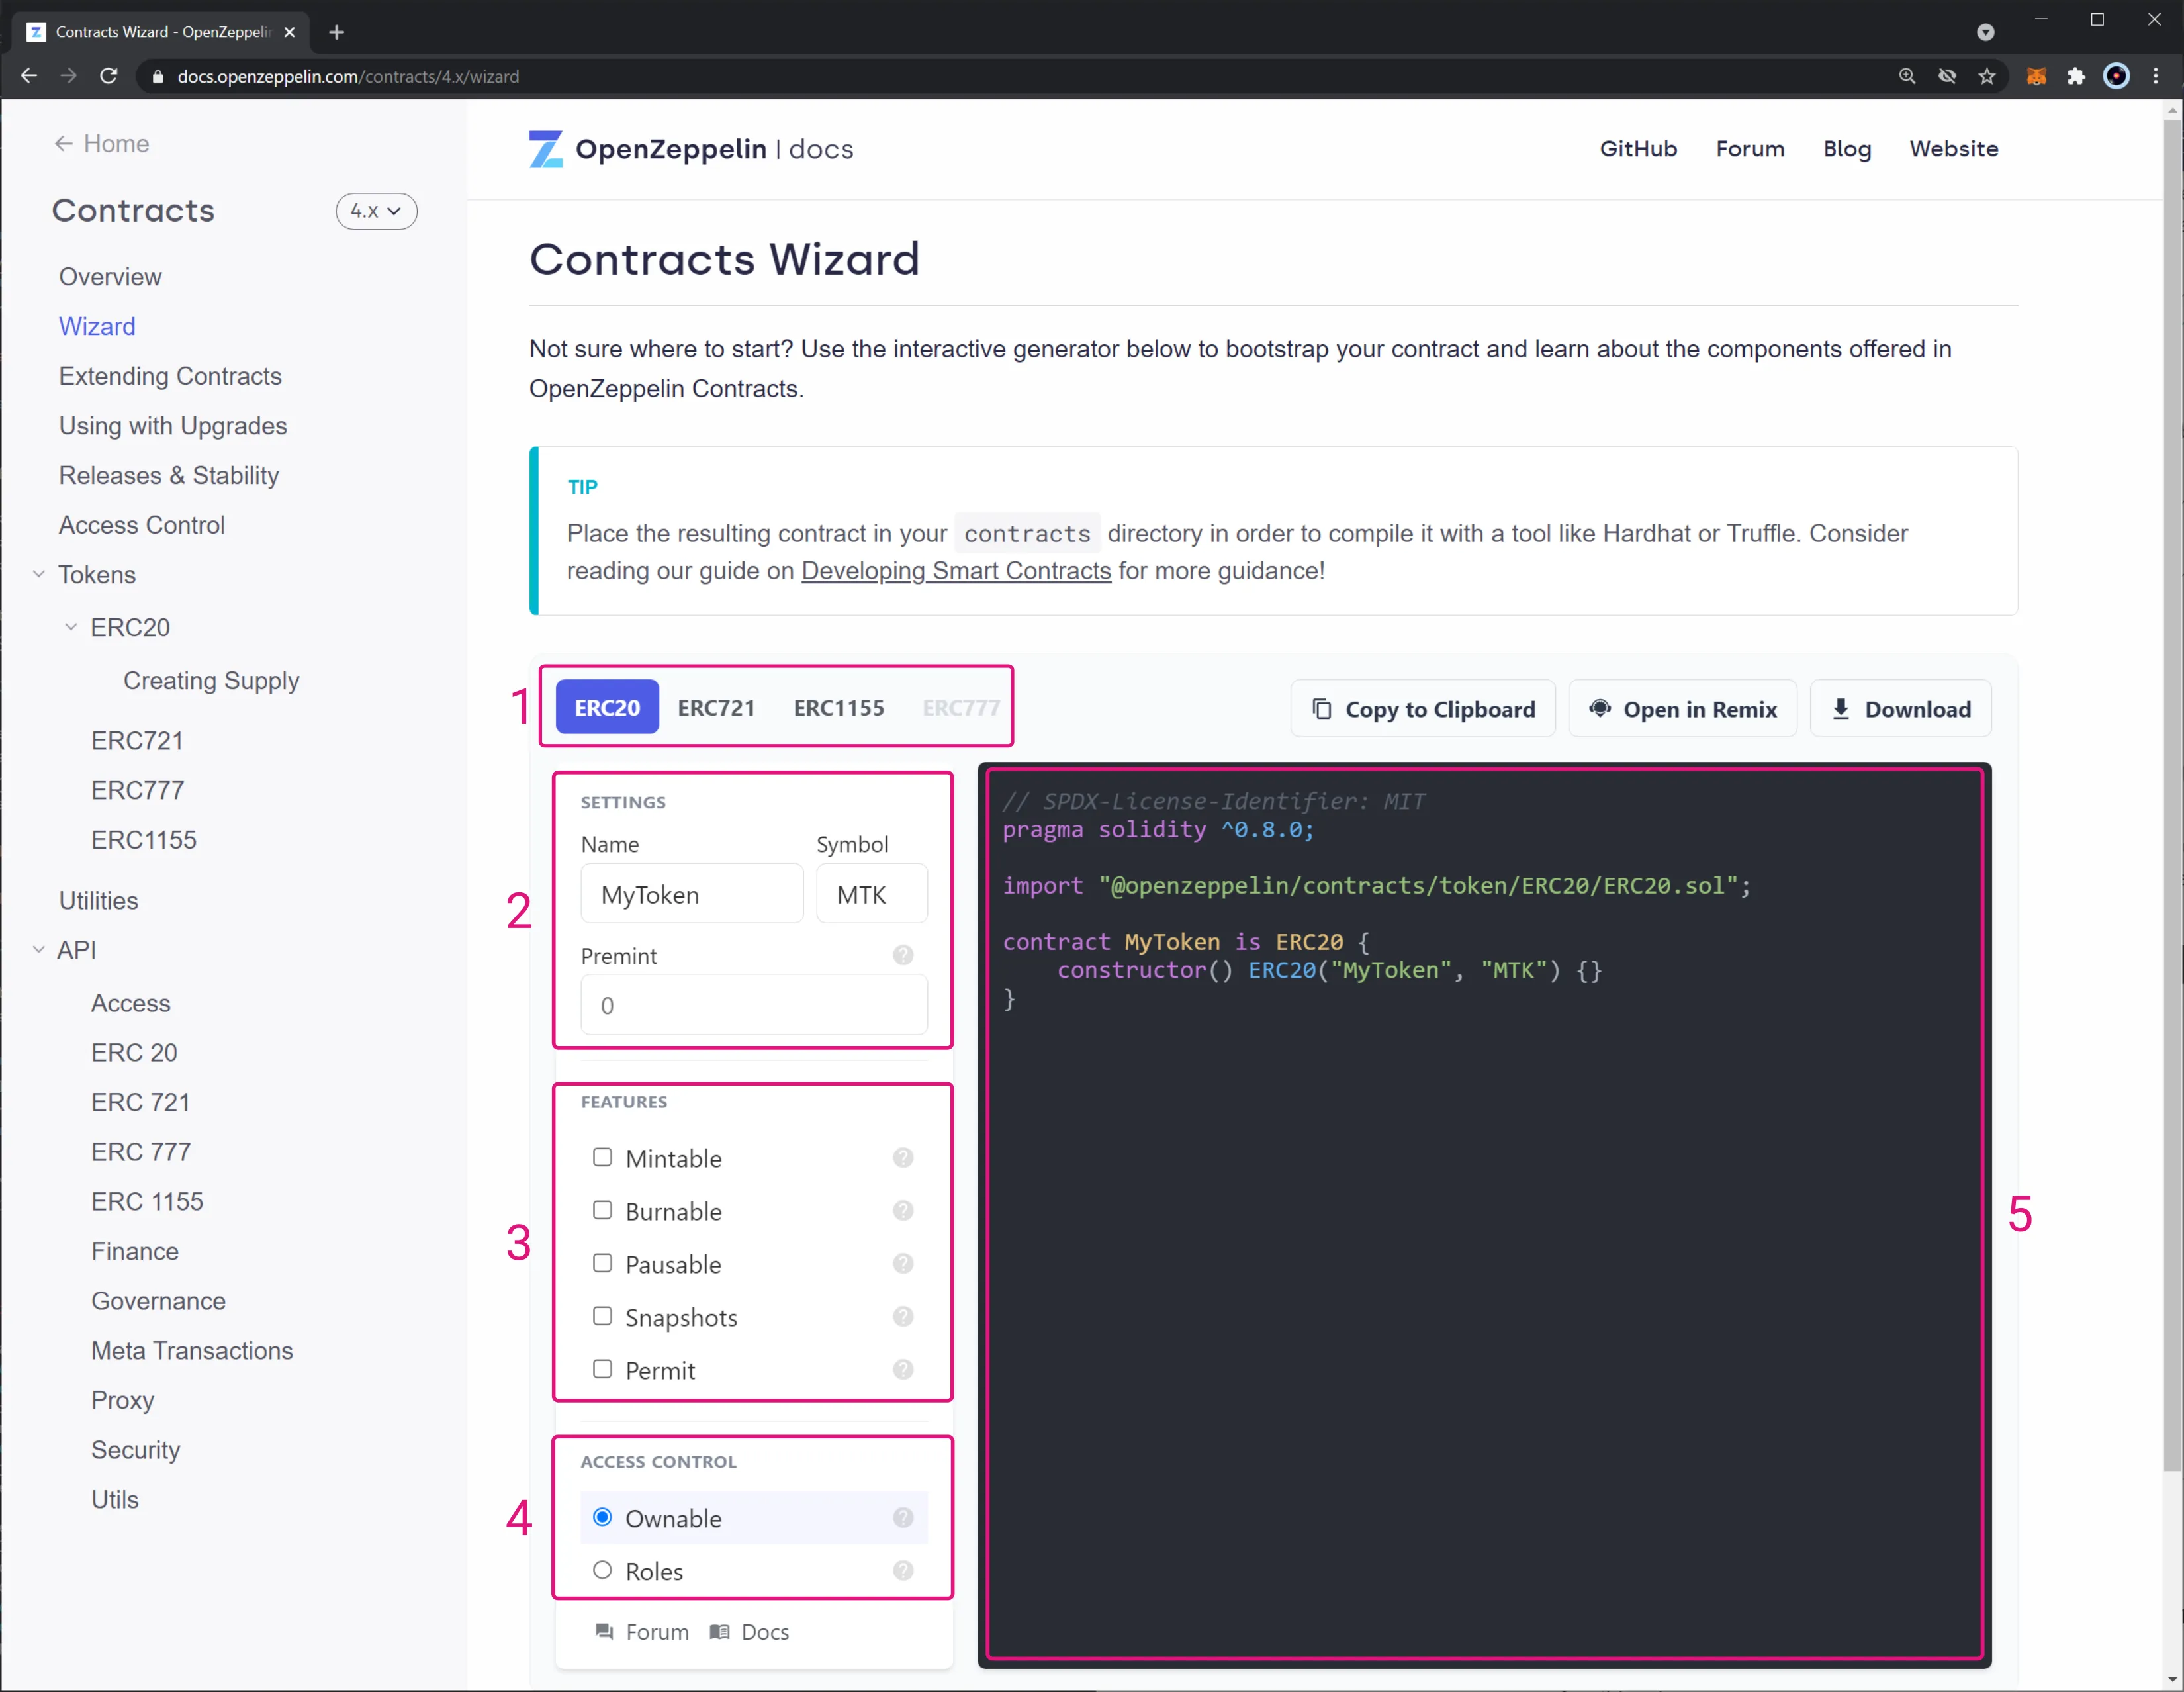
Once you have set up your contract with all the settings and features, it is just as easy as copying and pasting the code into your contract file.
### Deploying OpenZeppelin Contracts on Phron
This section goes through the steps for deploying OpenZeppelin contracts on Phron. It covers the following contracts:
* ERC-20 (fungible tokens)
* ERC-721 (non-fungible tokens)
* ERC-1155 (multi-token standard)
All the code of the contracts was obtained using OpenZeppelin [Contract Wizard](https://docs.openzeppelin.com/contracts/5.x/wizard).
#### Checking Prerequisites
The steps described in this section assume you have [MetaMask](https://metamask.io/) installed and connected to the Phron TestNet. If you're adapting this guide for Phron, make sure you're connected to the correct network. Contract deployment is done using the [Remix IDE](https://remix.ethereum.org/) via the **Injected Provider** environment. You can find corresponding tutorials in the following links:
* Interacting with Phron using MetaMask
* Interacting with Phron using Remix
#### Deploying an ERC-20 Token
For this example, an ERC-20 token will be deployed to Phron. The final code used combines different contracts from OpenZeppelin:
* **`ERC20.sol`** — ERC-20 token implementation with the optional features from the base interface. Includes the supply mechanism with a `mint` function but needs to be explicitly called from within the main contract
* **`Ownable.sol`** — extension to restrict access to certain functions
The mintable ERC-20 OpenZeppelin token contract provides a `mint` function that the owner of the contract can only call. By default, the owner is the contract's deployer address. There is also a premint of `1000` tokens sent to the contract's deployer configured in the `constructor` function.
The first step is to go to [Remix](https://remix.ethereum.org/) and take the following steps:
1. Click on the **Create New File** icon and set a file name. For this example, it was set to `ERC20.sol`
2. Make sure the file was created successfully. Click on the file to open it up in the text editor
3. Write your smart contract using the file editor. For this example, the following code was used:
```solidity
// SPDX-License-Identifier: MIT
// Compatible with OpenZeppelin Contracts ^5.0.0
pragma solidity ^0.8.20;
import "@openzeppelin/contracts/token/ERC20/ERC20.sol";
import "@openzeppelin/contracts/access/Ownable.sol";
import "@openzeppelin/contracts/token/ERC20/extensions/ERC20Permit.sol";
contract MyToken is ERC20, Ownable, ERC20Permit {
constructor(address initialOwner)
ERC20("MyToken", "MTK")
Ownable(initialOwner)
ERC20Permit("MyToken")
{
_mint(msg.sender, 1000 * 10 ** decimals());
}
function mint(address to, uint256 amount) public onlyOwner {
_mint(to, amount);
}
}
```
This ERC-20 token smart contract was extracted from the Contract Wizard, setting a premint of `1000` tokens and activating the `Mintable` and `Permit` features.
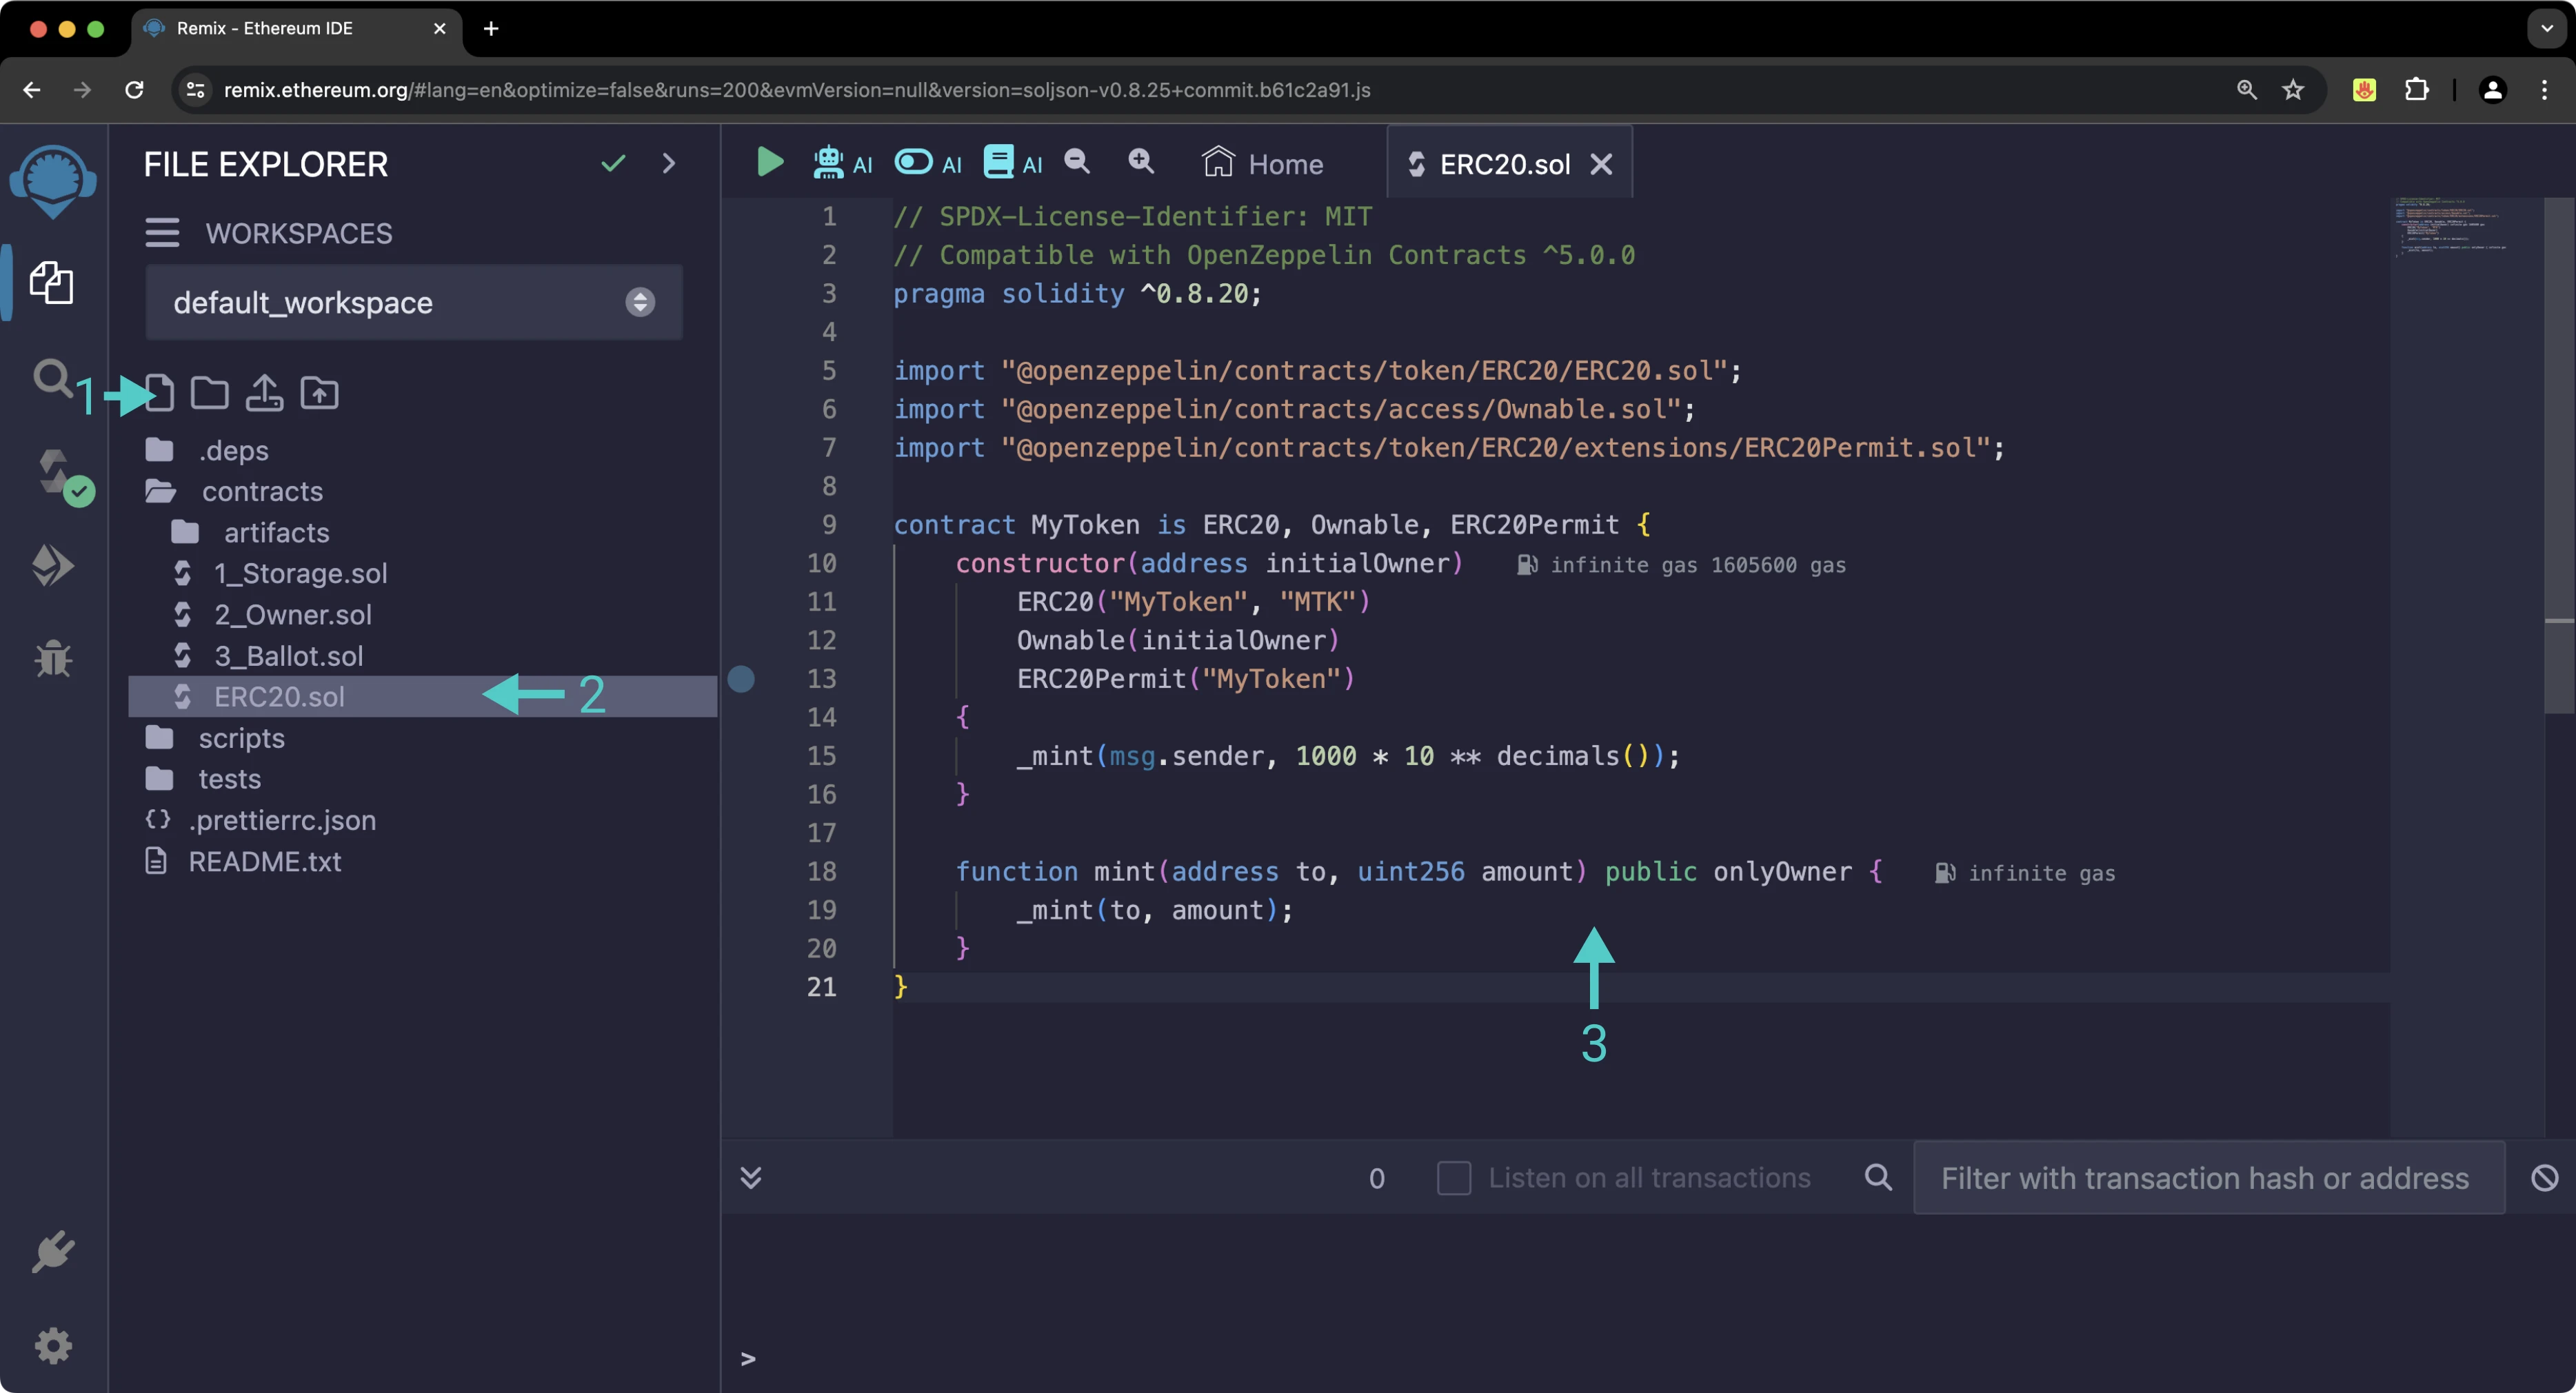
Once your smart contract is written, you can compile it by taking the following steps:
1. Head to the **Solidity Compiler**
2. Click on the compile button
3. Alternatively, you can check the **Auto compile** feature
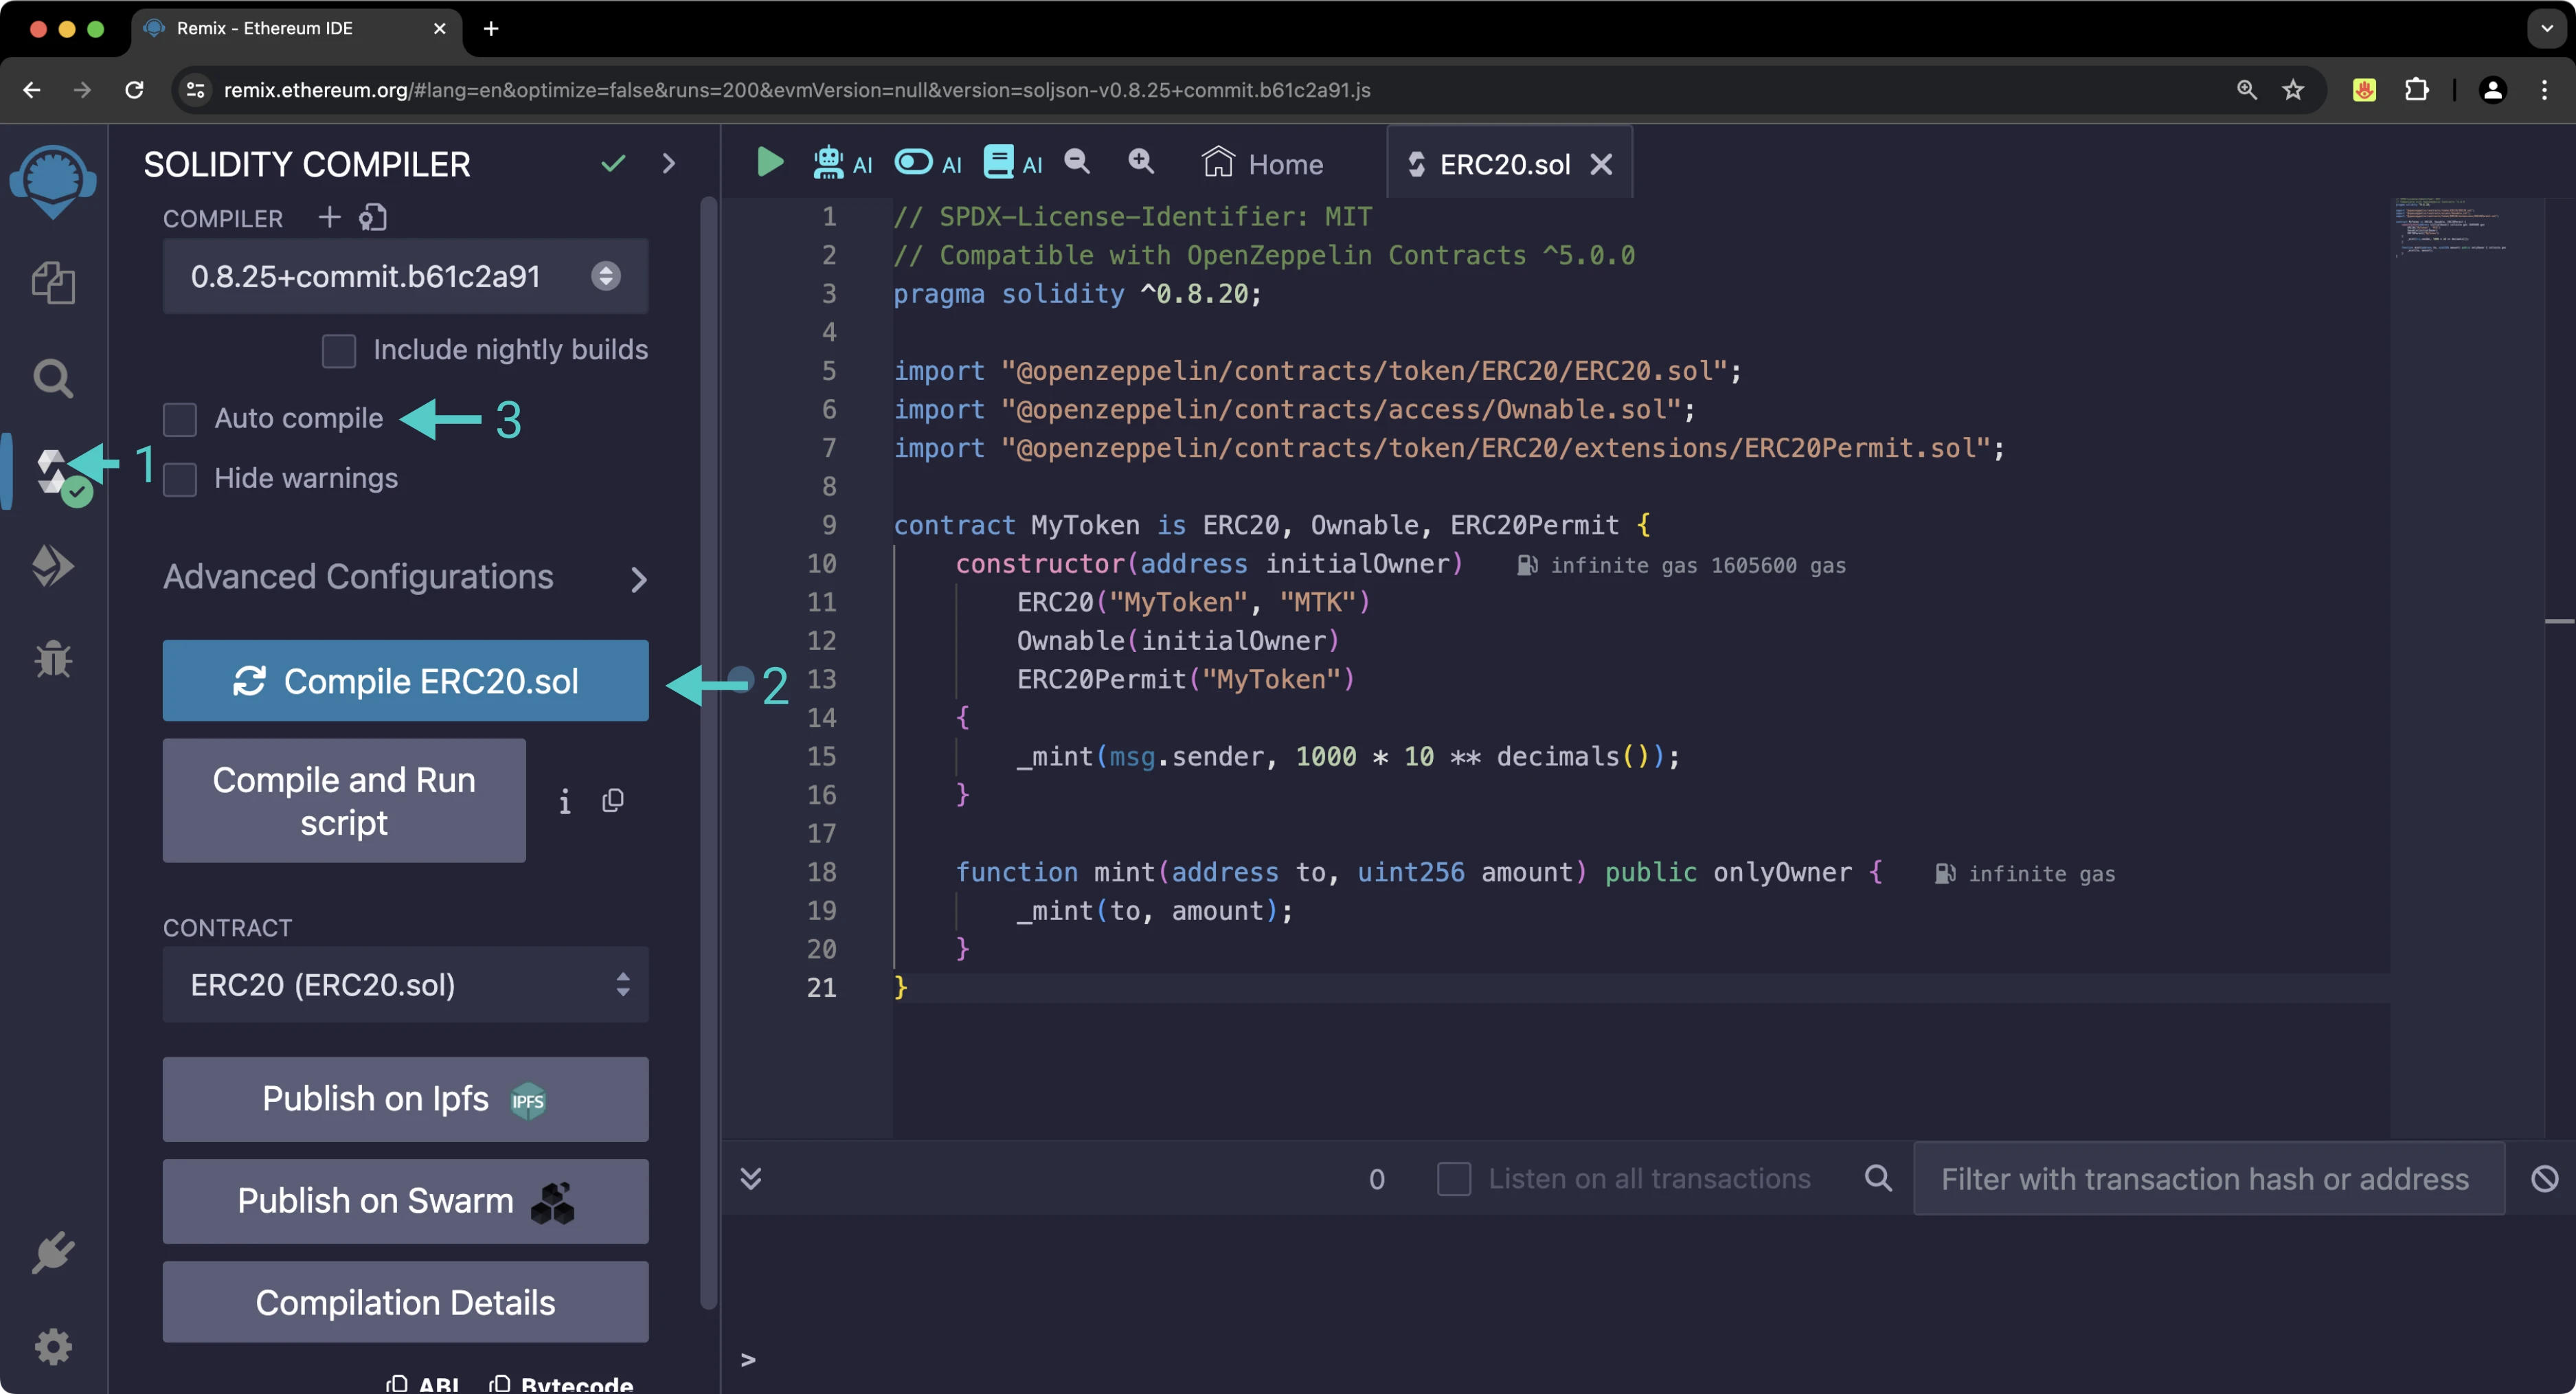
With the contract compiled, you are ready to deploy it taking the following steps:
1. Head to the **Deploy & Run Transactions** tab
2. Change the environment to **Injected Provider**. This will use MetaMask's injected provider. Consequently, the contract will be deployed to whatever network MetaMask is connected to. MetaMask might show a pop-up outlining that Remix is trying to connect to your wallet
3. Select the proper contract to deploy. In this example, it is the `MyToken` contract inside the `ERC20.sol` file
4. Enter the address of the initial owner and click on the **Deploy** button. Review the transaction information in MetaMask and confirm it
5. After a few seconds, the transaction should get confirmed, and you should see your contract under **Deployed Contracts**
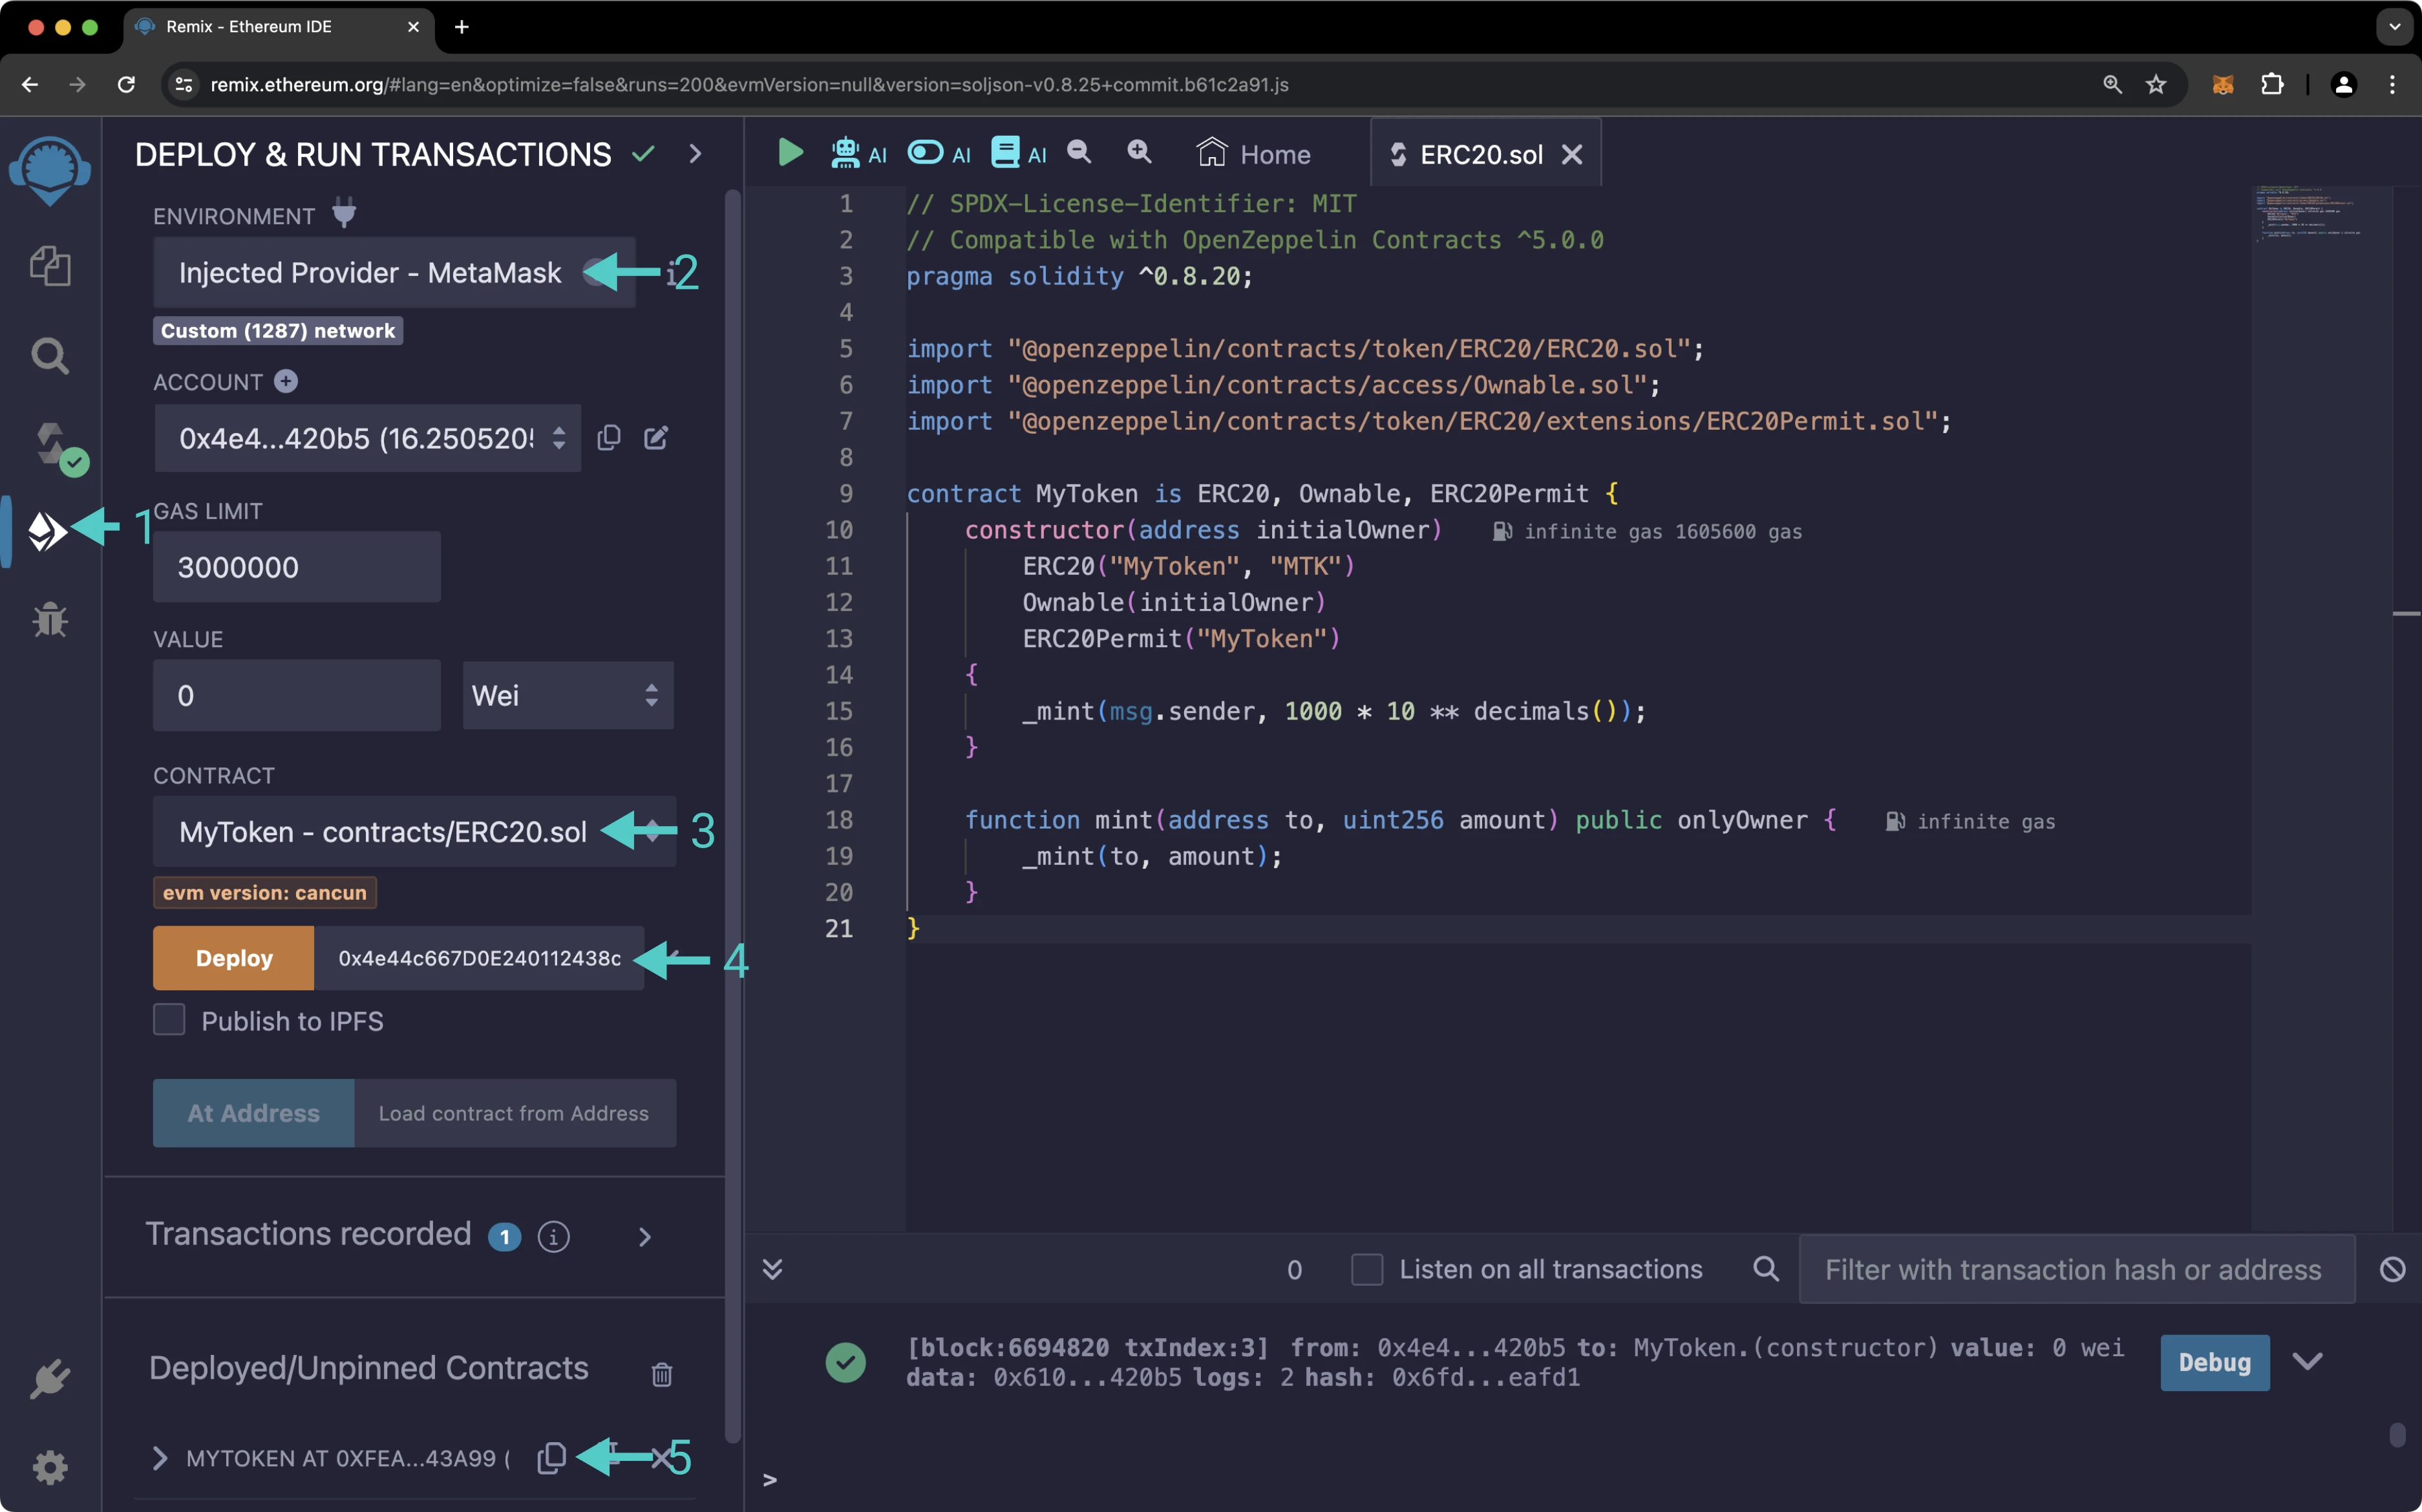
And that is it! You've deployed an ERC-20 token contract using OpenZeppelin's contracts and libraries. Next, you can interact with your token contract via Remix, or add it to MetaMask.
#### Deploying an ERC-721 Token
For this example, an ERC-721 token will be deployed to Phron. The final code used combines different contracts from OpenZeppelin:
* **`ERC721.sol`** — ERC-721 token implementation with the optional features from the base interface. Includes the supply mechanism with a `_mint` function but needs to be explicitly called from within the main contract
* **`ERC721Burnable.sol`** — extension to allow tokens to be destroyed by their owners (or approved addresses)
* **`ERC721Enumerable.sol`** — extension to allow on-chain enumeration of tokens
* **`Ownable.sol`** — extension to restrict access to certain functions
The mintable ERC-721 OpenZeppelin token contract provides a `mint` function that can only be called by the owner of the contract. By default, the owner is the contract's deployer address.
As with the ERC-20 contract, the first step is to go to [Remix](https://remix.ethereum.org/) and create a new file. For this example, the file name will be `ERC721.sol`.
Next, you'll need to write the smart contract and compile it. For this example, the following code is used:
```solidity
// SPDX-License-Identifier: MIT
// Compatible with OpenZeppelin Contracts ^5.0.0
pragma solidity ^0.8.20;
import "@openzeppelin/contracts/token/ERC721/ERC721.sol";
import "@openzeppelin/contracts/token/ERC721/extensions/ERC721Enumerable.sol";
import "@openzeppelin/contracts/token/ERC721/extensions/ERC721Burnable.sol";
import "@openzeppelin/contracts/access/Ownable.sol";
contract MyToken is ERC721, ERC721Enumerable, ERC721Burnable, Ownable {
constructor(address initialOwner)
ERC721("MyToken", "MTK")
Ownable(initialOwner)
{}
function _baseURI() internal pure override returns (string memory) {
return "Test";
}
function safeMint(address to, uint256 tokenId) public onlyOwner {
_safeMint(to, tokenId);
}
// The following functions are overrides required by Solidity
function _update(address to, uint256 tokenId, address auth)
internal
override(ERC721, ERC721Enumerable)
returns (address)
{
return super._update(to, tokenId, auth);
}
function _increaseBalance(address account, uint128 value)
internal
override(ERC721, ERC721Enumerable)
{
super._increaseBalance(account, value);
}
function supportsInterface(bytes4 interfaceId)
public
view
override(ERC721, ERC721Enumerable)
returns (bool)
{
return super.supportsInterface(interfaceId);
}
}
```
This ERC-721 token smart contract was extracted from the Contract Wizard, setting the `Base URI` as `Test` and activating the `Mintable`, `Burnable`, and `Enumerable` features.
With the contract compiled, next you will need to:
1. Head to the **Deploy & Run Transactions** tab
2. Change the environment to **Injected Provider**. This will use MetaMask's injected provider. Consequently, the contract will be deployed to whatever network MetaMask is connected to. MetaMask might show a pop-up outlining that Remix is trying to connect to your wallet
3. Select the proper contract to deploy. In this example, it is the `MyToken` contract inside the `ERC721.sol` file
4. Enter the address of the initial owner and click on the **Deploy** button. Review the transaction information in MetaMask and confirm it
5. After a few seconds, the transaction should get confirmed, and you should see your contract under **Deployed Contracts**
And that is it! You've deployed an ERC-721 token contract using OpenZeppelin's contracts and libraries. Next, you can interact with your token contract via Remix, or add it to MetaMask.
#### Deploying an ERC-1155 Token
For this example, an ERC-1155 token will be deployed to Phron. The final code used combines different contracts from OpenZeppelin:
* **`ERC1155.sol`** — ERC-1155 token implementation with the optional features from the base interface. Includes the supply mechanism with a `_mint` function but needs to be explicitly called from within the main contract
* **`Pausable.sol`** — extension to allows pausing tokens transfer, mintings and burnings
* **`Ownable.sol`** — extension to restrict access to certain functions
OpenZeppelin's ERC-1155 token contract provides a `_mint` function that can only be called in the `constructor` function. Therefore, this example creates 1000 tokens with an ID of `0`, and 1 unique token with an ID of `1`.
The first step is to go to [Remix](https://remix.ethereum.org/) and create a new file. For this example, the file name will be `ERC1155.sol`.
As shown for the [ERC-20 token](https://docs.moonbeam.network/builders/ethereum/dev-env/openzeppelin/contracts/#deploying-an-erc-20-token), you'll need to write the smart contract and compile it. For this example, the following code is used:
{% code overflow="wrap" %}
```solidity
// SPDX-License-Identifier: MIT
// Compatible with OpenZeppelin Contracts ^5.0.0
pragma solidity ^0.8.20;
import "@openzeppelin/contracts/token/ERC1155/ERC1155.sol";
import "@openzeppelin/contracts/access/Ownable.sol";
import "@openzeppelin/contracts/token/ERC1155/extensions/ERC1155Pausable.sol";
contract MyToken is ERC1155, Ownable, ERC1155Pausable {
constructor() ERC1155("") Ownable() {
_mint(msg.sender, 0, 1000 * 10 ** 18, "");
_mint(msg.sender, 1, 1, "");
}
function setURI(string memory newuri) public onlyOwner {
_setURI(newuri);
}
function pause() public onlyOwner {
_pause();
}
function unpause() public onlyOwner {
_unpause();
}
// The following function is an override required by Solidity
function _update(address from, address to, uint256[] memory ids, uint256[] memory values)
internal
override(ERC1155, ERC1155Pausable)
{
super._update(from, to, ids, values);
}
}
```
{% endcode %}
This ERC-1155 token smart contract was extracted from the Contract Wizard, setting no `Base URI` and activating `Pausable` feature. The constructor function was modified to include the minting of both a fungible and a non-fungible token.
With the contract compiled, next you will need to:
1. Head to the **Deploy & Run Transactions** tab
2. Change the environment to **Injected Provider**. This will use MetaMask's injected provider. Consequently, the contract will be deployed to whatever network MetaMask is connected to. MetaMask might show a pop-up outlining that Remix is trying to connect to your wallet
3. Select the proper contract to deploy. In this example, it is the `MyToken` contract inside the `ERC1155.sol` file
4. Enter the address of the initial owner and click on the **Deploy** button. Review the transaction information in MetaMask and confirm it
5. After a few seconds, the transaction should get confirmed, and you should see your contract under **Deployed Contracts**
And that is it! You've deployed an ERC-1155 token contract using OpenZeppelin's contracts and libraries. Next, you can interact with your token contract via Remix.
This tutorial is for educational purposes only. As such, any contracts or code created in this tutorial should not be used in production.The information presented herein has been provided by third parties and is made available solely for general information purposes. Phron does not endorse any project listed and described on the Phron Doc Website (). Phron does not warrant the accuracy, completeness or usefulness of this information. Any reliance you place on such information is strictly at your own risk. Phron disclaims all liability and responsibility arising from any reliance placed on this information by you or by anyone who may be informed of any of its contents. All statements and/or opinions expressed in these materials are solely the responsibility of the person or entity providing those materials and do not necessarily represent the opinion of Phron. The information should not be construed as professional or financial advice of any kind. Advice from a suitably qualified professional should always be sought in relation to any particular matter or circumstance. The information herein may link to or integrate with other websites operated or content provided by third parties, and such other websites may link to this website. Phron has no control over any such other websites or their content and will have no liability arising out of or related to such websites or their content. The existence of any such link does not constitute an endorsement of such websites, the content of the websites, or the operators of the websites. These links are being provided to you only as a convenience and you release and hold Phron harmless from any and all liability arising from your use of this information or the information provided by any third-party website or service.
# Defender
## OpenZeppelin Defender
### Introduction
[OpenZeppelin Defender](https://docs.openzeppelin.com/defender) is a web-based application that allows developers to perform and automate smart contract operations in a secure way. Defender V2 offers the following components:
* [**Code Inspector**](https://defender.openzeppelin.com/v2/#/code) — Automatic code analysis powered by AI models and tools developed by OpenZeppelin engineers
* [**Audit**](https://defender.openzeppelin.com/v2/#/audit) — Manage the smart contract audit process and track issues and resolutions
* [**Deploy**](https://defender.openzeppelin.com/v2/#/deploy) — Manage deployments and upgrades to ensure secure releases
* [**Monitor**](https://defender.openzeppelin.com/v2/#/monitor) — to monitor your smart contract's events, functions, and transactions, and receive notifications via email
* [**Incident Response**](https://defender.openzeppelin.com/v2/#/incident-response) — Configure predefined incident response scenarios triggered automatically by monitors or on-demand
* [**Actions**](https://defender.openzeppelin.com/v2/#/actions/automatic) — Create automated actions to perform on-chain and off-chain operations
* [**Access Control**](https://defender.openzeppelin.com/v2/#/access-control/contracts) — Manage smart contract accounts, roles, and permissions easily
OpenZeppelin Defender can be used on Phron, and the Phron TestNet. This guide will show you how to get started with Defender and demonstrate using OpenZeppelin Actions and Access Control to pause a smart contract on Phron.
### Getting Started with Defender
This section goes through the steps for getting started with OpenZeppelin Defender on Phron.
#### Checking Prerequisites
The steps described in this section assume you have [MetaMask](https://metamask.io/) installed and connected to the Phron TestNet. If you haven't connected MetaMask to the TestNet, check out our MetaMask integration guide.
In addition, you need to sign up for a free OpenZeppelin Defender account, which you can do on the main [Defender website](https://defender.openzeppelin.com/v2/#/overview).
#### Deploying the Pausable Box Contract
The contract used in this guide is an extension of the `Box.sol` contract used in the [upgrading smart contracts guide](https://docs.openzeppelin.com/learn/upgrading-smart-contracts) from the OpenZeppelin documentation. Also, the contract was made upgradable and [pausable](https://docs.openzeppelin.com/contracts/4.x/api/security#Pausable) to take full advantage of the Admin component. You can deploy your contract using the following code and following the [upgrading smart contracts guide](https://docs.openzeppelin.com/learn/upgrading-smart-contracts):
```solidity
// SPDX-License-Identifier: MIT
pragma solidity ^0.8.0;
import "@openzeppelin/contracts-upgradeable/security/PausableUpgradeable.sol";
import "@openzeppelin/contracts-upgradeable/access/OwnableUpgradeable.sol";
contract PausableBox is Initializable, PausableUpgradeable, OwnableUpgradeable {
uint256 private value;
// Emitted when the stored value changes
event ValueChanged(uint256 newValue);
// Initialize
function initialize() initializer public {
__Ownable_init(_msgSender());
__Pausable_init_unchained();
}
// Stores a new value in the contract
function store(uint256 newValue) whenNotPaused public {
value = newValue;
emit ValueChanged(newValue);
}
// Reads the last stored value
function retrieve() public view returns (uint256) {
return value;
}
function pause() public onlyOwner {
_pause();
}
function unpause() public onlyOwner {
_unpause();
}
}
```
> ### Note
>
> After deploying the above contract using Remix or another tool such as Hardhat, you'll need to call the `initialize` function to properly set the owner of the upgradeable contract. If you don't call this function, the owner will be set to the zero address, and you will be unable to proceed with the remainder of this tutorial.
### Using the Access Control Component
This section goes through the steps for getting started with the [OpenZeppelin Defender Access Control component](https://defender.openzeppelin.com/v2/#/access-control/contracts) to manage smart contracts on Phron.
#### Importing Your Contract
The first step to using Defender Access Control is to add the contract you want to manage. To do so, take the following steps:
1. Click on the **Access Control** menu item
2. Click **Add Contract**
3. Add a name for your contract
4. Select the **Network** on which the contract is deployed. For the demo,Phron is selected
5. Paste the contract address
6. If you have verified your contract, the ABI will be automatically imported. Otherwise, paste the contract ABI. This can be obtained either in [Remix](https://remix.ethereum.org/) or in the `.json` file generally created after the compilation process (for example, in Hardhat)
7. Once you've checked all the information, click on the **Create** button
If everything was successfully imported, you should see your contract on the **Access Control Contracts** main screen. You should see the address that you used to deploy the Pausable Box contract in the **Owner** field. If you see `0x0000000000000000000000000000000000000000`, this means that you didn't call the `initialize` function after deploying the Pausable Box contract. To simplify a later step, take a moment to add your address to your Defender Address Book by hovering over the address in the **Owner** field and clicking **Import into Defender 2.0**.
Then, you can add your address to the Defender Address Book as follows:
1. Enter a name for your address
2. Select the relevant network that the address pertains to
3. Paste the address
4. Review all the information and press **Create**
#### Create a Contract Proposal
Proposals are actions to be carried out in the contract. You can propose any function of the contract to be enacted, including but not limited to:
* **Pause** — available if the pause feature is detected. Pauses token transfers, minting, and burning
* **Upgrade** — available if the upgrade feature is detected. Allows for a contract to be [upgraded via a proxy contract](https://docs.openzeppelin.com/learn/upgrading-smart-contracts)
* **Admin action** — call to any function in the managed contract
In this case, a new proposal is created to pause the contract. To do so, take the following steps:
1. Click on the **Actions** menu item
2. Click **Transaction Proposals**
3. Enter a name for the proposal
4. Optionally, you may enter a description of the proposal
5. Select the target contract from the dropdown of imported contracts
6. Select the function to be carried out as part of the proposal
7. Select the desired approval process. For demo purposes, a simple approval process consisting of only the owner will be created in the following step
To create a simple new approval process consisting of only the contract owner, take the following steps:
1. Enter a name for the approval process
2. Select **EOA**
3. Select the owner of the Pausable Box contract
4. Review all information and press **Save Changes**
The last step remaining is to submit the transaction proposal. To do so, take the following steps:
1. Press **Connect Wallet** and connect your EVM account to Defender
2. Press **Submit Transaction Proposal**
#### Approve a Contract Proposal
Press **Continue**, and you'll be taken to the proposal status page. Here, you'll be able to execute the proposal. Press **Approve and Execute**, and confirm the transaction in your EVM wallet. Once the transaction is processed, the status should show **Executed**.
If all went smoothly, your Pausable Box Contract is now paused. If you'd like to try out additional scenarios, you can try creating a proposal to unpause your contract. And that's it! You're now well on your way to mastering OpenZeppelin Defender to manage your smart contracts on Phron. For more information, be sure to check out the [OpenZeppelin Defender Docs](https://docs.openzeppelin.com/defender/).
This tutorial is for educational purposes only. As such, any contracts or code created in this tutorial should not be used in production.The information presented herein has been provided by third parties and is made available solely for general information purposes. Phron does not endorse any project listed and described on the Phron Doc Website (). Phron does not warrant the accuracy, completeness or usefulness of this information. Any reliance you place on such information is strictly at your own risk. Phron disclaims all liability and responsibility arising from any reliance placed on this information by you or by anyone who may be informed of any of its contents. All statements and/or opinions expressed in these materials are solely the responsibility of the person or entity providing those materials and do not necessarily represent the opinion of Phron. The information should not be construed as professional or financial advice of any kind. Advice from a suitably qualified professional should always be sought in relation to any particular matter or circumstance. The information herein may link to or integrate with other websites operated or content provided by third parties, and such other websites may link to this website. Phron has no control over any such other websites or their content and will have no liability arising out of or related to such websites or their content. The existence of any such link does not constitute an endorsement of such websites, the content of the websites, or the operators of the websites. These links are being provided to you only as a convenience and you release and hold Phron harmless from any and all liability arising from your use of this information or the information provided by any third-party website or service.
# Ape
## Using Ape to Deploy To Phron
### Introduction
[Ape](https://docs.apeworx.io/ape/stable) is an Ethereum development environment that helps Python developers manage and automate the recurring tasks inherent to building smart contracts and DApps. Ape can directly interact with Phron's Ethereum API, so you can also use Ape to deploy smart contracts on Phron.
This guide will walk you through using Ape to compile, deploy, and interact with Ethereum smart contracts on the Phron TestNet.
### Checking Prerequisites
To get started, ensure you have the following:
* MetaMask installed and connected to Phron
* An account with funds. You can get DEV tokens for testing on Phron once every 24 hours from the [Phron Faucet](https://faucet.phron.ai/)
* To test out the examples in this guide on Phron, you will need to have your own endpoint and API key, which you can get from one of the supported Endpoint Providers
### Creating an Ape Project
If you don't already have an Ape project, you must install Ape and create a new one. You can follow the steps below to get started and create an empty project:
1. Create a directory for your project
```bash
mkdir ape && cd ape
```
2. If you don't have `pipx` installed, install it
```bash
python3 -m pip install --user pipx
python3 -m pipx ensurepath
```
3. [Install Ape using `pipx`](https://ape.readthedocs.io/en/stable/install.html)
```bash
pipx install eth-ape
```
4. Create a project
```bash
ape init
```
5. Enter a name for your project
```bash
ape initPlease enter project name: ape-demo
SUCCESS: ape-demo is written in ape-config.yaml
lsape-config.yaml contracts scripts tests
```
Your Ape project contains a bare-bones `ape-config.yaml` file for customizing specific settings and the following empty directories:
* `contracts` - an empty directory for storing smart contracts
* `scripts` - an empty directory for storing Python scripts, such as deployment scripts and scripts to interact with your deployed contracts
* `tests` - an empty directory for pytest testing scripts
### Configure Accounts
You'll need to import an account before you can deploy smart contracts or interact with previously deployed contracts from your Ape project. You can run the following command, which will import your account and give it a name:
```bash
ape accounts import INSERT_ACCOUNT_NAME
```
You'll then be prompted to enter your private key and add a password to encrypt your account.
{% code overflow="wrap" %}
```bash
ape accounts import aliceEnter Private Key:Create Passphrase to encrypt account:Repeat for confirmation:SUCCESS: A new account '0x097D9Eea23DE2D3081169e0225173d0C55768338' has been added with the id 'alice'
```
{% endcode %}
> ### Note
>
> If you wish to use a mnemonic instead, you can append the `--use-mnemonic` option to the import command.
### Create Smart Contracts
Now that you have set up your account, you can start writing smart contracts. As a basic example, you can use the following `Box` contract to store a value you can retrieve later.
Start by creating a file named `Box.sol` inside the contracts directory:
```bash
touch contracts/Box.sol
```
Open the file and add the following contract to it:
```solidity
// SPDX-License-Identifier: MIT
pragma solidity ^0.8.1;
contract Box {
uint256 private value;
event ValueChanged(uint256 newValue);
function store(uint256 newValue) public {
value = newValue;
emit ValueChanged(newValue);
}
function retrieve() public view returns (uint256) {
return value;
}
}
```
You can store any additional contracts in the `contracts` directory.
### Compile the Solidity Contract
Before compiling the Solidity, you must install the Solidity compiler plugin. Running the following command will install the latest version of the plugin:
```bash
ape plugins install solidity
```
To use a specific version of Solidity or a specific EVM version, you can modify your `ape-config.yaml` file as follows:
```yaml
solidity:
version: INSERT_VERSION
evm_version: INSERT_VERSION
```
For more information on the Solidity plugin, please refer to the [README of the `ape-solidity` repository on GitHub](https://github.com/ApeWorX/ape-solidity/blob/main/README.md).
With the Solidity plugin installed, the next step is to compile the smart contract:
```bash
ape compile
```
{% code overflow="wrap" %}
```bash
ape compileINFO: Compiling 'Box.sol'.INFO: Compiling using Solidity compiler '0.8.23+commit.f704f362'.
```
{% endcode %}
After compilation, you can find the bytecode and ABI for your contracts in the `.build` directory.
### Test the Contract
Before you deploy your contract, you can test it out directly inside your Ape project using the [pytest framework](https://docs.pytest.org/en/latest) to make sure it works as you expect.
You should already have a `tests` directory where you'll create your tests, but if not, please create one, as all tests must be located in a directory named `tests`. Additionally, each test file name must start with `test_` and end with `.py`. So, first, you can create a test file for the `Box.sol` contract:
```bash
touch tests/test_box.py
```
In addition to the test file, you can create a `conftest.py` file that will define a couple of essential [fixtures](https://docs.pytest.org/en/stable/explanation/fixtures.html). Fixtures allow you to define functions that set up the necessary environment or resources to run your tests. Note that while the `Box.sol` contract is simple, incorporating fixtures into your testing process is good practice.
To create the file, you can run the following command:
```bash
touch tests/conftest.py
```
Since your tests will rely on the injection of the fixtures, you must define the fixtures first. When defining fixtures, you need to apply the `pytest.fixture` decorator above each function. For this example, you'll create two fixtures: one that defines the owner of the contract and one that deploys the contract from the owner's account.
The `owner` fixture will use the built-in `accounts` fixture to take the first account in the list of test accounts provided by Ape and return it. The `box` fixture will deploy the `Box` contract type using the built-in `project` fixture, you simply have to provide the name of the contract and use the `owner` fixture to deploy it.
tests/conftest.py
```python
import pytest
@pytest.fixture
def owner(accounts):
return accounts[0]
@pytest.fixture
def box(owner, project):
return owner.deploy(project.Box)
```
Now that you've created the fixtures, you can start creating your tests. Each test function name must start with `test_` and describe what the test does. For this example, you can use `test_store_value`, as you'll create a test for the `store` function. The test will store a value and then retrieve it, asserting that the retrieved value is equal to the value passed into the `store` function.
To use the `owner` and `box` fixtures, you must pass them into your test function, which will inject the fixtures automatically for you to use. The `owner` account will be used to call the `store` function of the `box` contract instance.
tests/test\_box.py
```python
def test_store_value(box, owner):
new_value = 5
box.store(new_value, sender=owner)
assert box.retrieve() == new_value
```
And that's it! That's all you'll need inside your test file. You can use the following command to run the test:
```bash
ape test
```
The results of running the test will be printed to the terminal.
{% code overflow="wrap" %}
```bash
ape test===================== test session starts ======================platform darwin -- Python 3.10.4, pytest-7.2.1, pluggy-1.4.0rootdir: /Users/phron/apeplugins: eth-ape-0.7.7, web3-6.15.1collected 1 item
tests/test_box.py . [100%]
====================== 1 passed in 0.70s =======================
```
{% endcode %}
Now that you have confidence in your contract, the next step is to deploy it.
### Deploy the Contract
To deploy your contracts, create a deployment script named `deploy.py` inside of the `scripts` directory:
```bash
touch scripts/deploy.py
```
Next, you'll need to write the deployment script. You'll need to load the account you will use to deploy the contract and access it by its name using the project manager.
scripts/deploy.py
```python
from ape import project, accounts
def main():
# Load your account by its name
account = accounts.load("alice")
# Deploy the contract using your account
return account.deploy(project.Box)
```
Now you're ready to deploy the `Box` contract! To configure your project for Phron, you will need to have your own endpoint and API key, which you can get from one of the supported Endpoint Providers.
Take the following steps to initiate and send the deployment transaction:
1. Run the deployment script using the `ape run deploy` command
```bash
ape run deploy --network INSERT_RPC_API_ENDPOINT
```
>
Note
> For the ape run deploy command to work as intended, the deployment script must be named deploy.py and stored in the scripts directory, and the script must define a main() method.
>
1. Review the transaction details and enter **y** to sign the transaction
2. Enter your passphrase for your account
3. Enter **y** to leave your account unlocked or **n** to lock it
After you follow the prompts and submit the transaction, the transaction hash, total fees paid, and contract address will be displayed in the terminal.
{% code overflow="wrap" %}
```bash
ape run deploy --network https://testnet.phron.ai : Connecting to a 'phron' node.
DynamicFeeTransaction: chainId: 7744 from: 0x097D9Eea23DE2D3081169e0225173d0C55768338 gas: 123964 nonce: 372 value: 0 data: 0x307836...303333 type: 2 maxFeePerGas: 125000000 maxPriorityFeePerGas: 0 accessList: []
Sign: [y/N]: yEnter passphrase to unlock 'alice' []:Leave 'alice' unlocked? [y/N]: nINFO: Confirmed 0x365cd903e7fac5ad1f815d7a6f211b1aa32bd7d78630c2e81d67514cfb9e55bb (total fees paid = 15326250000000)SUCCESS: Contract 'Box' deployed to: 0x68039277300E8B104dDf848029dCA04C2EFe8610
```
{% endcode %}
Congratulations! Your contract is live! Save the address to interact with your contract in the following section.
### Interact with the Contract
You can interact with contracts using the Ape console for quick debugging and testing, or write a script.
#### Using The Ape Console
To interact with your newly deployed contract, you can launch the Ape console by running:
```bash
ape console --network INSERT_RPC_API_ENDPOINT
```
Next, you'll need to create a contract instance using the contract's address:
```bash
box = Contract("INSERT_CONTRACT_ADDRESS")
```
{% code overflow="wrap" %}
```bash
ape console --network https://testnet.phron.ai : Connecting to a 'phron' node.
alice = accounts.load("alice") box = Contract("0x68039277300E8B104dDf848029dCA04C2EFe8610")
```
{% endcode %}
Now, you can interact with your contract instance! For example, you can set the variable to be stored in the `Box` contract using the following commands:
1. Call the `store` method by passing in a value to store and the account you want to use to send the transaction:
```bash
box.store(4, sender=alice)
```
2. Review the transaction details and enter **y** to sign the transaction
3. If you previously locked your account, you must enter your passphrase to unlock it. Otherwise, Ape will use the cached key for your account
4. If you unlocked your account in the previous step, you'll be asked if you want to leave your account unlocked. You can enter **y** to leave it unlocked or **n** to lock it
After you follow the prompts and submit the transaction, the transaction hash and total fees paid will be displayed in the terminal.
{% code overflow="wrap" %}
```bash
box.store(4, sender=alice)DynamicFeeTransaction: chainId: 7744 to: 0x68039277300E8B104dDf848029dCA04C2EFe8610 from: 0x097D9Eea23DE2D3081169e0225173d0C55768338 gas: 45668 nonce: 373 value: 0 data: 0x307836...303034 type: 2 maxFeePerGas: 125000000 maxPriorityFeePerGas: 0 accessList: []
Sign: [y/N]: yEnter passphrase to unlock 'alice' []:Leave 'alice' unlocked? [y/N]: nINFO: Confirmed 0xd2e8305f22f33c1ab8ccaaef94252a93ff0f69c9bf98503fc2744bf257f1ef67 (total fees paid = 5573750000000) Receipt 0xd2e8305f22f33c1ab8ccaaef94252a93ff0f69c9bf98503fc2744bf257f1ef67
```
{% endcode %}
Then, you can retrieve the stored value by calling the `retrieve` method:
```bash
box.retrieve()
```
The number you just stored in the previous steps will be printed to the console.
contract.retrieve() 4
#### Using a Script
You can also write a script to interact with your newly deployed contract. To get started, you can create a new file in the `scripts` directory:
```bash
touch scripts/store-and-retrieve.py
```
Next, you can write a script that stores and retrieves a value. Note that when creating a contract instance to interact with, you must pass in the address of the deployed contract.
scripts/store-and-retrieve.py
```python
from ape import Contract, accounts
def main():
account = accounts.load("alice")
box = Contract("INSERT_CONTRACT_ADDRESS")
store = box.store(4, sender=account)
print("Transaction hash for updating the stored value:", store.txn_hash)
retrieve = box.retrieve()
print("Stored value:", retrieve)
```
Now, you can run the script to set the stored value and retrieve it:
1. Run the script
```bash
ape run store-and-retrieve --network INSERT_RPC_API_ENDPOINT
```
2. Review the transaction details and enter **y** to sign the transaction
3. If you previously locked your account, you must enter your passphrase to unlock it. Otherwise, Ape will use the cached key for your account
4. If you unlocked your account in the previous step, you'll be asked if you want to leave your account unlocked. You can enter **y** to leave it unlocked or **n** to lock it
Once completed, you should see a transaction hash and a value of `4` printed to the console.
{% code overflow="wrap" %}
```bash
ape run store-and-retrieve --network https://testnet.phron.ai : chainId: 7744 to: 0x68039277300E8B104dDf848029dCA04C2EFe8610 from: 0x097D9Eea23DE2D3081169e0225173d0C55768338 gas: 25974 nonce: 374 value: 0 data: 0x307836...303035 type: 2 maxFeePerGas: 125000000 maxPriorityFeePerGas: 0 accessList: []
Sign: [y/N]: yEnter passphrase to unlock 'alice' []:Leave 'alice' unlocked? [y/N]: nINFO: Confirmed 0x6d74e48c23fd48438bf48baad34e235693c737bd880ef0077c0fb996f3896f5f (total fees paid = 3086250000000)Transaction hash for updating the stored value: 0x6d74e48c23fd48438bf48baad34e235693c737bd880ef0077c0fb996f3896f5fStored value: 5
```
{% endcode %}
Congratulations! You have successfully deployed and interacted with a contract using Ape!
This tutorial is for educational purposes only. As such, any contracts or code created in this tutorial should not be used in production.The information presented herein has been provided by third parties and is made available solely for general information purposes. Phron does not endorse any project listed and described on the Phron Doc Website (). Phron does not warrant the accuracy, completeness or usefulness of this information. Any reliance you place on such information is strictly at your own risk. Phron disclaims all liability and responsibility arising from any reliance placed on this information by you or by anyone who may be informed of any of its contents. All statements and/or opinions expressed in these materials are solely the responsibility of the person or entity providing those materials and do not necessarily represent the opinion of Phron. The information should not be construed as professional or financial advice of any kind. Advice from a suitably qualified professional should always be sought in relation to any particular matter or circumstance. The information herein may link to or integrate with other websites operated or content provided by third parties, and such other websites may link to this website. Phron has no control over any such other websites or their content and will have no liability arising out of or related to such websites or their content. The existence of any such link does not constitute an endorsement of such websites, the content of the websites, or the operators of the websites. These links are being provided to you only as a convenience and you release and hold Phron harmless from any and all liability arising from your use of this information or the information provided by any third-party website or service.
# Brownie
## Using Brownie to Deploy To Phron
### Introduction
[Brownie](https://eth-brownie.readthedocs.io/) is an Ethereum development environment that helps Python developers manage and automate the recurring tasks inherent to building smart contracts and DApps. Brownie can directly interact with Phron's Ethereum API so it can also be used to deploy smart contracts on Phron.
This guide will cover how to use Brownie to compile, deploy, and interact with Ethereum smart contracts on the Phron TestNet.
**Please note that Brownie is no longer actively maintained.** You can check out [Ape](https://docs.apeworx.io/ape/stable) as an alternative Python Ethereum development environment.
### Checking Prerequisites
To get started, you will need the following:
* Have MetaMask installed and connected to Phron
* Have an account with funds. You can get DEV tokens for testing on Phron once every 24 hours from the [Phron Faucet](https://faucet.phron.ai/).
* To test out the examples in this guide on Phron, you will need to have your own endpoint and API key, which you can get from one of the supported Endpoint Providers
For this guide, Python version 3.9.10, pip version 22.0.3, and pipx version 1.0.0 were used.
### Creating a Brownie Project
You will need to install Brownie and create a Brownie project if you don't already have one. You can choose to either create an empty project or use a [Brownie mix](https://eth-brownie.readthedocs.io/en/stable/init.html?highlight=brownie%20mix#creating-a-project-from-a-template), which is essentially a template to build your project on. For this example, you can create an empty project. You can get started by completing the following steps:
1. Create a directory for your project
```bash
mkdir brownie && cd brownie
```
2. If you don't already have `pipx` installed, go ahead and install it
```bash
python3 -m pip install --user pipx
python3 -m pipx ensurepath
```
3. [Install Brownie using `pipx`](https://eth-brownie.readthedocs.io/en/stable/install.html), which is used to run executables installed locally in your project. Brownie will be installed into a virtual environment and be available directly from the command line
```bash
pipx install eth-brownie
```
> ### Note
>
> A common error while installing Brownie on Ubuntu is:
```bash
pip seemed to fail to build package:
pyyaml==5.4.1
Some possibly relevant errors from pip install:
error: subprocess-exited-with-error
AttributeError: cython_sources
Error installing eth-brownie.
```
This can be resolved by using the following command:
```bash
pip3 install wheel && \
pip3 install --no-build-isolation "Cython<3" "pyyaml==5.4.1" && \
pip3 install --upgrade --no-cache-dir eth-brownie
```
1. Create a project
```bash
brownie init
```
phron@ubuntu:~$ brownie init
Brownie v1.19.1 - Python development framework for Ethereum

SUCCESS: A new Brownie project has been initialized at /home/moonbeam/brownie

phron@ubuntu:~$ ls
build contracts interfaces reports scripts tests
Your Brownie project should contain the following empty directories:
* **build** - for project data such as contract artifacts from compilation
* **contracts** - to store the smart contract files
* **interfaces** - for smart contract interfaces that are required for your project
* **reports** - for JSON report files for use in the [Brownie GUI](https://eth-brownie.readthedocs.io/en/stable/gui.html)
* **scripts** - where Python scripts used for deploying contracts or other automated tasks will live
* **tests** - to store Python scripts for testing your project. Brownie uses the `pytest` framework for unit testing
Another important file to note that is not included in an empty project is the `brownie-config.yaml` configuration file. The configuration file is optional and comes in handy when customizing specific settings such as a default network, compiler version and settings, and more.
### Network Configuration
To deploy to a Phron network, you'll need to add and configure the network. Network configurations in Brownie are added from the command line. Brownie can be used with both development and live environments.
Phron are supported out of the box with Brownie as of version 1.19.3. To view the complete list of supported networks, you can run the following command:
```bash
brownie networks list
```
```bash
brownie networks list
Phron ├─Mainnet: Phron
```
If you're looking to deploy a contract to a Phron development node you'll need to add the network configurations. Under the hood, Brownie uses Ganache for development environments. However, since a Phron development node acts as your own personal development environment, Ganache isn't needed. Therefore, you can configure a development node as a "live" network.
To add Phron development node configurations, you can run the following command:
{% code overflow="wrap" %}
```bash
brownie networks add Phron phron-dev host=http://127.0.0.1:9944 name=Development chainid=7744
```
{% endcode %}
If you successfully added the network, you'll see a success message along with the network details in the terminal.
To deploy to a Phron network, or run tests on a specific network, you can specify the network by appending the following to the given command:
```bash
--network phron-main
```
If you would like to set a default network, you can do so by adding the following snippet to the `brownie-config.yaml` configuration file:
```bash
networks:
default: phron-main
```
> ### Note
>
> Keep in mind that the `brownie-config.yaml` file isn't automatically created, you can optionally create it yourself.
#### Setting your Networks RPC URLs
It is recommended that you override the default Brownie RPC URLs to your own RPC endpoint or the public Phron network endpoints. You can override the default Brownie RPC URL for each network as follows:
```bash
brownie networks modify phron-main host=INSERT_RPC_API_ENDPOINT
```
{% code overflow="wrap" %}
```bash
brownie networks modify phron-main host=https://testnet.phron.ai
SUCCESS: Network 'Mainnet' has been modified └─Mainnet ├─id: phron-main ├─chainid: 7744 ├─explorer: https://testnet.phronscan.io/ ├─host: https://testnet.phronscan └─multicall2: 0x1337BedC9D22ecbe766dF105c9623922A27963EC
```
{% endcode %}
### Account Configuration
Before you can deploy a contract, you'll need to configure your account, which is also done from the command line. To add a new account you can run:
```bash
brownie accounts new INSERT_ACCOUNT_NAME
```
Make sure to replace `INSERT_ACCOUNT_NAME` with your name of choice. For this example, `alice` will be used as the account name.
You'll be prompted to enter in your private key and a password to encrypt the account with. If the account was successfully configured, you'll see your account address printed to the terminal.
{% code overflow="wrap" %}
```bash
brownie accounts new aliceBrownie v1.19.1 - Python development framework for Ethereum
Enter the private key you wish to add: 0x5b92d6e98884f76de468fa3f6278f880748bebc13595d45af5bdc4da702133Enter the password to encrypt this account with: SUCCESS: A new account 'Oxf24FF3a9CF04c71Dbc94D06566f7A27B94566cac' has been generated with the id 'alice'
```
{% endcode %}
### The Contract File
Next you can create a contract inside of the `contracts` directory. The smart contract that you'll deploy as an example will be called `Box`, it will let you store a value that can be retrieved later. You can create a `Box.sol` contract by running the following command:
```bash
cd contracts && touch Box.sol
```
Open the file and add the following contract to it:
```solidity
// contracts/Box.sol
pragma solidity ^0.8.1;
contract Box {
uint256 private value;
// Emitted when the stored value changes
event ValueChanged(uint256 newValue);
// Stores a new value in the contract
function store(uint256 newValue) public {
value = newValue;
emit ValueChanged(newValue);
}
// Reads the last stored value
function retrieve() public view returns (uint256) {
return value;
}
}
```
### Compiling Solidity
To compile the contract you can simply run:
```bash
brownie compile
```
{% code overflow="wrap" %}
```bash
brownie compileBrownie v1.19.1 - Python development framework for Ethereum
New compatible solc version available: 0.8.4Compiling contracts... Solc version: 0.8.4 Optimizer: Enabled Runs: 200 EVM Version: IstanbulGenerating build data... - BoxProject has been compiled. Build artifacts saved at /home/phron/brownie/build/contracts
```
{% endcode %}
> ### Note
>
> The first time you compile your contracts it may take longer than usual while the `solc` binary is installed.
After compilation, you'll find the build artifacts in the `build/contracts` directory. The artifacts contain the bytecode and metadata of the contract, which are `.json` files. The `build` directory should already be in the `.gitignore` file but if it's not, it’s a good idea to add it there.
If you want to specify the compiler version or compilation settings, you can do so in the `brownie-config.yaml` file. Please note that if you haven't already created this file, you will need to do so. Then you can specify the compiler like so:
```javascript
compiler:
evm_version: null
solc:
version: 0.8.13
optimizer:
enabled: true
runs: 200
```
> ### Note
>
> You can view the list of [EVM versions supported by Brownie](https://github.com/eth-brownie/brownie/blob/master/docs/compile.rst#the-evm-version) in their documentation.
Your contracts will only be compiled again if Brownie notices that a change has been made. To force a new compilation, you can run:
```bash
brownie compile --all
```
### Deploying the Contract
In order to deploy the `Box.sol` smart contract, you will need to write a simple deployment script. You can create a new file under the `scripts` directory and name it `deploy.py`:
```bash
cd scripts && touch deploy.py
```
Next, you need to write your deployment script. To get started start, take the following steps:
1. Import the `Box` contract and the `accounts` module from `brownie`
2. Load your account using `accounts.load()` which decrypts a keystore file and returns the account information for the given account name
3. Use the `deploy` method that exists within this instance to instantiate the smart contract specifying the `from` account and the `gas_limit`
```python
# scripts/deploy.py
from brownie import Box, accounts
def main():
account = accounts.load("alice")
return Box.deploy({"from": account, "gas_limit": "200000"})
```
You can now deploy the `Box.sol` contract using the `run` command and specifying the network:
```bash
brownie run scripts/deploy.py --network phron-main
```
After a few seconds, the contract is deployed, and you should see the address in the terminal.
{% code overflow="wrap" %}
```bash
brownie run scripts/deploy.py --network phron-testnetBrownie v1.19.1 - Python development framework for Ethereum
BrownieProject is the active project.
Running 'scripts/deploy.py: :mainEnter password for "alice":Transaction sent: Oxf091d0415d1a4614ccd76a5f5f985fdf6abbd68d7481647fb3144dfecffb333Gas price: 1.0 gwei Gas limit: 200000 Nonce: 15298Box.constructor confirmed Block: 1901367 Gas used: 103095 (51.55%)Box deployed at: OxccA4aDdD51Af1E76beZaBE5FD04A82EB6063C65
```
{% endcode %}
Congratulations, your contract is live! Save the address, as you will use it to interact with this contract instance in the next step.
### Interacting with the Contract
You can interact with contracts using the Brownie console for quick debugging and testing or you can also write a script to interact.
#### Using Brownie Console
To interact with your newly deployed contract, you can launch the Brownie `console` by running:
```bash
brownie console --network phron-main
```
The contract instance will automatically be accessible from the console. It will be wrapped in a `ContractContainer` which also enables you to deploy new contract instances. To access the deployed contract you can use `Box[0]`. To call the `store` method and set the value to `5`, you can take the following steps:
1. Create a variable for the contract
```bash
box = Box[0]
```
2. Call the `store` method using your account and set the value to `5`
```bash
box.store(5, {'from': accounts.load('alice'), 'gas_limit': '50000'})
```
3. Enter the password for your account
The transaction will be signed by your account and broadcasted to the network. Now, you can retrieve the value by taking these steps:
1. Call the `retrieve` method
```bash
box.retrieve({'from': accounts.load('alice')})
```
2. Enter your password
You should see `5` or the value you have stored initially.
{% code overflow="wrap" %}
```bash
brownie console --network phron-testnetBrownie v1.19.1 - Python development framework for Ethereum
BrownieProject is the active project.Brownie environment is ready.box = Box[0]
box. store(5, {'from': accounts. load('alice"), 'gas-limit: "50000").Enter password for "alice":Transaction sent: 0x2418038735934917861dfa77068fe6dadd0b3c7e4362d6f73c1712aaf6a89aGas price: 1.0 gwei Box.store confirmed Gas limit: 50000 Nonce: 15299Box.store confirmed Block: 1901372 Gas used: 44593 (89.19%)
Transaction '0×24180387359349178b1dfa770e68fe6dadd0b3c7e4362d6f73c1712aaf6a89a'box.retrieve ({'from': accounts. load('alice")})Enter password for "alice":5
```
{% endcode %}
#### Using a Script
You can also write a script to interact with your newly deployed contract. To get started, you can create a new file in the `scripts` directory:
```bash
cd scripts && touch store-and-retrieve.py
```
Next, you need to write your script that will store and then retrieve a value. To get started, take the following steps:
1. Import the `Box` contract and the `accounts` module from `brownie`
2. Load your account using `accounts.load()` which decrypts a keystore file and returns the account information for the given account name
3. Create a variable for the `Box` contract
4. Use the `store` and `retrieve` functions to store a value and then retrieve it and print it to the console
```python
# scripts/store-and-retrieve.py
from brownie import Box, accounts
def main():
account = accounts.load("alice")
box = Box[0]
store = box.store(5, {"from": accounts.load("alice"), "gas_limit": "50000"})
retrieve = box.retrieve({"from": accounts.load("alice")})
print("Transaction hash for updating the stored value: " + store)
print("Stored value: " + retrieve)
```
To run the script, you can use the following command:
```bash
brownie run scripts/store-and-retrieve.py --network phron-main
```
You'll need to enter the password for Alice to send the transaction to update the stored value. Once the transaction goes through, you should see a transaction hash and a value of `5` printed to the console.
Congratulations, you have successfully deployed and interacted with a contract using Brownie!
This tutorial is for educational purposes only. As such, any contracts or code created in this tutorial should not be used in production.The information presented herein has been provided by third parties and is made available solely for general information purposes. Phron does not endorse any project listed and described on the Phron Doc Website (). Phron does not warrant the accuracy, completeness or usefulness of this information. Any reliance you place on such information is strictly at your own risk. Phron disclaims all liability and responsibility arising from any reliance placed on this information by you or by anyone who may be informed of any of its contents. All statements and/or opinions expressed in these materials are solely the responsibility of the person or entity providing those materials and do not necessarily represent the opinion of Phron. The information should not be construed as professional or financial advice of any kind. Advice from a suitably qualified professional should always be sought in relation to any particular matter or circumstance. The information herein may link to or integrate with other websites operated or content provided by third parties, and such other websites may link to this website. Phron has no control over any such other websites or their content and will have no liability arising out of or related to such websites or their content. The existence of any such link does not constitute an endorsement of such websites, the content of the websites, or the operators of the websites. These links are being provided to you only as a convenience and you release and hold Phron harmless from any and all liability arising from your use of this information or the information provided by any third-party website or service.
# Foundry
## Using Foundry to Deploy To Phron
### Introduction
[Foundry](https://github.com/foundry-rs/foundry) is an Ethereum development environment written in Rust that helps developers manage dependencies, compile projects, run tests, deploy contracts, and interact with blockchains from the command line. Foundry can directly interact with Phron's Ethereum API so it can be used to deploy smart contracts into Phron.
Four tools make up Foundry:
* [**Forge**](https://book.getfoundry.sh/forge) - compiles, tests, and deploys contracts
* [**Cast**](https://book.getfoundry.sh/cast) - a command line interface for interacting with contracts
* [**Anvil**](https://book.getfoundry.sh/anvil) - a local TestNet node for development purposes that can fork preexisting networks
* [**Chisel**](https://book.getfoundry.sh/chisel) - a Solidity REPL for quickly testing Solidity snippets
This guide will cover how to use Foundry to compile, deploy, and debug Ethereum smart contracts on the Phron TestNet.
### Checking Prerequisites
To get started, you will need the following:
* Have an account with funds. You can get DEV tokens for testing on Phron once every 24 hours from the [Phron Faucet](https://faucet.phron.ai/)
* To test out the examples in this guide on Phron, you will need to have your own endpoint and API key, which you can get from one of the supported Endpoint Providers
* Have [Foundry installed](https://book.getfoundry.sh/getting-started/installation)
### Creating a Foundry Project
You will need to create a Foundry project if you don't already have one. You can create one by completing the following steps:
1. Install Foundry if you haven't already. If on Linux or MacOS, you can run these commands:
```bash
curl -L https://foundry.paradigm.xyz | bash
foundryup
```
If on Windows, you'll have to install Rust and then build Foundry from source:
2. Create the project, which will create a folder with three folders within it, and open it:
```bash
forge init foundry && cd foundry
```
With the default project created, you should see three folders.
* `lib` - all of the project's dependencies in the form of git submodules
* `src` - where to put your smart contracts (with functionality)
* `test` - where to put the forge tests for your project, which are written in Solidity
In addition to these three folders, a git project will also be created along with a prewritten `.gitignore` file with relevant file types and folders ignored.
### The Source Folder
The `src` folder may already contain `Counter.sol`, a minimal Solidity contract. Feel free to delete it. To avoid errors, you should also delete the `Counter.s.sol` file in the `scripts` folder and the `Counter.t.sol` file in the `test` folder. In the following steps, you will be deploying an ERC-20 contract. In the contracts directory, you can create the `MyToken.sol` file:
```bash
cd src
touch MyToken.sol
```
Open the file and add the following contract to it:
```solidity
pragma solidity ^0.8.0;
// Import OpenZeppelin Contract
import "@openzeppelin/contracts/token/ERC20/ERC20.sol";
// This ERC-20 contract mints the specified amount of tokens to the contract creator
contract MyToken is ERC20 {
constructor(uint256 initialSupply) ERC20("MyToken", "MYTOK") {
_mint(msg.sender, initialSupply);
}
}
```
Before you attempt to compile, install OpenZeppelin contracts as a dependency. You may have to commit previous changes to git beforehand. By default, Foundry uses git submodules instead of npm packages, so the traditional npm import path and command are not used. Instead, use the name of OpenZeppelin's GitHub repository:
```bash
forge install OpenZeppelin/openzeppelin-contracts
```
### Compiling Solidity
Once all dependencies have been installed, you can compile the contract:
```bash
forge build
```
{% code overflow="wrap" %}
```bash
forge build[⠒] Compiling...[⠰] Compiling 30 files with 0.8.23[⠔] Solc 0.8.23 finished in 2.29sCompiler run successful!
```
{% endcode %}
After compilation, two folders will be created: `out` and `cache`. The ABI and bytecode for your contracts will be contained within the `out` folder. These two folders are already ignored by the `.gitignore` included in the default Foundry project initialization.
### Deploying the Contract
There are two primary ways to deploy contracts using Foundry. The first is the straightforward command `forge create`. There's also the more flexible and powerful option of foundry scripting, which runs simulations before any deployments. In the following sections, `forge create` and foundry scripting will both be covered.
#### Using Forge Create
Deploying the contract with `forge create` takes a single command, but you must include an RPC endpoint, a funded private key, and constructor arguments. `MyToken.sol` asks for an initial supply of tokens in its constructor, so each of the following commands includes 100 as a constructor argument. You can deploy the `MyToken.sol` contract using the following command for the correct network:
```bash
forge create --rpc-url INSERT_RPC_API_ENDPOINT \
--constructor-args 100 \
--private-key INSERT_YOUR_PRIVATE_KEY \
src/MyToken.sol:MyToken
```
After you've deployed the contract and a few seconds have passed, you should see the address in the terminal.
{% code overflow="wrap" %}
```bash
forge create --rpc-url https://testnet.phron.ai \ --constructor-args 100 \ --private-key INSERT_PRIVATE_KEY \ src/MyToken.sol:MyToken
[⠒] Compiling...No files changed, compilation skippedDeployer: 0x3B939FeaD1557C741Ff06492FD0127bd287A421eDeployed to: 0xc111402Aa1136ff6224106709ae51864512eC68fTransaction hash: 0xd77fc26aa296e81f35718b5878cda98e8371f6bf33b0f57e7d92997a36cf6465
```
{% endcode %}
Congratulations! Your contract is live! Save the address, as you will use it to interact with this contract instance in the next step.
#### Deploying via Solidity Scripting
Solidity scripting is a more powerful and flexible way to deploy contracts than [`forge create`](https://docs.moonbeam.network/builders/ethereum/dev-env/foundry/#deploying-the-contract). Writing a Solidity script is identical to writing a typical Solidity smart contract, though you won't ever deploy this contract.
You can tailor the behavior of `forge script` with various parameters. All components are optional except for local simulation, which is a required part of every run. The `forge script` command will attempt to execute all applicable steps in the following order:
1. **Local simulation** - simulate the transaction(s) in a local EVM
2. **Onchain simulation** - simulate the transaction(s) via the provided RPC URL
3. **Broadcasting** - when the `--broadcast` flag is provided, and simulations succeed, the transaction(s) are dispatched
4. **Verification** - API-based smart contract verification when the `--verify` flag and a valid API key are provided
Now, go ahead and write the script. In the script folder, create a file named `MyToken.s.sol`. Copy and paste the contents of the below file.
```solidity
// SPDX-License-Identifier: UNLICENSED
pragma solidity ^0.8.13;
import "forge-std/Script.sol";
import "../src/MyToken.sol";
contract MyScript is Script {
function run() external {
uint256 deployerPrivateKey = INSERT_PRIVATE_KEY;
vm.startBroadcast(deployerPrivateKey);
MyToken mytoken = new MyToken(1000000000);
vm.stopBroadcast();
}
}
```
{% hint style="warning" %}
### Remember
Remember never to store a production private key in a file, as shown above. This example is strictly for demonstration purposes.
{% endhint %}
Notice that even though the above script is not being deployed, it still requires all the typical formatting for a Solidity contract, such as the pragma statement.
You can deploy the `MyToken.sol` contract with the below command. Remember that it will execute all relevant steps in order. For this example, Foundry will first attempt a local simulation and a simulation against the provided RPC before deploying the contract. Foundry won't proceed with the deployment if any of the simulations fail.
{% code overflow="wrap" %}
```bash
forge script script/MyToken.s.sol --rpc-url https://testnet.phron.ai --broadcast
```
{% endcode %}
If your script's execution succeeds, your terminal should resemble the output below.
{% code overflow="wrap" %}
```bash
forge script script/MyToken.s.sol --rpc-url https://testnet.phron.ai --broadcast[⠒] Compiling...Script ran successfully.EIP-3855 is not supported in one or more of the RPCs used. Unsupported Chain IDs: 7744.Contracts deployed with a Solidity version equal or higher than 0.8.20 might not work properly.For more information, please see https://eips.ethereum.org/EIPS/eip-3855## Setting up 1 EVM.==========================
Chain 1287Estimated gas price: 3.25 gweiEstimated total gas used for script: 1346155Estimated amount required: 0.00437500375 ETH==========================
Finding wallets for all the necessary addresses...Sending transactions [0 - 0].⠁ [00:00:00] [#################################################] 1/1 txes (0.0s)Waiting for receipts. ⠉ [00:00:25] [#############################################] 1/1 receipts (0.0s)##### phron
✅ [Success]Hash: 0x95766ca2c8bc94171f9de783652d62468f004d686eb5ab82b3546774eee301bc Contract Address: 0x2A19aD12E9e8479207B78c39f5bCc848D386b9DABlock: 5881522Paid: 0.00309613125 ETH (990762 gas * 3.125 gwei)ONCHAIN EXECUTION COMPLETE & SUCCESSFUL.Total Paid: 0.00309613125 ETH (990762 gas * avg 3.125 gwei)Transactions saved to: /Users/ubuntu-jammy/foundry/foundry/broadcast/MyToken.s.sol/1287/run-latest.jsonSensitive values saved to: /Users/ubuntu-jammy/foundry/foundry/cache/MyToken.s.sol/1287/run-latest.json
```
{% endcode %}
And that's it! For more information about Solidity scripting with Foundry, be sure to check out [Foundry's documentation site](https://book.getfoundry.sh/tutorials/solidity-scripting).
### Interacting with the Contract
Foundry includes cast, a CLI for performing Ethereum RPC calls.
Try to retrieve your token's name using Cast, where `INSERT_YOUR_CONTRACT_ADDRESS` is the address of the contract that you deployed in the previous section:
```bash
cast call INSERT_YOUR_CONTRACT_ADDRESS "name()" --rpc-url INSERT_RPC_API_ENDPOINT
```
You should get this data in hexadecimal format:
{% code overflow="wrap" %}
```bash
0x000000000000000000000000000000000000000000000000000000000000002000000000000000000000000000000000000000000000000000000000000000074d79546f6b656e00000000000000000000000000000000000000000000000000
```
{% endcode %}
This is far from readable, but you can use Cast to convert it into your desired format. In this case, the data is text, so you can convert it into ASCII characters to see "My Token":
{% code overflow="wrap" %}
```bash
cast --to-ascii 0x000000000000000000000000000000000000000000000000000000000000002000 000000000000000000000000000000000000000000000000000000000000074d7954 6f6b656e00000000000000000000000000000000000000000000000000
MyToken
```
{% endcode %}
{% code overflow="wrap" %}
```bash
cast --to-ascii 0x000000000000000000000000000000000000000000000000000000000000002000000000000000000000000000000000000000000000000000000000000000074d79546f6b656e00000000000000000000000000000000000000000000000000
```
{% endcode %}
You can also mutate data with cast as well. Try burning tokens by sending them to the zero address.
```bash
cast send --private-key INSERT_YOUR_PRIVATE_KEY \
--rpc-url INSERT_RPC_API_ENDPOINT \
--chain 7744 \
INSERT_YOUR_CONTRACT_ADDRESS \
"transfer(address,uint256)" 0x0000000000000000000000000000000000000001 1
```
The transaction will be signed by your Phron account and be broadcast to the network. The output should look similar to:
{% code overflow="wrap" %}
```bash
cast send --private-key INSERT_PRIVATE_KEY \ --rpc-url https://testnet.phron.ai \ --chain 7744 \ INSERT_CONTRACT_ADDRESS \ "transfer(address,uint256)" 0x0000000000000000000000000000000000000001 1
blockHash 0x6f99fac1bb49feccb7b0476e0ffcd3cef4c456aa9111e193ce11c7a1ab62314eblockNumber 5892860contractAddresscumulativeGasUsed 51332effectiveGasPrice 3125000000gasUsed 51332logs [{"address":"0xc111402aa1136ff6224106709ae51864512ec68f","topics":["0xddf252ad1be2c89b69 c2b068fc378daa952ba7f163c4a11628f55a4df523b3ef", "0x0000000000000000000000003b939fead155 7c741ff06492fd0127bd287a421e", "0x0000000000000000000000000000000000000000000000000000000000000001"], "data":"0x0000000000000000000000000000000000000 000000000000000000000000001", "blockHash":"0x6f99fac1bb49feccb7b0476e0ffcd3cef4c4 56aa9111e193ce11c7a1ab62314e", "blockNumber":"0x59eafc", "transactionHash":"0xdd5f11be68d5 2967356ccf34b9a4b2632d0d5ac8932ff27e72c544320dec33e3", "transactionIndex":"0x0","logIndex":"0x0","transactionLogIndex":"0x0","removed":false}]logsBloom 0x000000000000000000000000000000000000000000000000000000000000000000000000000000004 00000000000000000000000000000000000000000040000000000000000000000000008000000000000 00000004000000000000000000000000000000000000000100000000000000000000000000000000001 00000010000000000000000000000000000000000000000000000000000000002000000040000000000 00000000000000000000000000000000000000000000000000000000002000000000000000000000000 00000000000000000000000000004000000000000000000000000000000000000000000000000000000 0001000000rootstatus 1transactionHash 0xdd5f11be68d52967356ccf34b9a4b2632d0d5ac8932ff27e72c544320dec33e3transactionIndex 0type 2
```
{% endcode %}
Congratulations, you have successfully deployed and interacted with a contract using Foundry!
### Forking with Anvil
As previously mentioned, [Anvil](https://book.getfoundry.sh/anvil) is a local TestNet node for development purposes that can fork preexisting networks. Forking Phron allows you to interact with live contracts deployed on the network.
There are some limitations to be aware of when forking with Anvil. Since Anvil is based on an EVM implementation, you cannot interact with any of the Phron precompiled contracts and their functions. Precompiles are a part of the Substrate implementation and therefore cannot be replicated in the simulated EVM environment. This prohibits you from interacting with cross-chain assets on Phron and Substrate-based functionality such as staking and governance.
To fork Phron, you will need to have your own endpoint and API key which you can get from one of the supported Endpoint Providers.
To fork Phron from the command line, you can run the following command from within your Foundry project directory:
```bash
anvil --fork-url INSERT_RPC_API_ENDPOINT
```
Your forked instance will have 10 development accounts that are pre-funded with 10,000 test tokens. The forked instance is available at `http://127.0.0.1:8545/`. The output in your terminal should resemble the following:
{% code overflow="wrap" %}
```bash
anvil --fork-url https://testnet.phron.ai
Available Accounts==================(0) "0xf39Fd6e51aad88F6F4ce6aB8827279cffFb92266" (10000.000000000000000000 ETH)(1) "0x70997970C51812dc3A010C7d01b50e0d17dc79C8" (10000.000000000000000000 ETH)(2) "0x3C44CdDdB6a900fa2b585dd299e03d12FA4293BC" (10000.000000000000000000 ETH)(3) "0x90F79bf6EB2c4f870365E785982E1f101E93b906" (10000.000000000000000000 ETH)(4) "0x15d34AAf54267DB7D7c367839AAf71A00a2C6A65" (10000.000000000000000000 ETH)(5) "0x9965507D1a55bcC2695C58ba16FB37d819B0A4dc" (10000.000000000000000000 ETH)(6) "0x976EA74026E726554dB657fA54763abd0C3a0aa9" (10000.000000000000000000 ETH)(7) "0x14dC79964da2C08b23698B3D3cc7Ca32193d9955" (10000.000000000000000000 ETH)(8) "0x23618e81E3f5cdF7f54C3d65f7FBc0aBf5B21E8f" (10000.000000000000000000 ETH)(9) "0xa0Ee7A142d267C1f36714E4a8F75612F20a79720" (10000.000000000000000000 ETH)
Private Keys==================(0) 0xac0974bec39a17e36ba4a6b4d238ff944bacb478cbed5efcae784d7bf4f2ff80(1) 0x59c6995e998f97a5a0044966f0945389dc9e86dae88c7a8412f4603b6b78690d(2) 0x5de4111afa1a4b94908f83103eb1f1706367c2e68ca870fc3fb9a804cdab365a(3) 0x7c852118294e51e653712a81e05800f419141751be58f605c371e15141b007a6(4) 0x47e179ec197488593b187f80a00eb0da91f1b9d0b13f8733639f19c30a34926a(5) 0x8b3a350cf5c34c9194ca85829a2df0ec3153be0318b5e2d3348e872092edffba(6) 0x92db14e403b83dfe3df233f83dfa3a0d7096f21ca9b0d6d6b8d88b2b4ec1564e(7) 0x4bbbf85ce3377467afe5d46f804f221813b2bb87f24d81f60f1fcdbf7cbf4356(8) 0xdbda1821b80551c9d65939329250298aa3472ba22feea921c0cf5d620ea67b97(9) 0x2a871d0798f97d79848a013d4936a73bf4cc922c825d33c1cf7073dff6d409c6
Wallet==================Mnemonic: test test test test test test test test test test test junkDerivation path: m/44'/60'/0'/0/
Fork==================Endpoint: https://testnet.phron.networkBlock number: 5892944Block hash: 0xc9579299f55d507c305d5357d4c1b9d9c550788ddb471b0231d8d0146e7144b7Chain ID: 7744
Base Fee==================125000000
Gas Limit==================30000000
Genesis Timestamp==================1705278817
Listening on 127.0.0.1:8545
```
{% endcode %}
To verify you have forked the network, you can query the latest block number:
{% code overflow="wrap" %}
```bash
curl --data '{"method":"eth_blockNumber","params":[],"id":1,"jsonrpc":"2.0"}' -H "Content-Type: application/json" -X POST localhost:8545
```
{% endcode %}
If you convert the `result` from [hex to decimal](https://www.rapidtables.com/convert/number/hex-to-decimal.html), you should get the latest block number from the time you forked the network. You can cross reference the block number using a block explorer.
From here you can deploy new contracts to your forked instance of Phron or interact with contracts already deployed. Building off of the previous example in this guide, you can make a call using Cast to check the balance of the minted MYTOK tokens in the account you deployed the contract with:
{% code overflow="wrap" %}
```bash
cast call INSERT_CONTRACT_ADDRESS "balanceOf(address)(uint256)" INSERT_YOUR_ADDRESS --rpc-url http://localhost:8545
```
{% endcode %}
### Using Chisel
Chisel is a Solidity REPL or shell. It allows a developer to write Solidity directly in the console for testing small snippets of code, letting developers skip the project setup and contract deployment steps for what should be a quick process.
Since Chisel is mainly useful for quick testing, it can be used outside of a Foundry project. But, if executed within a Foundry project, it will keep the configurations within `foundry.toml` when running.
For this example, you will be testing out some of the features of `abi` within Solidity because it is complex enough to demonstrate how Chisel could be useful. To get started using Chisel, run the following in the command line to start the shell:
```bash
chisel
```
In the shell, you can write Solidity code as if it were running within a function:
```bash
bytes memory myData = abi.encode(100, true, "Develop on Phron");
```
Let's say you were interested in how `abi` encoded data because you're looking into how to most efficiently store data on the blockchain and thus save gas. To view how the `myData` is stored in memory, you can use the following command while in the Chisel shell:
```bash
!memdump
```
`memdump` will dump all of the data in your current session. You'll likely see something like this below. If you aren't good at reading hexadecimal or if you don't know how ABI encoding works, then you might not be able to find where the `myData` variable has been stored.
{% code overflow="wrap" %}
```bash
chisel
Welcome to Chisel! Type `!help` to show available commands. bytes memory myData = abi.encode(100, true, "Develop on Phron");
!memdump[0x00:0x20]: 0x0000000000000000000000000000000000000000000000000000000000000000[0x20:0x40]: 0x0000000000000000000000000000000000000000000000000000000000000000[0x40:0x60]: 0x0000000000000000000000000000000000000000000000000000000000000140[0x60:0x80]: 0x0000000000000000000000000000000000000000000000000000000000000000[0x80:0xa0]: 0x00000000000000000000000000000000000000000000000000000000000000a0[0xa0:0xc0]: 0x0000000000000000000000000000000000000000000000000000000000000064[0xc0:0xe0]: 0x0000000000000000000000000000000000000000000000000000000000000001[0xe0:0x100]: 0x0000000000000000000000000000000000000000000000000000000000000060[0x100:0x120]: 0x0000000000000000000000000000000000000000000000000000000000000013[0x120:0x140]: 0x446576656c6f70206f6e204d6f6f6e6265616d00000000000000000000000000
```
{% endcode %}
Fortunately, Chisel lets you easily figure out where this information is stored. Using the `!rawstack` command, you can find the location in the stack where the value of a variable:
```bash
!rawstack myData
```
In this situation, since bytes is over 32 bytes in length, the memory pointer is displayed instead. But that's exactly what's needed since you already know the entirety of the stack from the `!memdump` command.
{% code overflow="wrap" %}
```bash
chisel
Welcome to Chisel! Type `!help` to show available commands. bytes memory myData = abi.encode(100, true, "Develop on Phron");
!memdump[0x00:0x20]: 0x0000000000000000000000000000000000000000000000000000000000000000[0x20:0x40]: 0x0000000000000000000000000000000000000000000000000000000000000000[0x40:0x60]: 0x0000000000000000000000000000000000000000000000000000000000000140[0x60:0x80]: 0x0000000000000000000000000000000000000000000000000000000000000000[0x80:0xa0]: 0x00000000000000000000000000000000000000000000000000000000000000a0[0xa0:0xc0]: 0x0000000000000000000000000000000000000000000000000000000000000064[0xc0:0xe0]: 0x0000000000000000000000000000000000000000000000000000000000000001[0xe0:0x100]: 0x0000000000000000000000000000000000000000000000000000000000000060[0x100:0x120]: 0x0000000000000000000000000000000000000000000000000000000000000013[0x120:0x140]: 0x446576656c6f70206f6e204d6f6f6e6265616d00000000000000000000000000 !rawstack myData
Type: bytes32 └ Data: 0x0000000000000000000000000000000000000000000000000000000000000080
```
{% endcode %}
The `!rawstack` command shows that the `myData` variable is stored at `0x80`, so when comparing this with the memory dump retrieved from the `!memdump` command, it looks like `myData` is stored like this:
```bash
[0x80:0xa0]: 0x00000000000000000000000000000000000000000000000000000000000000a0
[0xa0:0xc0]: 0x0000000000000000000000000000000000000000000000000000000000000064
[0xc0:0xe0]: 0x0000000000000000000000000000000000000000000000000000000000000001
[0xe0:0x100]: 0x0000000000000000000000000000000000000000000000000000000000000060
[0x100:0x120]: 0x0000000000000000000000000000000000000000000000000000000000000013
[0x120:0x140]: 0x446576656c6f70206f6e204d6f6f6e6265616d00000000000000000000000000
```
At first glance, this makes sense, since `0xa0` has a value of `0x64` which is equal to 100, and `0xc0` has a value of `0x01` which is equal to true. If you want to learn more about how ABI-encoding works, the [Solidity documentation for ABI is helpful](https://docs.soliditylang.org/en/v0.8.18/abi-spec.html). In this case, there are a lot of zeros in this method of data packing, so as a smart contract developer you might instead try to use structs or pack the data together more efficiently with bitwise code.
Since you're done with this code, you can clear the state of Chisel so that it doesn't mess with any future logic that you want to try out (while running the same instance of Chisel):
```bash
!clear
```
There's an even easier way to test with Chisel. When writing code that ends with a semicolon (`;`), Chisel will run it as a statement, storing its value in Chisel's runtime state. But if you only needed to see how the ABI-encoded data was represented, then you could get away with running the code as an expression. To try this out with the same `abi` example, write the following in the Chisel shell:
```bash
abi.encode(100, true, "Develop on Phron")
```
You should see something like the following:
{% code overflow="wrap" %}
```bash
!clearCleared session! abi.encode(100, true, "Develop on Phron")Type: dynamic bytes├ Hex (Memory):├─ Length ([0x00:0x20]): 0x00000000000000000000000000000000000000000000000000000000000000a0├─ Contents ([0x20:..]): 0x000000000000000000000000000000000000000000000000000000000000006400000000000000000000000000000000000000000000000000000000000000010000000000000000000000000000000000000000000000000000000000000060000000000000000000000000000000000000000000000000000000000000000134446576656c6f70206f6e204d6f6f6e6265616d00000000000000000000000000├ Hex (Tuple Encoded):├─ Pointer ([0x00:0x20]): 0x0000000000000000000000000000000000000000000000000000000000000020├─ Length ([0x20:0x40]): 0x00000000000000000000000000000000000000000000000000000000000000a0└─ Contents ([0x40:..]): 0x000000000000000000000000000000000000000000000000000000000000006400000000000000000000000000000000000000000000000000000000000000010000000000000000000000000000000000000000000000000000000000000060000000000000000000000000000000000000000000000000000000000000000134446576656c6f70206f6e204d6f6f6e6265616d00000000000000000000000000
```
{% endcode %}
While it doesn't display the data in the same way, you still get the contents of the data, and it also further breaks down how the information is coded, such as letting you know that the `0xa0` value defines the length of the data.
By default, when you leave the Chisel shell, none of the data is persisted. But you can instruct chisel to do so. For example, you can take the following steps to store a variable:
1. Store a `uint256` in Chisel
```bash
uint256 myNumber = 101;
```
2. Store the session with `!save`. For this example, you can use the number `1` as a save ID
```bash
!save 1
```
3. Quit the session
```bash
!quit
```
Then to view and interact with your stored Chisel states, you can take the following steps:
1. View a list of saved Chisel states
```bash
chisel list
```
2. Load your stored states
```bash
chisel load 1
```
3. View the `uint256` saved in Chisel from the previous set of steps
```bash
!rawstack myNumber
```
{% code overflow="wrap" %}
```bash
uint256 myNumber = 101; !save 1 Saved session to cache with ID = 1 !quitchisel list⚒️ Chisel Sessions├─ "2024-01-15 01:17:34" - chisel-1.jsonchisel load 1Welcome to Chisel! Type `!help` to show available commands. !rawstack myNumberType: bytes32└ Data: 0x0000000000000000000000000000000000000000000000000000000000000065
```
{% endcode %}
You can even fork networks while using Chisel:
```
!fork https://testnet.phronscan.io
```
Then, for example, you can query the balance of one of Phron's collators:
```solidity
0x12E7BCCA9b1B15f33585b5fc898B967149BDb9a5.balance
```
{% code overflow="wrap" %}
```bash
!fork https://testnet.phron.networkSet fork URL to https://testnet.phronscan.io 0x12E7BCCA9b1B15f33585b5fc898B967149BDb9a5.balanceType: uint├ Hex: 0x000000000000000000000000000000000000000000000358affd3d76ebb78555└ Decimal: 15803094286802091476309
```
{% endcode %}
If you want to learn more about Chisel, download Foundry and refer to its [official reference page](https://book.getfoundry.sh/reference/chisel).
### Foundry With Hardhat
Often, there will be the case where a project that you wish to integrate with has all of its setup within Hardhat, making it an arduous task to convert the entirety of the project into Foundry. This additional work is avoidable by creating a hybrid project that uses both Hardhat and Foundry features together. This is possible with Hardhat's [hardhat-foundry plugin](https://hardhat.org/hardhat-runner/plugins/nomicfoundation-hardhat-foundry).
To convert your preexisting Foundry project to a hybrid project, you will essentially have to install a Hardhat project into the same folder:
```bash
npm init
npm install --save-dev hardhat @nomicfoundation/hardhat-foundry
npx hardhat init
```
For more information, please refer to our documentation on [Creating a Hardhat Project](https://docs.moonbeam.network/builders/ethereum/dev-env/hardhat/#creating-a-hardhat-project).
After initializing the new Hardhat project, a few new folders and files should appear: `contracts`, `hardhat.config.js`, `scripts`, and `test/Lock.js`. You'll need to make a few modifications to create a hybrid project:
1. Edit the `hardhat.config.js` file within your repository. Open it up, and at the top, add the following:
```bash
require("@nomicfoundation/hardhat-foundry");
```
After adding the `hardhat-foundry` plugin, the typical `contracts` folders for Hardhat will not work because now Hardhat expects all smart contracts to be stored within Foundry's `src` folder
2. Move all smart contracts within the `contracts` folder into the `src` folder, and then delete the `contracts` folder
3. Edit the `foundry.toml` file to ensure that dependencies installed via Git submodules and npm can be compiled by the Forge tool. Edit the `profile.default` to ensure that the `libs` entry has both `lib` and `node_modules`:
```javascript
[profile.default]
src = 'src'
out = 'out'
libs = ['lib', 'node_modules']
solc = '0.8.20'
evm_version = 'london'
```
Now both `forge build` and `npx hardhat compile` should work regardless of the dependencies.
Both `forge test` and `npx hardhat test` should now be able to access all smart contracts and dependencies. `forge test` will only test the Solidity tests, whereas `npx hardhat test` will only test the JavaScript tests. If you would like to use them in conjunction, then you can create a new script within your `package.json` file:
```json
"scripts": {
"test": "npx hardhat test && forge test"
}
```
You can run this command with:
```bash
npm run test
```
Finally, while not necessary, it could be worthwhile to move all JavaScript scripts from the `scripts` folder into Foundry's `script` folder and delete the `scripts` folder so that you don't have two folders that serve the same purpose.
This tutorial is for educational purposes only. As such, any contracts or code created in this tutorial should not be used in production.The information presented herein has been provided by third parties and is made available solely for general information purposes. Phron does not endorse any project listed and described on the Phron Doc Website (). Phron does not warrant the accuracy, completeness or usefulness of this information. Any reliance you place on such information is strictly at your own risk. Phron disclaims all liability and responsibility arising from any reliance placed on this information by you or by anyone who may be informed of any of its contents. All statements and/or opinions expressed in these materials are solely the responsibility of the person or entity providing those materials and do not necessarily represent the opinion of Phron. The information should not be construed as professional or financial advice of any kind. Advice from a suitably qualified professional should always be sought in relation to any particular matter or circumstance. The information herein may link to or integrate with other websites operated or content provided by third parties, and such other websites may link to this website. Phron has no control over any such other websites or their content and will have no liability arising out of or related to such websites or their content. The existence of any such link does not constitute an endorsement of such websites, the content of the websites, or the operators of the websites. These links are being provided to you only as a convenience and you release and hold Phron harmless from any and all liability arising from your use of this information or the information provided by any third-party website or service.
# Hardhat
## Using Hardhat to Deploy To Phron
### Introduction
[Hardhat](https://hardhat.org/) is a flexible and extensible Ethereum development environment that streamlines the smart contract development process. Since Phron is Ethereum-compatible, you can use Hardhat to develop and deploy smart contracts on Phron.
Hardhat takes a task-based approach to development, where you can define and execute [tasks](https://hardhat.org/hardhat-runner/docs/advanced/create-task) that perform specific actions. These actions include compiling and deploying contracts, running tests, and more. Tasks are highly configurable, so you can create, customize, and execute tasks that are tailored to meet your needs.
You can also extend Hardhat's functionality through the use of [plugins](https://hardhat.org/hardhat-runner/plugins). Plugins are external extensions that integrate with Hardhat to provide additional features and tools for your workflow. For example, there are plugins for common Ethereum libraries, like Ethers.js and viem, a plugin that extends the Chai assertion library to include Ethereum-specific functionality, and more. All of these plugins can be used to extend your Hardhat project on Phron.
This guide will provide a brief introduction to Hardhat and show you how to use Hardhat to compile, deploy, and debug Ethereum smart contracts on the Phron TestNet.
Please note that although Hardhat comes with a [Hardhat Network](https://hardhat.org/docs#hardhat-network) component, which provides a local development environment, you should use a local Phron development node instead. You can connect a Phron development node to Hardhat just like you would with any other network.
### Checking Prerequisites
To get started, you will need the following:
* Have MetaMask installed and connected to Phron
* Have an account with funds. You can get DEV tokens for testing on Phron once every 24 hours from the [Phron Faucet](https://faucet.phron.ai/)
* To test out the examples in this guide on Phron, you will need to have your own endpoint and API key, which you can get from one of the supported Endpoint Providers
### Create a Hardhat Project
You will need to create a Hardhat project if you don't already have one. You can create one by completing the following steps:
1. Create a directory for your project
```bash
mkdir hardhat && cd hardhat
```
2. Initialize the project, which will create a `package.json` file
```bash
npm init -y
```
3. Install Hardhat
```bash
npm install hardhat
```
4. Create a Hardhat project
```bash
npx hardhat init
```
> ### Note
>
> `npx` is used to run executables installed locally in your project. Although Hardhat can be installed globally, it is recommended to install it locally in each project so that you can control the version on a project-by-project basis.
1. A menu will appear, which will allow you to create a new project or use a sample project. For this example, you can choose **Create an empty hardhat.config.js**, which will create a Hardhat configuration file for your project
{% code overflow="wrap" %}
```bash
npx hardhat init888 888 888 888 888888 888 888 888 888888 888 888 888 8888888888888 8888b. 888d888 .d88888 88888b. 8888b. 888888888 888 "88b 888P" d88" 888 888 "88b "88b 888888 888 .d888888 888 888 888 888 888 .d888888 888888 888 888 888 888 Y88b 888 888 888 888 888 Y88b.888 888 "Y888888 888 "Y88888 888 888 "Y888888 "Y888
👷 Welcome to Hardhat v2.22.2 👷
What do you want to do? … Create a JavaScript project Create a TypeScript project Create a TypeScript project (with Viem) Quit
```
{% endcode %}
### Hardhat Configuration File
The Hardhat configuration file is the entry point into your Hardhat project. It defines various settings and options for your Hardhat project, such as the Solidity compiler version to use and the networks you can deploy your contracts to.
To start, your `hardhat.config.js` should resemble the following:
```javascript
/** @type import('hardhat/config').HardhatUserConfig */
module.exports = {
solidity: '0.8.20',
};
```
For this example, you can leave the Solidity compiler version to `0.8.20`; however, if you are using a different contract that requires a newer version, don't forget to update the version here.
Next, you'll need to modify your configuration file to add the network configurations for the network you want to deploy your contract to. For Phron networks, you'll need to specify the following:
* `url` - the RPC endpoint of the node
* `chainId` - the chain ID, which is used to validate the network
* `accounts` - the accounts that can be used to deploy and interact with contracts. You can either enter an array of the private keys for your accounts or use an [HD Wallet](https://github.com/ethereumbook/ethereumbook/blob/develop/05wallets.asciidoc#hierarchical-deterministic-wallets-bip-32bip-44)
For this example, the network will be Phron, but you can modify the configuration to use any of the Phron networks:
```javascript
module.exports = {
solidity: '0.8.20',
networks: {
phron: {
url: 'INSERT_RPC_API_ENDPOINT', // Insert your RPC URL here
chainId: 7744, // (hex: 0x504),
accounts: ['INSERT_PRIVATE_KEY'],
},
},
};
```
{% hint style="warning" %}
### Remember
This is for demo purposes only. Never store your private key in a JavaScript file.
{% endhint %}
If you are planning on using any plugins with your project, you'll need to install the plugin and import it into the `hardhat.config.js` file. Once a plugin has been imported, it becomes part of the [Hardhat Runtime Environment](https://hardhat.org/hardhat-runner/docs/advanced/hardhat-runtime-environment), and you can leverage the plugin's functionality within tasks, scripts, and more.
For this example, you can install the `hardhat-ethers` plugin and import it into the configuration file. This plugin provides a convenient way to use the Ethers.js library to interact with the network.
```bash
npm install @nomicfoundation/hardhat-ethers ethers
```
Additionally, you'll need to install the `hardhat-ignition-ethers` plugin to enable deployment of smart contracts with Hardhat Ignition. You can install it with the following command:
```bash
npm install --save-dev @nomicfoundation/hardhat-ignition-ethers
```
To import both plugins, add the following `require` statements to the top of the Hardhat configuration file:
```javascript
/** @type import('hardhat/config').HardhatUserConfig */
require('@nomicfoundation/hardhat-ethers');
require('@nomicfoundation/hardhat-ignition-ethers');
const privateKey = 'INSERT_PRIVATE_KEY';
module.exports = {
solidity: '0.8.20',
networks: {
phron: {
url: 'https://',
chainId: 1287, // 0x507 in hex,
accounts: [privateKey]
}
}
};
```
For more information on the available configuration options, please refer to Hardhat's documentation on [Configuration](https://hardhat.org/hardhat-runner/docs/config#networks-configuration).
### The Contract File
Now that you've configured your project, you can begin the development process by creating your smart contract. The contract will be a simple one that will let you store a value that can be retrieved later, called `Box`.
To add the contract, you'll take the following steps:
1. Create a `contracts` directory
```bash
mkdir contracts
```
2. Create a `Box.sol` file
```bash
touch contracts/Box.sol
```
3. Open the file and add the following contract to it:
```solidity
// contracts/Box.sol
// SPDX-License-Identifier: MIT
pragma solidity ^0.8.1;
contract Box {
uint256 private value;
// Emitted when the stored value changes
event ValueChanged(uint256 newValue);
// Stores a new value in the contract
function store(uint256 newValue) public {
value = newValue;
emit ValueChanged(newValue);
}
// Reads the last stored value
function retrieve() public view returns (uint256) {
return value;
}
}
```
### Compile the Contract
The next step is to compile the `Box.sol` smart contract. For this, you can use the built-in `compile` task, which will look for Solidity files in the `contracts` directory and compile them using the version and compiler settings defined in the `hardhat.config.js` file.
To use the `compile` task, all you have to do is run:
```bash
npx hardhat compile
```
{% code overflow="wrap" %}
```bash
npx hardhat compileCompiled 1 Solidity files successfully (evm target: paris).ls -lartifactscachecontractshardhat.config.jsnode_modulespackage.jsonpackage-lock.json
```
{% endcode %}
After compilation, an `artifacts` directory is created that holds the bytecode and metadata of the contract, which are `.json` files. It’s a good idea to add this directory to a `.gitignore` file.
If you make changes to the contract after you've compiled it, you can compile it again using the same command. Hardhat will look for any changes and recompile the contract. If no changes are found, nothing will be compiled. If needed, you can force a compilation using the `clean` task, which will clear the cache and delete the old artifacts.
### Deploy the Contract
To deploy the contract, you'll use Hardhat Ignition, a declarative framework for deploying smart contracts. Hardhat Ignition is designed to make it easy to manage recurring tasks surrounding smart contract deployment and testing. For more information, be sure to check out the [Hardhat Ignition docs](https://hardhat.org/ignition/docs/getting-started#overview).
To set up the proper file structure for your Ignition module, create a folder named `ignition` and a subdirectory called `modules`. Then add a new file to it called `Box.js`. You can take all three of these steps with the following command:
```bash
mkdir ignition ignition/modules && touch ignition/modules/Box.js
```
Next, you can write your Hardhat Ignition module. To get started, take the following steps:
1. Import the `buildModule` function from the Hardhat Ignition module
2. Export a module using `buildModule`
3. Use the `getAccount` method to select the deployer account
4. Deploy the `Box` contract
5. Return an object from the module. This makes the `Box` contract accessible for interaction in Hardhat tests and scripts
```javascript
// 1. Import the `buildModule` function from the Hardhat Ignition module
const { buildModule } = require("@nomicfoundation/hardhat-ignition/modules");
// 2. Export a module using `buildModule`
module.exports = buildModule("BoxModule", (m) => {
// 3. Use the `getAccount` method to select the deployer account
const deployer = m.getAccount(0);
// 4. Deploy the `Box` contract
const box = m.contract("Box", [], {
from: deployer,
});
// 5. Return an object from the module
return { box };
});
```
To run the script and deploy the `Box.sol` contract, use the following command, which requires you to specify the network name as defined in your `hardhat.config.js`. If you don't specify a network, hardhat will deploy the contract to a local hardhat network by default.
```bash
npx hardhat ignition deploy ./ignition/modules/Box.js --network phron
```
> ### Note
>
> If you're using another Phron network, make sure that you specify the correct network. The network name needs to match how it's defined in the `hardhat.config.js` file.
You'll be prompted to confirm the network you wish to deploy to. After a few seconds after you confirm, the contract is deployed, and you'll see the contract address in the terminal.
```bash
npx hardhat ignition deploy ./ignition/modules/Box.js --network phron
✅ Confirm deploy to network phron (7744)? … yesHardhat Ignition 🚀
Deploying [ BoxModule ]
Batch #1Executed BoxModule#Box
[ BoxModule ] successfully deployed 🚀
Deployed Addresses
BoxModule#Box - 0xfBD78CE8C9E1169851119754C4Ea2f70AB159289
```
Congratulations, your contract is live! Save the address, as you will use it to interact with this contract instance in the next step.
### Interact with the Contract
There are a couple of ways that you can interact with your newly deployed contract using Hardhat: you can use the `console` task, which spins up an interactive JavaScript console, or you can create another script and use the `run` task to execute it.
#### Using the Hardhat Console
The [Hardhat console](https://hardhat.org/hardhat-runner/docs/guides/hardhat-console) uses the same execution environment as the tasks and scripts, so it automatically uses the configurations and plugins defined in the `hardhat.config.js`.
To launch the Hardhat `console`, you can run:
```bash
npx hardhat console --network phron
```
Next, you can take the following steps, entering one line at a time:
1. Create a local instance of the `Box.sol` contract
```bash
const Box = await ethers.getContractFactory('Box');
```
2. Connect the local instance to the deployed contract, using the address of the contract
```bash
const box = await Box.attach('0xfBD78CE8C9E1169851119754C4Ea2f70AB159289');
```
3. Interact with the attached contract. For this example, you can call the `store` method and store a simple value
```bash
await box.store(5);
```
The transaction will be signed by your account configured in the `hardhat.config.js` file and broadcasted to the network. The output should look similar to:
{% code overflow="wrap" %}
```bash
npx hardhat console --network phron
Welcome to Node.js v20.9.0.Type ".help" for more information. const Box = await ethers.getContractFactory('Box');undefined
const box = await Box.attach('0xfBD78CE8C9E1169851119754C4Ea2f70AB159289');undefined
await box.store(5);ContractTransactionResponse {
provider: HardhatEthersProvider { ... },
blockNumber: null,
blockHash: null,
index: undefined,
hash: '0x1c49a64a601fc5dd184f0a368a91130cb49203ec0f533c6fcf20445c68e20264',
type: 2,
to: '0xa84caB60db6541573a091e5C622fB79e175E17be',
from: '0x3B939FeaD1557C741Ff06492FD0127bd287A421e',
nonce: 87,
gasLimit: 45881n,
gasPrice: 1107421875n,
maxPriorityFeePerGas: 1n,
maxFeePerGas: 1107421875n,
data: '0x6057361d0000000000000000000000000000000000000000000000000000000000000005',
value: 0n,
chainId: 5678n,
signature: Signature { r: "0x9233b9cc4ae6879b7e08b9f1a4bfb175c8216eee0099966eca4a305c7f369ecc", s: "0x7663688633006b5a449d02cb08311569fadf2f9696bd7fe65417860a3b5fc57d", yParity: 0, networkV: null },
accessList: [],
blobVersionedHashes: null
} await box.retrieve();5n
```
{% endcode %}
Notice your address labeled `from`, the address of the contract, and the `data` that is being passed. Now, you can retrieve the value by running:
```bash
await box.retrieve();
```
You should see `5`, or the value you initially stored.
#### Using a Script
Similarly to the deployment script, you can create a script to interact with your deployed contract, store it in the `scripts` directory, and run it using the built-in `run` task.
To get started, create a `set-value.js` file in the `scripts` directory:
```bash
mkdir scripts && touch scripts/set-value.js
```
Now paste the following contract into the `set-value.js` file:
```javascript
// scripts/set-value.js
async function main() {
// Create instance of the Box contract
const Box = await ethers.getContractFactory('Box');
// Connect the instance to the deployed contract
const box = await Box.attach('0xfBD78CE8C9E1169851119754C4Ea2f70AB159289');
// Store a new value
await box.store(2);
// Retrieve the value
const value = await box.retrieve();
console.log(`The new value is: ${value}`);
}
main()
.then(() => process.exit(0))
.catch(error => {
console.error(error);
process.exit(1);
});
```
To run the script, you can use the following command:
```bash
npx hardhat run --network phron scripts/set-value.js
```
The script should return `2` as the value.
```bash
npx hardhat run --network phron scripts/set-value.js
The new value is: 2
```
### Hardhat Forking
You can [fork](https://hardhat.org/hardhat-network/docs/guides/forking-other-networks) any EVM-compatible chain using Hardhat, including Phron. Forking simulates the live Phron network locally, enabling you to interact with deployed contracts on Phron in a local test environment. Since Hardhat forking is based on an EVM implementation, you can interact with the fork using standard Ethereum JSON-RPC methods supported by Phron and [Hardhat](https://hardhat.org/hardhat-network/docs/reference#json-rpc-methods-support).
There are some limitations to be aware of when using Hardhat forking. You cannot interact with any of the Phron precompiled contracts or their functions. Precompiles are a part of the Substrate implementation and therefore cannot be replicated in the simulated EVM environment. This prohibits you from interacting with cross-chain assets on Phron and Substrate-based functionality such as staking and governance.
There is currently an issue related to forking Phron, so in order to fix the issue, you'll need to manually patch Hardhat first. You can find out more information by following the [issue on GitHub](https://github.com/NomicFoundation/hardhat/issues/2395#issuecomment-1043838164) as well as the related [PR](https://github.com/NomicFoundation/hardhat/pull/2313).
#### Patching Hardhat
Before getting started, you'll need to apply a temporary patch to workaround an RPC error until Hardhat fixes the root issue. The error is as follows:
{% code overflow="wrap" %}
```bash
Error HH604: Error running JSON-RPC server: Invalid JSON-RPC response's result.
Errors: Invalid value null supplied to : RpcBlockWithTransactions | null/transactions: RpcTransaction Array/0: RpcTransaction/accessList: Array<{ address: DATA, storageKeys: Array | null }> | undefined, Invalid value null supplied to : RpcBlockWithTransactions | null/transactions: RpcTransaction Array/1: RpcTransaction/accessList: Array<{ address: DATA, storageKeys: Array | null }> | undefined, Invalid value null supplied to : RpcBlockWithTransactions | null/transactions: RpcTransaction Array/2: RpcTransaction/accessList: Array<{ address: DATA, storageKeys: Array | null }> | undefined
```
{% endcode %}
To patch Hardhat, you'll need to open the `node_modules/hardhat/internal/hardhat-network/jsonrpc/client.js` file of your project. Next, you'll add an `addAccessList` function and update the `_perform` and `_performBatch` functions.
To get started, you can remove the preexisting `_perform` and `_performBatch` functions and, in their place, add the following code snippet:
```javascript
addAccessList(method, rawResult) {
if (
method.startsWith('eth_getBlock') &&
rawResult &&
rawResult.transactions?.length
) {
rawResult.transactions.forEach((t) => {
if (t.accessList == null) t.accessList = [];
});
}
}
async _perform(method, params, tType, getMaxAffectedBlockNumber) {
const cacheKey = this._getCacheKey(method, params);
const cachedResult = this._getFromCache(cacheKey);
if (cachedResult !== undefined) {
return cachedResult;
}
if (this._forkCachePath !== undefined) {
const diskCachedResult = await this._getFromDiskCache(
this._forkCachePath,
cacheKey,
tType
);
if (diskCachedResult !== undefined) {
this._storeInCache(cacheKey, diskCachedResult);
return diskCachedResult;
}
}
const rawResult = await this._send(method, params);
this.addAccessList(method, rawResult);
const decodedResult = (0, decodeJsonRpcResponse_1.decodeJsonRpcResponse)(
rawResult,
tType
);
const blockNumber = getMaxAffectedBlockNumber(decodedResult);
if (this._canBeCached(blockNumber)) {
this._storeInCache(cacheKey, decodedResult);
if (this._forkCachePath !== undefined) {
await this._storeInDiskCache(this._forkCachePath, cacheKey, rawResult);
}
}
return decodedResult;
}
async _performBatch(batch, getMaxAffectedBlockNumber) {
// Perform Batch caches the entire batch at once.
// It could implement something more clever, like caching per request
// but it's only used in one place, and those other requests aren't
// used anywhere else.
const cacheKey = this._getBatchCacheKey(batch);
const cachedResult = this._getFromCache(cacheKey);
if (cachedResult !== undefined) {
return cachedResult;
}
if (this._forkCachePath !== undefined) {
const diskCachedResult = await this._getBatchFromDiskCache(
this._forkCachePath,
cacheKey,
batch.map((b) => b.tType)
);
if (diskCachedResult !== undefined) {
this._storeInCache(cacheKey, diskCachedResult);
return diskCachedResult;
}
}
const rawResults = await this._sendBatch(batch);
const decodedResults = rawResults.map((result, i) => {
this.addAccessList(batch[i].method, result);
return (0, decodeJsonRpcResponse_1.decodeJsonRpcResponse)(
result,
batch[i].tType
);
});
const blockNumber = getMaxAffectedBlockNumber(decodedResults);
if (this._canBeCached(blockNumber)) {
this._storeInCache(cacheKey, decodedResults);
if (this._forkCachePath !== undefined) {
await this._storeInDiskCache(this._forkCachePath, cacheKey, rawResults);
}
}
return decodedResults;
}
```
Then you can use [patch-package](https://www.npmjs.com/package/patch-package) to automatically patch the package by running the following command:
```bash
npx patch-package hardhat
```
A `patches` directory will be created, and now you should be all set to fork Phron without running into any errors.
#### Forking Phron
You can fork Phron from the command line or configure your Hardhat project to always run the fork from your `hardhat.config.js` file. To fork Phron, you will need to have your own endpoint and API key, which you can get from one of the supported Endpoint Providers.
To fork Phron from the command line, you can run the following command from within your Hardhat project directory:
```bash
npx hardhat node --fork INSERT_RPC_API_ENDPOINT
```
If you prefer to configure your Hardhat project, you can update your `hardhat.config.js` file with the following configurations:
```javascript
...
networks: {
hardhat: {
forking: {
url: 'INSERT_RPC_API_ENDPOINT',
},
},
},
...
```
When you spin up the Hardhat fork, you'll have 20 development accounts that are pre-funded with 10,000 test tokens. The forked instance is available at `http://127.0.0.1:8545/`. The output in your terminal should resemble the following:
{% code overflow="wrap" %}
```bash
Private Key: Oxdbda1821b80551c9d65939329250298aa3472ba22feea921c0cf5d620ea67b97Account #9: Oxa0Ee7A142d267C1f36714E4a8F75612F20a79720 (10000 ETH)Private Key: 0x2a871d0798f97d79848a013d4936a73bf4cc922c825d33c1cf7073dff6d409c6Account #10: OxBcd4042DE499D14e55001CcbB24a551F3b954096 (10000 ETH)Private Key: Oxf214f2b2cd398c806f84e317254e0f0b801d0643303237d97a22a48e01628897Account #11: 0x71bE63f3384f5fb98995898A86B02Fb2426c5788 (10000 ETH)Private Key: 0x701b615bbdfb9de65240bc28bd21bbc0d996645a3dd57e7b12bc2bdf6f192c82Account #12: OxFABBOac9d68B0B445fB7357272F202C5651694a (10000 ETH)Private Key: Oxa267530f49f8280200edf313ee7af6b827f2a8bce2897751d06a843f644967b1Account #13: 0x1CBd3b2770909D4e10f157cABC84C7264073C9Ec (10000 ETH)Private Key: 0x47c99abed3324a2707c28affff1267e45918ec8c3f20b8aa892e8b065d2942ddAccount #14: OxdF3e18d64BC6A983f673Ab319CCaE4f1a5707097 (10000 ETH)Private Key: Oxc526ee95bf44d8fc405a158bb884d9d1238d990612e9f33d006bb0789009aaaAccount #15: Oxcd3B766CCDd6AE721141F452C550Ca635964ce71 (10000 ETH)Private Key: 0x8166f546bab6da521a8369cab06c5d2b9e46670292d85c875ee9ec20e84ffb61Account #16: 0×2546BcD3c84621e976D8185a91A922aE77ECEc30 (10000 ETH)Private Key: Oxea6c44ac03bff858b476bba40716402b03e41b8e97e276d1baec7c37d42484a0Account #17: OxbDA5747bFD65F08deb54cb465eB87D40e51B197E (10000 ETH)Private Key: 0x689af8efa8c651a91ad287602527f3af2fe9f6501a7ac4b06166765a93e037fdAccount #18: OxdD2FD4581271e230360230F9337D5c0430Bf44C0 (10000 ETH)Private Key: Oxde9be858da4a475276426320d5e9262ecfc3ba460bfac56360bfa6c4c28b4ee0Account #19: 0×8626f6940E2eb28930eFb4CeF49B2d1F2C9C1199 (10000 ETH)Private Key: Oxdf57089febbacf7ba0bc227dafbffa9fc08a93fdc68e1e42411a14efcf23656eWARNING: These accounts, and their private keys, are publicly known.
Any funds sent to them on Mainnet or any other live network WILL BE LOST.
```
{% endcode %}
To verify you have forked the network, you can query the latest block number:
{% code overflow="wrap" %}
```bash
curl --data '{"method":"eth_blockNumber","params":[],"id":1,"jsonrpc":"2.0"}' -H "Content-Type: application/json" -X POST localhost:8545
```
{% endcode %}
If you convert the `result` from [hex to decimal](https://www.rapidtables.com/convert/number/hex-to-decimal.html), you should get the latest block number from the time you forked the network. You can cross-reference the block number using a block explorer.
From here, you can deploy new contracts to your forked instance of Phron or interact with contracts already deployed by creating a local instance of the deployed contract.
To interact with an already deployed contract, you can create a new script in the `scripts` directory using `ethers`. Because you'll be running it with Hardhat, you don't need to import any libraries. Inside the script, you can access a live contract on the network using the following snippet:
```javascript
const hre = require('hardhat');
async function main() {
const provider = new ethers.JsonRpcProvider(
'http://127.0.0.1:8545/'
);
const contract = new ethers.Contract(
'INSERT_CONTRACT_ADDRESS',
'INSERT_CONTRACT_ABI',
provider
);
}
main().catch((error) => {
console.error(error);
process.exitCode = 1;
});
```
This tutorial is for educational purposes only. As such, any contracts or code created in this tutorial should not be used in production.The information presented herein has been provided by third parties and is made available solely for general information purposes. Phron does not endorse any project listed and described on the Phron Doc Website (). Phron does not warrant the accuracy, completeness or usefulness of this information. Any reliance you place on such information is strictly at your own risk. Phron disclaims all liability and responsibility arising from any reliance placed on this information by you or by anyone who may be informed of any of its contents. All statements and/or opinions expressed in these materials are solely the responsibility of the person or entity providing those materials and do not necessarily represent the opinion of Phron. The information should not be construed as professional or financial advice of any kind. Advice from a suitably qualified professional should always be sought in relation to any particular matter or circumstance. The information herein may link to or integrate with other websites operated or content provided by third parties, and such other websites may link to this website. Phron has no control over any such other websites or their content and will have no liability arising out of or related to such websites or their content. The existence of any such link does not constitute an endorsement of such websites, the content of the websites, or the operators of the websites. These links are being provided to you only as a convenience and you release and hold Phron harmless from any and all liability arising from your use of this information or the information provided by any third-party website or service.
# Remix
## Using Remix to Deploy to Phron
### Introduction
[Remix](https://remix.ethereum.org/) is an integrated development environment (IDE) for developing smart contracts on Ethereum and Ethereum-compatible chains. It provides an easy-to-use interface for writing, compiling, and deploying smart contracts. Given Phron’s Ethereum compatibility features, you can use Remix directly with any Phron network.
This guide walks through the process of creating and deploying a Solidity smart contract to a Phron development node using the Remix IDE.
If you're familiar with Remix, you can skip ahead to the Connect Remix to Phron section to learn how to use Remix with Phron.
### Checking Prerequisites
For the purposes of this guide, you'll need to have the following:
* A locally running Phron development node
* MetaMask installed and connected to your development node
If you followed the guides above, you should have a local Phron node, which will begin to author blocks as transactions arrive.
Your development node comes with 10 pre-funded accounts. You should have MetaMask connected to your Phron development node and have imported at least one of the pre-funded accounts. You can refer to the Import Accounts section of the MetaMask docs for step-by-step instructions on how to import a development account.
If you're adapting this guide for Phron, make sure you are connected to the correct network and have an account with funds. You can get DEV tokens for testing on Phron once every 24 hours from the [Phron Faucet](https://faucet.phron.ai/).
### Get Familiar with Remix
If you navigate to , you'll see that the layout of Remix is split into four sections:
1. The plugin panel
2. The side panel
3. The main panel
4. The terminal
The plugin panel displays icons for each of the preloaded plugins, the plugin manager, and the settings menu. You'll see a few icons there for each of the preloaded plugins, which are the **File explorer**, **Search in files**, **Solidity compiler**, and **Deploy and run transactions** plugins. As additional plugins are activated, their icons will appear in this panel.
The side panel displays the content of the plugin that is currently being viewed. By default, you'll see the File explorer plugin, which displays the default workspace and some preloaded files and folders. However, if you select one of the other icons from the plugin panel, you'll see the content for the selected plugin.
The main panel is automatically loaded with the **Home** tab, which contains links to a variety of resources. You can close this tab at any time and reopen it by clicking on the blue Remix icon in the top left corner of the plugin panel. The main panel is where you'll be able to see each of the files you're working with. For example, you can double-click on any file in the **File explorer** side panel and it will appear as a tab in the main panel.
The terminal panel is similar to a standard terminal that you have on your OS; you can execute scripts from it, and logs are printed to it. All transactions and contract interactions are automatically logged to the terminal. You can also interact with the [Ethers](https://docs.ethers.org/v6) and [Web3](https://web3js.org/#) JavaScript libraries directly from the terminal.
### Add a Smart Contract to the File Explorer
For this example, you will create a new file that contains an ERC-20 token contract. This will be a simple ERC-20 contract based on the current [OpenZeppelin ERC-20 template](https://docs.openzeppelin.com/contracts/4.x/erc20). The contract will create a `MyToken` token with the `MYTOK` symbol that mints the entirety of the initial supply to the creator of the contract.
From the **File explorer** tab on the plugin panel, you can create a new file by taking the following steps:
1. Click on the file icon
2. Enter the name of the contract: `MyToken.sol`
The main panel will switch to an empty file where you can add the Solidity code for the contract. Paste the `MyToken.sol` smart contract into the new file:
```solidity
// SPDX-License-Identifier: MIT
pragma solidity ^0.8.0;
import "@openzeppelin/contracts/token/ERC20/ERC20.sol";
contract MyToken is ERC20 {
constructor(uint256 initialSupply) ERC20("MyToken", "MYTOK") {
_mint(msg.sender, initialSupply);
}
}
```
### Compile a Solidity Smart Contract
Before you compile a contract, make sure you've selected the file of the contract from the **File explorer** tab. Then, select the **Solidity Compiler** option from the plugin panel.
Make sure that the compiler version in the top-left corner meets the version defined in your contract and the version defined in [OpenZeppelin's `ERC20.sol` contract](https://github.com/OpenZeppelin/openzeppelin-contracts/blob/master/contracts/token/ERC20/ERC20.sol). For example, the `MyToken.sol` contract requires Solidity ^0.8.0, but at the time of writing, OpenZeppelin's `ERC20.sol` contract requires ^0.8.20, so the compiler needs to be set to version 0.8.20 or newer.
The Solidity compiler plugin also lets you change some settings and apply advanced configurations for the compiler. If you're planning on iterating over the smart contract, you can check the **Auto compile** box, and whenever you make a change, the contract will automatically be recompiled.
Additionally, from the **Advanced Configurations** menu, you can change the EVM version, enable optimizations, and set the number of times the bytecode is expected to be run throughout the contract's lifetime; the default is set to 200 times. For more information on contract optimization, please refer to the [Solidity docs on The Optimizer](https://docs.soliditylang.org/en/latest/using-the-compiler.html#optimizer-options).
For this example, no additional configurations are needed. To compile the `MyToken.sol` contract, simply click on the **Compile MyToken.sol** contract. If the compilation was successful, you'll see a green check mark appear on the plugin panel next to the **Solidity compiler** plugin.
#### Debug Compilation Errors
If you tried to compile your smart contract but there was an error or warning, you can easily debug the issue with the help of ChatGPT directly from the Solidity compiler plugin in Remix.
For example, if you only provided the token name to the ERC-20 constructor but forgot the token symbol and tried to compile the contract, an error would appear in the side panel. You can scroll down to read the error, and you'll see that there is also an **ASK GPT** button. To get help debugging the issue, you can click on **ASK GPT**, and a response will be returned in the Remix terminal that will guide you in the right direction to try and fix the issue. If you need additional help, you can go straight to the source and ask [ChatGPT](https://chat.openai.com/) directly.
Once you successfully fix the issue and recompile the contract, you'll see a green check mark appear on the plugin panel next to the **Solidity compiler** plugin.
### Deploy a Solidity Smart Contract
The **Deploy and run transactions** plugin enables you to configure contract deployment options, deploy contracts, and interact with deployed contracts.
The side panel consists of the following deployment options:
* Environment - allows you to choose the execution environment for deployment
* Account - the account from which the deployment transaction will be sent
* Gas Limit - the maximum amount of gas that the deployment transaction can consume
* Value - the amount of the native asset to send along with the deployment transaction
* Contract - the contract to deploy
* Deploy - sends the deployment transaction to the specified environment using the selected account, gas limit, value, and the values for any constructor arguments
* At Address - allows you to interact with an existing contract by specifying its address
The following section will cover how to configure the environment for deployment to be Phron.
#### Connect Remix to Phron
To deploy the smart contract to Phron, you'll need to make sure that you've connected your wallet to your Phron development node or the Phron network of your choice. Then, from the **Deploy and run transactions** tab, you can connect Remix to your wallet by selecting your wallet from the **ENVIRONMENT** dropdown. For example, if you have Trust Wallet installed, you'll see **Injected Provider - TrustWallet** from the dropdown. Aside from injected providers, you can also connect to Phron via WalletConnect.
For this example, MetaMask will be used. You should already have MetaMask installed and connected to your local Phron development node. If not, please refer to the Interacting with Phron Using MetaMask guide for step-by-step instructions.
From the **ENVIRONMENT** dropdown, select **Injected Provider - MetaMask**.
MetaMask will pop up automatically and prompt you to connect to Remix. You'll need to:
1. Select the account you want to connect to Remix
2. Click **Next**
3. Click **Connect** to connect your account to Remix
Once you've connected MetaMask to Remix, the side panel will update to reveal the network and account you're connected to. For a Phron development node, you should see **Custom (1281) network**.
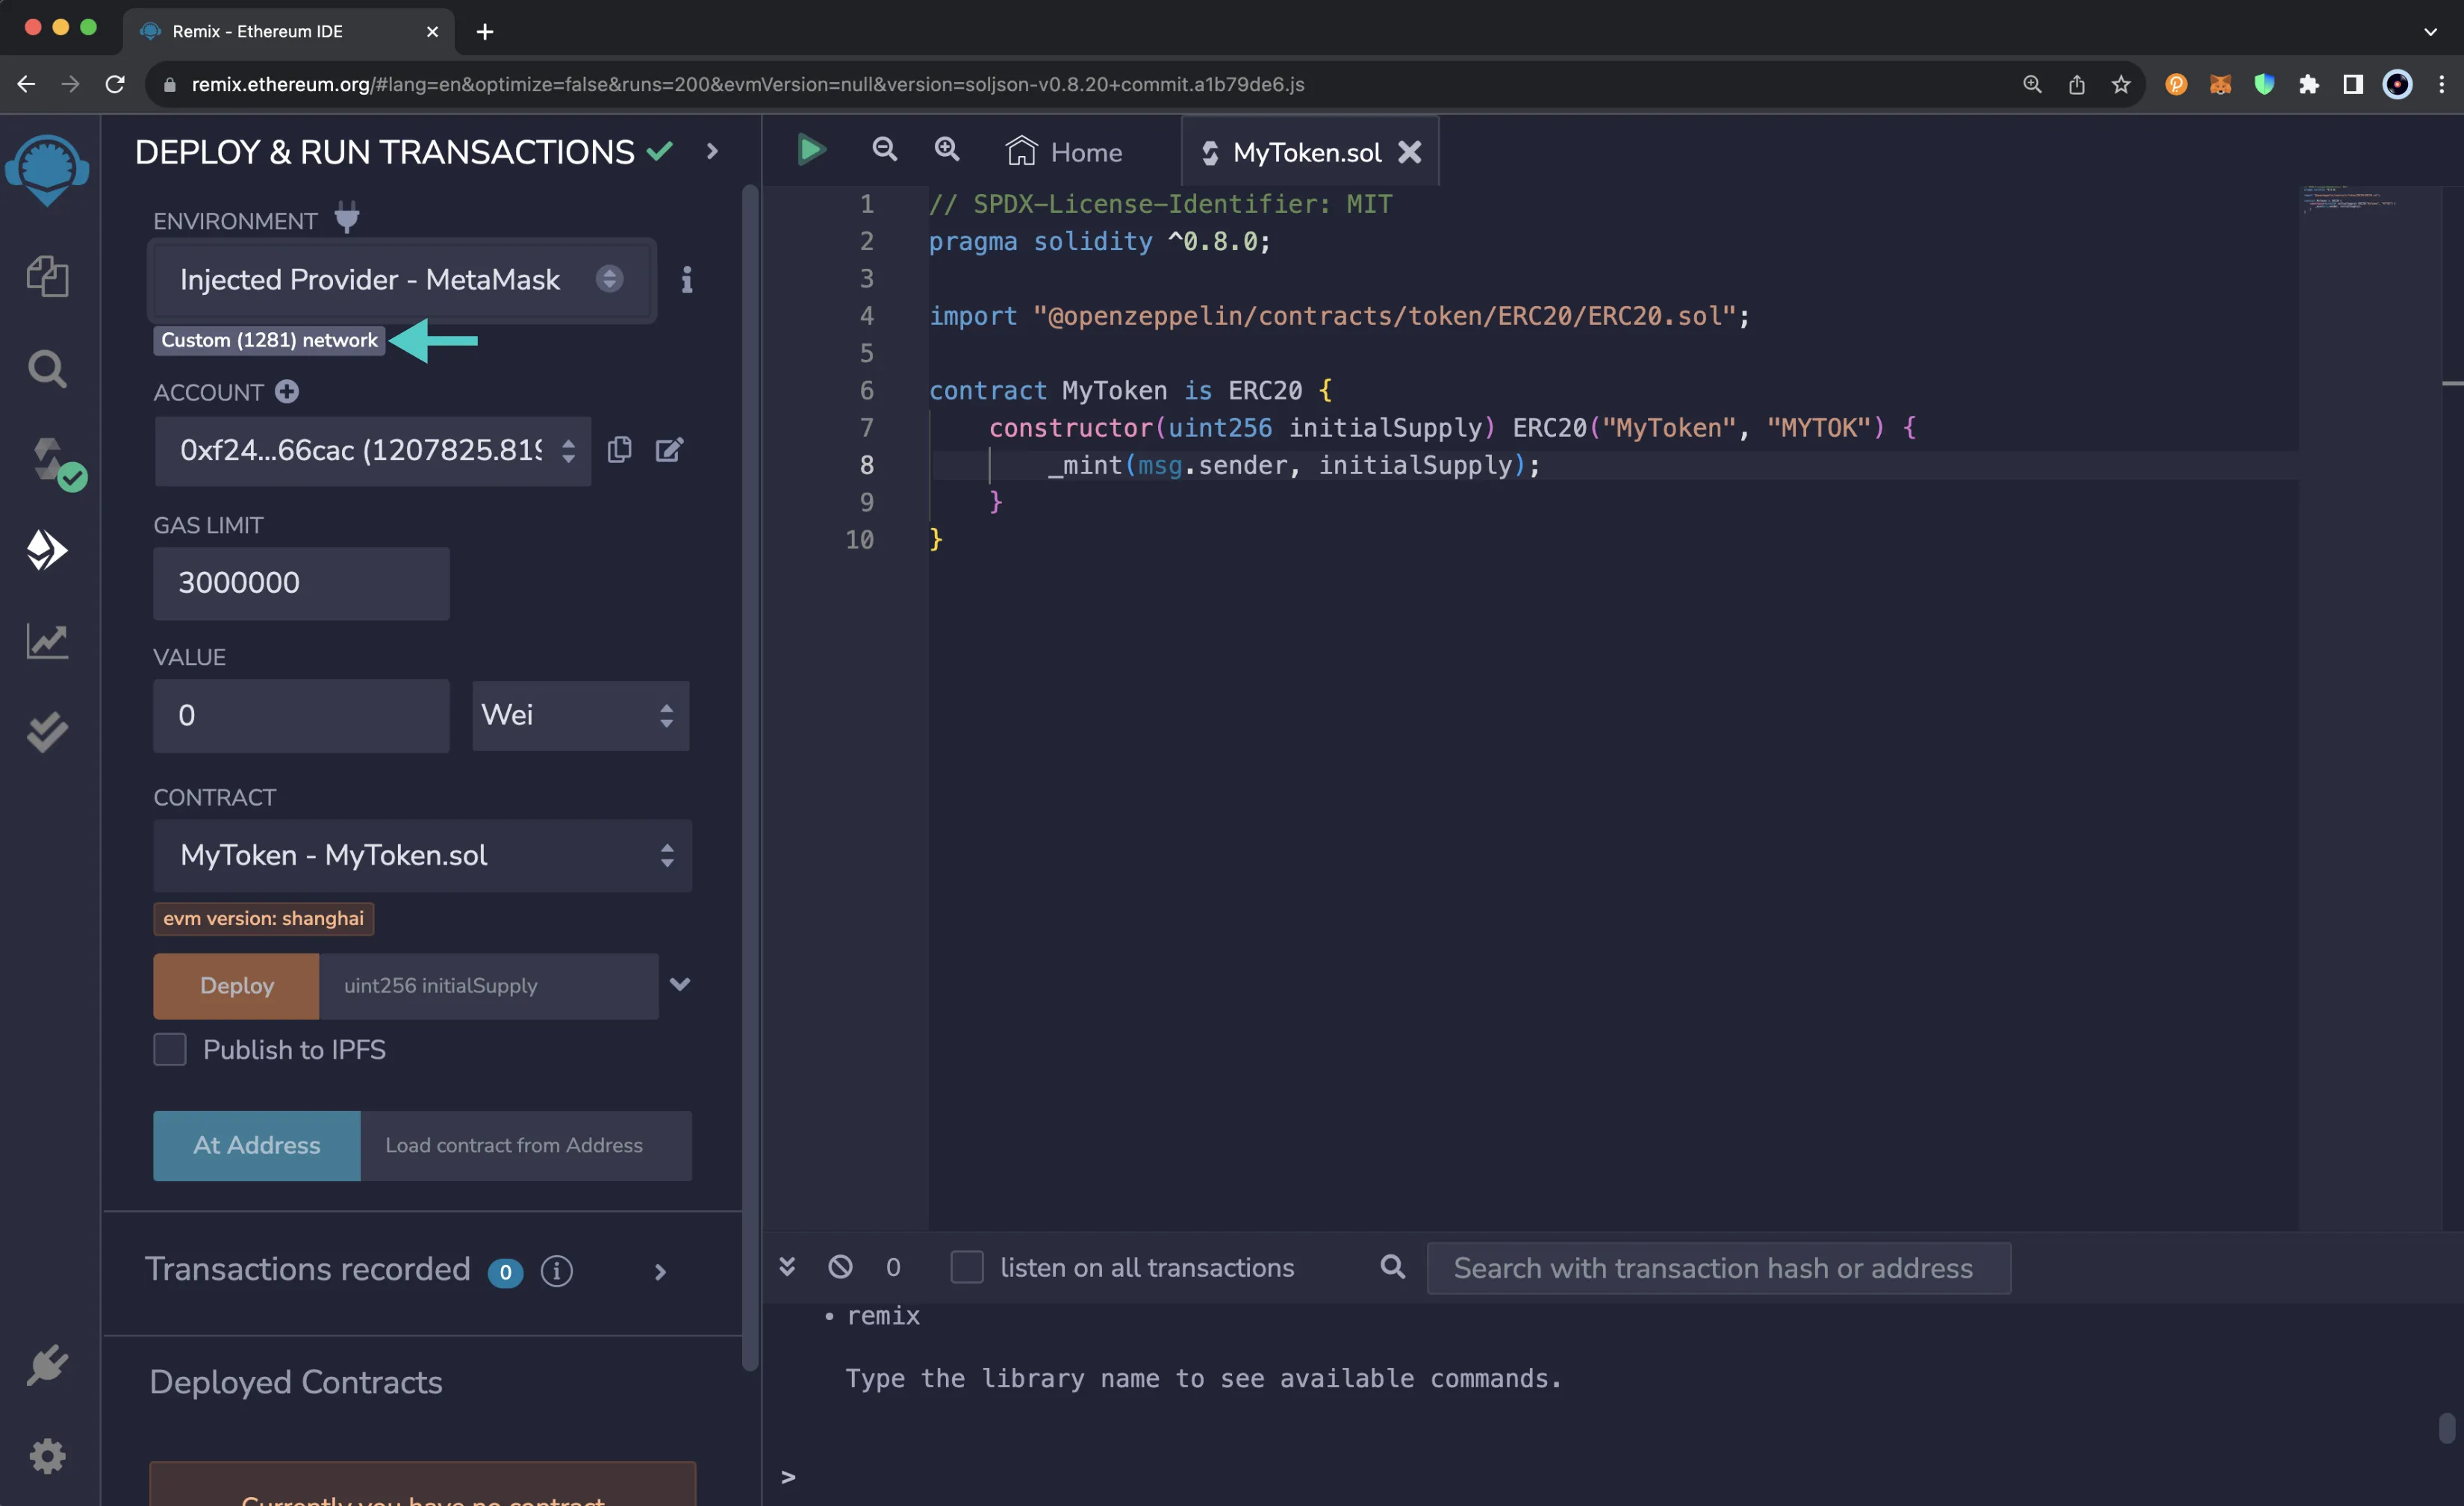
#### Deploy the Contract to Phron
Now that you've connected your wallet, you're ready to deploy the contract. Since you're deploying a simple ERC-20 token smart contract, the default gas limit set by Remix of 3 million is more than enough, and you don't need to specify a value to send along with the deployment. As such, you can take the following steps to deploy the contract:
1. Make sure the **ENVIRONMENT** is set to **Injected Provider - MetaMask**
2. Make sure the connected account is the one you want to deploy the transaction from
3. Use the default **GAS LIMIT** of `3000000`
4. Leave the **VALUE** as `0`
5. Make sure `MyToken.sol` is the selected contract
6. Expand the **DEPLOY** dropdown
7. Specify the initial supply. For this example, you can set it to 8 million tokens. Since this contract uses the default of 18 decimals, the value to put in the box is `8000000000000000000000000`
8. Click **transact** to send the deployment transaction
9. MetaMask will pop up, and you can click **Confirm** to deploy the contract
Once the transaction has been deployed, you'll see details about the deployment transaction in the Remix terminal. Additionally, the contract will appear under the **Deployed Contracts** section of the side panel.
### Interact with Deployed Smart Contracts
Once you've deployed a smart contract or accessed an existing contract via the **At Address** button, the contract will appear under the **Deployed Contracts** section of the side panel. You can expand the contract to view all of the contract's functions you can interact with.
To interact with a given function, you can click on the function name, which will be contained in an orange, red, or blue button. Orange buttons are for functions that write to the blockchain and are non-payable; red buttons are for functions that write to the blockchain and are payable; and blue buttons are for functions that read data from the blockchain.
Depending on the function you're interacting with, you may need to input parameter values. If the function requires inputs, you'll be able to enter them by expanding the function and entering a value for each of the parameters.
If the function you're interacting with is payable, you'll be able to enter an amount in the **VALUE** field towards the top of the side panel, in the same value field used for contracts that have payable constructors.
#### Call the Smart Contract Functions
If you expand the **MYTOKEN** contract dropdown, you'll be able to see all of the available functions you can interact with. To interact with a given function, you can provide any inputs, if needed, and then click on the button containing the function name you want to interact with.
For example, if you wanted to call the `tokenSupply` function, you wouldn't need to sign a transaction, as you'd get a response right away.
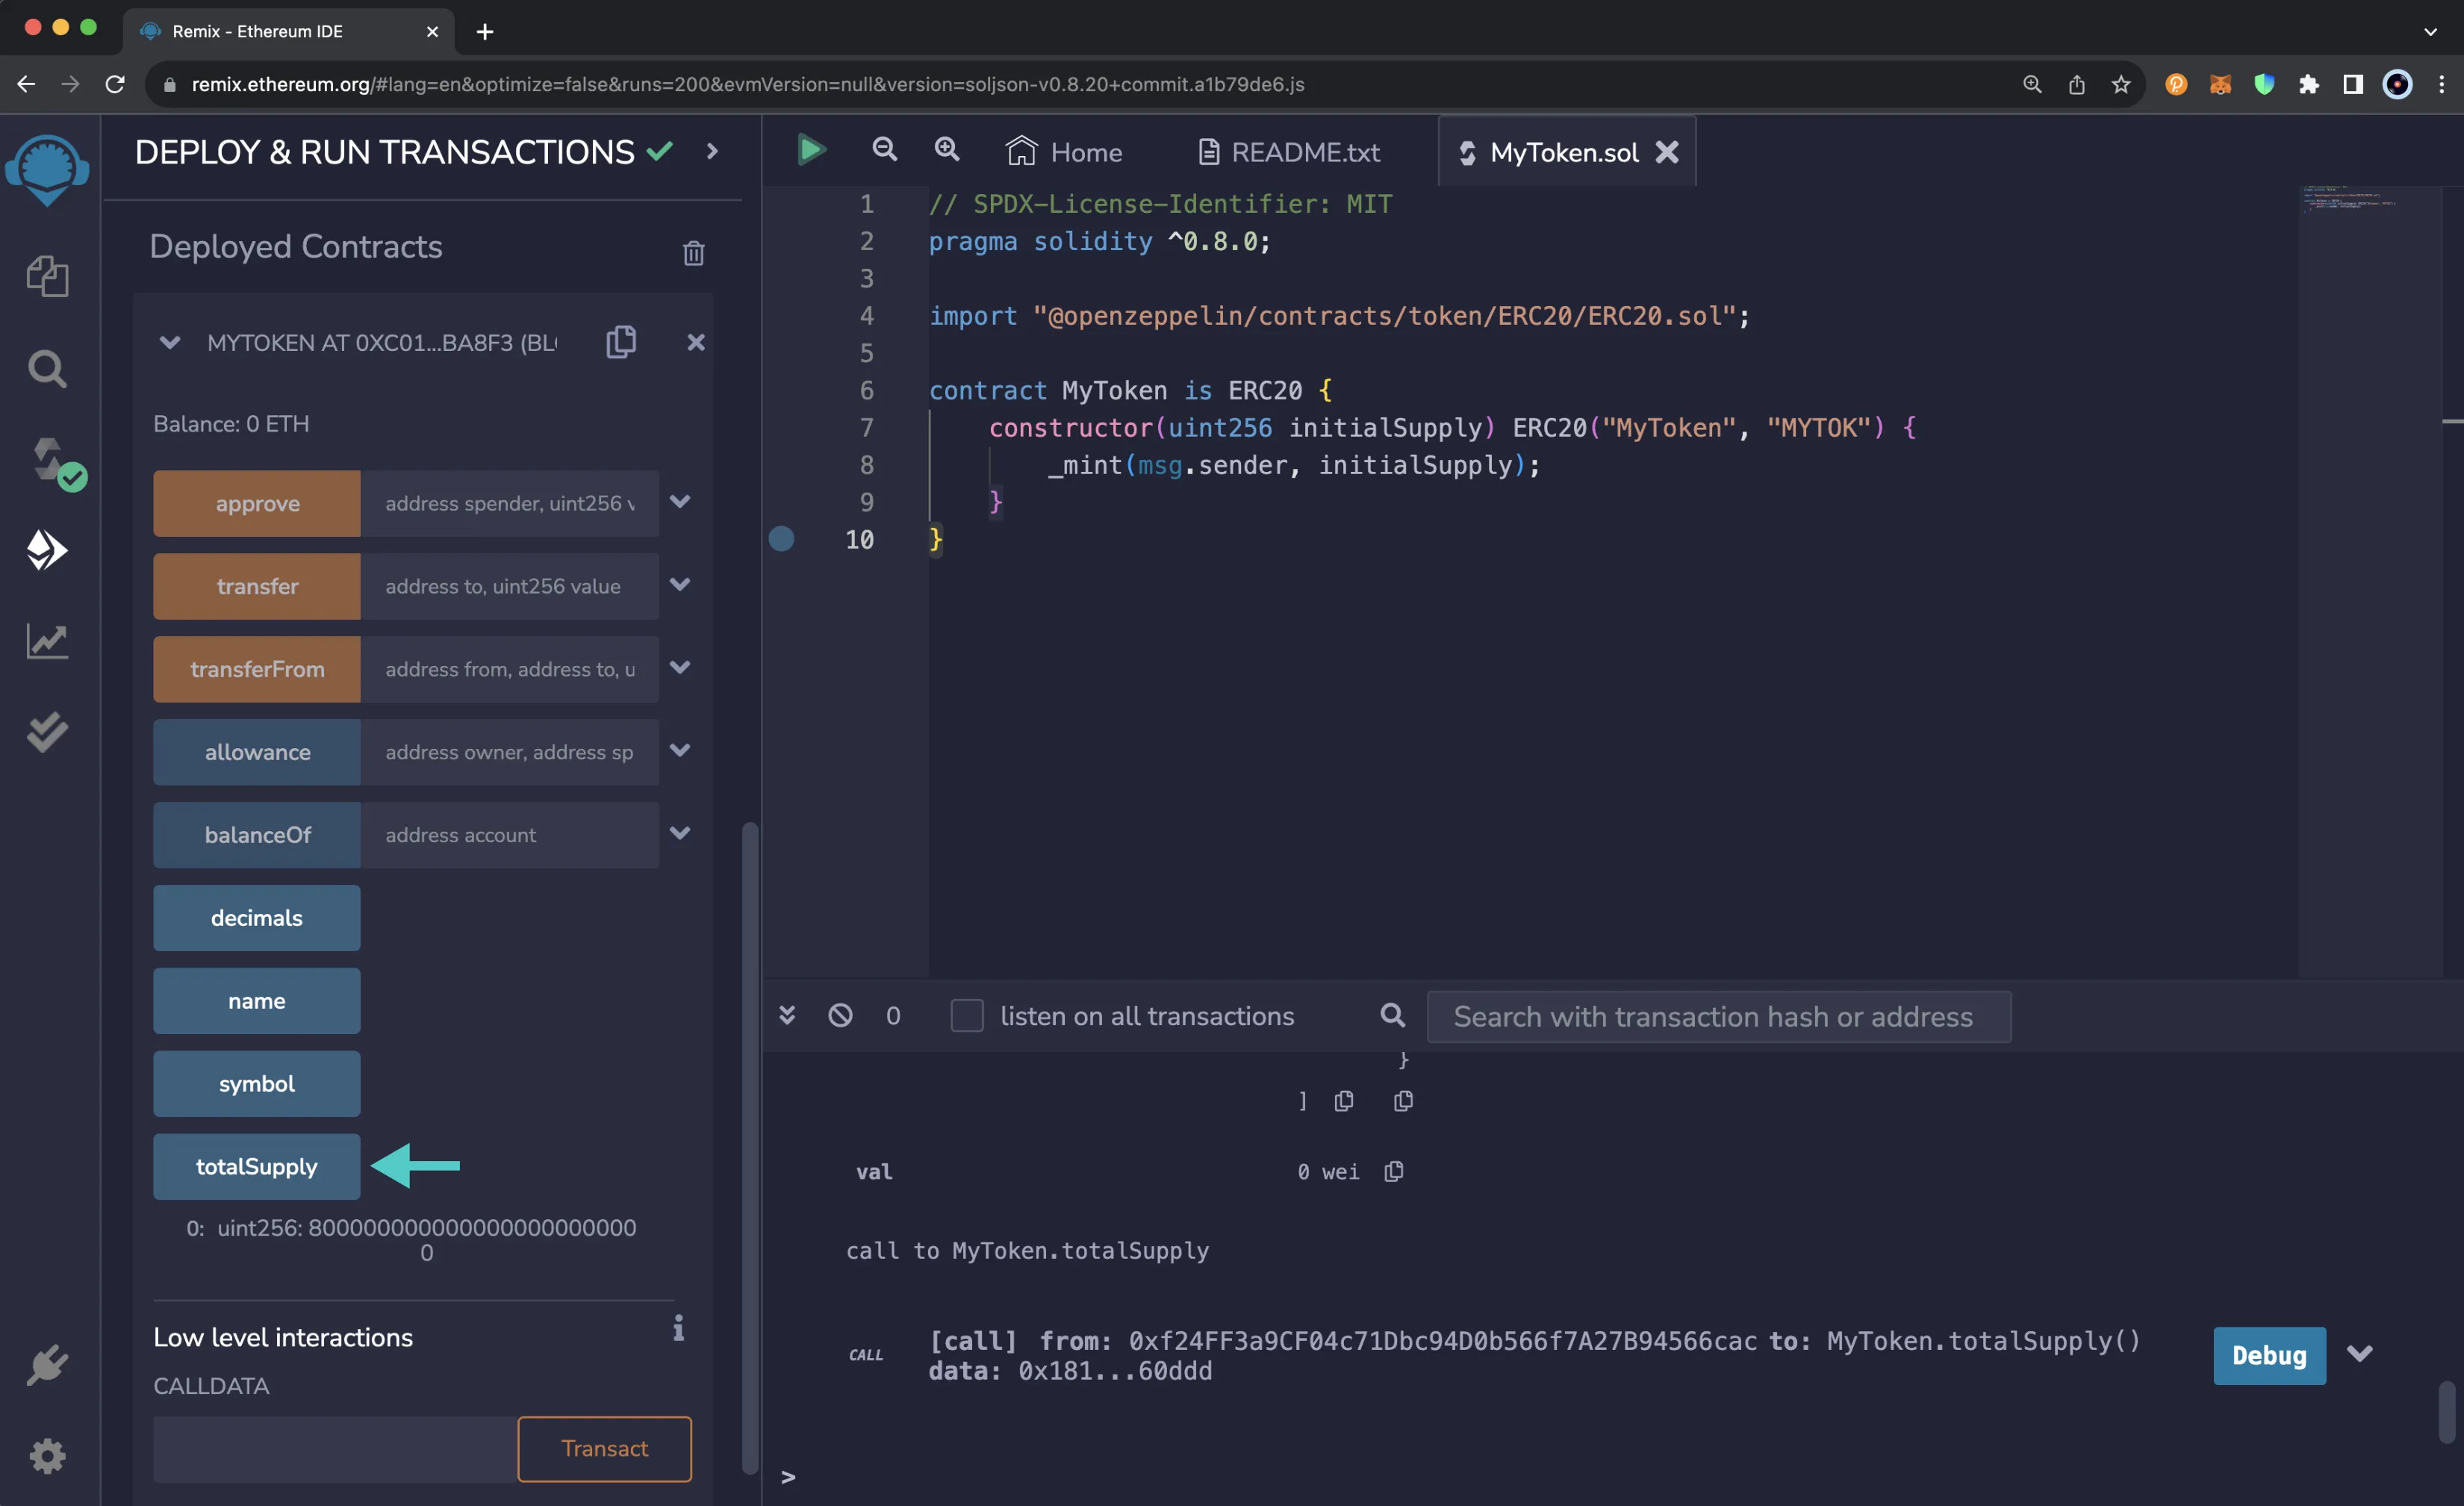
On the other hand, if you call the `approve` function, which will approve an account as a spender of a given amount of MYTOK tokens, you'll need to submit the approval in MetaMask. To test this out, you can take the following steps:
1. Set the **spender** to an account that you want to be able to spend tokens on your behalf. For this example, you can use Bob's account (one of the pre-funded development accounts): `0x3Cd0A705a2DC65e5b1E1205896BaA2be8A07c6e0`
2. Enter the amount the spender can spend. For this example, you can approve Bob to spend 10 MYTOK by entering in `10000000000000000000`
3. Press **transact**
4. MetaMask will pop up and you'll need to review the details of the approval and submit the approval
To view your balance or approvals, or transfer MYTOKs, you can add the MYTOK to your wallet. For information on how to add a token to MetaMask, you can refer to the Add an ERC-20 Token section of our MetaMask documentation.
This tutorial is for educational purposes only. As such, any contracts or code created in this tutorial should not be used in production.The information presented herein has been provided by third parties and is made available solely for general information purposes. Phron does not endorse any project listed and described on the Phron Doc Website (). Phron does not warrant the accuracy, completeness or usefulness of this information. Any reliance you place on such information is strictly at your own risk. Phron disclaims all liability and responsibility arising from any reliance placed on this information by you or by anyone who may be informed of any of its contents. All statements and/or opinions expressed in these materials are solely the responsibility of the person or entity providing those materials and do not necessarily represent the opinion of Phron. The information should not be construed as professional or financial advice of any kind. Advice from a suitably qualified professional should always be sought in relation to any particular matter or circumstance. The information herein may link to or integrate with other websites operated or content provided by third parties, and such other websites may link to this website. Phron has no control over any such other websites or their content and will have no liability arising out of or related to such websites or their content. The existence of any such link does not constitute an endorsement of such websites, the content of the websites, or the operators of the websites. These links are being provided to you only as a convenience and you release and hold Phron harmless from any and all liability arising from your use of this information or the information provided by any third-party website or service.
# Scaffold-PHR
## Using Scaffold-ETH 2 to Deploy a DApp on Phron
### Introduction
[Scaffold-ETH 2](https://github.com/scaffold-eth/scaffold-eth-2) is a collection of commonly used Ethereum development tools to quickly deploy a Solidity smart contract and launch a DApp with a React frontend.
Scaffold-ETH 2 consists of several sub-components, including [Hardhat](https://hardhat.org/docs) for creating, deploying, and testing smart contracts and [Next.js](https://nextjs.org/docs) for building a React frontend. These components can be used on Phron networks with some slight modifications.
This guide will walk through the steps to deploy and run the default example contract and DApp that Scaffold-ETH 2 comes with on a Phron network.
### Checking Prerequisites
To get started, you will need the following:
* An account with funds. You can get DEV tokens for testing on Phron once every 24 hours from the [Phron Faucet](https://faucet.phron.ai/)
* A Phronscan API key
* To test out the examples in this guide on Phron, you will need to have your own endpoint and API key, which you can get from one of the supported Endpoint Providers
#### Installing Scaffold-ETH 2
First, download [Scaffold-ETH 2 from GitHub](https://github.com/scaffold-eth/scaffold-eth-2).
From the command line, enter:
```bash
git clone https://github.com/scaffold-eth/scaffold-eth-2.git
```
After the download completes, run:
```bash
yarn install
```
### The Development Process with Scaffold-ETH 2
The process for developing a project with Scaffold-ETH 2 can be outlined as follows:
1. Update the network configurations in Hardhat for Phron
2. Add your smart contracts to the `packages/hardhat/contracts`
3. Edit your deployment scripts in the `packages/hardhat/deploy`
4. Deploy your smart contracts to Phron
5. Verify your smart contracts with the Etherscan plugin and your Phronscan API key
6. Configure your frontend to target Phron in the `packages/nextjs/scaffold.config.ts` file
7. Edit your frontend as needed in the `packages/nextjs/pages` directory
In this guide, you can use the default contract and frontend that you get out of the box when you clone the Scaffold-ETH 2 repository. All you'll have to do is modify these components for Phron.
### The Hardhat Component
In the following sections, you'll update the network configurations in the Hardhat configuration file to target the Phron-based network you want to interact with, and deploy and verify the example contract to that network.
#### Configure Hardhat for Phron
You can begin by making modifications to the Hardhat component under the `packages/hardhat` folder. You'll primarily be editing the `hardhat.config.js` file to configure it for Phron. However, you'll also need to create a `.env` file to store a couple of variables that will be consumed by the `hardhat.config.js` file.
You can refer to the `.env.example` file for the variables that are already used in the `hardhat.config.js` file. For Phron, you'll only need to create two variables: `DEPLOYED_PRIVATE_KEY` and `ETHERSCAN_API_KEY`.
Check out the Etherscan Plugins documentation to learn how to generate a Phronscan API key.
To get started, create a `.env` file:
```bash
touch packages/hardhat/.env
```
Edit your `.env` file to include the following variables:
```bash
DEPLOYER_PRIVATE_KEY=INSERT_PRIVATE_KEY
ETHERSCAN_API_KEY=INSERT_PHRONSCAN_API_KEY
```
The private key you add to your `.env` file corresponds to the account that will deploy and interact with the smart contracts in your Hardhat project. Additionally, the Etherscan API key will correspond to your Phronscan API key and will be used to verify your deployed smart contracts. To learn how to generate a Phronscan API key, check out the Etherscan Plugins documentation.
With the environment variables taken care of, next you can modify the `hardhat.config.js` file for Phronscan:
1. Set the constant `defaultNetwork` to the network you are deploying the smart contract to
```
defaultNetwork = 'phron';
```
2. Add the network configurations for the Phron network you want to interact with under the `networks` configuration object
```javascript
phron: {
url: "INSERT_RPC_API_ENDPOINT",
accounts: [deployerPrivateKey],
},
```
For more information on using Hardhat with Phron, please check the dedicated Hardhat page for more details.
#### Deploy Your Contract to Phron
After all the modifications to the configuration files are done, you can deploy your contract to the configured Phron-based network.
First, you can compile your contract by running:
```bash
yarn compile
```
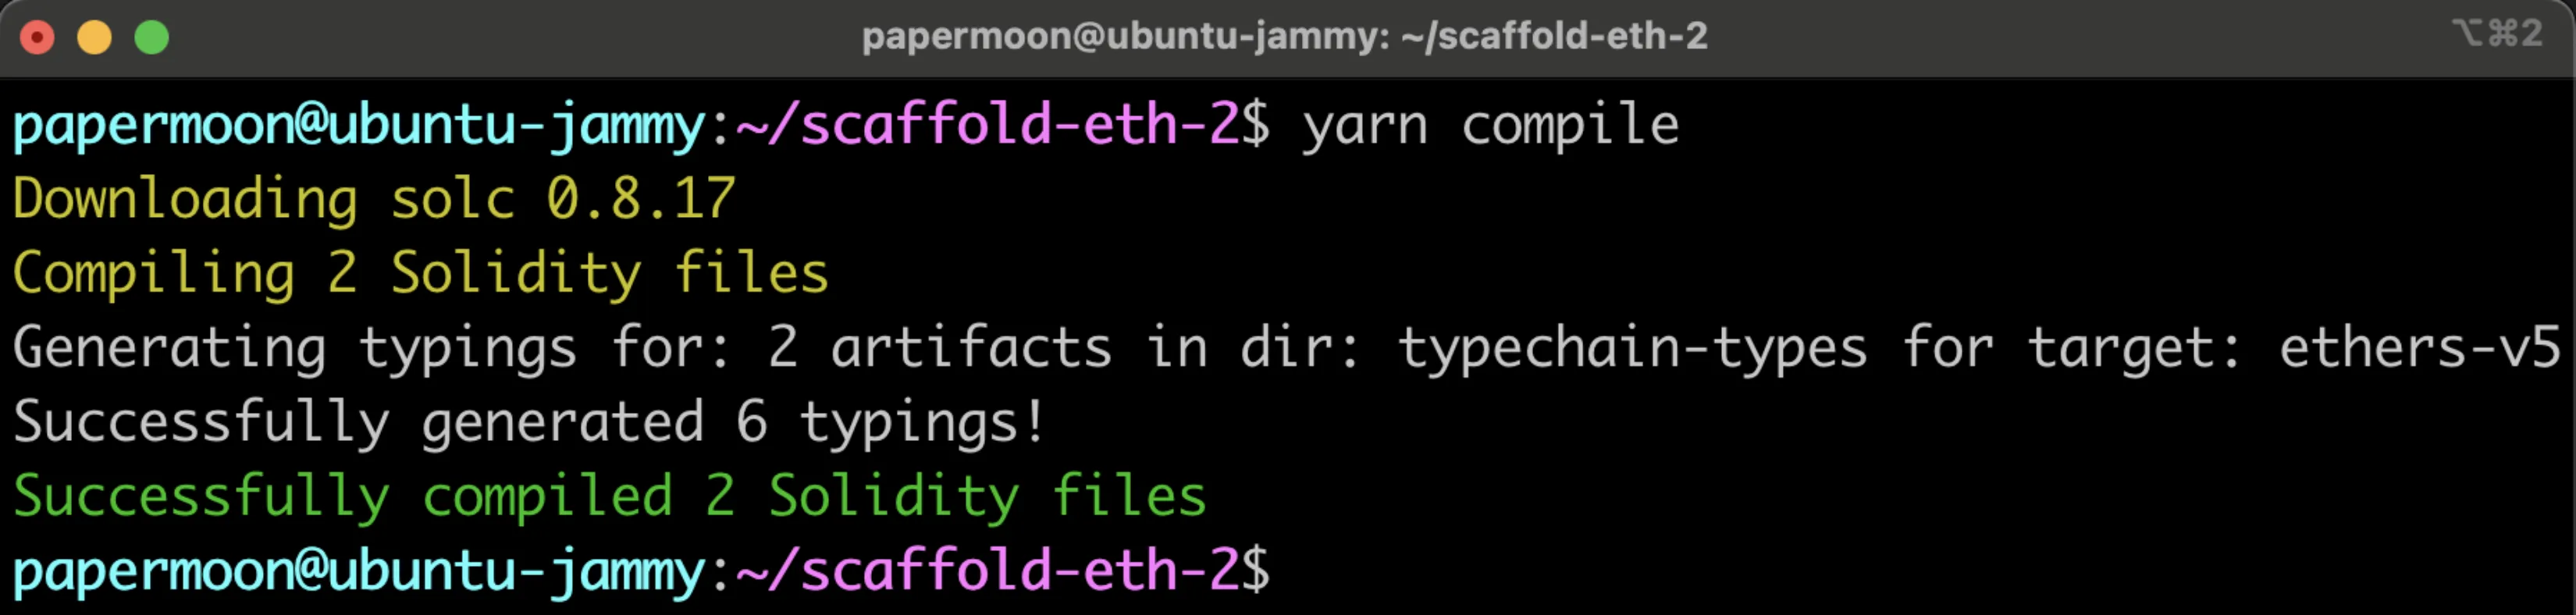
Then, you can run the following command from the root directory of your project:
```bash
yarn deploy
```
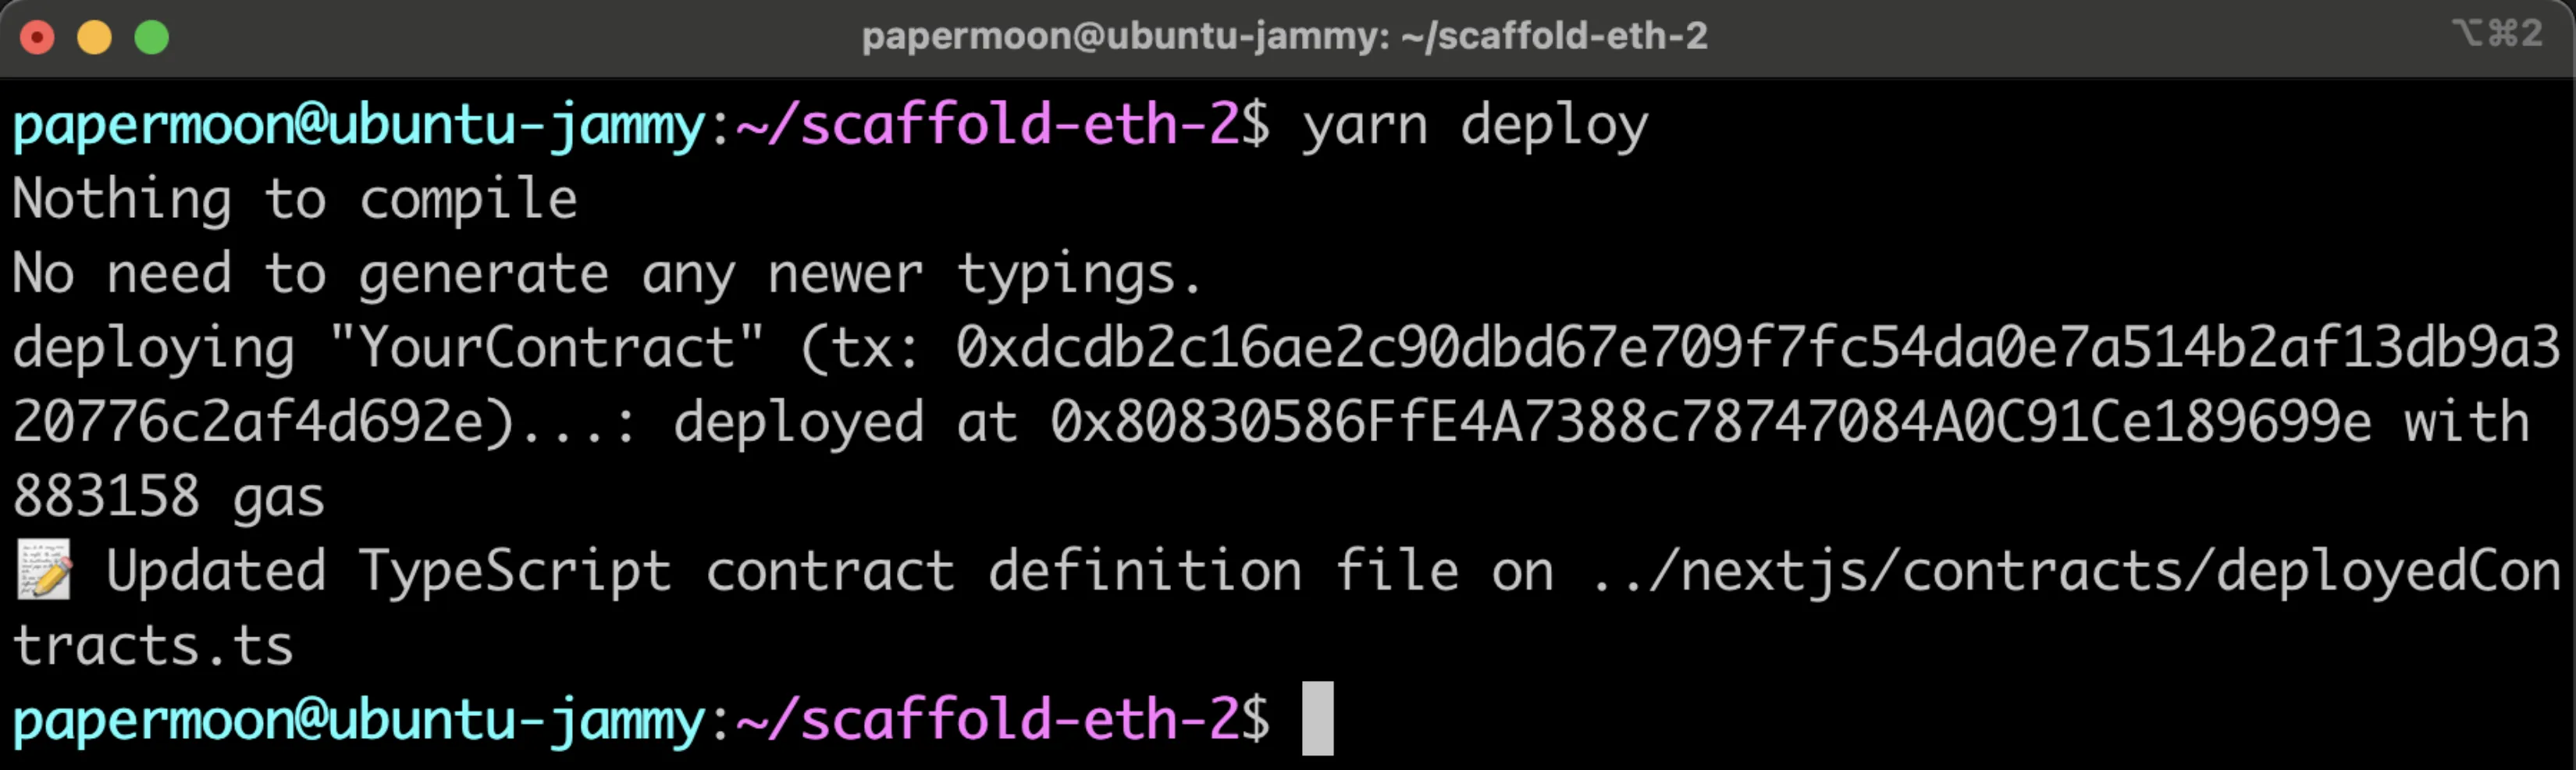
> ### Note
>
> If you did not set the `defaultNetwork` config in the `hardhat.config.js` file, you can append `--network INSERT_NETWORK` to the command. For example, the following command would deploy a contract to Phron.
```bash
yarn deploy --network phron
```
#### Verify Your Deployed Contract
If you would also like to use Scaffold-ETH 2 to verify the deployed smart contract and have entered your Phronscan API key into the `.env` file, you can go ahead and verify your deployed contract.
If the smart contract you are verifying has constructor method parameters, you will also need to append the parameters used to the end of the command.
You can use the following command to verify the smart contract:
```bash
yarn verify --api-url https://testnet.phronscan.io
```
> ### Note
>
> If you did not set the `defaultNetwork` configuration in the `hardhat.config.js` file, you can append `--network INSERT_NETWORK` to the command. For example, the following command would verify a contract on Phron.
```bash
yarn verify --network phron --api-url https://testnet.phronscan.io
```
After a short wait, the console output will display the verification result and, if successful, the URL to the verified contract on Phronscan.
For more information about verifying smart contracts on Phron using the Hardhat Etherscan plugin, please refer to the Etherscan Plugins page.
### The Next.js Component
In the following sections, you'll modify the Next.js configuration so that it targets the Phron-based network that your contract has been deployed to, and then you'll launch the dApp.
#### Configure the DApp for Phron
To target the Phron network that you deployed your smart contract to, you'll need to edit the configurations in the `packages/nextjs/scaffold.config.ts` file. More specifically, you'll need to modify the `targetNetworks` array in the `scaffoldConfig` object. You can use the [list of chains that viem provides](https://github.com/wevm/viem/blob/main/src/chains/index.ts) to specify the chain(s) you've deployed your contract to.
```bash
targetNetworks: [chains.phron],
```
That's all you have to do to configure Next.js! Next, you can launch the dApp.
#### Launch the DApp
After all the modifications to the configuration files are done, you can launch the example dApp. To do so, you can run:
```bash
yarn start
```
This will launch the React-based DApp frontend at by default. You can then point your browser to and interact with the React frontend by connecting your wallet or checking out the contract debugger page.
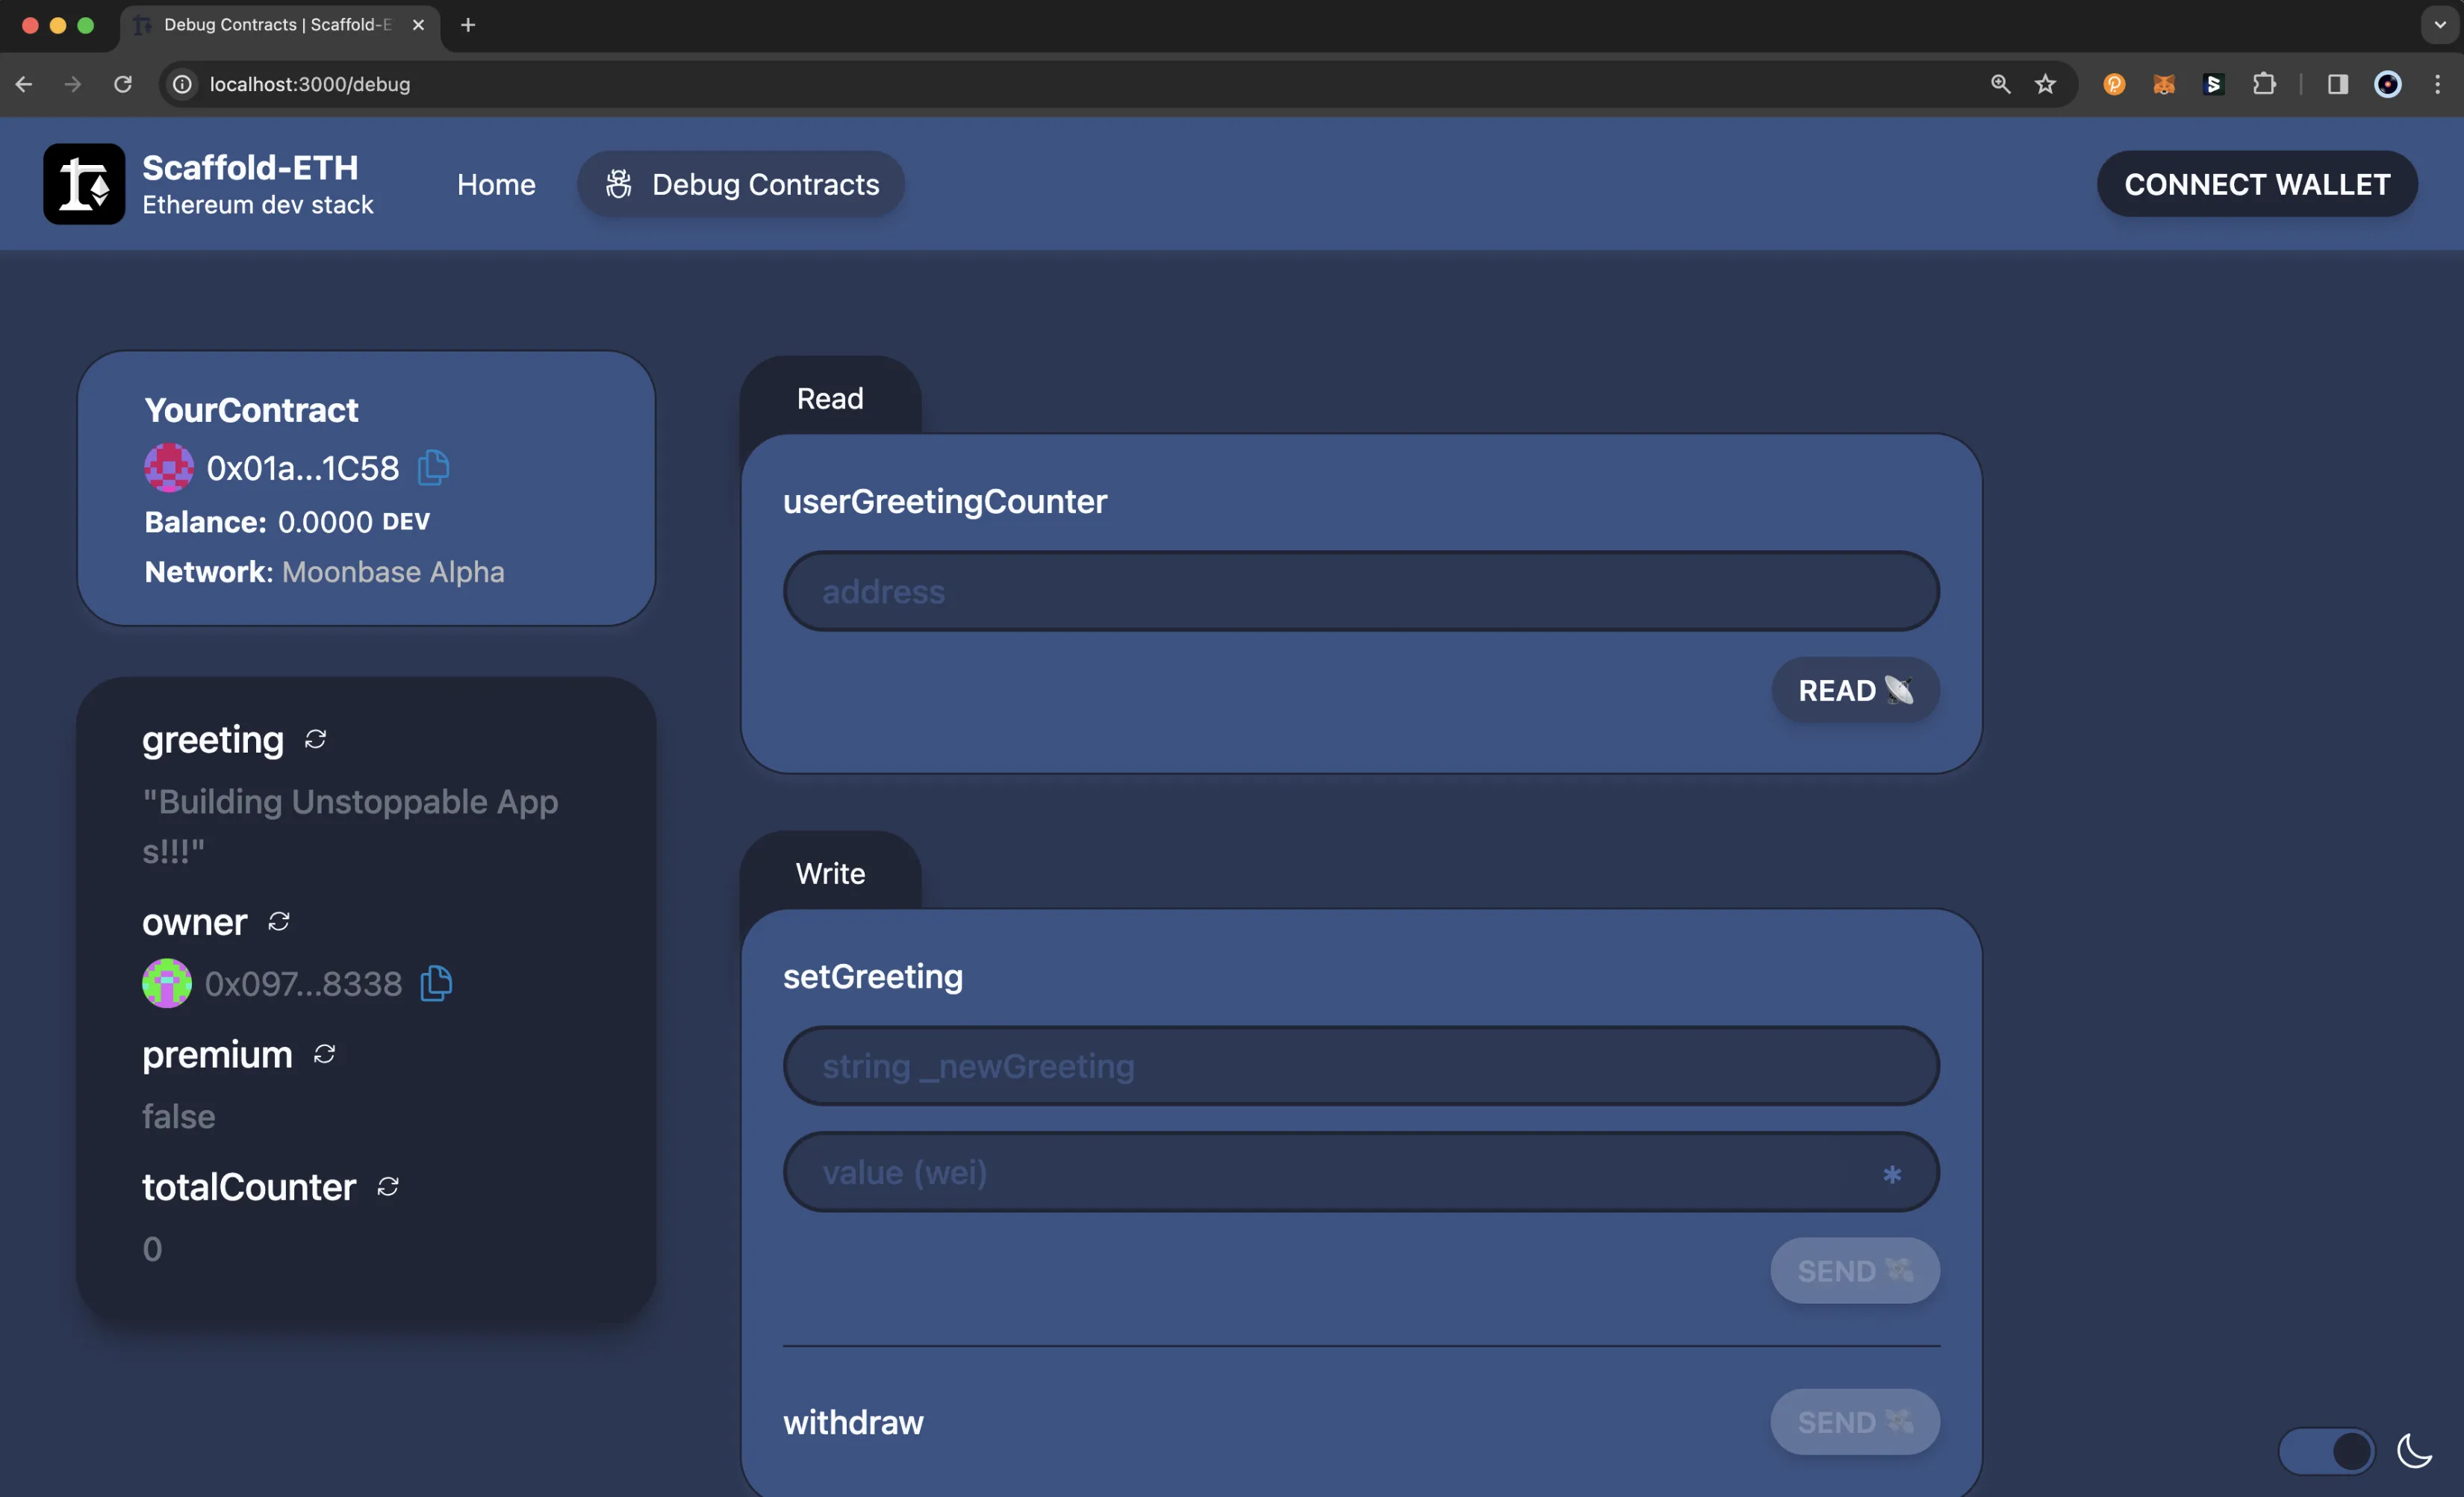
And that's it! Now that you have the basics down, feel free to create and deploy your own smart contracts and modify the frontend to fit your dApp's needs! For more information, you can check out the [Scaffold-ETH 2 docs](https://docs.scaffoldeth.io/).
This tutorial is for educational purposes only. As such, any contracts or code created in this tutorial should not be used in production.The information presented herein has been provided by third parties and is made available solely for general information purposes. Phron does not endorse any project listed and described on the Phron Doc Website (). Phron does not warrant the accuracy, completeness or usefulness of this information. Any reliance you place on such information is strictly at your own risk. Phron disclaims all liability and responsibility arising from any reliance placed on this information by you or by anyone who may be informed of any of its contents. All statements and/or opinions expressed in these materials are solely the responsibility of the person or entity providing those materials and do not necessarily represent the opinion of Phron. The information should not be construed as professional or financial advice of any kind. Advice from a suitably qualified professional should always be sought in relation to any particular matter or circumstance. The information herein may link to or integrate with other websites operated or content provided by third parties, and such other websites may link to this website. Phron has no control over any such other websites or their content and will have no liability arising out of or related to such websites or their content. The existence of any such link does not constitute an endorsement of such websites, the content of the websites, or the operators of the websites. These links are being provided to you only as a convenience and you release and hold Phron harmless from any and all liability arising from your use of this information or the information provided by any third-party website or service.
# Tenderly
## Using Tenderly on Phron
### Introduction
[Tenderly](https://tenderly.co/) is a Web3 development platform that contains a suite of tools designed to help developers throughout the DApp development life cycle. With Tenderly, you can build, debug, test, optimize, monitor, set up alerts, and view analytics for your smart contracts on Phron.
The Tenderly platform provides the following features:
* [**Contract Verification**](https://docs.tenderly.co/contract-verification) - as it is essential to verify your smart contracts to take full advantage of all of Tenderly's features, Tenderly provides several methods of verification. You can verify smart contracts through [the Tenderly dashboard](https://docs.tenderly.co/contract-verification/dashboard), [the Tenderly CLI and Foundry](https://docs.tenderly.co/contract-verification/foundry), or [the Tenderly Hardhat plugin](https://docs.tenderly.co/contract-verification/hardhat)
* [**Debugger**](https://docs.tenderly.co/debugger) - use the visual debugger to inspect transactions and get better insight into the behavior of your code. With the debugger, you can review a transaction's stack trace, view the calls made in a transaction, step through a contract, and review decoded inputs, outputs, and state variables. You can use the debugger on the Tenderly dashboard or the [Tenderly Debugger Chrome Extension](https://docs.tenderly.co/debugger/tenderly-debugger-extension)
* [**Gas Profiler**](https://docs.tenderly.co/debugger#gas-profiler) - view how much gas you're spending on a granular level, so you can optimize your smart contracts and reduce transaction gas costs
* [**Simulator**](https://docs.tenderly.co/simulator-ui) - simulate transactions in a forked development environment to learn how your transactions will behave without having to send them on-chain. This way, you can know the outcome of the transaction and make sure it works as expected before sending it to the network. You can experiment with different parameters, simulate historical and current transactions, and edit the contract source code. You can access the simulator from the Tenderly dashboard or you can use the [Tenderly Simulation API](https://docs.tenderly.co/reference/api#tag/Simulations) to take advantage of the simulator programmatically
* [**Forks**](https://docs.tenderly.co/forks) - this feature simulates the live Phron network in an isolated environment, which enables you to interact with deployed contracts and live on-chain data. Forking also takes transaction simulations a step further by enabling you to chain multiple simulations together chronologically. This allows for the testing of complex transaction scenarios where one transaction depends upon another, with the benefit of using live on-chain data. There are some limitations to be aware of when using Tenderly's forking feature. You cannot interact with any of the Phron precompiled contracts and their functions. Precompiles are a part of the Substrate implementation and therefore cannot be replicated in the simulated EVM environment. This prohibits you from interacting with cross-chain assets on Phron and Substrate-based functionality such as staking and governance
* [**Alerting**](https://docs.tenderly.co/alerts/intro-to-alerts) - configure real-time alerts to notify you whenever a specific event occurs, allowing you to stay informed about what's going on with your smart contracts
* [**Web3 Actions**](https://docs.tenderly.co/web3-actions/intro-to-web3-actions) - create programmable functions in JavaScript or TypeScript that are executed automatically by Tenderly when a specific smart contract or chain event occurs
* [**Analytics**](https://docs.tenderly.co/analytics/general-analytics) - visualize transaction and on-chain data to get useful insights into what's going on with your project. You can use Tenderly's analytics builder or create custom queries and scripts to meet your analytic needs
* [**Sandbox**](https://sandbox.tenderly.co/) - write, compile, execute, and debug your smart contracts directly in your browser with baked-in JavaScript and Solidity editors. Every time you run your code, Tenderly creates a temporary fork that comes with 10 pre-funded accounts, each with 100 tokens for testing purposes
> ### Note
>
> Phron is fully supported by Tenderly with the exception of the Web3 Gateway. Phron is not currently supported by Tenderly. For more information, check out Tenderly's documentation on [Supported Networks](https://docs.tenderly.co/supported-networks-and-languages#supported-networks).
### Getting Started
The Tenderly dashboard provides access to the all-in-one Web3 development platform. To get started with the dashboard, you'll need to [sign up](https://dashboard.tenderly.co/register) for an account. Once you've signed up, you'll be able to start exploring your Tenderly dashboard.
If you prefer not to set up an account, you can also access limited features using [Tenderly's explorer](https://dashboard.tenderly.co/explorer). Without an account, you can still gain insights for contracts and transactions. However, you won't be able to simulate transactions or create forked environments.
To interact with Tenderly's features programmatically, you can check out the [Tenderly CLI](https://github.com/Tenderly/tenderly-cli) GitHub repository for more information.
The following sections will show you how to get started with Tenderly on Phron. For more detailed documentation, please refer to [Tenderly's documentation site](https://docs.tenderly.co/).
#### Create a Sandbox
To deploy contracts to Phron with a Tenderly Sandbox, you can navigate to [sandbox.tenderly.co](https://sandbox.tenderly.co/) and take the following steps:
1. Enter your smart contract into the Solidity editor on the left-hand side
2. Select Phron from the **Network** menu, adjust any of the compilation settings, and specify the block to run your code on if needed
3. Update the JavaScript editor on the right-hand side for your contract. [Ethers.js](/build-with-phronai/sdks-and-tools/ethereum/libraries/ethers.js) and [Web3.js](/build-with-phronai/sdks-and-tools/ethereum/libraries/web3.js) are included in the Sandbox by default and can be instantiated with `ethers` and `web3`, respectively. It's also important to note that the Sandbox includes [global variables](https://docs.tenderly.co/tenderly-sandbox#available-javascript-global-variables) to ease development, so you don't need to worry about updating the RPC URL for Phron
4. Click on **RUN** when you're ready to compile your contract and execute your code
If your code contained logic to deploy your contract or send a transaction, you'll see the transaction(s) appear under the **Simulated Transactions** section on the bottom left-hand side.
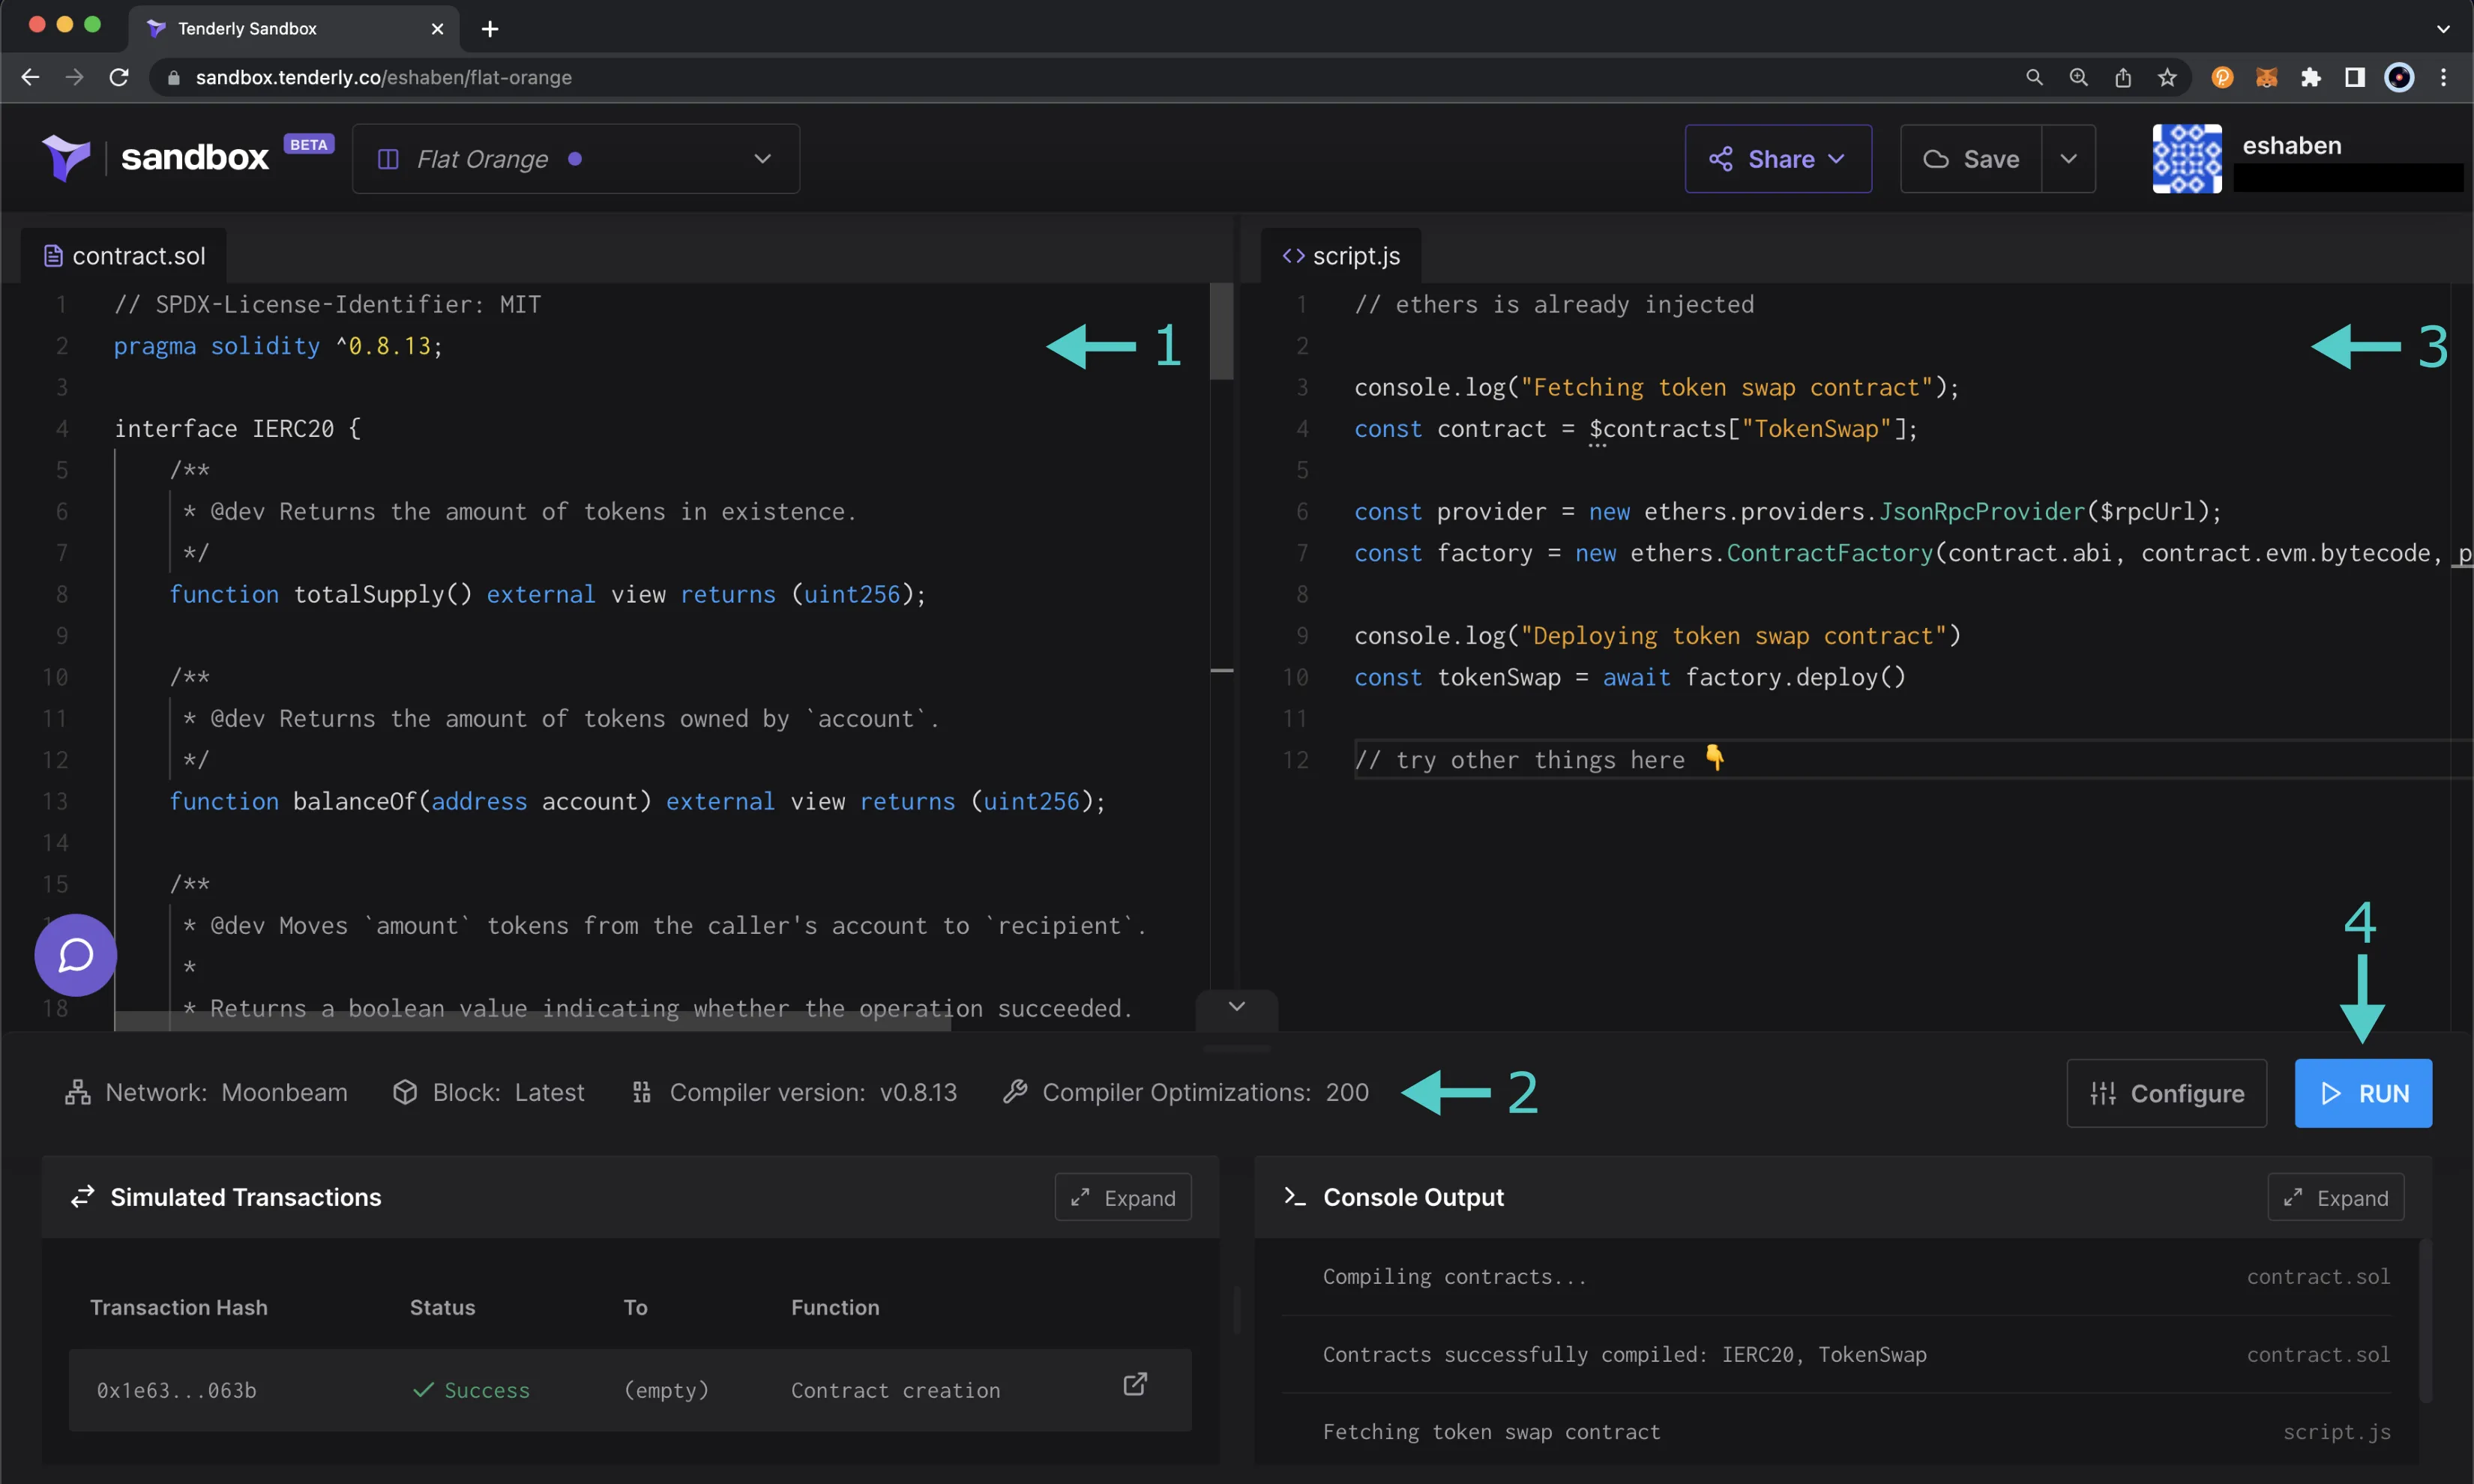
#### Add a Contract
A good place to start with the Tenderly dashboard is to add a deployed smart contract. Once you've added a contract, you'll be able to create transaction simulations and forks, use the debugger, set up monitoring and alerts, and more.
To add a new contract, you can click on **Contracts** on the left-side panel and click **Add Contract**. A pop-up will appear and you can take the following steps:
1. Enter the contract address
2. Choose Phron as the network, depending on which network you've deployed your smart contract to
3. (Optional) You can give your contract a name
4. (Optional) You can toggle the **Add more** slider to on if you'd like to add additional contracts. This will allow you to add more contracts after the initial contract has been added
5. Finally to add the contract to the dashboard, click **Add contract**
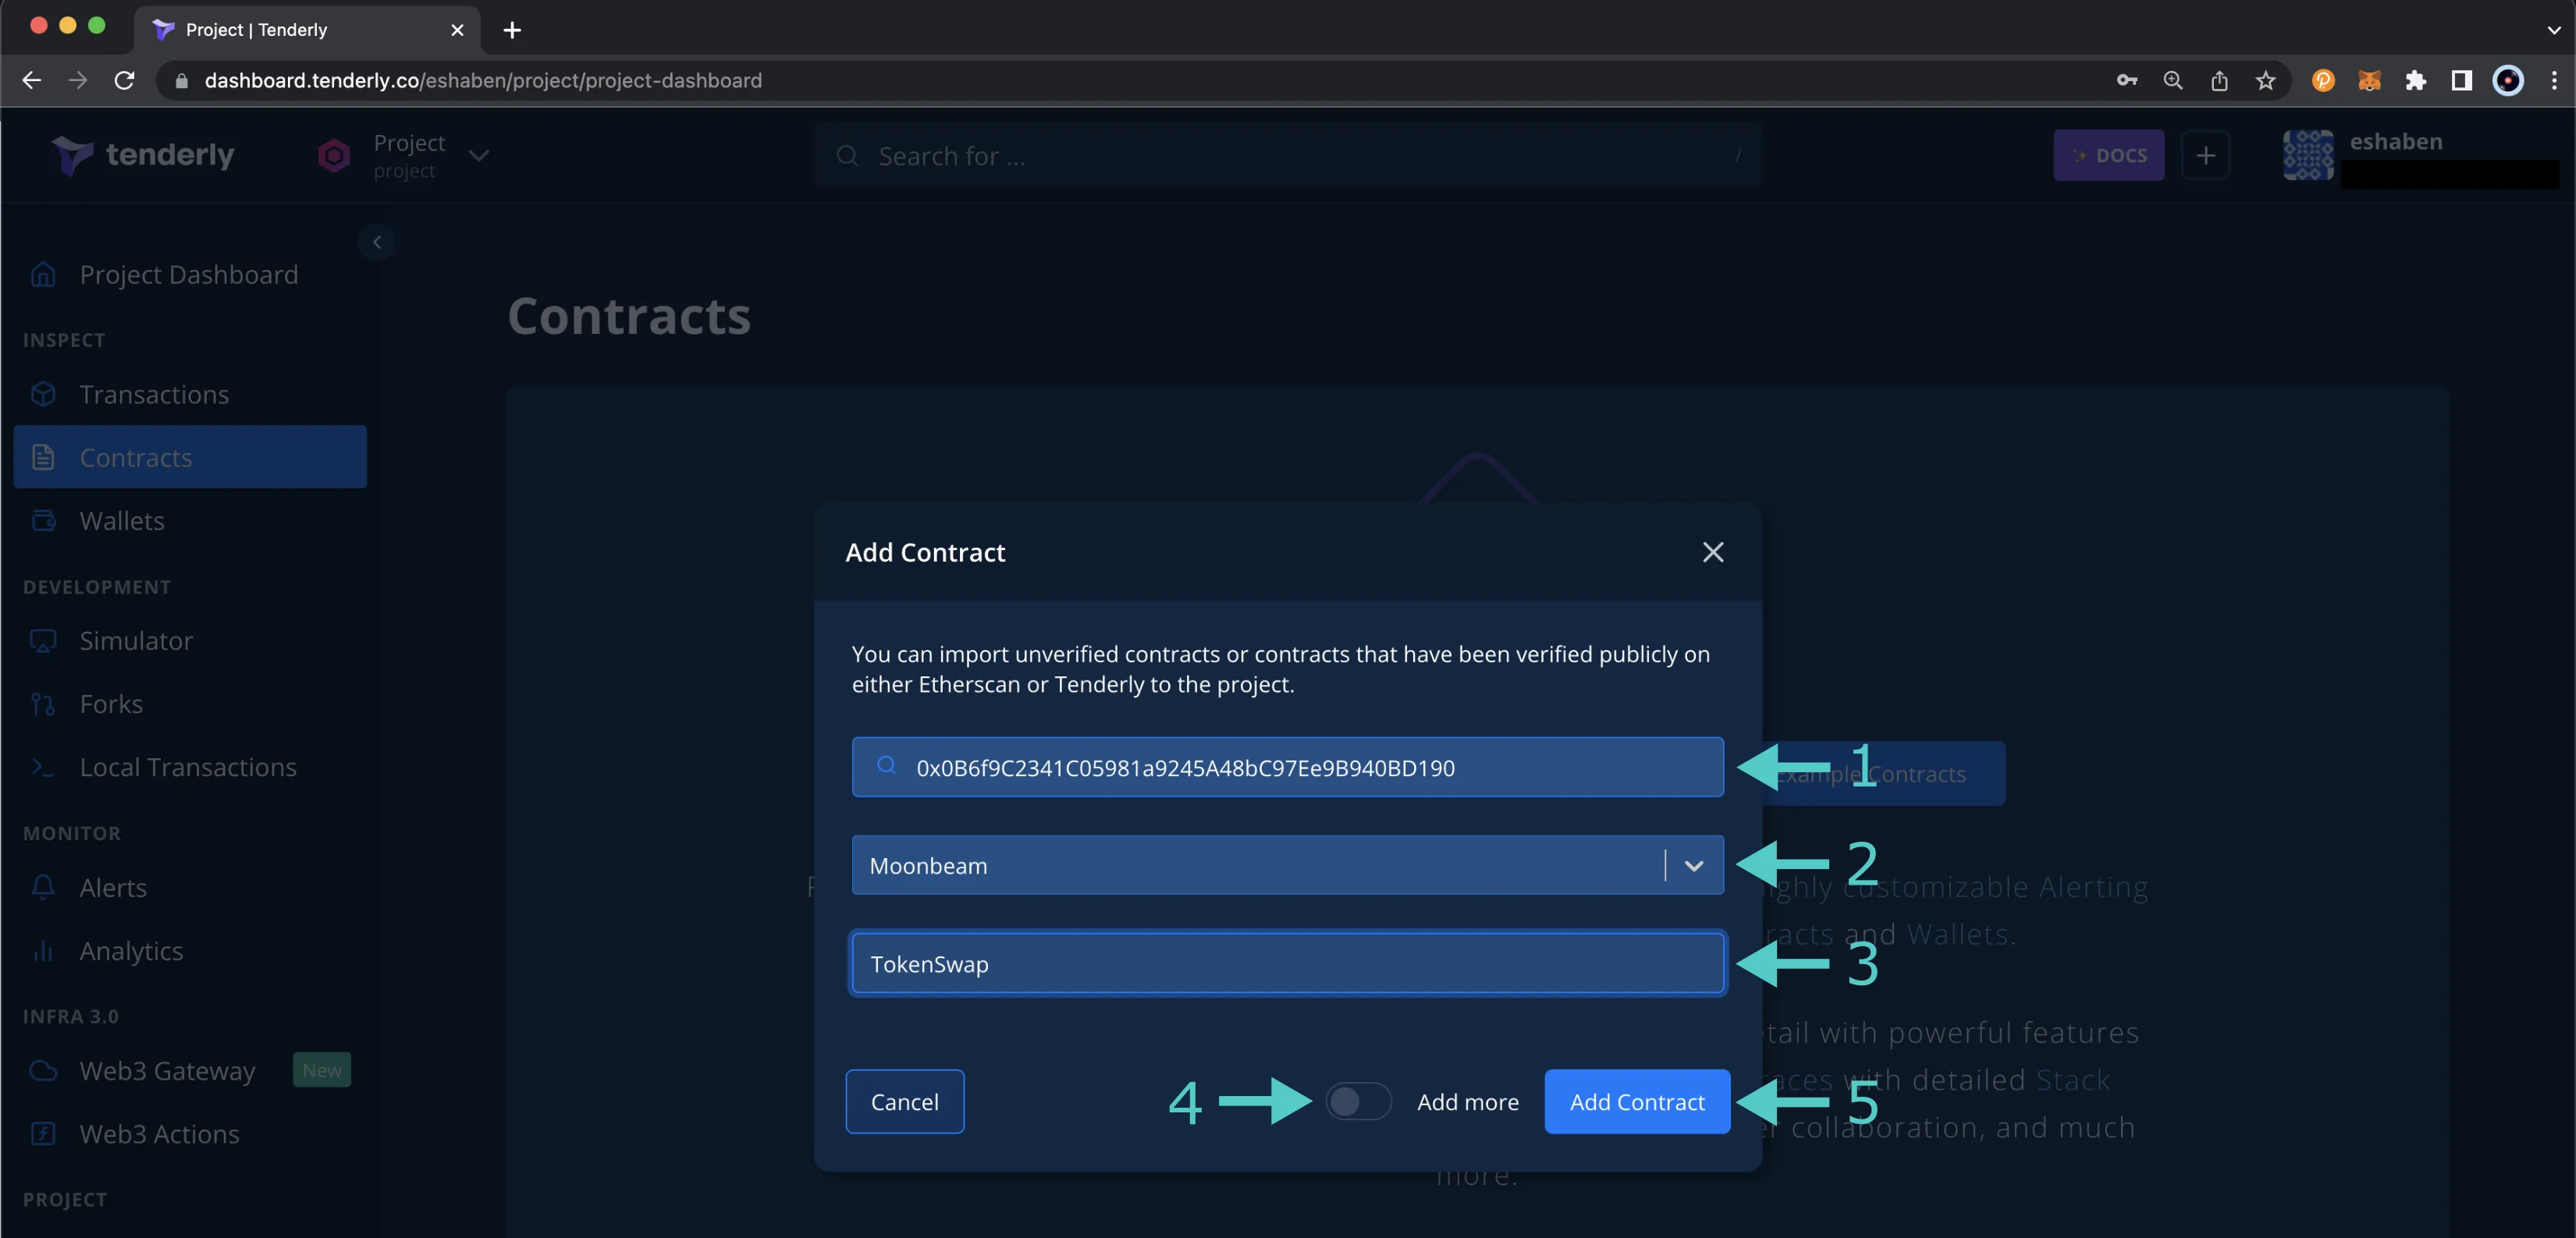
After a contract has been added, it will appear in the list of contracts on the **Contracts** dashboard. If the contract hasn't been verified yet, the dashboard will display an **Unverified** status along with a **Verify** button.
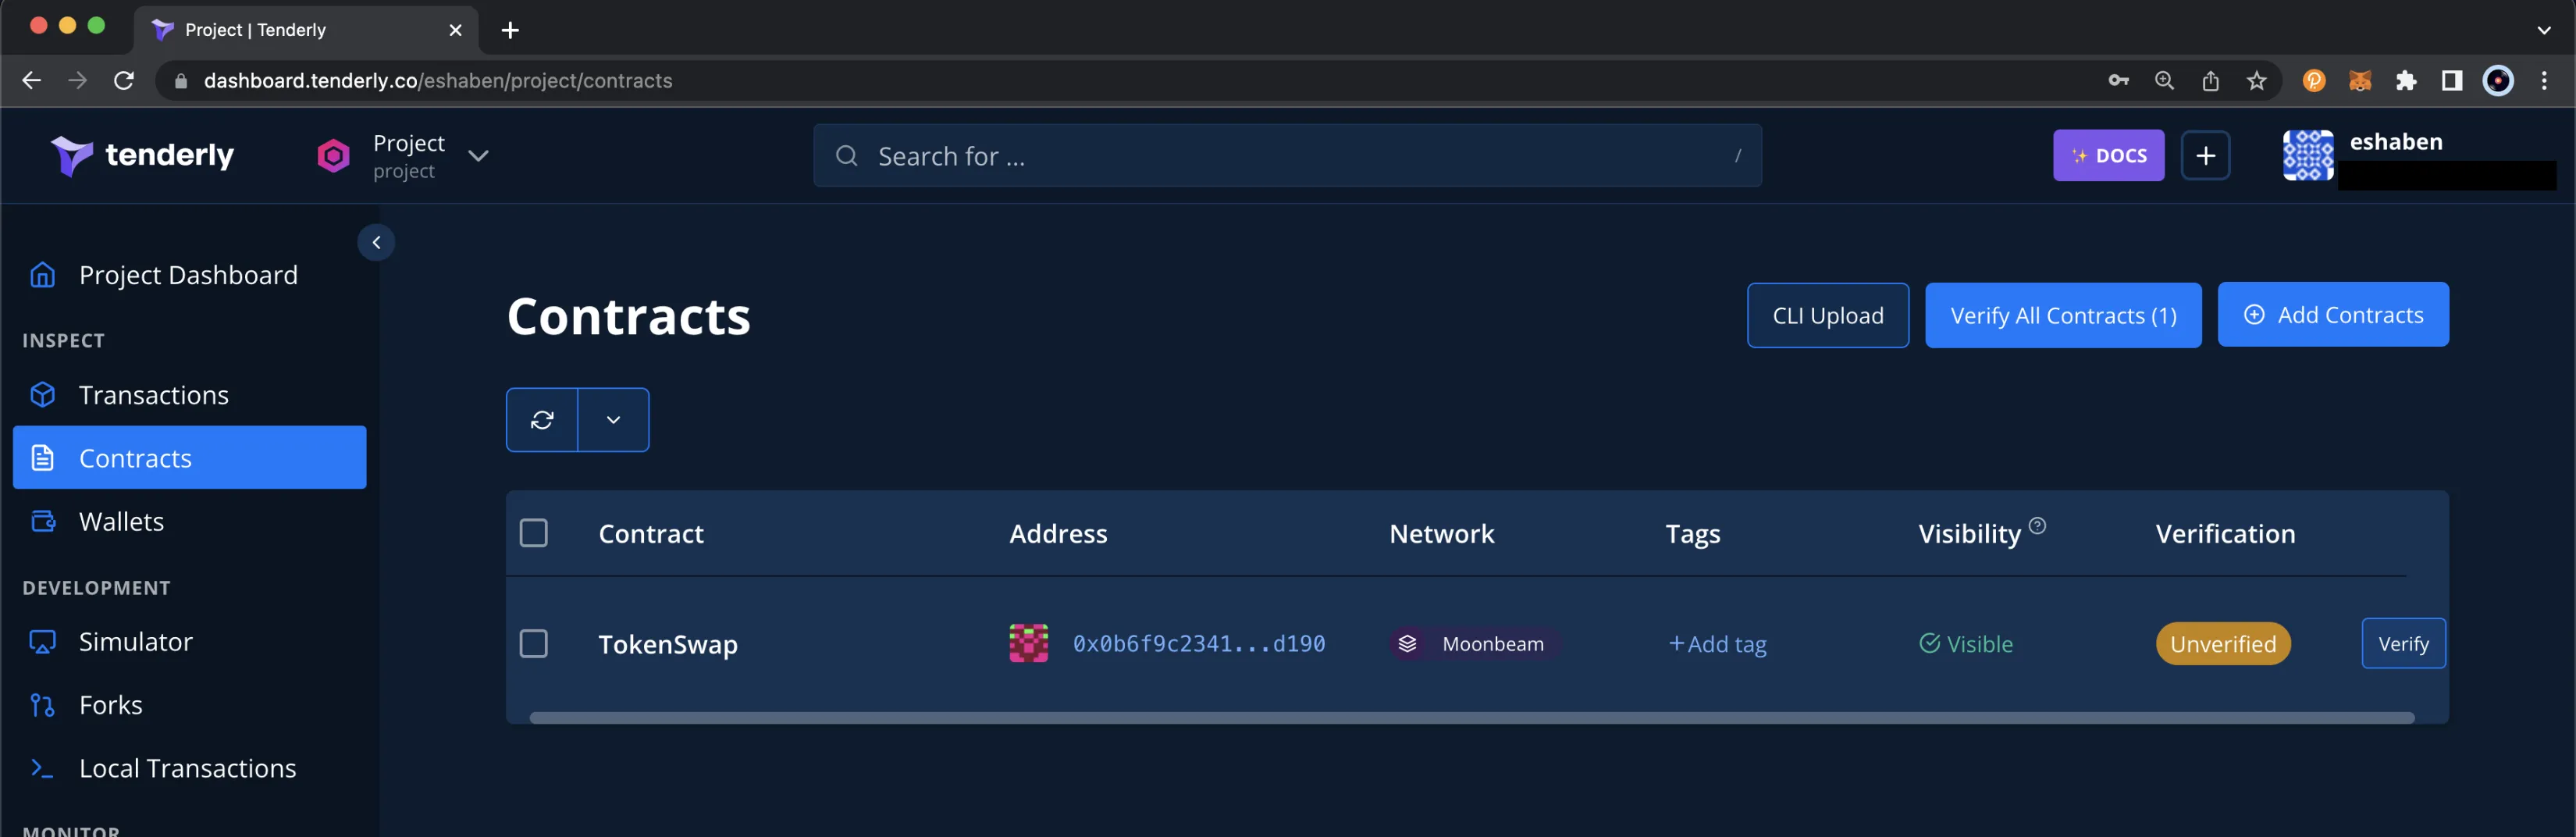
To take full advantage of the Tenderly tool set, it is recommended that you verify your smart contracts, which you can do by clicking on **Verify**. You can choose to verify your contract by uploading the contract's JSON, ABI, or source code. For more information, please refer to Tenderly's documentation on [Smart Contract Verification](https://docs.tenderly.co/contract-verification#verifying-a-smart-contract).
#### Create a Fork
Tenderly's forking feature simulates the live Phron network in an isolated environment, which enables you to interact with deployed contracts and live on-chain data.
There are some limitations to be aware of when using Tenderly's forking feature. You cannot interact with any of the Phron precompiled contracts and their functions. Precompiles are a part of the Substrate implementation and therefore cannot be replicated in the simulated EVM environment. This prohibits you from interacting with cross-chain assets on Phron and Substrate-based functionality such as staking and governance.
Tenderly makes creating a fork through the dashboard quite simple. To get started, click on **Forks** on the left-side menu and then click **Create Fork**. From there, you can take the following steps:
1. Select Phron from the **Network** dropdown
2. (Optional) Give your fork a name
3. If you only need data up until a specific block, you can toggle the **Use Latest Block** slider to off and specify the block number. Otherwise, you can leave the slider as is to include all blocks up until the latest block
4. Click **Create**
Once you've created your fork, you can start using it by deploying a contract to it or creating a transaction simulation using it.
To deploy a contract to your fork, you can click on the **Deploy Contract** button, upload your contract's source code, and set the compiler configurations. Once you submit the deployment, you'll see the transaction of your deployment appear under the **Simulated Transactions** tab and can click on the simulation for more information.
To create additional simulations, you can click the **New Simulation** button and enter in the configurations for the simulation. For more information on simulations, please refer to Tenderly's [Simulator UI Overview](https://docs.tenderly.co/simulator-ui/using-simulation-ui) documentation.
Now that you've learned how to get started with a few of Tenderly's features on Phron, please feel free to dive in and check out the other tools available in their development platform. You can visit [Tenderly's documentation site](https://docs.tenderly.co/) for more information. You can also check out Phron's tutorial on Using Tenderly to Simulate and Debug Transactions.
This tutorial is for educational purposes only. As such, any contracts or code created in this tutorial should not be used in production.The information presented herein has been provided by third parties and is made available solely for general information purposes. Phron does not endorse any project listed and described on the Phron Doc Website (). Phron does not warrant the accuracy, completeness or usefulness of this information. Any reliance you place on such information is strictly at your own risk. Phron disclaims all liability and responsibility arising from any reliance placed on this information by you or by anyone who may be informed of any of its contents. All statements and/or opinions expressed in these materials are solely the responsibility of the person or entity providing those materials and do not necessarily represent the opinion of Phron. The information should not be construed as professional or financial advice of any kind. Advice from a suitably qualified professional should always be sought in relation to any particular matter or circumstance. The information herein may link to or integrate with other websites operated or content provided by third parties, and such other websites may link to this website. Phron has no control over any such other websites or their content and will have no liability arising out of or related to such websites or their content. The existence of any such link does not constitute an endorsement of such websites, the content of the websites, or the operators of the websites. These links are being provided to you only as a convenience and you release and hold Phron harmless from any and all liability arising from your use of this information or the information provided by any third-party website or service.
# thirdweb
## Using thirdweb on Phron
### Introduction
[thirdweb](https://thirdweb.com/) is a complete Web3 development framework that provides everything you need to develop smart contracts, build dApps, and more.
With thirdweb, you can access tools to help you through every phase of the dApp development cycle. You can create your own custom smart contracts or use any of thirdweb's prebuilt contracts to get started quickly. From there, you can use thirdweb's CLI to deploy your smart contracts. Then you can interact with your smart contracts by creating a Web3 application using the language of your choice, including but not limited to React and TypeScript.
This guide will show you some of the thirdweb features you can use to develop smart contracts and dApps on Phron. To check out all of the features thirdweb has to offer, please refer to the [thirdweb documentation site](https://portal.thirdweb.com/). For a comprehensive step-by-step tutorial for building a dApp on Phron with thirdweb, be sure to check out Phron's thirdweb tutorial in the tutorials section.
### Create Contract
To create a new smart contract using the [thirdweb CLI](https://portal.thirdweb.com/cli), follow these steps:
1. In your CLI, run the following command:
```bash
npx thirdweb create contract
```
2. Input your preferences for the command line prompts:
1. Give your project a name
2. Choose your preferred framework: **Hardhat** or **Foundry**
3. Name your smart contract
4. Choose the type of base contract: **Empty**, [**ERC20**](https://portal.thirdweb.com/solidity/base-contracts/erc20base), [**ERC721**](https://portal.thirdweb.com/solidity/base-contracts/erc721base), or [**ERC1155**](https://portal.thirdweb.com/solidity/base-contracts/erc1155base)
5. Add any desired [extensions](https://portal.thirdweb.com/solidity/extensions)
3. Once created, navigate to your project’s directory and open in your preferred code editor
4. If you open the `contracts` folder, you will find your smart contract; this is your smart contract written in Solidity
The following is code for an `ERC721Base` contract without specified extensions. It implements all of the logic inside the [`ERC721Base.sol`](https://github.com/thirdweb-dev/contracts/blob/main/contracts/base/ERC721Base.sol) contract; which implements the [`ERC721A`](https://github.com/thirdweb-dev/contracts/blob/main/contracts/eip/ERC721A.sol) standard.
```solidity
// SPDX-License-Identifier: MIT
pragma solidity ^0.8.0;
import '@thirdweb-dev/contracts/base/ERC721Base.sol';
contract Contract is ERC721Base {
constructor(
string memory _name,
string memory _symbol,
address _royaltyRecipient,
uint128 _royaltyBps
) ERC721Base(_name, _symbol, _royaltyRecipient, _royaltyBps) {}
}
```
This contract inherits the functionality of `ERC721Base` through the following steps:
* Importing the `ERC721Base` contract
* Inheriting the contract by declaring that your contract is an `ERC721Base` contract
* Implementing any required methods, such as the constructor
5. After modifying your contract with your desired custom logic, you can deploy it to Phron using [Deploy](https://portal.thirdweb.com/contracts/deploy/overview). That will be covered in the next section!
Alternatively, you can deploy a prebuilt contract for NFTs, tokens, or marketplace directly from the thirdweb Explore page:
1. Go to the [thirdweb Explore page](https://thirdweb.com/explore)
2. Choose the type of contract you want to deploy from the available options: NFTs, tokens, marketplace, and more
3. Follow the on-screen prompts to configure and deploy your contract
For more information on different contracts available on Explore, check out [thirdweb’s documentation on prebuilt contracts](https://portal.thirdweb.com/contracts).
### Deploy Contract
[Deploy](https://portal.thirdweb.com/contracts/deploy/overview) is thirdweb's tool that allows you to easily deploy a smart contract to any EVM compatible network without configuring RPC URLs, exposing your private keys, writing scripts, and other additional setup such as verifying your contract.
1. To deploy your smart contract using deploy, navigate to the `contracts` directory of your project and execute the following command:
```bash
npx thirdweb deploy
```
Executing this command will trigger the following actions:
* Compiling all the contracts in the current directory
* Providing the option to select which contract(s) you wish to deploy
* Uploading your contract source code (ABI) to IPFS
2. When it is completed, it will open a dashboard interface to finish filling out the parameters
* `_name` - contract name
* `_symbol` - symbol or "ticker"
* `_royaltyRecipient` - wallet address to receive royalties from secondary sales
* `_royaltyBps` - basis points (bps) that will be given to the royalty recipient for each secondary sale, e.g. 500 = 5%
3. Select the desired Phron network.
4. Manage additional settings on your contract’s dashboard as needed such as uploading NFTs, configuring permissions, and more
For additional information on Deploy, please reference [thirdweb’s documentation](https://portal.thirdweb.com/contracts/deploy/overview).
### Create Application
thirdweb offers SDKs for a range of programming languages, such as React, React Native, TypeScript, and Unity. You'll start off by creating an application and then you can choose which SDK to use:
1. In your CLI run the following command:
```bash
npx thirdweb create --app
```
2. Input your preferences for the command line prompts:
1. Give your project a name
2. Choose your preferred framework: **Next.js**, **Vite**, or **React Native**. For this example, select **Vite**
3. Use the React or TypeScript SDK to interact with your application’s functions. This will be covered in the following section on interacting with a contract
#### Specify Client ID
Before you launch your dApp (locally or publicly deployed), you must have a thirdweb Client ID associated with your project. A thirdweb Client ID is synonymous with an API key. You can create a free API key by [signing into your thirdweb account, navigating to **Settings**, and clicking on **API Keys**](https://thirdweb.com/dashboard/settings/api-keys).
Press **Create API Key** then take the following steps:
1. Give your API key a name
2. Enter the allowed domains that the API key should accept requests from. It's recommended that you allow only necessary domains, but for development purposes, you can select **Allow all domains**
3. Press **Next** and confirm the prompt on the next page
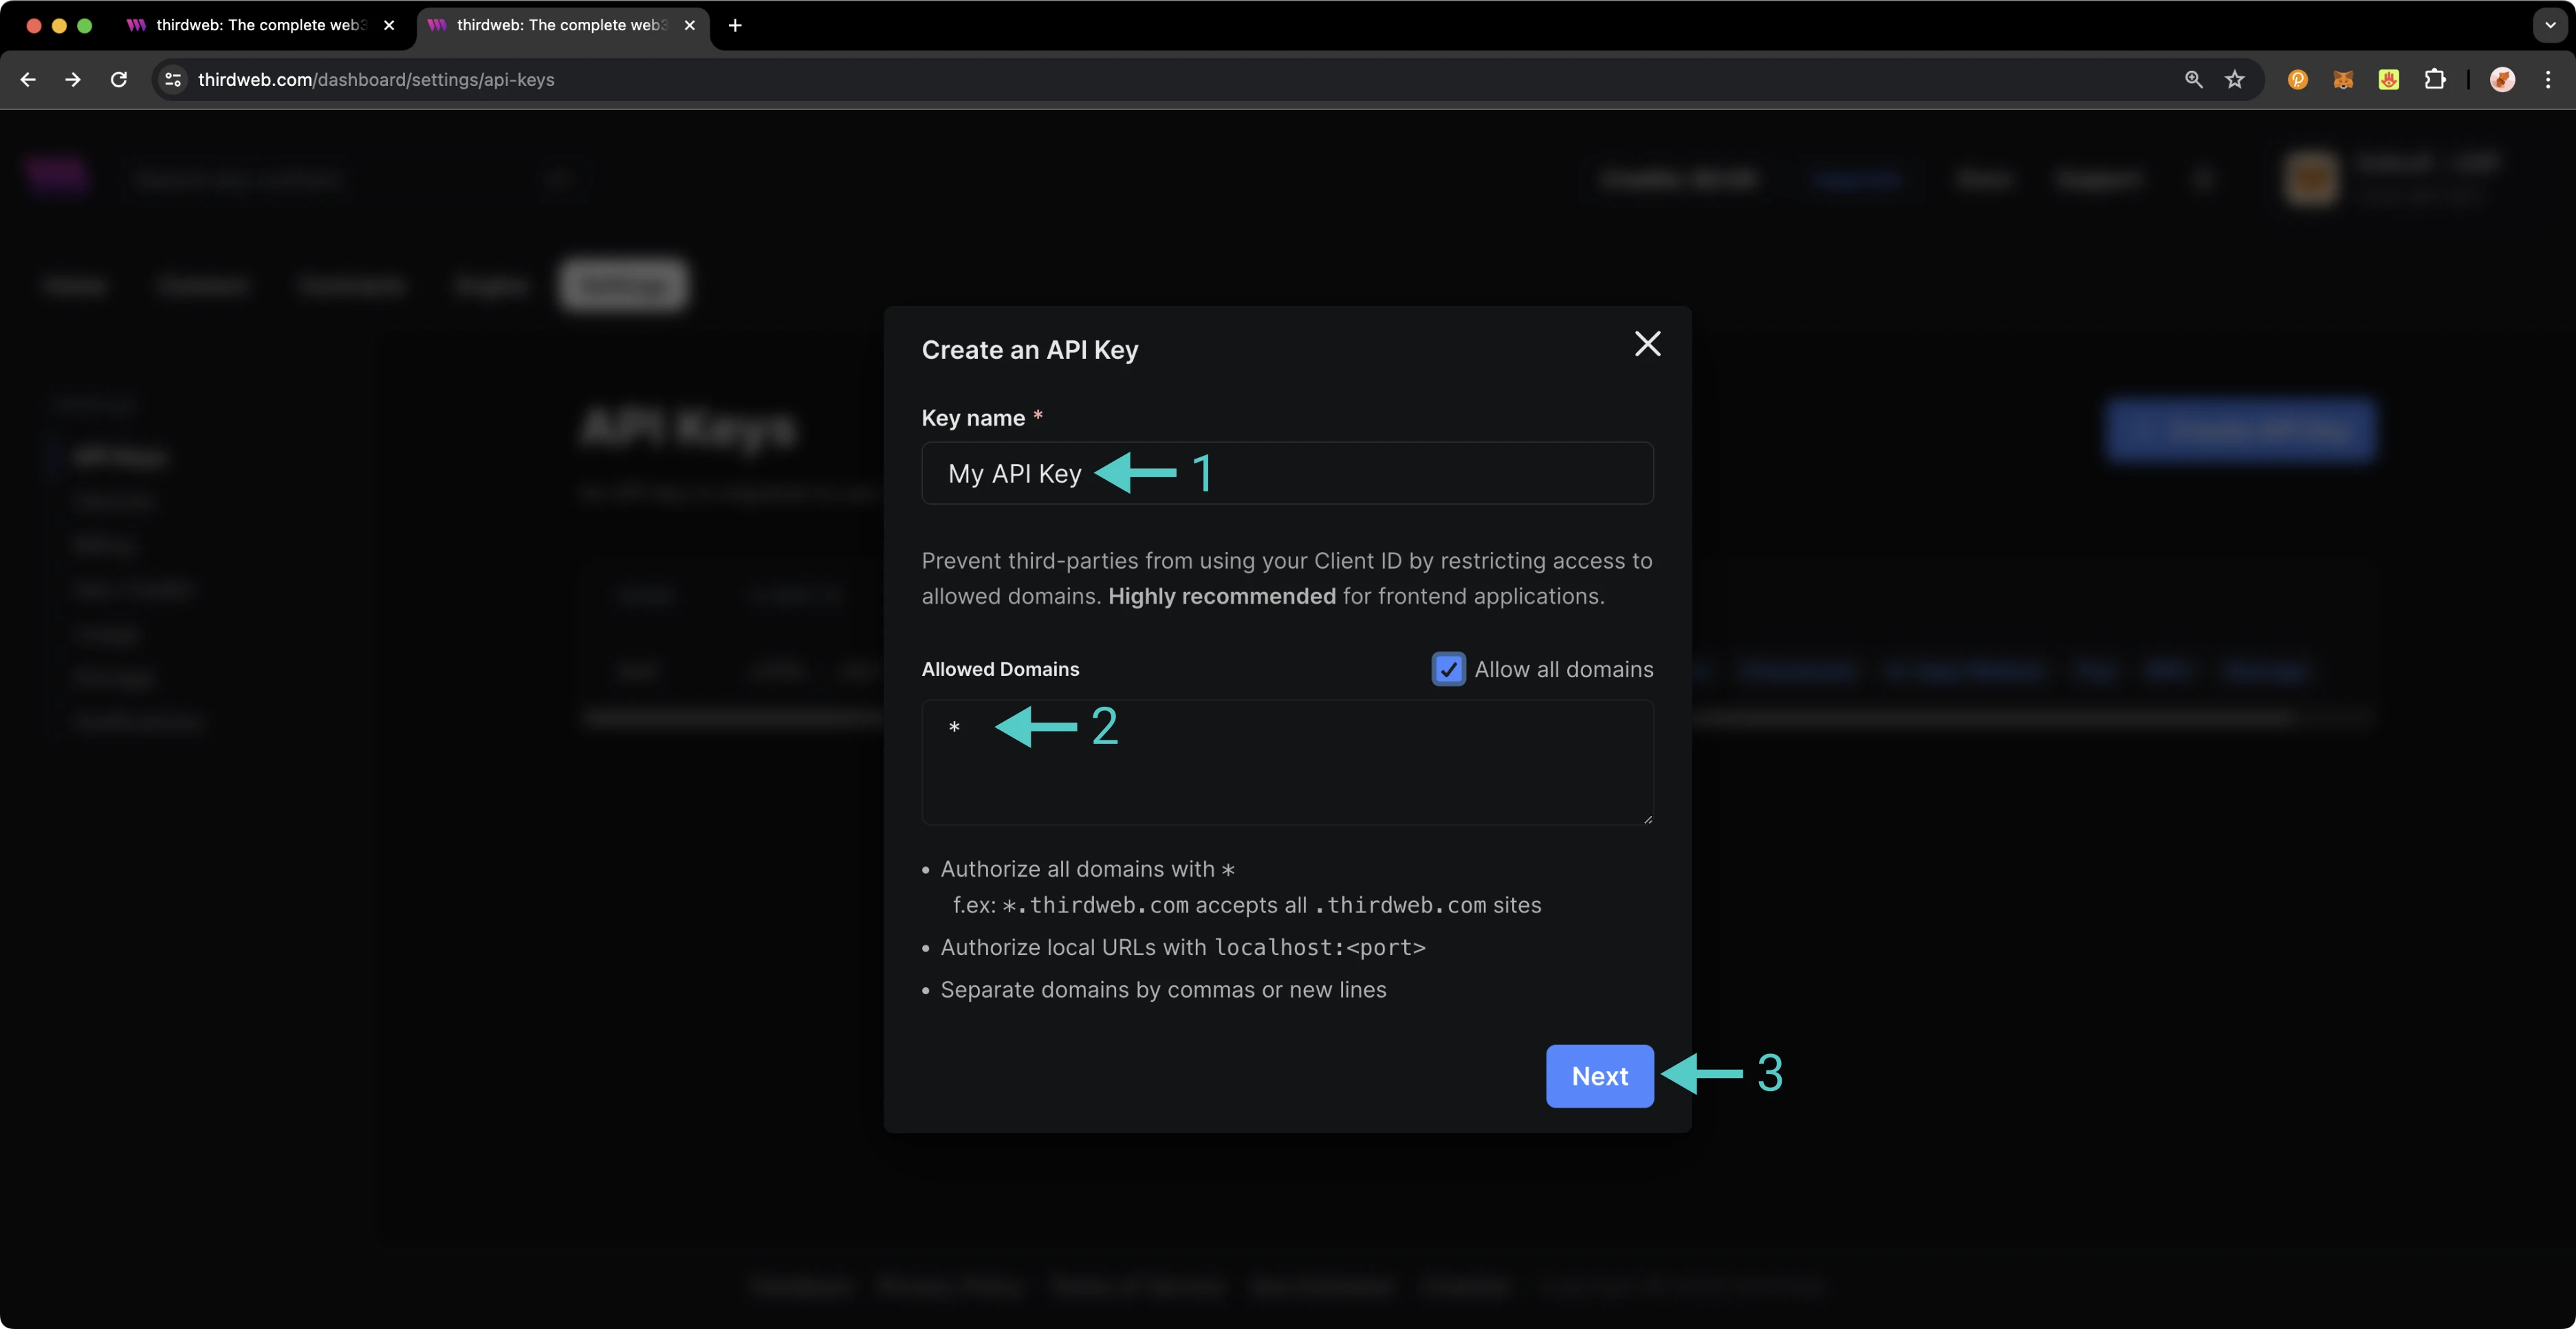
> ### Note
>
> The respective name for your Client ID variable will vary with the framework you've chosen, e.g., Vite will be `VITE_TEMPLATE_CLIENT_ID`, Next.js will be `NEXT_PUBLIC_TEMPLATE_CLIENT_ID`, and React Native will be `EXPO_PUBLIC_THIRDWEB_CLIENT_ID`.
Finally, specify your Client ID (API Key) in your `.env` file. Your `.env` file must be located at the root directory of the project (e.g., not the `src` folder).
If you generated your thirdweb app with Vite, you'll have a `client.ts` file that looks like the below. As long you've created a `.env` file with your thirdweb API Key (Client ID) defined in `VITE_TEMPLATE_CLIENT_ID`, you can leave the `client.ts` as is and proceed to the next section.
client.ts
{% code overflow="wrap" %}
```typescript
import { createThirdwebClient } from 'thirdweb';
// Replace this with your client ID string.
// Refer to https://portal.thirdweb.com/typescript/v5/client on how to get a client ID
const clientId = import.meta.env.VITE_TEMPLATE_CLIENT_ID;
export const client = createThirdwebClient({
clientId: clientId,
});
```
{% endcode %}
> ### Note
>
> If you don't create a Client ID and specify is correctly in your `.env` file, you'll get a blank screen when trying to build the web app. There is no error message shown without digging into the console, so ensure you've set your Client ID correctly first and foremost.
#### Run Locally
To run your dApp locally for testing and debugging purposes, use the command:
```bash
yarn dev
```
The app will compile and specify the localhost and port number for you to visit in your browser.
#### Configure Chain
thirdweb offers a small number of chains from `@thirdweb/chains` and does not include Phron networks in that list, so you'll need to specify the network details including chain ID and RPC URL. You can create a custom chain with [`defineChain`](https://portal.thirdweb.com/references/typescript/v5/defineChain) as follows:
chains.ts
```javascript
import { defineChain } from 'thirdweb';
const phron = defineChain({
id: 7744,
rpc: 'https://testnet.phron.ai',
});
```
### thirdweb SDK
The following sections will provide an overview of fundamental methods of the thirdweb SDK and how to interact with them. Each code snippet will showcase the relevant import statements and demonstrate using the method in a typical scenario. This guide is intended to be a quick reference guide to the most common thirdweb methods that dApp developers will use. However, it does not include information on each and every thirdweb offering. For details on the entirety of thirdweb's offerings, be sure to visit the [thirdweb documentation site](https://portal.thirdweb.com/).
For a comprehensive, step-by-step guide to building a dApp with thirdweb be sure to check out Phron's thirdweb tutorial in the tutorials section. The following sections will cover everything from connecting wallets, to preparing transactions, and more.
#### Accounts and Wallets
thirdweb distinguishes between accounts and wallets in the SDK. In the eyes of the thirdweb SDK, an account always has a single blockchain address and can sign messages, transactions, and typed data, but it cannot be "connected" or "disconnected." In contrast, a wallet contains one or more accounts, can be connected or disconnected, and delegates the signing tasks to its accounts.
The below code snippet demonstrates how to initialize and connect a MetaMask wallet using the thirdweb SDK, then sign and send a transaction, retrieving the transaction hash. This process is applicable to any of the 300+ wallet connectors supported by the SDK.
initialize.ts
{% code overflow="wrap" %}
```typescript
import { sendTransaction } from 'thirdweb';
// MetaMask wallet used for example, the pattern is the same for all wallets
import { createWallet } from 'thirdweb/wallets';
// Initialize the wallet. thirdweb supports 300+ wallet connectors
const wallet = createWallet('io.metamask');
// Connect the wallet. This returns a promise that resolves to the connected account
const account = await wallet.connect({
// Pass the client you created with `createThirdwebClient()`
client,
});
// Sign and send a transaction with the account. Returns the transaction hash
const { transactionHash } = await sendTransaction({
// Assuming you have called `prepareTransaction()` or `prepareContractCall()` before, which returns the prepared transaction to send
transaction,
// Pass the account to sign the transaction with
account,
});
```
{% endcode %}
#### Get Contract
To connect to your contract, use the SDK’s [`getContract`](https://portal.thirdweb.com/references/typescript/v5/getContract) method. As an example, you could fetch data from an incrementer contract on Phron.
{% code overflow="wrap" %}
```typescript
import { getContract } from 'thirdweb';
import { client } from './client';
const myContract = getContract({
client,
chain: phron,
address: 0xa72f549a1a12b9b49f30a7f3aeb1f4e96389c5d8, // Incrementer contract address on Phron
abi: '[{"inputs":[],"name":"increment","outputs":[],"stateMutability":"nonpayable","type":"function"},{"inputs":[],"name":"number","outputs":[{"internalType":"uint256","name":"","type":"uint256"}],"stateMutability":"view","type":"function"},{"inputs":[],"name":"timestamp","outputs":[{"internalType":"uint256","name":"","type":"uint256"}],"stateMutability":"view","type":"function"}]';
});
```
{% endcode %}
#### Calling Contract Functions
To call a contract in the latest version of the SDK, you can use [`prepareContractCall`](https://portal.thirdweb.com/typescript/v5/transactions/prepare).
```typescript
import { prepareContractCall, toWei } from 'thirdweb';
const tx = prepareContractCall({
contract,
// Pass the method signature that you want to call
method: 'function mintTo(address to, uint256 amount)',
// Pass the params for that method.
// Their types are automatically inferred based on the method signature
params: ['0x123...', toWei('100')],
});
```
Returning to our incrementer contract, preparing a call to increment the contract looks like the following:
```typescript
import { prepareContractCall } from 'thirdweb';
const tx = prepareContractCall({
contract,
// Pass the method signature that you want to call
method: 'function increment()',
// Increment takes no params so we are leaving an empty array
params: [],
});
```
#### Preparing Raw Transactions
You can also prepare a transaction directly with encoded data. To do so, you'll use thirdweb's [`prepareTransaction` method](https://portal.thirdweb.com/typescript/v5/transactions/prepare) and specify the `to`, `value`, `chain`, and `client` values directly.
```typescript
import { prepareTransaction, toWei } from 'thirdweb';
const transaction = prepareTransaction({
// The account that will be the receiver
to: '0x456...',
// The value is the amount of ether you want to send with the transaction
value: toWei('1'),
// The chain to execute the transaction on. This assumes you already set up
// phron as a custom chain as shown in the configure chain section
chain: phron,
// Your thirdweb client
client,
});
```
#### Reading Contract State
Use the [`readContract` function](https://portal.thirdweb.com/typescript/v5/transactions/read) to call any read functions on your contract by passing in the Solidity method signature and any parameters.
```typescript
import { readContract } from 'thirdweb';
const balance = await readContract({
contract: contract,
method: 'function balanceOf(address) view returns (uint256)',
params: ['0x123...'],
});
```
For a function that takes no parameters, such as the number function that returns the current number stored in the incrementer contract, you simply need to provide the function name as follows:
```typescript
import { readContract } from 'thirdweb';
const number = await readContract({
contract: contract,
method: 'number',
params: [],
});
```
Did you know? With the [thirdweb CLI](https://portal.thirdweb.com/cli), you can easily and generate functions for all of the possible calls to a contract. To do so, run the following command in the command line:
```bash
npx thirdweb generate INSERT_CHAIN_ID/INSERT_CONTRACT_ADDRESS
```
Both the chain ID and the contract address are required. As an example, if you wanted to generate the functions for the incrementer contract on Phron , you would use the following command:
```bash
npx thirdweb generate 1287/0xa72f549a1a12b9b49f30a7f3aeb1f4e96389c5d8
```
The file generated with all of the corresponding methods will be placed in a directory labelled `thirdweb/CHAIN_ID/CONTRACT_ADDRESS`. In the example shown above, the output file is located at `thirdweb/1287/0xa72f549a1a12b9b49f30a7f3aeb1f4e96389c5d8.ts`. For more information, see the [thirdweb's docs on the CLI](https://portal.thirdweb.com/cli/generate).
#### Sending a Transaction
Every transaction sent using the SDK must first be prepared. This preparation process is synchronous and lightweight, requiring no network requests. Additionally, it provides type-safe definitions for your contract calls.
You can prepare a transaction as follows:
Prepare a transaction
```javascript
import { prepareTransaction, toWei } from 'thirdweb';
const transaction = prepareTransaction({
to: '0x1234567890123456789012345678901234567890',
chain: phron,
client: thirdwebClient,
value: toWei('1.0'),
gasPrice: 150n,
});
```
After the transaction is prepared, you can send it as follows:
Send a transaction
```javascript
import { sendTransaction } from 'thirdweb';
const { transactionHash } = await sendTransaction({
account,
transaction,
});
```
You can optionally use `sendAndConfirmTransaction` to wait for the transaction to be mined. This is relevant if you want to block the user from continuing until the transaction is confirmed.
Send and Confirm a Transaction
```javascript
import { sendAndConfirmTransaction } from 'thirdweb';
import { createWallet } from 'thirdweb/wallets';
const wallet = createWallet('io.metamask');
const account = await wallet.connect({ client });
const receipt = await sendAndConfirmTransaction({
transaction,
account,
});
```
#### Transaction Utilities
thirdweb provides a number of helpful utility methods surrounding preparing and sending transactions.
You can estimate the gas used by a transaction as follows:
Estimating gas
```javascript
import { estimateGas } from 'thirdweb';
const gasEstimate = await estimateGas({ transaction });
console.log('estmated gas used', gasEstimate);
```
You can estimate the gas cost in Ether and Wei as follows:
Estimating gas cost
```javascript
import { estimateGas } from 'thirdweb';
const gasCost = await estimateGasCost({ transaction });
console.log('cost in ether', gasCost.ether);
```
thirdweb also provides a handy way to simulate transactions and verify their integrity before actually submitting it to the blockchain. You can simulate a transaction as follows:
Simulate a transaction
```javascript
import { simulateTransaction } from 'thirdweb';
const result = await simulateTransaction({ transaction });
console.log('simulation result', result);
```
You can encode transaction data to act on later by taking the following steps:
Encode transaction data
```javascript
import { encode } from 'thirdweb';
const data = await encode(transaction);
console.log('encoded data', data);
```
#### ConnectButton
Perhaps the first and most important interaction users will have with your dApp is connecting their wallet. thirdweb provides an easy and highly customizable way for you to enable this. thirdweb provides a highly customizable [`ConnectButton`](https://portal.thirdweb.com/typescript/v5/react/components/ConnectButton) to tailor it to your desired wallets. The `ConnectButton` accepts an optional `wallets` parameter with an array of wallets. You can add or remove wallets from the `wallets` array to change the options available to users. thirdweb also offers a [`ConnectButton` Playground](https://thirdweb.com/dashboard/connect/playground) to customize and view changes for the `ConnectButton` in real-time, given the button's high degree of flexibility.
ConnectButton
```javascript
import { ConnectButton } from 'thirdweb/react';
import { createWallet, inAppWallet } from 'thirdweb/wallets';
const wallets = [
inAppWallet(),
createWallet('io.metamask'),
createWallet('com.coinbase.wallet'),
createWallet('me.rainbow'),
];
function Example() {
return (
);
}
```
### Deploy Application
As a reminder, you can build your example project locally by running:
```bash
yarn dev
```
To host your static web application on decentralized storage, run:
```bash
npx thirdweb deploy --app
```
By running this command, your application is built for production and stored using [Storage](https://portal.thirdweb.com/infrastructure/storage/overview), thirdweb's decentralized file management solution. The built application is uploaded to IPFS, a decentralized storage network, and a unique URL is generated for your application. This URL serves as a permanent hosting location for your application on the web.
If you have any further questions or encounter any issues during the process, please reach out to thirdweb support at [support.thirdweb.com](http://support.thirdweb.com/).
This tutorial is for educational purposes only. As such, any contracts or code created in this tutorial should not be used in production.The information presented herein has been provided by third parties and is made available solely for general information purposes. Phron does not endorse any project listed and described on the Phron Doc Website (). Phron does not warrant the accuracy, completeness or usefulness of this information. Any reliance you place on such information is strictly at your own risk. Phron disclaims all liability and responsibility arising from any reliance placed on this information by you or by anyone who may be informed of any of its contents. All statements and/or opinions expressed in these materials are solely the responsibility of the person or entity providing those materials and do not necessarily represent the opinion of Phron. The information should not be construed as professional or financial advice of any kind. Advice from a suitably qualified professional should always be sought in relation to any particular matter or circumstance. The information herein may link to or integrate with other websites operated or content provided by third parties, and such other websites may link to this website. Phron has no control over any such other websites or their content and will have no liability arising out of or related to such websites or their content. The existence of any such link does not constitute an endorsement of such websites, the content of the websites, or the operators of the websites. These links are being provided to you only as a convenience and you release and hold Phron harmless from any and all liability arising from your use of this information or the information provided by any third-party website or service.
# Waffle & Mars
## Using Waffle & Mars to Deploy to Phron
### Introduction
[Waffle](https://getwaffle.io/) is a library for compiling and testing smart contracts, and [Mars](https://github.com/TrueFiEng/Mars) is a deployment manager. Together, Waffle and Mars can be used to write, compile, test, and deploy Ethereum smart contracts. Since Phron is Ethereum compatible, Waffle and Mars can be used to deploy smart contracts to a Phron development node or the Phron TestNet.
Waffle uses minimal dependencies, has syntax that is easy to learn and extend, and provides fast execution times when compiling and testing smart contracts. Furthermore, it is [TypeScript](https://www.typescriptlang.org/) compatible and uses [Chai matchers](https://ethereum-waffle.readthedocs.io/en/latest/matchers.html) to make tests easy to read and write.
Mars provides a simple, TypeScript compatible framework for creating advanced deployment scripts and staying in sync with state changes. Mars focuses on infrastructure-as-code, allowing developers to specify how their smart contracts should be deployed and then using those specifications to automatically handle state changes and deployments.
In this guide, you'll be creating a TypeScript project to write, compile, and test a smart contract using Waffle, then deploy it on to the Phron TestNet using Mars.
### Checking Prerequisites
You will need to have the following:
* MetaMask installed and connected to Phron
* An account with funds. You can get DEV tokens for testing on Phron once every 24 hours from the [Phron Faucet](https://faucet.phron.ai/)
* To test out the examples in this guide on Phron, you will need to have your own endpoint and API key, which you can get from one of the supported Endpoint Providers
Once you've created an account you'll need to export the private key to be used in this guide.
### Create a TypeScript Project with Waffle & Mars
To get started, you'll create a TypeScript project and install and configure a few dependencies.
1. Create the project directory and change to it:
```bash
mkdir waffle-mars && cd waffle-mars
```
2. Initialize the project. Which will create a `package.json` in the directory:
```bash
npm init -y
```
3. Install the following dependencies:
```bash
npm install ethereum-waffle ethereum-mars ethers \
@openzeppelin/contracts typescript ts-node chai \
@types/chai mocha @types/mocha
```
* [Waffle](https://github.com/TrueFiEng/Waffle) - for writing, compiling, and testing smart contracts
* [Mars](https://github.com/TrueFiEng/Mars) - for deploying smart contracts to Phron
* [Ethers](https://github.com/ethers-io/ethers.js) - for interacting with Phron's Ethereum API
* [OpenZeppelin Contracts](https://github.com/OpenZeppelin/openzeppelin-contracts) - the contract you'll be creating will use OpenZeppelin's ERC-20 base implementation
* [TypeScript](https://github.com/microsoft/TypeScript) - the project will be a TypeScript project
* [TS Node](https://github.com/TypeStrong/ts-node) - for executing the deployment script you'll create later in this guide
* [Chai](https://github.com/chaijs/chai) - an assertion library used alongside Waffle for writing tests
* [@types/chai](https://github.com/DefinitelyTyped/DefinitelyTyped/tree/HEAD/types/chai) - contains the type definitions for chai
* [Mocha](https://github.com/mochajs/mocha) - a testing framework for writing tests alongside Waffle
* [@types/mocha](https://github.com/DefinitelyTyped/DefinitelyTyped/tree/HEAD/types/mocha) - contains the type definitions for mocha
4. Create a [TypeScript configuration](https://www.typescriptlang.org/docs/handbook/tsconfig-json.html) file:
```bash
touch tsconfig.json
```
5. Add a basic TypeScript configuration:
```typescript
{
"compilerOptions": {
"strict": true,
"target": "ES2019",
"moduleResolution": "node",
"resolveJsonModule": true,
"esModuleInterop": true,
"module": "CommonJS",
"composite": true,
"sourceMap": true,
"declaration": true,
"noEmit": true
}
}
```
Now, you should have a basic TypeScript project with the necessary dependencies to get started building with Waffle and Mars.
### Add a Contract
For this guide, you will create an ERC-20 contract that mints a specified amount of tokens to the contract creator. It's based on the OpenZeppelin ERC-20 template.
1. Create a directory to store your contracts and a file for the smart contract:
```bash
mkdir contracts && cd contracts && touch MyToken.sol
```
2. Add the following contract to `MyToken.sol`:
```solidity
pragma solidity ^0.8.0;
import "@openzeppelin/contracts/token/ERC20/ERC20.sol";
contract MyToken is ERC20 {
constructor() ERC20("MyToken", "MYTOK") {}
function initialize(uint initialSupply) public {
_mint(msg.sender, initialSupply);
}
}
```
In this contract, you are creating an ERC-20 token called MyToken with the symbol MYTOK, that allows you, as the contract creator, to mint as many MYTOKs as desired.
### Use Waffle to Compile and Test
#### Compile with Waffle
Now that you have written a smart contract, the next step is to use Waffle to compile it. Before diving into compiling your contract, you will need to configure Waffle:
1. Go back to the root project directory and create a `waffle.json` file to configure Waffle:
```bash
cd .. && touch waffle.json
```
2. Edit the `waffle.json` to specify compiler configurations, the directory containing your contracts, and more. For this example, we'll use `solcjs` and the Solidity version you used for the contract, which is `0.8.0`:
```json
{
"compilerType": "solcjs",
"compilerVersion": "0.8.0",
"compilerOptions": {
"optimizer": {
"enabled": true,
"runs": 20000
}
},
"sourceDirectory": "./contracts",
"outputDirectory": "./build",
"typechainEnabled": true
}
```
3. Add a script to run Waffle in the `package.json`:
```javascript
"scripts": {
"build": "waffle"
},
```
That is all you need to do to configure Waffle, now you're all set to compile the `MyToken` contract using the `build` script:
```bash
npm run build
```
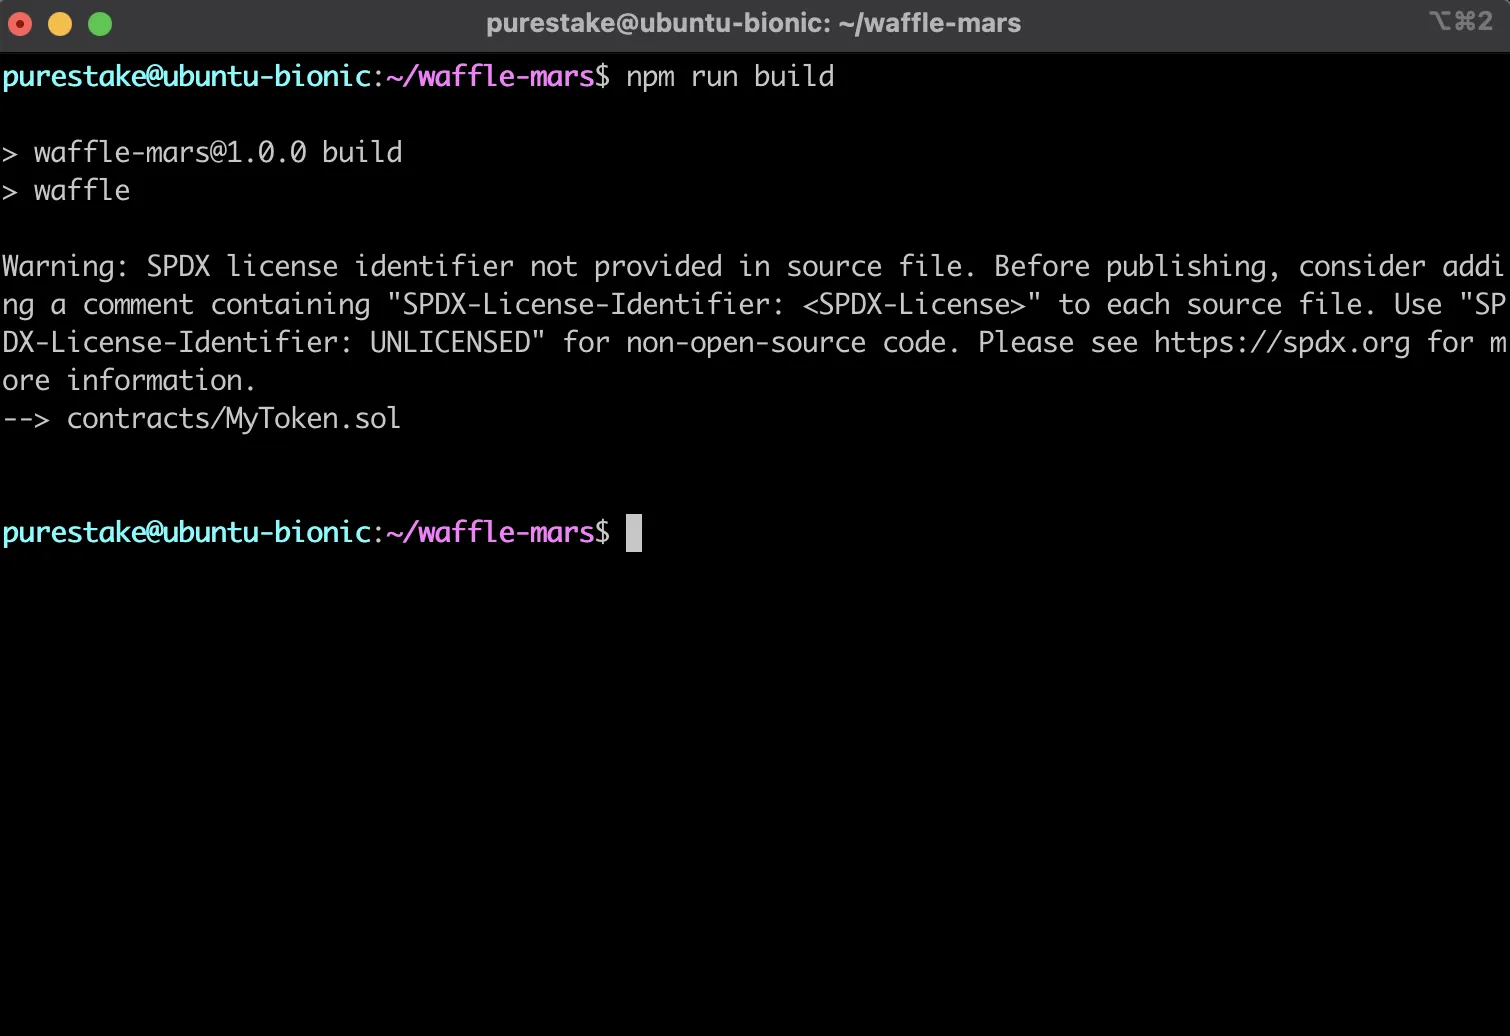
After compiling your contracts, Waffle stores the JSON output in the `build` directory. Since the contract in this guide is based on OpenZeppelin's ERC-20 template, relevant ERC-20 JSON files will appear in the `build` directory too.
#### Test with Waffle
Before deploying your contract and sending it off into the wild, you should test it first. Waffle provides an advanced testing framework and has plenty of tools to help you with testing.
You'll be running tests against the Phron TestNet and will need the corresponding RPC URL to connect to it: `https://testnet.phron.ai`.
To configure your project for Phron, you will need to have your own endpoint and API key, which you can get from one of the supported Endpoint Providers.
Since you will be running tests against the TestNet, it might take a couple minutes to run all of the tests. If you want a more efficient testing experience, you can spin up a Phron development node using `instant seal`. Running a local Phron development node with the `instant seal` feature is similar to the quick and iterative experience you would get with [Hardhat Network](https://hardhat.org/hardhat-network/docs/overview).
1. Create a directory to contain your tests and a file to test your `MyToken` contract:
```bash
mkdir test && cd test && touch MyToken.test.ts
```
2. Open the `MyToken.test.ts` file and setup your test file to use Waffle's Solidity plugin and use Ethers custom JSON-RPC provider to connect to Phron:
```javascript
import { use, expect } from 'chai';
import { Provider } from '@ethersproject/providers';
import { solidity } from 'ethereum-waffle';
import { ethers, Wallet } from 'ethers';
import { MyToken, MyTokenFactory } from '../build/types';
// Tell Chai to use Waffle's Solidity plugin
use(solidity);
describe ('MyToken', () => {
// Use custom provider to connect to Phron
let provider: Provider = new ethers.providers.JsonRpcProvider(
'https://testnet.phron.ai'
);
let wallet: Wallet;
let walletTo: Wallet;
let token: MyToken;
beforeEach(async () => {
// Logic for setting up the wallet and deploying MyToken will go here
});
// Tests will go here
})
```
3. Before each test is run, you'll want to create wallets and connect them to the provider, use the wallets to deploy an instance of the `MyToken` contract, and then call the `initialize` function once with an initial supply of 10 tokens:
  beforeEach(async () => {
       // This is for demo purposes only. Never store your private key in a JavaScript/TypeScript file
       const privateKey = 'INSERT_PRIVATE_KEY'
       // Create a wallet instance using your private key & connect it to the provider
       wallet = new Wallet(privateKey).connect(provider);

       // Create a random account to transfer tokens to & connect it to the provider
       walletTo = Wallet.createRandom().connect(provider);

       // Use your wallet to deploy the MyToken contract
       token = await new MyTokenFactory(wallet).deploy();

       // Mint 10 tokens to the contract owner, which is you
       let contractTransaction = await token.initialize(10);

       // Wait until the transaction is confirmed before running tests
       await contractTransaction.wait();
     });
4. Now you can create your first test. The first test will check your initial balance to ensure you received the initial supply of 10 tokens. However, to follow good testing practices, write a failing test first:
```javascript
it('Mints the correct initial balance', async () => {
expect(await token.balanceOf(wallet.address)).to.equal(1); // This should fail
});
```
5. Before you can run your first test, you'll need to go back to the root direction and add a `.mocharc.json` Mocha configuration file:
```
cd .. && touch .mocharc.json
```
6. Now edit the `.mocharc.json` file to configure Mocha:
```typescript
{
"require": "ts-node/register/transpile-only",
"timeout": 600000,
"extension": "test.ts"
}
```
7. You'll also need to add a script in the `package.json` to run your tests:
```json
"scripts": {
"build": "waffle",
"test": "mocha"
},
```
8. You're all set to run the tests, simply use the `test` script you just created and run:
```bash
npm run test
```
Please note that it could take a few minutes to process because the tests are running against Phron, but if all worked as expected, you should have one failing test.
9. Next, you can go back and edit the test to check for 10 tokens:
```javascript
it('Mints the correct initial balance', async () => {
expect(await token.balanceOf(wallet.address)).to.equal(10); // This should pass
});
```
10. If you run the tests again, you should now see one passing test:
```bash
npm run test
```
11. You've tested the ability to mint tokens, next you'll test the ability to transfer the minted tokens. If you want to write a failing test first again that is up to, however the final test should look like this:
it('Should transfer the correct amount of tokens to the destination account', async () => {
      // Send the destination wallet 7 tokens
      await (await token.transfer(walletTo.address, 7)).wait();

      // Expect the destination wallet to have received the 7 tokens
      expect(await token.balanceOf(walletTo.address)).to.equal(7);
    });
Congratulations, you should now have two passing tests! Altogether, your test file should look like this:
{% code overflow="wrap" %}
```jsx
import { use, expect } from 'chai';
import { Provider } from '@ethersproject/providers';
import { solidity } from 'ethereum-waffle';
import { ethers, Wallet } from 'ethers';
import { MyToken, MyTokenFactory } from '../build/types';
use(solidity);
describe('MyToken', () => {
let provider: Provider = new ethers.providers.JsonRpcProvider(
'https://testnet.phron.ai'
);
let wallet: Wallet;
let walletTo: Wallet;
let token: MyToken;
beforeEach(async () => {
// For demo purposes only. Never store your private key in a JavaScript/TypeScript file
const privateKey = 'INSERT_PRIVATE_KEY';
wallet = new Wallet(privateKey).connect(provider);
walletTo = Wallet.createRandom().connect(provider);
token = await new MyTokenFactory(wallet).deploy();
let contractTransaction = await token.initialize(10);
await contractTransaction.wait();
});
it('Mints the correct initial balance', async () => {
expect(await token.balanceOf(wallet.address)).to.equal(10);
});
it('Should transfer the correct amount of tokens to the destination account', async () => {
await (await token.transfer(walletTo.address, 7)).wait();
expect(await token.balanceOf(walletTo.address)).to.equal(7);
});
});
```
{% endcode %}
If you want to write more tests on your own, you could consider testing transfers from accounts without any funds or transfers from accounts without enough funds.
### Use Mars to Deploy to Phron
After you compile your contracts and before deployment, you will have to generate contract artifacts for Mars. Mars uses the contract artifacts for typechecks in deployments. Then you'll need to create a deployment script and deploy the `MyToken` smart contract.
Remember, you will be deploying to Phron and will need to use the TestNet RPC URL:
```url
https://testnet.phron.ai
```
To configure your project for Phron, you will need to have your own endpoint and API key, which you can get from one of the supported Endpoint Providers.
The deployment will be broken up into three sections: generate artifacts, create a deployment script, and deploy with Mars.
#### Generate Artifacts
Artifacts need to be generated for Mars so that typechecks are enabled within deployment scripts.
1. Update existing script to run Waffle in the `package.json` to include Mars:
```json
"scripts": {
"build": "waffle && mars",
"test": "mocha"
},
```
2. Generate the artifacts and create the `artifacts.ts` file needed for deployments:
```bash
npm run build
```
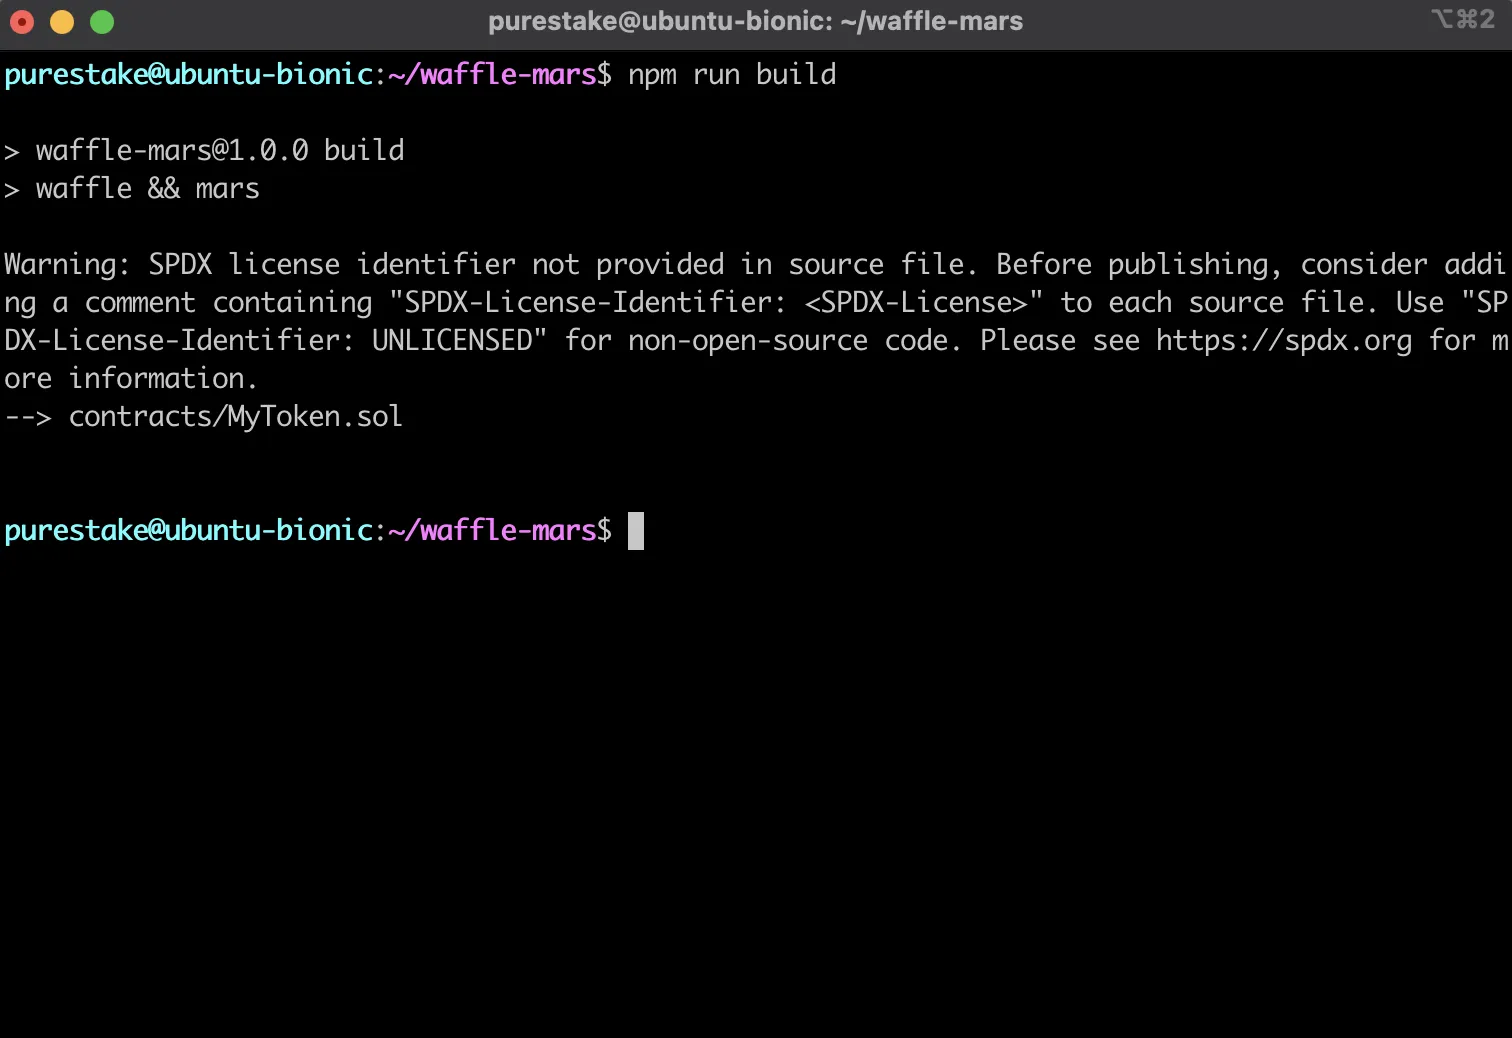
If you open the `build` directory, you should now see an `artifacts.ts` file containing the artifact data needed for deployments. To continue on with the deployment process, you'll need to write a deployment script. The deployment script will be used to tell Mars which contract to deploy, to what network, and which account is to be used to trigger the deployment.
#### Create a Deployment Script
Now you need to configure the deployment for the `MyToken` contract to the Phron TestNet.
In this step, you'll create the deployment script which will define how the contract should be deployed. Mars offers a `deploy` function that you can pass options to such as the private key of the account to deploy the contract, the network to deploy to, and more. Inside of the `deploy` function is where the contracts to be deployed are defined. Mars has a `contract` function that accepts the `name`, `artifact`, and `constructorArgs`. This function will be used to deploy the `MyToken` contract with an initial supply of 10 MYTOKs.
1. Create a `src` directory to contain your deployment scripts and create the script to deploy the `MyToken` contract:
```bash
mkdir src && cd src && touch deploy.ts
```
2. In `deploy.ts`, use Mars' `deploy` function to create a script to deploy to Phron using your account's private key:
import { deploy } from 'ethereum-mars';

   // For demo purposes only. Never store your private key in a JavaScript/TypeScript file
   const privateKey = 'INSERT_PRIVATE_KEY';
   deploy(
     { network: 'https://testnet.phron.ai', privateKey },
     (deployer) => {
       // Deployment logic will go here
     }
   );
3. Set up the `deploy` function to deploy the `MyToken` contract created in the previous steps:
import { deploy, contract } from 'ethereum-mars';
   import { MyToken } from '../build/artifacts';

   // For demo purposes only. Never store your private key in a JavaScript/TypeScript file
   const privateKey = 'INSERT_PRIVATE_KEY';
   deploy({ network: 'https://testnet.phron.ai', privateKey }, () => {
     contract('myToken', MyToken);
   });
4. Add a deploy script to the `scripts` object in the `package.json`:
```json
"scripts": {
"build": "waffle && mars",
"test": "mocha",
"deploy": "ts-node src/deploy.ts"
}
```
So far, you should have created a deployment script in `deploy.ts` that will deploy the `MyToken` contract to Phron, and added the ability to easily call the script and deploy the contract.
#### Deploy with Mars
You've configured the deployment, now it's time to actually deploy to Phron.
1. Deploy the contract using the script you just created:
```bash
npm run deploy
```
2. In your Terminal, Mars will prompt you to press `ENTER` to send your transaction
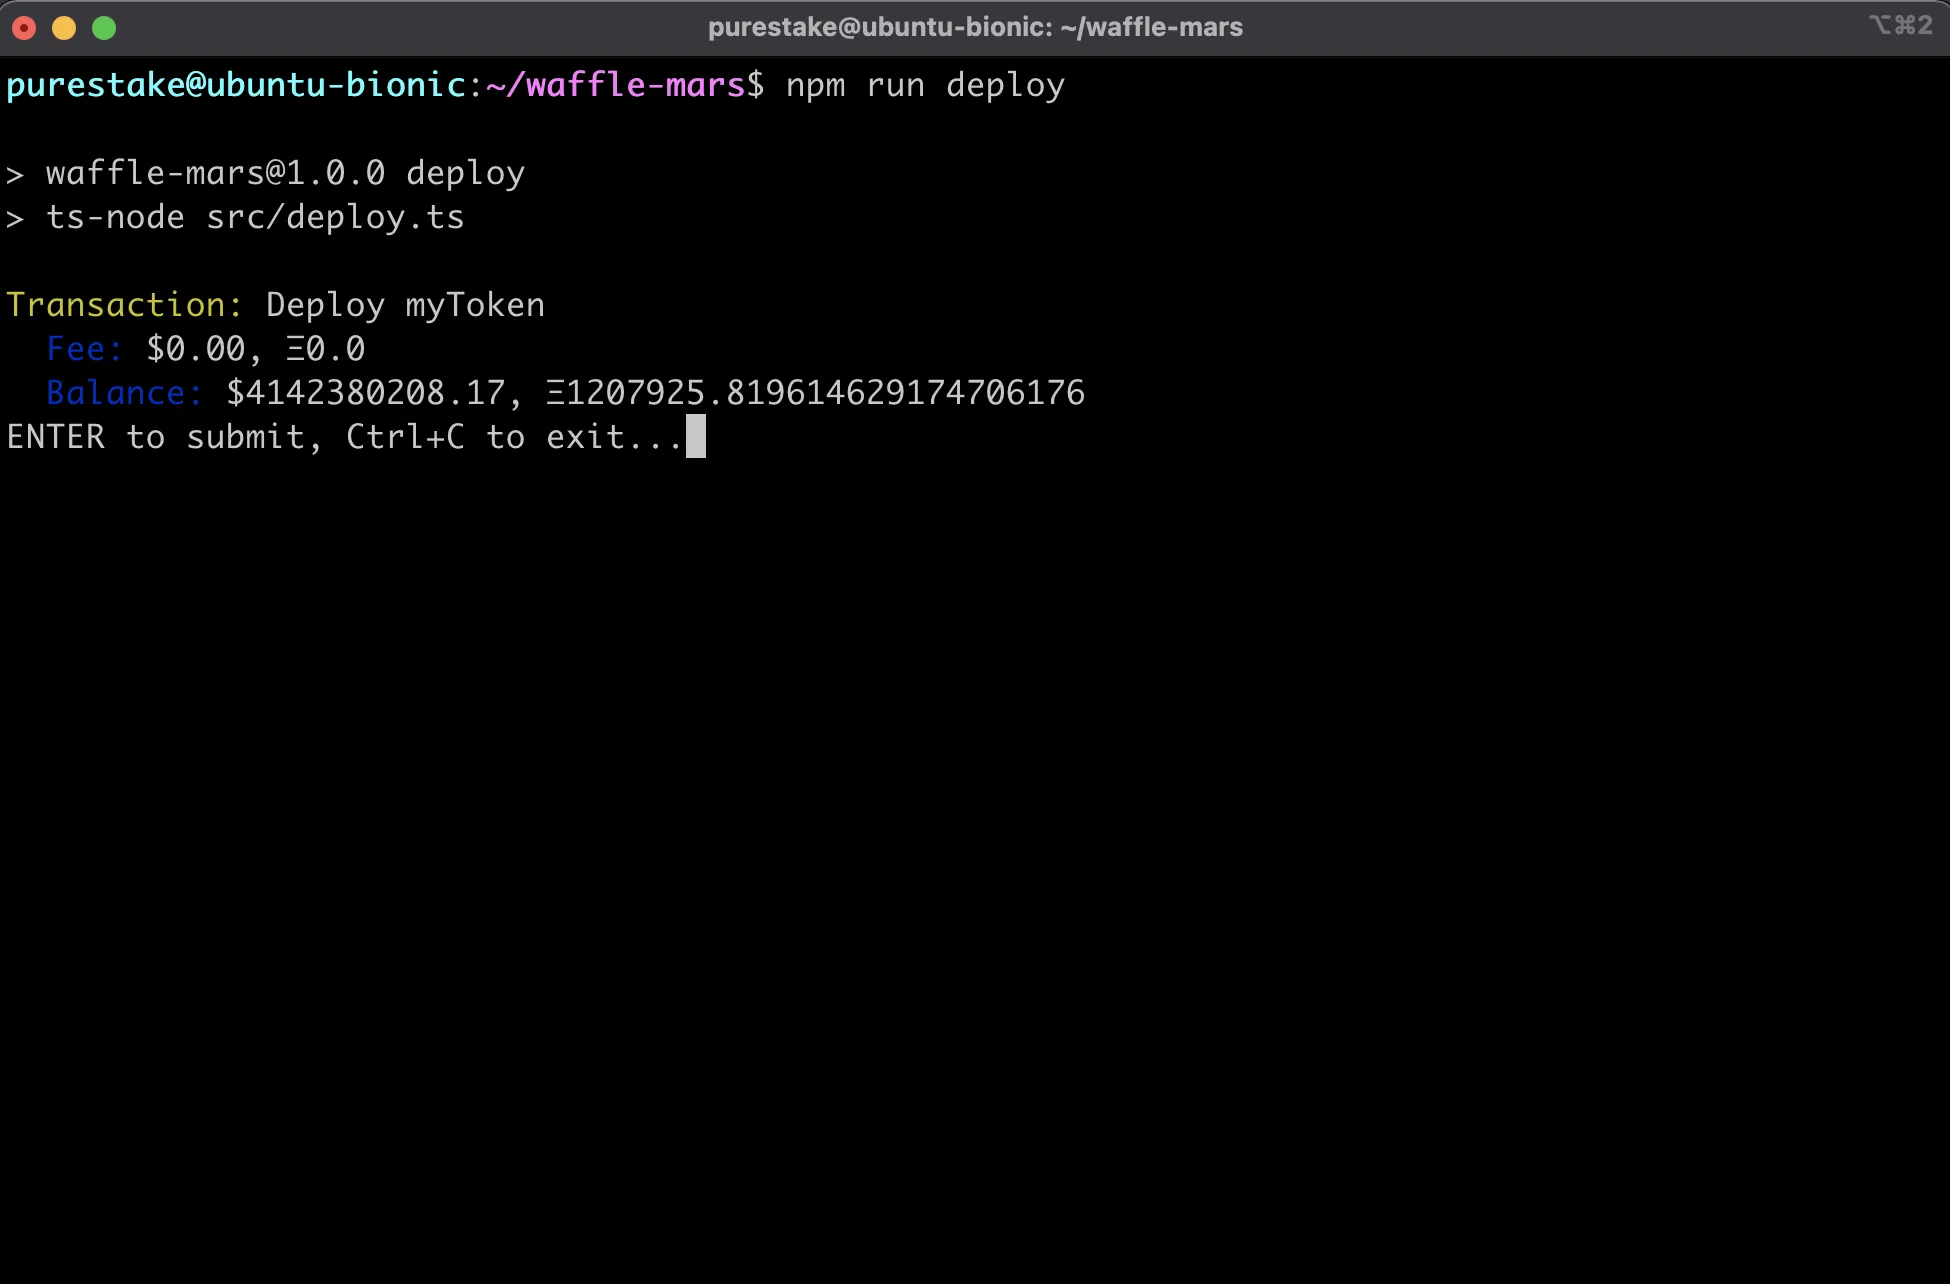
If successful, you should see details about your transaction including it's hash, the block it was included in, and it's address.
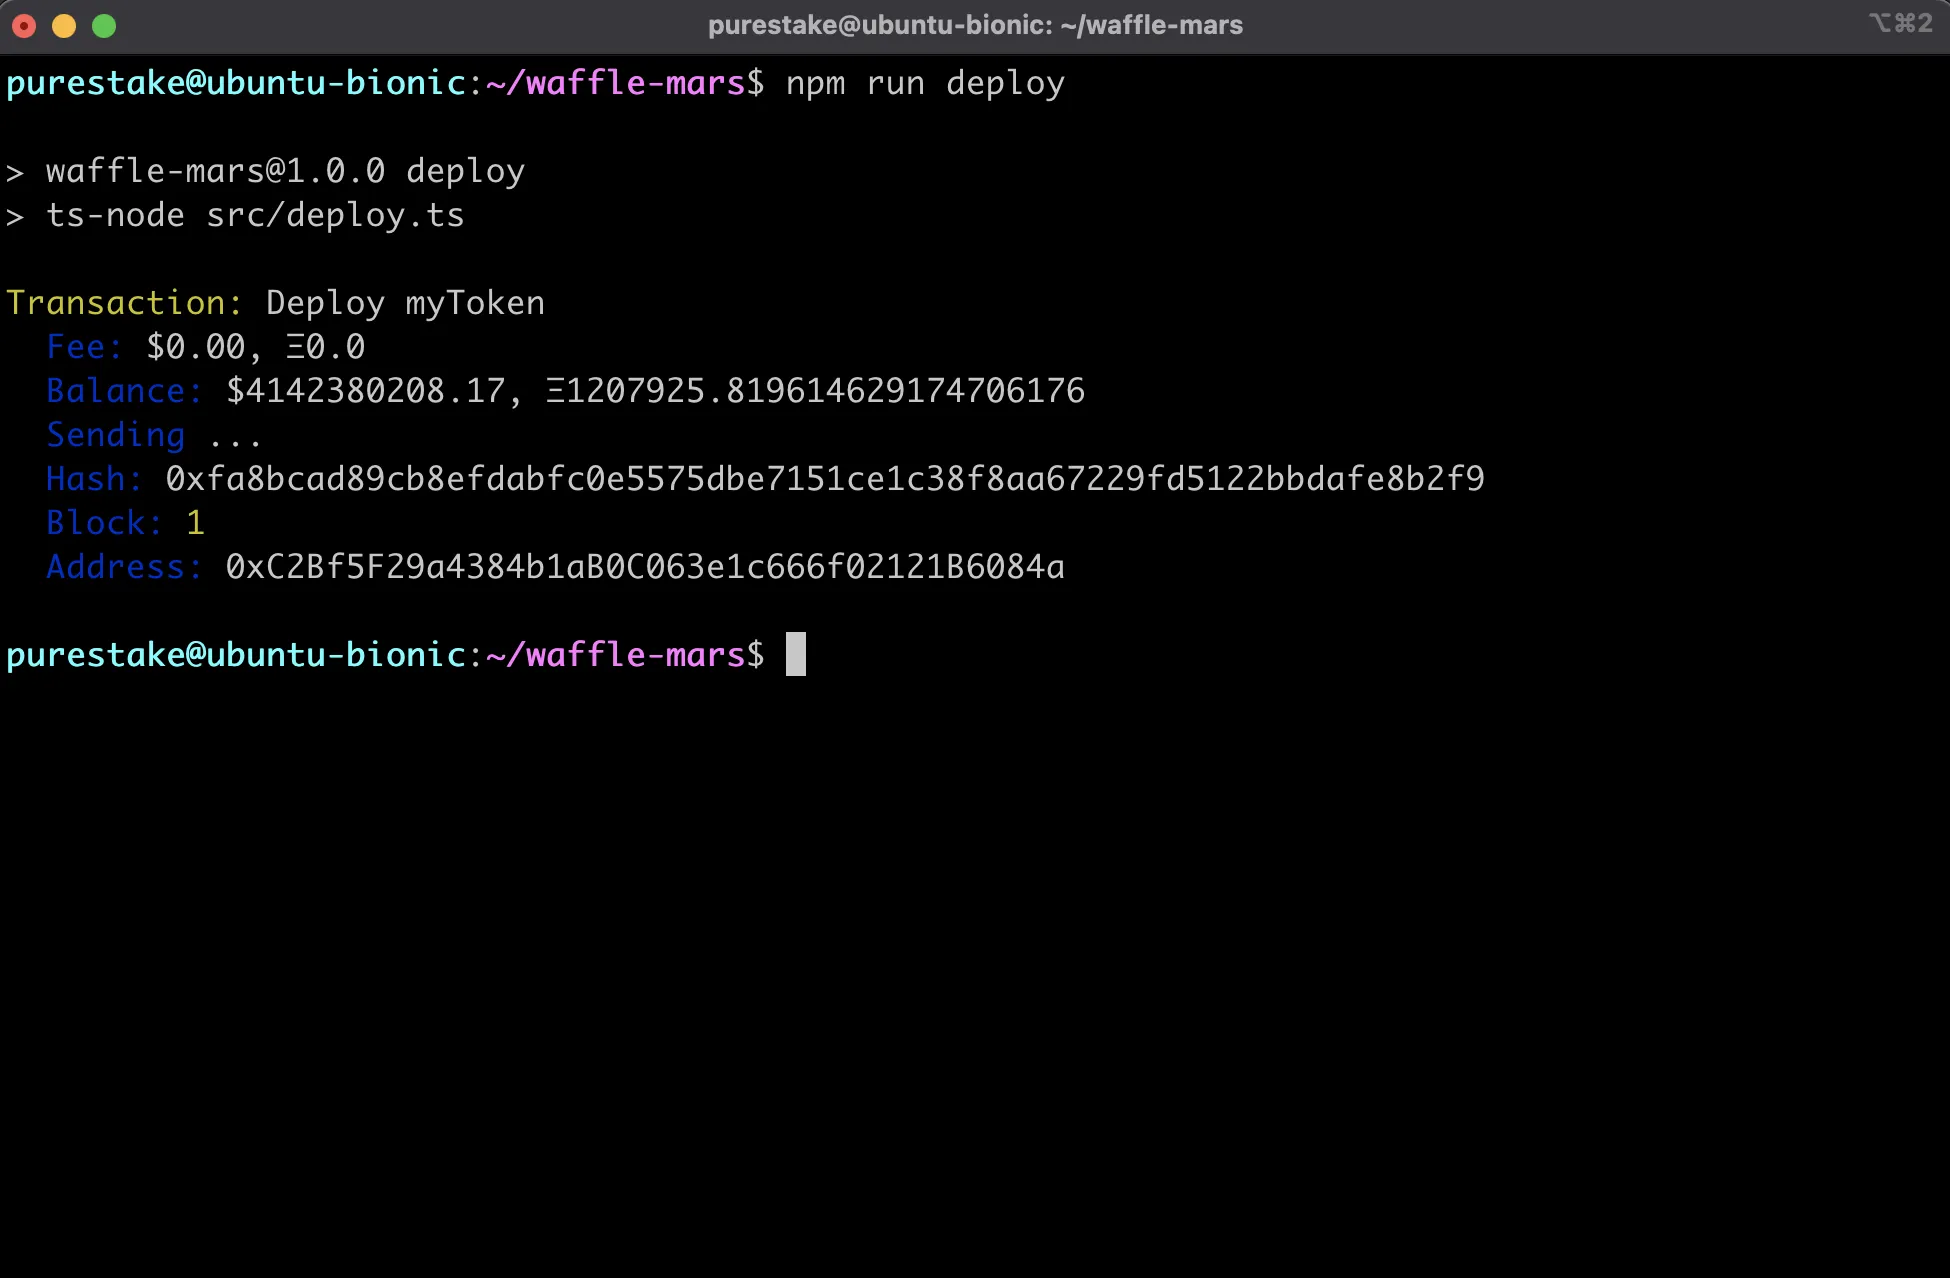
Congratulations! You've deployed a contract to Phron using Waffle and Mars!
### Example Project
If you want to see a completed example of a Waffle and Mars project on Phron, check out the phron-waffle-mars-example created by the team behind Waffle and Mars, EthWorks.
This tutorial is for educational purposes only. As such, any contracts or code created in this tutorial should not be used in production.The information presented herein has been provided by third parties and is made available solely for general information purposes. Phron does not endorse any project listed and described on the Phron Doc Website (). Phron does not warrant the accuracy, completeness or usefulness of this information. Any reliance you place on such information is strictly at your own risk. Phron disclaims all liability and responsibility arising from any reliance placed on this information by you or by anyone who may be informed of any of its contents. All statements and/or opinions expressed in these materials are solely the responsibility of the person or entity providing those materials and do not necessarily represent the opinion of Phron. The information should not be construed as professional or financial advice of any kind. Advice from a suitably qualified professional should always be sought in relation to any particular matter or circumstance. The information herein may link to or integrate with other websites operated or content provided by third parties, and such other websites may link to this website. Phron has no control over any such other websites or their content and will have no liability arising out of or related to such websites or their content. The existence of any such link does not constitute an endorsement of such websites, the content of the websites, or the operators of the websites. These links are being provided to you only as a convenience and you release and hold Phron harmless from any and all liability arising from your use of this information or the information provided by any third-party website or service.
# Contract Verification
# PhronScan
## Verify Smart Contracts using PhronScan
### Introduction
Verifying smart contracts on a PhronScan is a great way to improve the transparency and security of deployed smart contracts on Phron. Users can directly view the source code for verified smart contracts, and for some block explorers, they can also directly interact with the contract's public methods through the PhronScan's interface.
This page will outline the steps for verifying smart contracts on Phron networks through block explorers.
### Deploying the Contract
In order to verify a smart contract on a PhronScan, the contract must first be deployed on the target network. This tutorial will be about deploying the smart contract to Phron.
You can check out this page for a tutorial on deploying smart contracts using Ethereum libraries on Phron. You may also use a developer tool such as Remix, Hardhat, or another tool if preferred, to deploy the smart contract to Phron.
This tutorial will use the same contract as the above deployment tutorial for the contract verification example.
The contract used is a simple incrementer, arbitrarily named `Incrementer.sol`. The Solidity code is the following:
```solidity
// SPDX-License-Identifier: MIT
pragma solidity ^0.8.0;
contract Incrementer {
uint256 public number;
constructor(uint256 _initialNumber) {
number = _initialNumber;
}
function increment(uint256 _value) public {
number = number + _value;
}
function reset() public {
number = 0;
}
}
```
#### Collecting Information for Contract Verification
You will need to collect some information related to the contract's compiler and deployment in order to verify it successfully.
1. Take note of the Solidity compiler version used to compile and deploy the contract. The Solidity compiler version can usually be selected or specified in the deployment tool used
2. Take note of any SPDX license identifier used at the beginning of the Solidity source file (this example uses an MIT license):
```solidity
// SPDX-License-Identifier: MIT
```
3. (Optional) If optimization is enabled during compilation, take note of the value of the optimization runs parameter
4. (Optional) If the contract constructor method accepts arguments, take note of the [ABI-encoded form](https://docs.soliditylang.org/en/develop/abi-spec.html) of the constructor arguments
5. After deployment, take note of the deployed contract address of the smart contract. The deployment address of the contract can be found either in the console output if using a command-line-based tool such as Hardhat, or an Ethereum library, or it can be copied from the GUI in tools such as Remix IDE
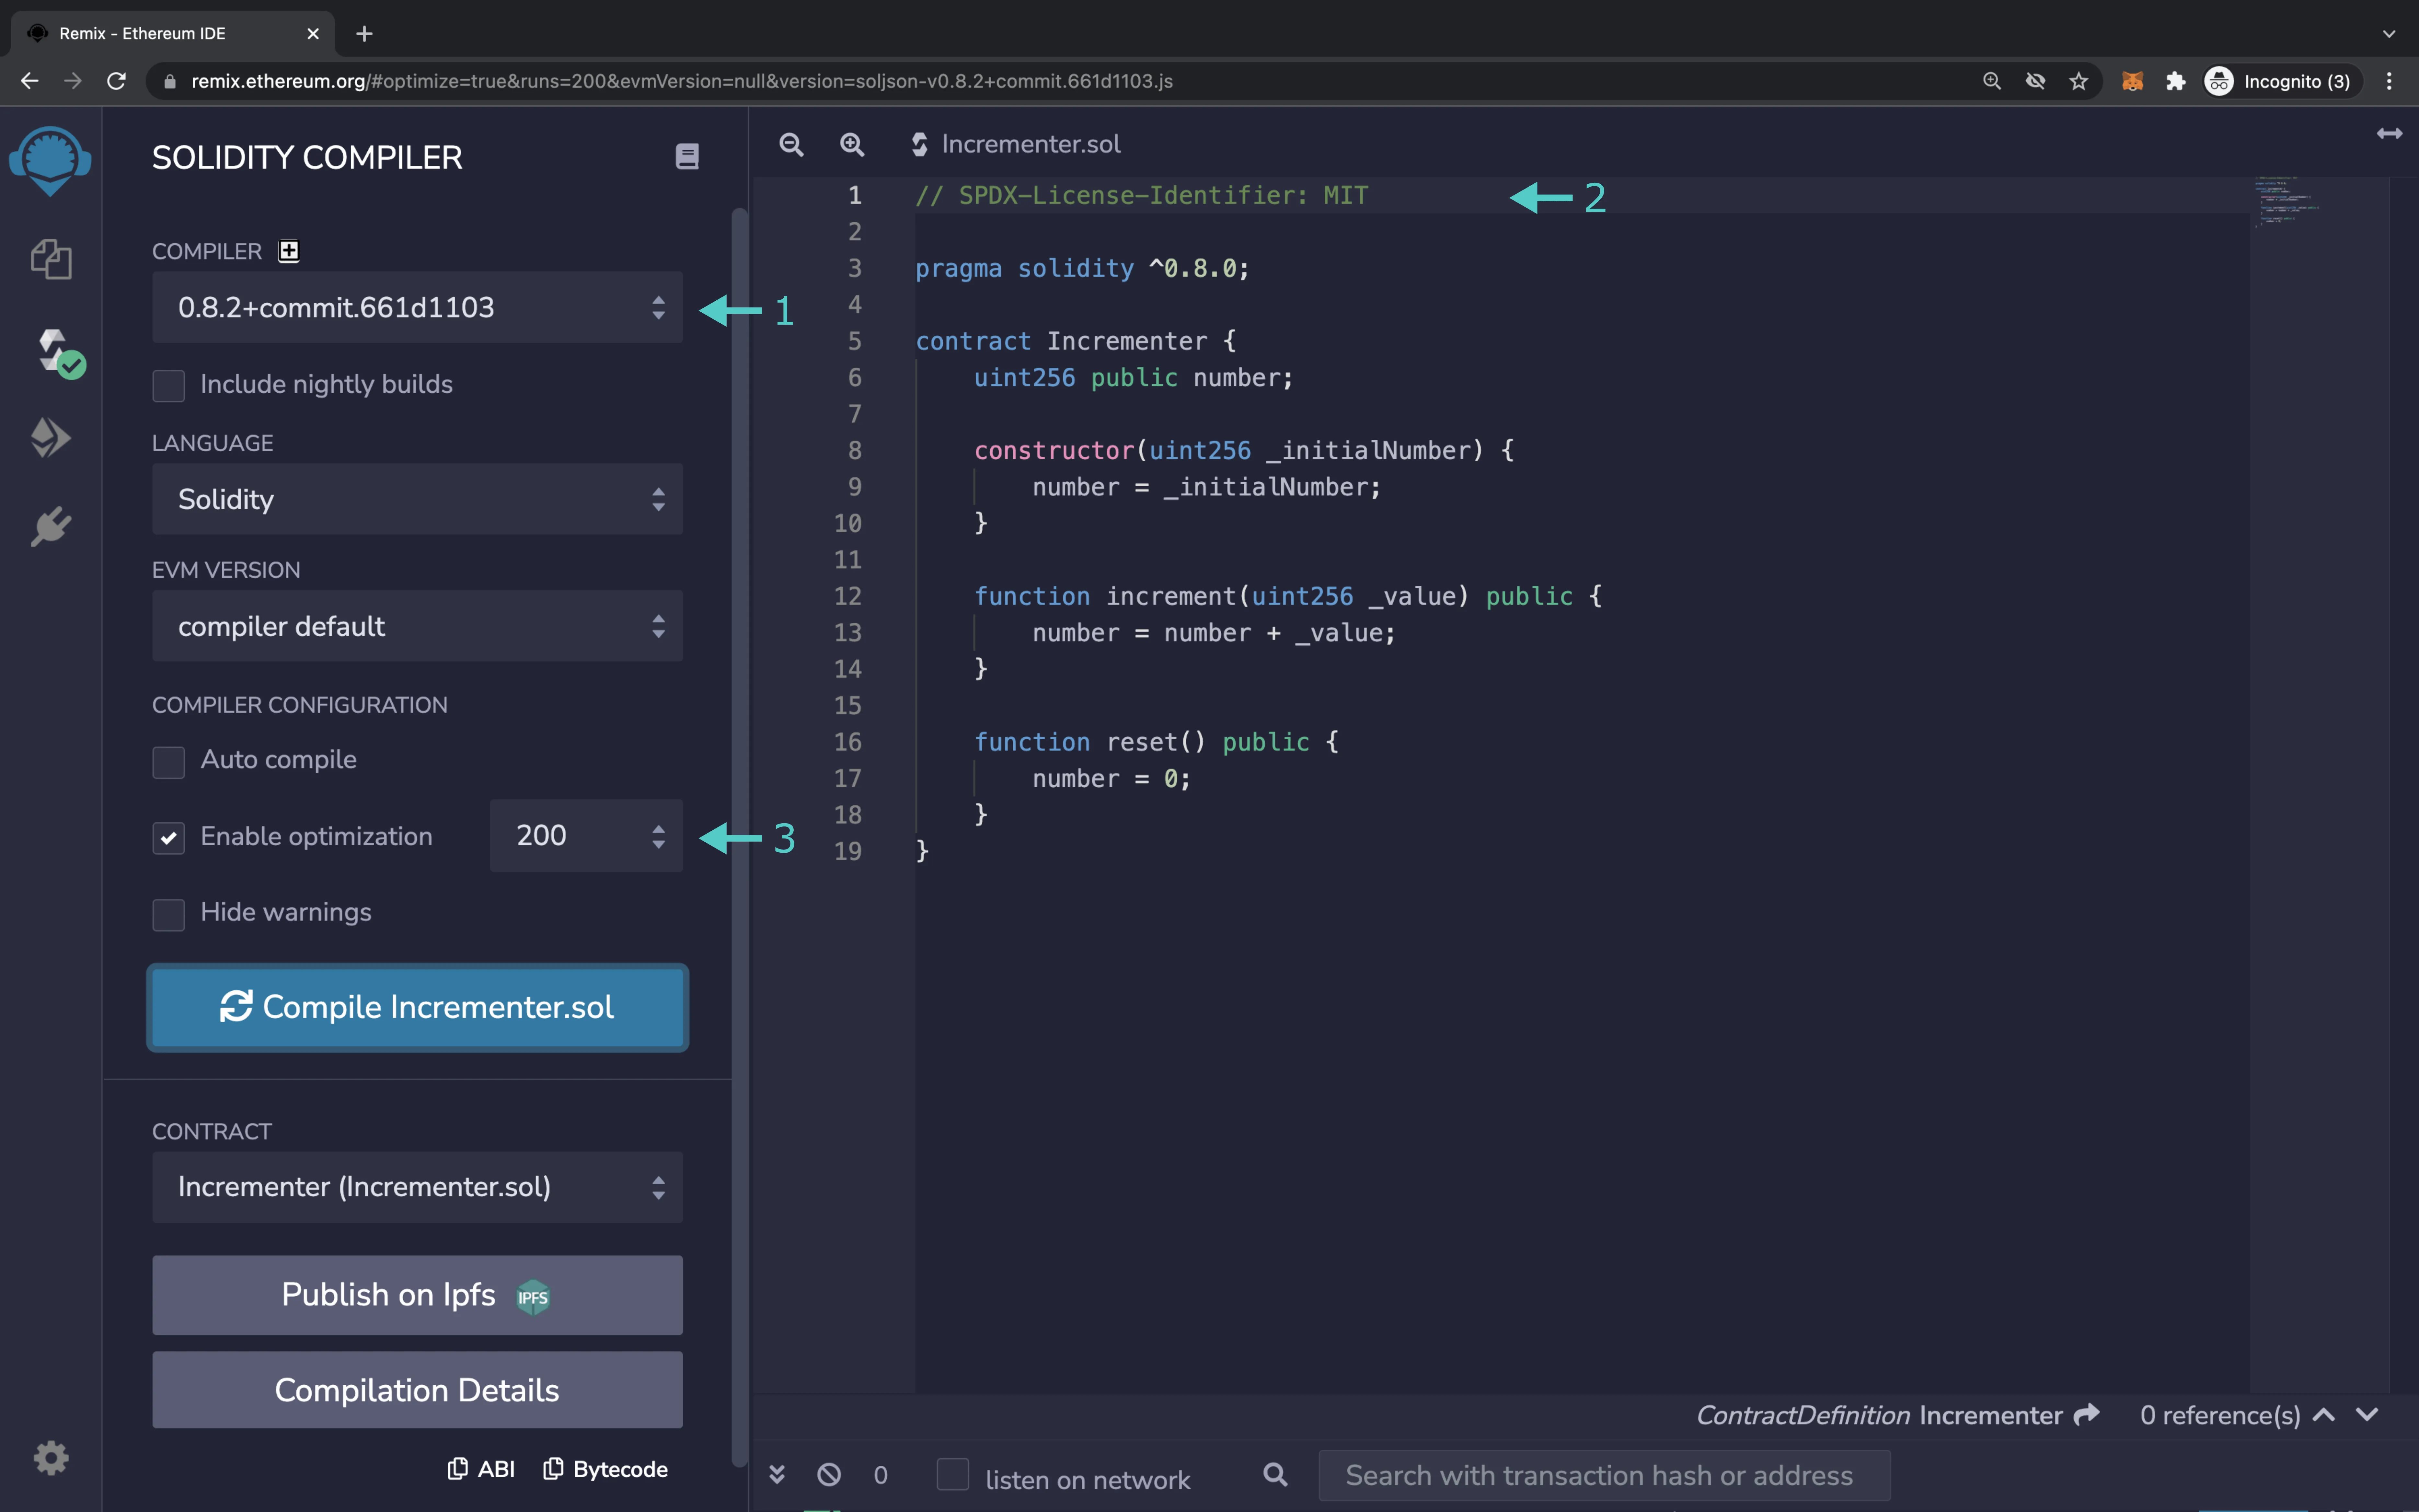
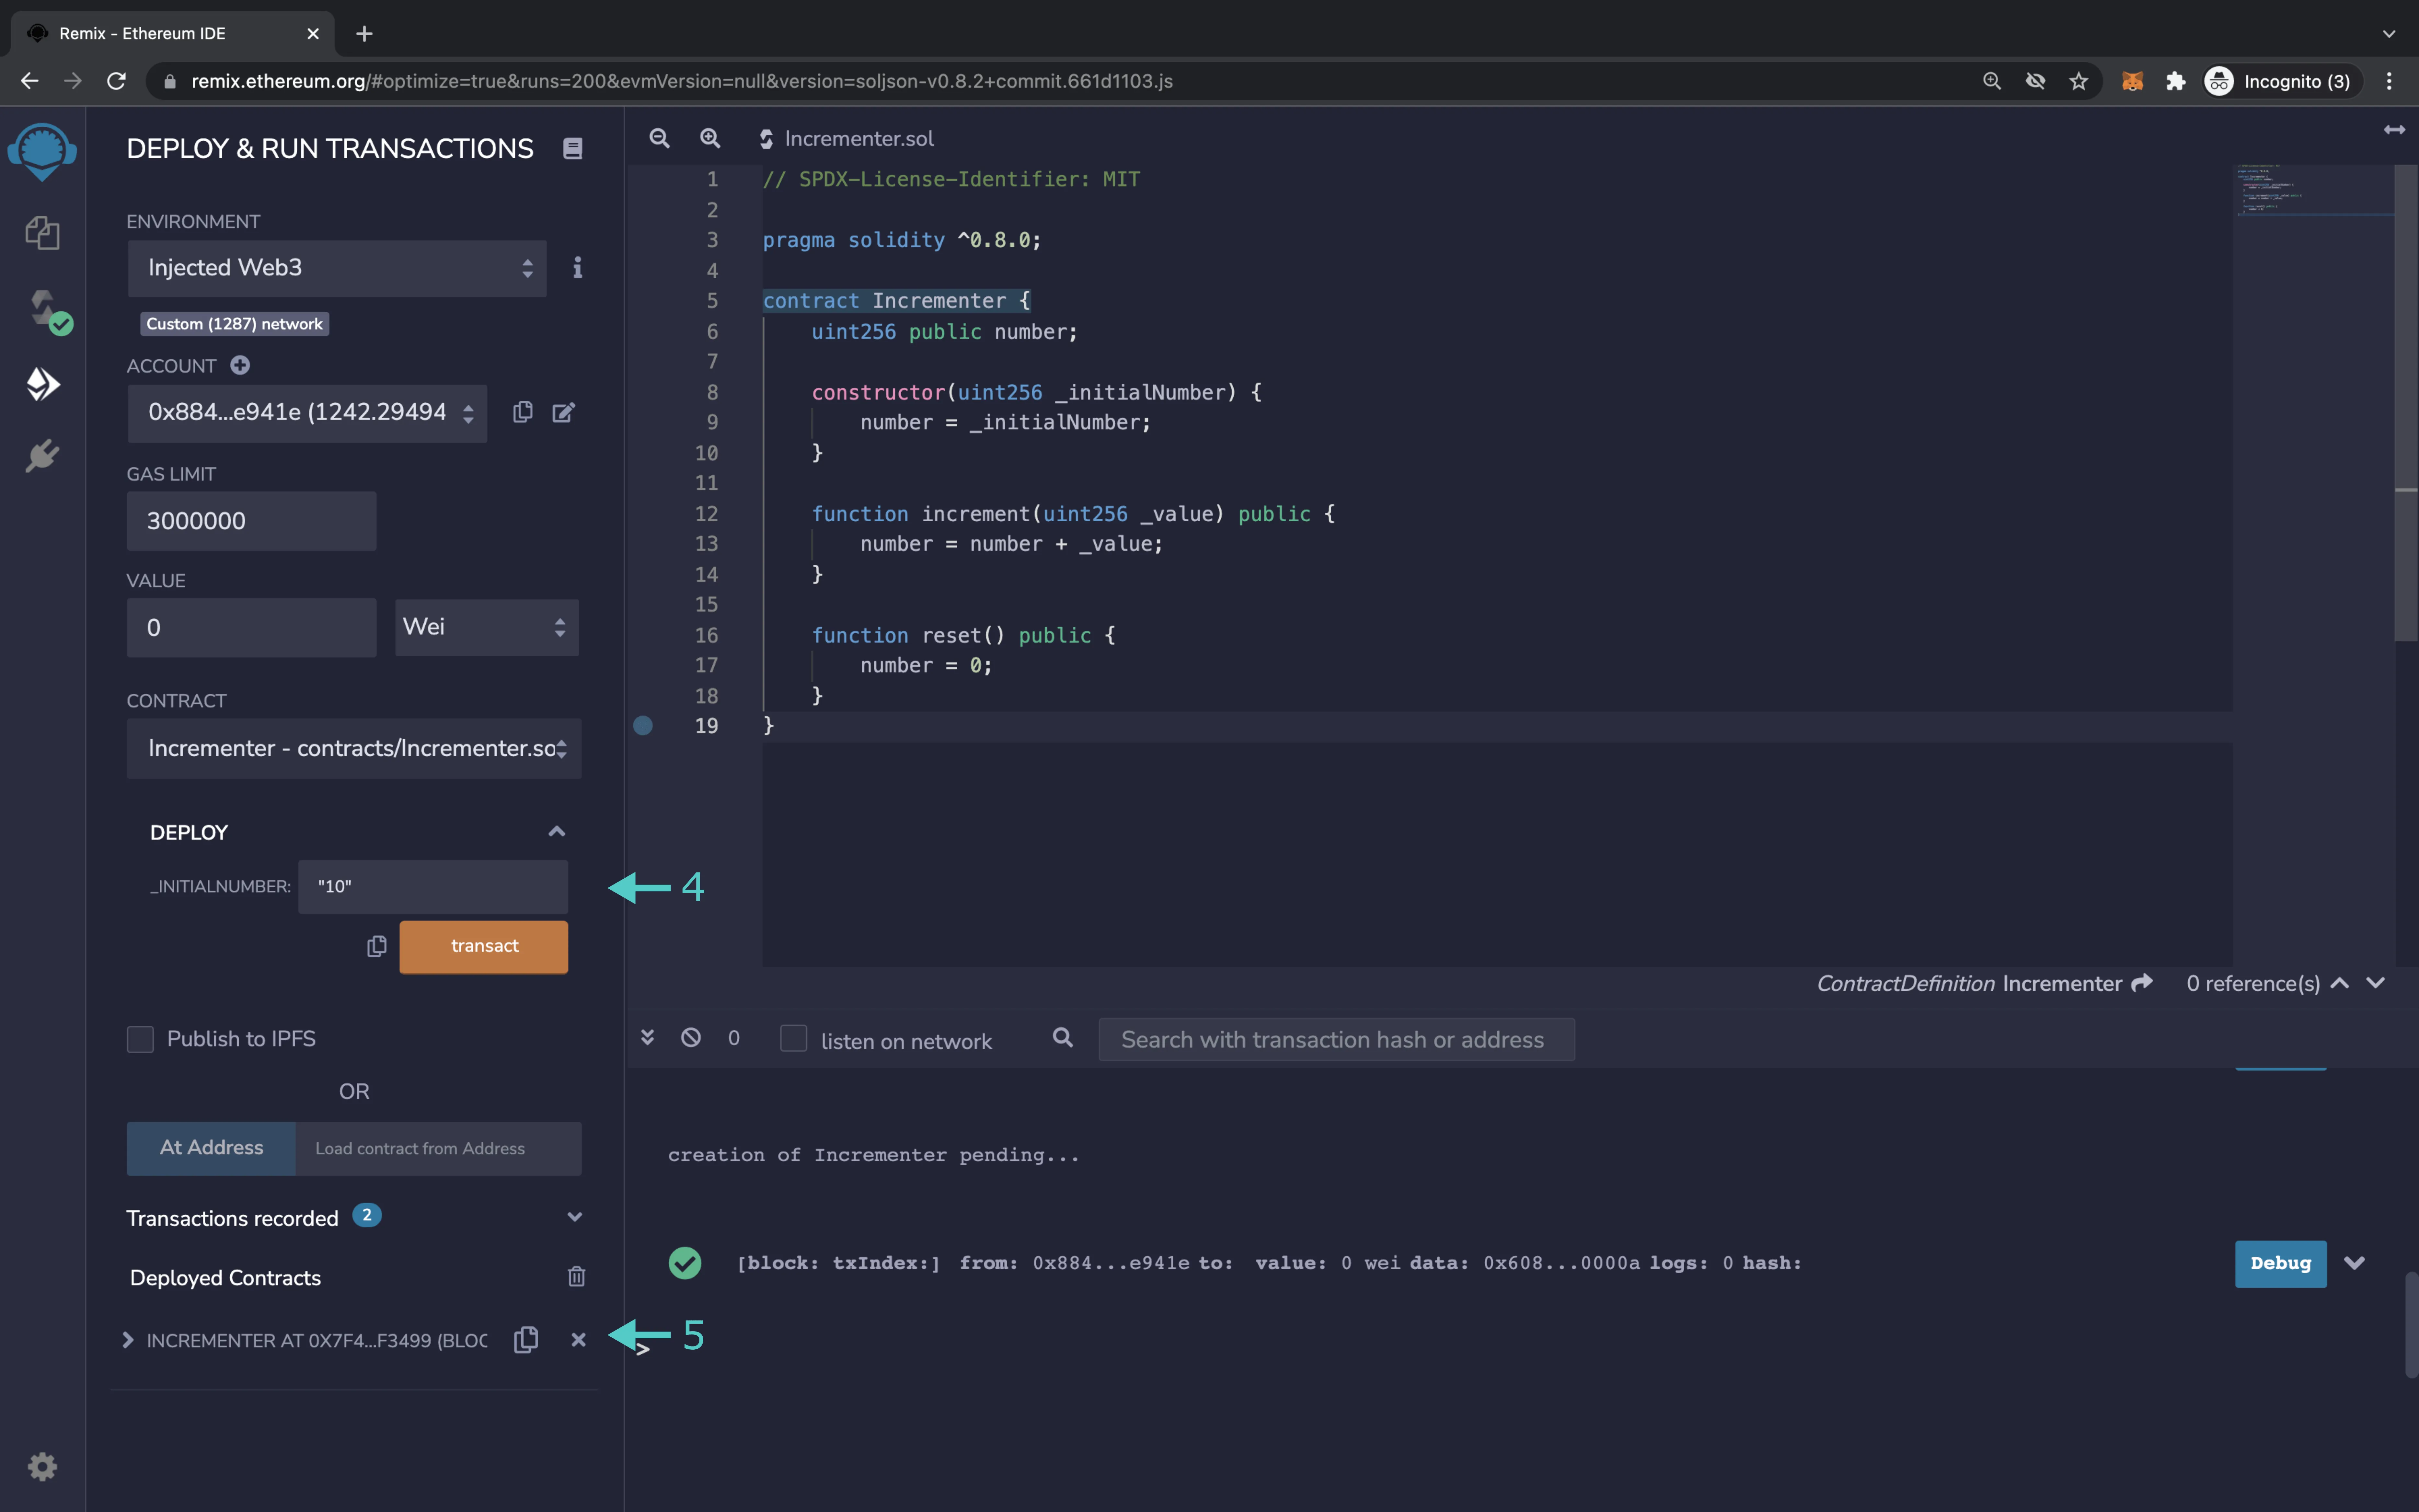
### Verify the Contract
The next step will be verifying the smart contract in an EVM-compatible explorer for the Phron network that you deployed to.
#### Phronscan
Take the following steps to verify the contract on Phronscan:
1. Go to the [PhronScan](https://testnet.phronscan.io).
2. Fill in the contract's deployed address in the first field, including the `0x` prefix
Search contract address
3. Click on contract tab
Click on contract
4. Then click on Verify & publish
Click on Verify & publish
5. Select the compiler type. For the current `Incrementer.sol` example, select **Solidity (Single file)**
6. After selecting the compiler type, select the compiler version used to compile the contract. If the compiler version used was a nightly commit, uncheck the box under the field to select the nightly version
7. Select the open-source license used. For the current `Incrementer.sol` example, select the option **MIT License (MIT)**. If there was none used, select **No License (None)**
8. Copy and paste the entirety of the contract's content into the text field labeled as such
9. (Optional) Select **Yes** for **Optimization** if it was enabled during compilation, and fill in the number of runs under **Misc Settings/Runs(Optimizer)**
10. (Optional) Add contract libraries and their addresses, if any were used in the contract
11. (Optional) Check any other optional fields that may apply to your contract, and fill them out accordingly
Click to Verify & publish
After a short wait, the result of verification will be displayed in the browser, and a success result page will display the contract's ABI-encoded constructor arguments, the contract name, bytecode, and ABI.
### Smart Contract Flattening
For verifying smart contracts that are made up of multiple files, the process is slightly different and requires some pre-processing to combine all the dependencies of the target smart contract into a single Solidity file.
This pre-processing is usually referred to as smart contract flattening. There are a number of tools that can be used to flatten a multi-part smart contract into a single Solidity file, such as [Hardhat's Flatten task](https://hardhat.org/hardhat-runner/docs/advanced/flattening). Please refer to the respective smart contract flattening tool's documentation for more detailed instructions on its usage.
After flattening the multi-part smart contract, it can be verified using the new flattened Solidity file on a PhronScan in the same way that a single-file smart contract is verified, as described in this tutorial.
# RPC APIs
# Standard Ethereum
## Supported Ethereum RPC Methods
### Introduction
While Phron supports a wide range of Ethereum JSON-RPC methods, not all are available, and some return default values—particularly those related to Ethereum’s Proof of Work (PoW) consensus mechanism. This guide provides a detailed list of the Ethereum JSON-RPC methods supported by Phron, allowing developers to easily reference the available functionality when interacting with Phron’s Ethereum-compatible blockchain.
### Standard Ethereum JSON-RPC Methods
The basic JSON-RPC methods from the Ethereum API supported by Phron are:
* [**eth\_protocolVersion**](https://ethereum.org/en/developers/docs/apis/json-rpc/#eth_protocolversion) — returns `1` by default
* [**eth\_syncing**](https://ethereum.org/en/developers/docs/apis/json-rpc/#eth_syncing) — returns an object with data about the sync status or `false`
* [**eth\_hashrate**](https://ethereum.org/en/developers/docs/apis/json-rpc/#eth_hashrate) — returns `"0x0"` by default
* [**eth\_coinbase**](https://ethereum.org/en/developers/docs/apis/json-rpc/#eth_coinbase) — returns the latest block author. Not necessarily a finalized block
* [**eth\_mining**](https://ethereum.org/en/developers/docs/apis/json-rpc/#eth_mining) — returns `false` by default
* [**eth\_chainId**](https://ethereum.org/en/developers/docs/apis/json-rpc/#eth_chainid) — returns the chain ID used for signing at the current block
* [**eth\_gasPrice**](https://ethereum.org/en/developers/docs/apis/json-rpc/#eth_gasprice) — returns the base fee per unit of gas used. This is currently the minimum gas price for each network
* [**eth\_accounts**](https://ethereum.org/en/developers/docs/apis/json-rpc/#eth_accounts) — returns a list of addresses owned by the client
* [**eth\_blockNumber**](https://ethereum.org/en/developers/docs/apis/json-rpc/#eth_blocknumber) — returns the highest available block number
* [**eth\_getBalance**](https://ethereum.org/en/developers/docs/apis/json-rpc/#eth_getbalance) — returns the balance of the given address
* [**eth\_getStorageAt**](https://ethereum.org/en/developers/docs/apis/json-rpc/#eth_getstorageat) — returns the content of the storage at a given address
* [**eth\_getBlockByHash**](https://ethereum.org/en/developers/docs/apis/json-rpc/#eth_getblockbyhash) — returns information about the block of the given hash, including `baseFeePerGas` on post-London blocks
* [**eth\_getBlockByNumber**](https://ethereum.org/en/developers/docs/apis/json-rpc/#eth_getblockbynumber) — returns information about the block specified by block number, including `baseFeePerGas` on post-London blocks
* [**eth\_getBlockReceipts**](https://docs.alchemy.com/reference/eth-getblockreceipts) — returns all transaction receipts for a given block
* [**eth\_getTransactionCount**](https://ethereum.org/en/developers/docs/apis/json-rpc/#eth_gettransactioncount) — returns the number of transactions sent from the given address (nonce)
* [**eth\_getBlockTransactionCountByHash**](https://ethereum.org/en/developers/docs/apis/json-rpc/#eth_getblocktransactioncountbyhash) — returns the number of transactions in a block with a given block hash
* [**eth\_getBlockTransactionCountByNumber**](https://ethereum.org/en/developers/docs/apis/json-rpc/#eth_getblocktransactioncountbynumber) — returns the number of transactions in a block with a given block number
* [**eth\_getUncleCountByBlockHash**](https://ethereum.org/en/developers/docs/apis/json-rpc/#eth_getunclecountbyblockhash) — returns `"0x0"` by default
* [**eth\_getUncleCountByBlockNumber**](https://ethereum.org/en/developers/docs/apis/json-rpc/#eth_getunclecountbyblocknumber) — returns `"0x0"` by default
* [**eth\_getCode**](https://ethereum.org/en/developers/docs/apis/json-rpc/#eth_getcode) — returns the code at the given address at the given block number
* [**eth\_sendTransaction**](https://ethereum.org/en/developers/docs/apis/json-rpc/#eth_sendtransaction) — creates a new message call transaction or a contract creation, if the data field contains code. Returns the transaction hash or the zero hash if the transaction is not yet available
* [**eth\_sendRawTransaction**](https://ethereum.org/en/developers/docs/apis/json-rpc/#eth_sendrawtransaction) — creates a new message call transaction or a contract creation for signed transactions. Returns the transaction hash or the zero hash if the transaction is not yet available
* [**eth\_call**](https://ethereum.org/en/developers/docs/apis/json-rpc/#eth_call) — executes a new message call immediately without creating a transaction on the blockchain, returning the value of the executed call
* Phron supports the use of the optional *state override set* object. This address-to-state mapping object allows the user to specify some state to be ephemerally overridden before executing a call to `eth_call`. The state override set is commonly used for tasks like debugging smart contracts. Visit the [go-ethereum](https://geth.ethereum.org/docs/interacting-with-geth/rpc/ns-eth#:~:text=Object%20%2D%20State%20override%20set) documentation to learn more
* [**eth\_estimateGas**](https://ethereum.org/en/developers/docs/apis/json-rpc/#eth_estimategas) — returns an estimated amount of gas necessary for a given transaction to succeed. You can optionally specify a `gasPrice` or `maxFeePerGas` and `maxPriorityFeePerGas`
* [**eth\_maxPriorityFeePerGas**](https://docs.alchemy.com/reference/eth-maxpriorityfeepergas) - returns an estimate of how much priority fee, in Wei, is needed for inclusion in a block
* [**eth\_feeHistory**](https://docs.alchemy.com/reference/eth-feehistory) — returns `baseFeePerGas`, `gasUsedRatio`, `oldestBlock`, and `reward` for a specified range of up to 1024 blocks
* [**eth\_getTransactionByHash**](https://ethereum.org/en/developers/docs/apis/json-rpc/#eth_gettransactionbyhash) — returns the information about a transaction with a given hash. EIP-1559 transactions have `maxPriorityFeePerGas` and `maxFeePerGas` fields
* [**eth\_getTransactionByBlockHashAndIndex**](https://ethereum.org/en/developers/docs/apis/json-rpc/#eth_gettransactionbyblockhashandindex) — returns information about a transaction at a given block hash and a given index position. EIP-1559 transactions have `maxPriorityFeePerGas` and `maxFeePerGas` fields
* [**eth\_getTransactionByBlockNumberAndIndex**](https://ethereum.org/en/developers/docs/apis/json-rpc/#eth_gettransactionbyblocknumberandindex) — returns information about a transaction at a given block number and a given index position. EIP-1559 transactions have `maxPriorityFeePerGas` and `maxFeePerGas` fields
* [**eth\_getTransactionReceipt**](https://ethereum.org/en/developers/docs/apis/json-rpc/#eth_gettransactionreceipt) — returns the transaction receipt of a given transaction hash
* [**eth\_getUncleByBlockHashAndIndex**](https://ethereum.org/en/developers/docs/apis/json-rpc/#eth_getunclebyblockhashandindex) — returns `null` by default
* [**eth\_getUncleByBlockNumberAndIndex**](https://ethereum.org/en/developers/docs/apis/json-rpc/#eth_getunclebyblocknumberandindex) — returns `null` by default
* [**eth\_getLogs**](https://ethereum.org/en/developers/docs/apis/json-rpc/#eth_getlogs) — returns an array of all logs matching a given filter object
* [**eth\_newFilter**](https://ethereum.org/en/developers/docs/apis/json-rpc/#eth_newfilter) — creates a filter object based on the input provided. Returns a filter ID
* [**eth\_newBlockFilter**](https://ethereum.org/en/developers/docs/apis/json-rpc/#eth_newblockfilter) — creates a filter in the node to notify when a new block arrives. Returns a filter ID
* [**eth\_newPendingTransactionFilter**](https://ethereum.org/en/developers/docs/apis/json-rpc/#eth_newpendingtransactionfilter) - creates a filter in the node to notify when new pending transactions arrive. Returns a filter ID
* [**eth\_getFilterChanges**](https://ethereum.org/en/developers/docs/apis/json-rpc/#eth_getfilterchanges) — polling method for filters (see methods above). Returns an array of logs that occurred since the last poll
* [**eth\_getFilterLogs**](https://ethereum.org/en/developers/docs/apis/json-rpc/#eth_getfilterlogs) — returns an array of all the logs matching the filter with a given ID
* [**eth\_uninstallFilter**](https://ethereum.org/en/developers/docs/apis/json-rpc/#eth_uninstallfilter) — uninstall a filter with a given ID. It should be used when polling is no longer needed. Filters timeout when they are not requested using `eth_getFilterChanges` after some time
### Unsupported Ethereum JSON-RPC Methods
Phron does not support the following Ethereum API JSON-RPC methods:
* [**eth\_getProof**](https://docs.alchemy.com/reference/eth-getproof) - returns the account and storage values of the specified account including the Merkle-proof
* [**eth\_blobBaseFee**](https://www.quicknode.com/docs/ethereum/eth_blobBaseFee) - returns the expected base fee for blobs in the next block
* [**eth\_createAccessList**](https://docs.alchemy.com/reference/eth-createaccesslist) - creates an EIP-2930 type `accessList` based on a given transaction object
* [**eth\_sign**](https://ethereum.org/en/developers/docs/apis/json-rpc/#eth_sign) - allows the user to sign an arbitrary hash to be sent at a later time. Presents a [security risk](https://support.metamask.io/privacy-and-security/what-is-eth_sign-and-why-is-it-a-risk/) as the arbitrary hash can be fraudulently applied to other transactions
* [**eth\_signTransaction**](https://ethereum.org/en/developers/docs/apis/json-rpc/#eth_signtransaction) - allows the user to sign a transaction to be sent at a later time. It is rarely used due to associated security risks
# Non-standard Ethereum: Tracing
## Debug API & Trace Module
### Introduction
**Geth's** [**`debug`**](https://geth.ethereum.org/docs/interacting-with-geth/rpc/ns-debug) **and** [**`txpool`**](https://geth.ethereum.org/docs/interacting-with-geth/rpc/ns-txpool) **APIs** and **OpenEthereum's** [**`trace`**](https://openethereum.github.io/JSONRPC-trace-module) **module** provide non-standard RPC methods that offer deeper insights into transaction processing. Phron supports several of these non-standard RPC methods to ensure a seamless Ethereum-like experience for developers. This support is crucial as many blockchain projects, such as [**The Graph**](https://thegraph.com/), depend on these methods to efficiently index blockchain data.
This guide details the non-standard RPC methods available on Phron, along with instructions on how to invoke them using `curl` commands against a tracing node. To use these RPC methods, ensure that your node is running with the `debug`, `txpool`, and `tracing` flags enabled.
You can access a tracing node in one of two ways:
1. Through a supported tracing RPC provider.
2. By setting up your own tracing node.
For a list of available tracing RPC providers, refer to the **Network Endpoints** page.
# Substrate
# Libraries
# Polkadot.js
### Introduction
[Polkadot.js](https://wiki.polkadot.network/docs/polkadotjs) is a collection of tools that allow you to interact with Polkadot and its parachains, such as Phron. The [Polkadot.js API](https://polkadot.js.org/docs/api) is one component of Polkadot.js and is a library that allows application developers to query a Phron node and interact with the node's Substrate interfaces using JavaScript, enabling you to read and write data to the network.
You can use the Polkadot.js API to query on-chain data and send extrinsics from the Substrate side of Phron. You can query Phron's runtime constants, chain state, events, transaction (extrinsic) data, and more.
Here you will find an overview of the available functionalities and some commonly used code examples to get you started on interacting with Phron networks using the Polkadot.js API library.
### Checking Prerequisites
Installing and using Polkadot.js API library requires Node.js to be installed.
You need to install Node.js (for this example, you can use v16.x) and the npm package manager. You can download directly from [Node.js](https://nodejs.org/en/download/package-manager) or in your terminal:
{% tabs %}
{% tab title="Ubuntu" %}
```bash
curl -sL https://deb.nodesource.com/setup_16.x | sudo -E bash -
sudo apt install -y nodejs
```
{% endtab %}
{% tab title="MacOS" %}
```bash
# You can use homebrew (https://docs.brew.sh/Installation)
brew install node
# Or you can use nvm (https://github.com/nvm-sh/nvm)
nvm install node
```
{% endtab %}
{% endtabs %}
You can verify that everything is installed correctly by querying the version for each package:
```bash
node -v
```
```bash
npm -v
```
To test out the examples in this guide on Phron, you will need to have your own endpoint and API key, which you can get from one of the supported Endpoint Providers.
#### Install Polkadot.js API
First, you need to install the Polkadot.js API library for your project through a package manager such as `yarn`. Install it in your project directory with the following command:
{% tabs %}
{% tab title="npm" %}
```bash
npm i @polkadot/api
```
{% endtab %}
{% tab title="yarn" %}
```bash
yarn add @polkadot/api
```
{% endtab %}
{% endtabs %}
The library also includes other core components like Keyring for account management, or some utilities that are used throughout this guide.
### Create an API Provider Instance
Similar to Ethereum API libraries, you must first instantiate an API instance of the Polkadot.js API. Create the `WsProvider` using the WebSocket endpoint of the Phron network you wish to interact with.
To test out the examples in this guide on Phron, you will need to have your own endpoint and API key, which you can get from one of the supported Endpoint Providers.
{% tabs %}
{% tab title="Phron" %}
```javascript
// Import
import { ApiPromise, WsProvider } from '@polkadot/api';
const main = async () => {
// Construct API provider
const wsProvider = new WsProvider('INSERT_WSS_API_ENDPOINT');
const api = await ApiPromise.create({ provider: wsProvider });
// Code goes here
await api.disconnect();
}
main();
```
{% endtab %}
{% endtabs %}
#### Metadata and Dynamic API Decoration
Before diving into the details of performing different tasks via the Polkadot.js API library, it's useful to understand some of the basic workings of the library.
When the Polkadot.js API connects to a node, one of the first things it does is retrieve the metadata and decorate the API based on the metadata information. The metadata effectively provides data in the form of:
```javascript
api...
```
Where `` can be either:
* `query` - for endpoints to read all the state queries
* `tx` - for endpoints related to transactions
* `rpc` - for endpoints specific to RPC calls
* `consts` - for endpoints specific to runtime constants
And therefore, none of the information contained in the `api.{query, tx, rpc, consts}..` endpoints are hard-coded in the API. This allows parachains like Phron to have custom endpoints through its pallets that can be directly accessed via the Polkadot.js API library.
### Query On-Chain Data on Phron
In this section, you will learn how to query for on-chain information using the Polkadot.js API library.
#### Phron Chain State Queries
This category of queries retrieves information related to the current state of the chain. These endpoints are generally of the form `api.query..`, where the module and method decorations are generated through metadata. You can see a list of all available endpoints by examining the `api.query` object, for example via:
```javascript
console.log(api.query);
```
Assuming you've initialized the API, here is a code sample for retrieving basic account information given its address :
```javascript
// Define wallet address
const addr = 'INSERT_ADDRESS';
// Retrieve the last timestamp
const now = await api.query.timestamp.now();
// Retrieve the account balance & current nonce via the system module
const { nonce, data: balance } = await api.query.system.account(addr);
console.log(
`${now}: balance of ${balance.free} and a current nonce of ${nonce}`
);
```
View the complete script
```javascript
import { ApiPromise, WsProvider } from '@polkadot/api';
const main = async () => {
// Construct API provider
const wsProvider = new WsProvider('INSERT_WSS_ENDPOINT');
const api = await ApiPromise.create({ provider: wsProvider });
// Define wallet address
const addr = 'INSERT_ADDRESS';
// Retrieve the last timestamp via the timestamp module
const now = await api.query.timestamp.now();
// Retrieve the account balance & current nonce via the system module
const { nonce, data: balance } = await api.query.system.account(addr);
console.log(
`${now}: balance of ${balance.free} and a current nonce of ${nonce}`
);
// Disconnect the API
await api.disconnect();
};
main();
```
#### Phron RPC Queries
The RPC calls provide the backbone for the transmission of data to and from the node. This means that all API endpoints such as `api.query`, `api.tx` or `api.derive` just wrap RPC calls, providing information in the encoded format as expected by the node. You can see a list of all available endpoints by examining the `api.rpc` object, for example via:
```javascript
console.log(api.rpc);
```
The `api.rpc` interface follows the a similar format to `api.query`, for instance:
```javascript
// Retrieve the chain name
const chain = await api.rpc.system.chain();
// Retrieve the latest header
const lastHeader = await api.rpc.chain.getHeader();
// Log the information
console.log(
`${chain}: last block #${lastHeader.number} has hash ${lastHeader.hash}`
);
```
View the complete script
```javascript
import { ApiPromise, WsProvider } from '@polkadot/api';
const main = async () => {
// Construct API provider
const wsProvider = new WsProvider('INSERT_WSS_ENDPOINT');
const api = await ApiPromise.create({ provider: wsProvider });
// Retrieve the chain name
const chain = await api.rpc.system.chain();
// Retrieve the latest header
const lastHeader = await api.rpc.chain.getHeader();
// Log the information
console.log(
`${chain}: last block #${lastHeader.number} has hash ${lastHeader.hash}`
);
// Disconnect the API
await api.disconnect();
};
main();
```
#### Query Subscriptions
The `rpc` API also provide endpoints for subscriptions. You can adapt the previous example to start using subscriptions to listen to new blocks. Note that you need to remove the API disconnect when using subscriptions, to avoid normal closures of the WSS connection.
```javascript
// Retrieve the chain name
const chain = await api.rpc.system.chain();
// Subscribe to the new headers
await api.rpc.chain.subscribeNewHeads((lastHeader) => {
console.log(
`${chain}: last block #${lastHeader.number} has hash ${lastHeader.hash}`
);
});
// Remove await api.disconnect()!
```
The general pattern for `api.rpc.subscribe*` functions is to pass a callback into the subscription function, and this will be triggered on each new entry as they are imported.
Other calls under `api.query.*` can be modified in a similar fashion to use subscription, including calls that have parameters. Here is an example of how to subscribe to balance changes in an account:
{% code overflow="wrap" %}
```javascript
// Define wallet address
const addr = 'INSERT_ADDRESS';
// Subscribe to balance changes for a specified account
await api.query.system.account(addr, ({ nonce, data: balance }) => {
console.log(
`Free balance is ${balance.free} with ${balance.reserved} reserved and a nonce of ${nonce}`
);
});
// Remove await api.disconnect()!
```
{% endcode %}
View the complete script
{% code overflow="wrap" %}
```javascript
import { ApiPromise, WsProvider } from '@polkadot/api';
const main = async () => {
// Construct API provider
const wsProvider = new WsProvider('INSERT_WSS_ENDPOINT');
const api = await ApiPromise.create({ provider: wsProvider });
// Retrieve the chain name
const chain = await api.rpc.system.chain();
// Subscribe to the new headers
await api.rpc.chain.subscribeNewHeads((lastHeader) => {
console.log(
`${chain}: last block #${lastHeader.number} has hash ${lastHeader.hash}`
);
});
// Define wallet address
const addr = 'INSERT_ADDRESS';
// Subscribe to balance changes for a specified account
await api.query.system.account(addr, ({ nonce, data: balance }) => {
console.log(
`free balance is ${balance.free} with ${balance.reserved} reserved and a nonce of ${nonce}`
);
// Handle API disconnect here if needed
});
};
main();
```
{% endcode %}
### Create a Keyring for a Phron Account
The Keyring object is used for maintaining key pairs, and the signing of any data, whether it's a transfer, a message, or a contract interaction.
#### Create a Keyring Instance
You can create an instance by just creating an instance of the Keyring class, and specifying the default type of wallet address used. For Phron networks, the default wallet type should be `ethereum`.
```javascript
// Import the keyring as required
import Keyring from '@polkadot/keyring';
// Create a keyring instance
const keyring = new Keyring({ type: 'ethereum' });
```
#### Add an Account to a Keyring
There are a number of ways to add an account to the keyring instance, including from the mnemonic phrase and from the shortform private key.
{% tabs %}
{% tab title="From Mnemonic" %}
```javascript
// Import the required packages
import Keyring from '@polkadot/keyring';
import { u8aToHex } from '@polkadot/util';
import { mnemonicToLegacySeed, hdEthereum } from '@polkadot/util-crypto';
// Import Ethereum account from mnemonic
const keyringECDSA = new Keyring({ type: 'ethereum' });
const mnemonic = 'INSERT_MNEMONIC';
// Define index of the derivation path and the derivation path
const index = 0;
const ethDerPath = "m/44'/60'/0'/0/" + index;
console.log(`Mnemonic: ${mnemonic}`);
console.log(`--------------------------\n`);
// Extract Ethereum address from mnemonic
const alice = keyringECDSA.addFromUri(`${mnemonic}/${ethDerPath}`);
console.log(`Ethereum Derivation Path: ${ethDerPath}`);
console.log(`Derived Ethereum Address from Mnemonic: ${alice.address}`);
// Extract private key from mnemonic
const privateKey = u8aToHex(
hdEthereum(mnemonicToLegacySeed(mnemonic, '', false, 64), ethDerPath)
.secretKey
);
console.log(`Derived Private Key from Mnemonic: ${privateKey}`);
```
{% endtab %}
{% tab title="From Private Key" %}
```javascript
// Import the required packages
import Keyring from '@polkadot/keyring';
// Import Ethereum account from mnemonic
const keyringECDSA = new Keyring({ type: 'ethereum' });
const privateKeyInput = 'INSERT_PK';
// Extract address from private key
const alice = keyringECDSA.addFromUri(privateKeyInput);
console.log(`Derived Address from provided Private Key: ${alice.address}`);
```
{% endtab %}
{% endtabs %}
### Send Transactions on Phron
Transaction endpoints are exposed on endpoints generally of the form `api.tx..`, where the module and method decorations are generated through metadata. These allow you to submit transactions for inclusion in blocks, be it transfers, interacting with pallets, or anything else Phron supports. You can see a list of all available endpoints by examining the `api.tx` object, for example via:
```javascript
console.log(api.tx);
```
#### Send a Transaction
The Polkadot.js API library can be used to send transactions to the network. For example, assuming you've initialized the API and a keyring instance, you can use the following snippet to send a basic transaction (this code sample will also retrieve the encoded calldata of the transaction as well as the transaction hash after submitting):
```javascript
// Initialize wallet key pairs
const alice = keyring.addFromUri('INSERT_ALICES_PRIVATE_KEY');
const bob = 'INSERT_BOBS_ADDRESS';
// Form the transaction
const tx = await api.tx.balances.transferAllowDeath(bob, 12345n);
// Retrieve the encoded calldata of the transaction
const encodedCalldata = tx.method.toHex();
console.log(`Encoded calldata: ${encodedCallData}`);
// Sign and send the transaction
const txHash = await tx
.signAndSend(alice);
// Show the transaction hash
console.log(`Submitted with hash ${txHash}`);
```
View the complete script
```javascript
import { ApiPromise, WsProvider } from '@polkadot/api';
import Keyring from '@polkadot/keyring';
const main = async () => {
// Construct API provider
const wsProvider = new WsProvider('INSERT_WSS_ENDPOINT');
const api = await ApiPromise.create({ provider: wsProvider });
// Create a keyring instance (ECDSA)
const keyring = new Keyring({ type: 'ethereum' });
// Initialize wallet key pairs
const alice = keyring.addFromUri('INSERT_ALICES_PRIVATE_KEY');
const bob = 'INSERT_BOBS_ADDRESS';
// Form the transaction
const tx = await api.tx.balances.transferAllowDeath(bob, BigInt(12345));
// Retrieve the encoded calldata of the transaction
const encodedCalldata = tx.method.toHex();
console.log(`Encoded calldata: ${encodedCalldata}`);
// Sign and send the transaction
const txHash = await tx.signAndSend(alice);
// Show the transaction hash
console.log(`Submitted with hash ${txHash}`);
// Disconnect the API
await api.disconnect();
};
main();
```
> ## Note!
>
> Prior to client v0.35.0, the extrinsic used to perform a simple balance transfer was the `balances.transfer` extrinsic. It has since been deprecated and replaced with the `balances.transferAllowDeath` extrinsic.
Note that the `signAndSend` function can also accept optional parameters, such as the `nonce`. For example, `signAndSend(alice, { nonce: aliceNonce })`. You can use the sample code from the State Queries section to retrieve the correct nonce, including transactions in the mempool.
#### Fee Information
The transaction endpoint also offers a method to obtain weight information for a given `api.tx..`. To do so, you'll need to use the `paymentInfo` function after having built the entire transaction with the specific `module` and `method`.
The `paymentInfo` function returns weight information in terms of `refTime` and `proofSize`, which can be used to determine the transaction fee. This is extremely helpful when crafting remote execution calls via XCM.
For example, assuming you've initialized the API, the following snippet shows how you can get the weight information for a simple balance transfer between two accounts:
```javascript
// Transaction to get weight information
const tx = api.tx.balances.transferAllowDeath('INSERT_BOBS_ADDRESS', BigInt(12345));
// Get weight info
const { partialFee, weight } = await tx.paymentInfo('INSERT_SENDERS_ADDRESS');
console.log(`Transaction weight: ${weight}`);
console.log(`Transaction fee: ${partialFee.toHuman()}`);
```
View the complete script
{% code overflow="wrap" %}
```javascript
import { ApiPromise, WsProvider } from '@polkadot/api';
const main = async () => {
// Construct API provider
const wsProvider = new WsProvider('INSERT_WSS_ENDPOINT');
const api = await ApiPromise.create({ provider: wsProvider });
// Transaction to get weight information
const tx = api.tx.balances.transferAllowDeath('INSERT_BOBS_ADDRESS', BigInt(12345));
// Get weight info
const { partialFee, weight } = await tx.paymentInfo('INSERT_SENDERS_ADDRESS');
console.log(`Transaction weight: ${weight}`);
console.log(`Transaction fee: ${partialFee.toHuman()}`);
// Disconnect the API
await api.disconnect();
};
main();
```
{% endcode %}
#### Transaction Events
Any transaction will emit events, as a bare minimum this will always be either a `system.ExtrinsicSuccess` or `system.ExtrinsicFailed` event for the specific transaction. These provide the overall execution result for the transaction, i.e. execution has succeeded or failed.
Depending on the transaction sent, some other events may however be emitted, for instance for a balance transfer event, this could include one or more `balance.Transfer` events.
The Transfer API page includes an example code snippet for subscribing to new finalized block headers, and retrieving all `balance.Transfer` events.
#### Batch Transactions
The Polkadot.js API allows transactions to be batch processed via the `api.tx.utility.batch` method. The batched transactions are processed sequentially from a single sender. The transaction fee can be estimated using the `paymentInfo` helper method.
For example, assuming you've initialized the API, a keyring instance and added an account, the following example makes a couple of transfers and also uses the `api.tx.parachainStaking` module to schedule a request to decrease the bond of a specific collator candidate:
```javascript
// Construct a list of transactions to batch
const collator = 'INSERT_COLLATORS_ADDRESS';
const txs = [
api.tx.balances.transferAllowDeath('INSERT_BOBS_ADDRESS', BigInt(12345)),
api.tx.balances.transferAllowDeath('INSERT_CHARLEYS_ADDRESS', BigInt(12345)),
api.tx.parachainStaking.scheduleDelegatorBondLess(collator, BigInt(12345)),
];
// Estimate the fees as RuntimeDispatchInfo, using the signer (either
// address or locked/unlocked keypair)
const info = await api.tx.utility.batch(txs).paymentInfo(alice);
console.log(`Estimated fees: ${info}`);
// Construct the batch and send the transactions
api.tx.utility.batch(txs).signAndSend(alice, ({ status }) => {
if (status.isInBlock) {
console.log(`included in ${status.asInBlock}`);
// Disconnect API here!
}
});
```
View the complete script
{% code overflow="wrap" %}
```javascript
import { ApiPromise, WsProvider } from '@polkadot/api';
import Keyring from '@polkadot/keyring';
const main = async () => {
// Construct API provider
const wsProvider = new WsProvider('INSERT_WSS_ENDPOINT');
const api = await ApiPromise.create({ provider: wsProvider });
// Create a keyring instance (ECDSA)
const keyring = new Keyring({ type: 'ethereum' });
// Initialize wallet key pairs
const alice = keyring.addFromUri('INSERT_ALICES_PRIVATE_KEY');
// Construct a list of transactions to batch
const collator = 'INSERT_COLLATORS_ADDRESS';
const txs = [
api.tx.balances.transferAllowDeath('INSERT_BOBS_ADDRESS', BigInt(12345)),
api.tx.balances.transferAllowDeath('INSERT_CHARLEYS_ADDRESS', BigInt(12345)),
api.tx.parachainStaking.scheduleDelegatorBondLess(collator, BigInt(12345)),
];
// Estimate the fees as RuntimeDispatchInfo, using the signer (either
// address or locked/unlocked keypair)
const info = await api.tx.utility.batch(txs).paymentInfo(alice);
console.log(`Estimated fees: ${info}`);
// Construct the batch and send the transactions
api.tx.utility.batch(txs).signAndSend(alice, async ({ status }) => {
if (status.isInBlock) {
console.log(`Included in ${status.asInBlock}`);
// Disconnect the API
await api.disconnect();
}
});
};
main();
```
{% endcode %}
> ## Note!
>
> You can check out all of the available functions for the `parachainStaking` module by adding `console.log(api.tx.parachainStaking);` to your code.
### Substrate and Custom JSON-RPC Endpoints
RPCs are exposed as a method on a specific module. This means that once available, you can call any RPC via `api.rpc..(...params[])`. This also works for accessing Ethereum RPCs using the Polkadot.js API, in the form of `polkadotApi.rpc.eth.*`.
Some of the methods availabe through the Polkadot.js API interface are also available as JSON-RPC endpoints on Phron nodes. This section will provide some examples; you can check for a list of exposed RPC endpoints by calling `api.rpc.rpc.methods()` or the `rpc_methods` endpoint listed below.
* [**`methods()`**](https://polkadot.js.org/docs/substrate/rpc/#methods-rpcmethods)
* **Interface** - `api.rpc.rpc.methods`
* **JSON-RPC** - `rpc_methods`
* **Returns** - The list of RPC methods that are exposed by the node
```javascript
curl --location --request POST 'https://testnet.phron.ai' \
--header 'Content-Type: application/json' \
--data-raw '{
"jsonrpc":"2.0",
"id":1,
"method":"rpc_methods",
"params": []
}'
```
* [**`getBlock(hash?: BlockHash)`**](https://polkadot.js.org/docs/substrate/rpc/#getblockhash-blockhash-signedblock)
* **Interface** - `api.rpc.chain.getBlock`
* **JSON-RPC** - `chain_getBlock`
* **Returns** - The header and body of a block as specified by the block hash parameter
* [**`getFinalizedHead()`**](https://polkadot.js.org/docs/substrate/rpc/#getfinalizedhead-blockhash)
* **Interface** `api.rpc.chain.getFinalizedHead`
* **JSON-RPC** `chain_getFinalizedHead`
* **Returns** The block hash of the last finalized block in the canonical chain
```javascript
curl --location --request POST 'https://testnet.phron.ai' \
--header 'Content-Type: application/json' \
--data-raw '{
"jsonrpc":"2.0",
"id":1,
"method":"chain_getHeader",
"params": []
}'
```
The Consensus and Finality page has sample code for using the exposed custom and Substrate RPC calls to check the finality of a given transaction.
### Polkadot.js API Utility Functions
The Polkadot.js API also includes a number of utility libraries for computing commonly used cryptographic primitives and hash functions.
The following example computes the deterministic transaction hash of a raw Ethereum legacy transaction by first computing its RLP ([Recursive Length Prefix](https://ethereum.org/en/developers/docs/data-structures-and-encoding/rlp/)) encoding, then hashing the result with keccak256.
```javascript
import { encode } from '@polkadot/util-rlp';
import { keccakAsHex } from '@polkadot/util-crypto';
import { numberToHex } from '@polkadot/util';
// Define the raw signed transaction
const txData = {
nonce: numberToHex(1),
gasPrice: numberToHex(21000000000),
gasLimit: numberToHex(21000),
to: '0xc390cC49a32736a58733Cf46bE42f734dD4f53cb',
value: numberToHex(1000000000000000000),
data: '',
v: '0507',
r: '0x5ab2f48bdc6752191440ce62088b9e42f20215ee4305403579aa2e1eba615ce8',
s: '0x3b172e53874422756d48b449438407e5478c985680d4aaa39d762fe0d1a11683',
};
// Extract the values to an array
var txDataArray = Object.keys(txData).map(function (key) {
return txData[key];
});
// Calculate the RLP encoded transaction
var encoded_tx = encode(txDataArray);
// Hash the encoded transaction using keccak256
console.log(keccakAsHex(encoded_tx));
```
You can check the respective [NPM repository page](https://www.npmjs.com/package/@polkadot/util-crypto/v/0.32.19) for a list of available methods in the `@polkadot/util-crypto` library and their descriptions.
This tutorial is for educational purposes only. As such, any contracts or code created in this tutorial should not be used in production.The information presented herein has been provided by third parties and is made available solely for general information purposes. Phron does not endorse any project listed and described on the Phron Doc Website (). Phron does not warrant the accuracy, completeness or usefulness of this information. Any reliance you place on such information is strictly at your own risk. Phron disclaims all liability and responsibility arising from any reliance placed on this information by you or by anyone who may be informed of any of its contents. All statements and/or opinions expressed in these materials are solely the responsibility of the person or entity providing those materials and do not necessarily represent the opinion of Phron. The information should not be construed as professional or financial advice of any kind. Advice from a suitably qualified professional should always be sought in relation to any particular matter or circumstance. The information herein may link to or integrate with other websites operated or content provided by third parties, and such other websites may link to this website. Phron has no control over any such other websites or their content and will have no liability arising out of or related to such websites or their content. The existence of any such link does not constitute an endorsement of such websites, the content of the websites, or the operators of the websites. These links are being provided to you only as a convenience and you release and hold Phron harmless from any and all liability arising from your use of this information or the information provided by any third-party website or service.
# Py substrate interface
## Python Substrate Interface
### Introduction
[Python Substrate Interface](https://github.com/polkascan/py-substrate-interface) library allows application developers to query a Phron node and interact with the node's Polkadot or Substrate features using a native Python interface. Here you will find an overview of the available functionalities and some commonly used code examples to get you started on interacting with Phron networks using Python Substrate Interface.
### Checking Prerequisites
For the examples in this guide, you will need to have the following:
* An account with funds. You can get DEV tokens for testing on Phron once every 24 hours from the [Phron Faucet](https://faucet.phron.ai/)
* To test out the examples in this guide on Phron, you will need to have your own endpoint and API key, which you can get from one of the supported Endpoint Providers
* Have [`pip`](https://pypi.org/project/pip) installed
> ## Note !
>
> The examples in this guide assume you have a MacOS or Ubuntu 22.04-based environment and will need to be adapted accordingly for Windows.
#### Installing Python Substrate Interface
You can install Python Substrate Interface library for your project through `pip`. Run the following command in your project directory:
```bash
pip install substrate-interface
```
### Creating an API Provider Instance
Similar to ETH API libraries, you must first instantiate an API instance of Python Substrate Interface API. Create the `WsProvider` using the websocket endpoint of the Phron network you wish to interact with.
To test out the examples in this guide on Phron, you will need to have your own endpoint and API key, which you can get from one of the supported Endpoint Providers.
{% tabs %}
{% tab title="Phron" %}
```rust
# Imports
from substrateinterface import SubstrateInterface
# Construct the API provider
ws_provider = SubstrateInterface(
url="INSERT_WSS_API_ENDPOINT",
)
```
{% endtab %}
{% tab title="Phron Dev Node" %}
```javascript
# Import
from substrateinterface import SubstrateInterface
# Construct the API provider
ws_provider = SubstrateInterface(
url="ws://127.0.0.1:9944",
)
```
{% endtab %}
{% endtabs %}
### Querying for Information
In this section, you will learn how to query for on-chain information of Phron networks using Python Substrate Interface library.
#### Accessing Runtime Constants
All runtime constants, such as `BlockWeights`, `DefaultBlocksPerRound` and `ExistentialDeposit`, are provided in the metadata. You can use the [`get_metadata_constants`](https://polkascan.github.io/py-substrate-interface/#substrateinterface.SubstrateInterface.get_metadata_constants) method to see a list of available runtime constants within Phron network's metadata.
Runtime constants available in the metadata can be queried through the [`get_constant`](https://polkascan.github.io/py-substrate-interface/#substrateinterface.SubstrateInterface.get_constant) method.
```javascript
# Imports
from substrateinterface import SubstrateInterface
# Construct the API provider
ws_provider = SubstrateInterface(
url="wss://testnet.phron.ai",
)
# List of available runtime constants in the metadata
constant_list = ws_provider.get_metadata_constants()
print(constant_list)
# Retrieve the Existential Deposit constant on Moonbeam, which is 0
constant = ws_provider.get_constant("Balances", "ExistentialDeposit")
print(constant.value)
```
#### Retrieving Blocks and Extrinsics
You can retrieve basic information about Phron networks, such as blocks and extrinsics, using the Python Substrate Interface API.
To retrieve a block, you can use the [`get_block`](https://polkascan.github.io/py-substrate-interface/#substrateinterface.SubstrateInterface.get_block) method. You can also access extrinsics and their data fields inside a block object, which is simply a Python dictionary.
To retrieve a block header, you can use the [`get_block_header`](https://polkascan.github.io/py-substrate-interface/#substrateinterface.SubstrateInterface.get_block_header) method.
```javascript
# Imports
from substrateinterface import SubstrateInterface
# Construct the API provider
ws_provider = SubstrateInterface(
url="wss://testnet.phron.ai",
)
# Retrieve the latest block
block = ws_provider.get_block()
# Retrieve the latest finalized block
block = ws_provider.get_block_header(finalized_only=True)
# Retrieve a block given its Substrate block hash
block_hash = "0xa499d4ebccdabe31218d232460c0f8b91bd08f72aca25f9b25b04b6dfb7a2acb"
block = ws_provider.get_block(block_hash=block_hash)
# Iterate through the extrinsics inside the block
for extrinsic in block["extrinsics"]:
if "address" in extrinsic:
signed_by_address = extrinsic["address"].value
else:
signed_by_address = None
print(
"\nPallet: {}\nCall: {}\nSigned by: {}".format(
extrinsic["call"]["call_module"].name,
extrinsic["call"]["call_function"].name,
signed_by_address,
)
)
```
> ## Note!
>
> The block hash used in the above code sample is the Substrate block hash. The standard methods in Python Substrate Interface assume you are using the Substrate version of primitives, such as block or tx hashes.
#### Subscribing to New Block Headers
You can also adapt the previous example to use a subscription based model to listen to new block headers.
```javascript
# Imports
from substrateinterface import SubstrateInterface
# Construct the API provider
ws_provider = SubstrateInterface(
url="wss://testnet.phron.ai",
)
def subscription_handler(obj, update_nr, subscription_id):
print(f"New block #{obj['header']['number']}")
if update_nr > 10:
return {
"message": "Subscription will cancel when a value is returned",
"updates_processed": update_nr,
}
result = ws_provider.subscribe_block_headers(subscription_handler)
```
#### Querying for Storage Information
You can use the [`get_metadata_storage_functions`](https://polkascan.github.io/py-substrate-interface/#substrateinterface.SubstrateInterface.get_metadata_storage_functions) to see a list of available storage functions within Phron network's metadata.
Chain states that are provided in the metadata through storage functions can be queried through the [`query`](https://polkascan.github.io/py-substrate-interface/#substrateinterface.SubstrateInterface.query) method.
The Substrate system modules, such as `System`, `Timestamp`, and `Balances`, can be queried to provide basic information such as account nonce and balance. The available storage functions are read from the metadata dynamically, so you can also query for storage information on Phron custom modules, such as `ParachainStaking` and `Democracy`, for state information that's specific to Phron.
```javascript
# Imports
from substrateinterface import SubstrateInterface
# Construct the API provider
ws_provider = SubstrateInterface(
url="wss://testnet.phron.ai",
)
# List of available storage functions in the metadata
method_list = ws_provider.get_metadata_storage_functions()
print(method_list)
# Query basic account information
account_info = ws_provider.query(
module="System",
storage_function="Account",
params=["0x578002f699722394afc52169069a1FfC98DA36f1"],
)
# Log the account nonce
print(account_info.value["nonce"])
# Log the account free balance
print(account_info.value["data"]["free"])
# Query candidate pool information from Moonbeam's Parachain Staking module
candidate_pool_info = ws_provider.query(
module="ParachainStaking", storage_function="CandidatePool", params=[]
)
print(candidate_pool_info)
```
### Signing and Transactions
#### Creating a Keypair
The keypair object in Python Substrate Interface is used in the signing of any data, whether it's a transfer, a message, or a contract interaction.
You can create a keypair instance from the shortform private key or from the mnemonic. For Phron networks, you also need to specify the `KeypairType` to be `KeypairType.ECDSA`.
```javascript
# Imports
from substrateinterface import Keypair, KeypairType
# Define the shortform private key
privatekey = bytes.fromhex("INSERT_PRIVATE_KEY_WITHOUT_0X_PREFIX")
# Define the account mnenomic
mnemonic = "INSERT_MNEMONIC"
# Generate the keypair from shortform private key
keypair = Keypair.create_from_private_key(privatekey, crypto_type=KeypairType.ECDSA)
# Generate the keypair from mnemonic
keypair = Keypair.create_from_mnemonic(mnemonic, crypto_type=KeypairType.ECDSA)
```
#### Forming and Sending a Transaction
The [`compose_call`](https://polkascan.github.io/py-substrate-interface/#substrateinterface.SubstrateInterface.compose_call) method can be used to compose a call payload which can be used as an unsigned extrinsic or a proposal.
Then the payload can be signed using a keypair through the [`create_signed_extrinsic`](https://polkascan.github.io/py-substrate-interface/#substrateinterface.SubstrateInterface.create_signed_extrinsic) method.
The signed extrinsic can then be submitted using the [`submit_extrinsic`](https://polkascan.github.io/py-substrate-interface/#substrateinterface.SubstrateInterface.submit_extrinsic) method.
This method will also return an `ExtrinsicReceipt` object which contains information about the on-chain execution of the extrinsic. If you need to examine the receipt object, you can set the `wait_for_inclusion` to `True` when submitting the extrinsic to wait until the extrinsic is successfully included into the block.
The following sample code will show a complete example for sending a transaction.
```javascript
# Imports
from substrateinterface import SubstrateInterface, Keypair, KeypairType
from substrateinterface.exceptions import SubstrateRequestException
# Construct the API provider
ws_provider = SubstrateInterface(
url="wss://testnet.phron.ai",
)
# Define the shortform private key of the sending account
privatekey = bytes.fromhex("INSERT_PRIVATE_KEY_WITHOUT_0X_PREFIX")
# Generate the keypair
keypair = Keypair.create_from_private_key(privatekey, crypto_type=KeypairType.ECDSA)
# Form a transaction call
call = ws_provider.compose_call(
call_module="Balances",
call_function="transfer_allow_death",
call_params={
"dest": "0x44236223aB4291b93EEd10E4B511B37a398DEE55",
"value": 1 * 10**18,
},
)
# Form a signed extrinsic
extrinsic = ws_provider.create_signed_extrinsic(call=call, keypair=keypair)
# Submit the extrinsic
try:
receipt = ws_provider.submit_extrinsic(extrinsic, wait_for_inclusion=True)
print(
"Extrinsic '{}' sent and included in block '{}'".format(
receipt.extrinsic_hash, receipt.block_hash
)
)
except SubstrateRequestException as e:
print("Failed to send: {}".format(e))
```
#### Offline Signing
You can sign transaction payloads or any arbitrary data using a keypair object through the [`sign`](https://polkascan.github.io/py-substrate-interface/#substrateinterface.Keypair.sign) method. This can be used for offline signing of transactions.
1. First, generate the signature payload on an online machine:
```javascript
# Imports
from substrateinterface import SubstrateInterface
# Construct the API provider
ws_provider = SubstrateInterface(
url="wss://testnet.phron.ai",
)
# Construct a transaction call
call = ws_provider.compose_call(
call_module="Balances",
call_function="transfer_allow_death",
call_params={
"dest": "0x44236223aB4291b93EEd10E4B511B37a398DEE55",
"value": 1 * 10**18,
},
)
# Generate the signature payload
signature_payload = ws_provider.generate_signature_payload(call=call)
```
2. On an offline machine, create a keypair with the private key of the sending account, and sign the signature payload:
# Imports
   from substrateinterface import Keypair, KeypairType

   # Define the signature payload from the offline machine
   signature_payload = "INSERT_SIGNATURE_PAYLOAD"

   # Define the shortform private key of the sender account
   privatekey = bytes.fromhex("INSERT_PRIVATE_KEY_WITHOUT_0X_PREFIX")

   # Generate the keypair from shortform private key
   keypair = Keypair.create_from_private_key(privatekey, crypto_type=KeypairType.ECDSA)

   # Sign the signature_payload
   signature = keypair.sign(signature_payload)
3. On an online machine, create a keypair with the public key of the sending account, and submit the extrinsic with the generated signature from the offline machine:
# Imports
   from substrateinterface import SubstrateInterface, Keypair, KeypairType

   # Construct the API provider
   ws_provider = SubstrateInterface(
       url="wss://testnet.phron.ai",
   )

   # Define the signature from the offline machine
   signature_payload = "INSERT_SIGNATURE_PAYLOAD"

   # Construct a keypair with the Ethereum style wallet address of the sending account
   keypair = Keypair(public_key="INSERT_ADDRESS_WITHOUT_0X", crypto_type=KeypairType.ECDSA)

   # Construct the same transaction call that was signed
   call = ws_provider.compose_call(
       call_module="Balances",
       call_function="transfer_allow_death",
       call_params={
           "dest": "0x44236223aB4291b93EEd10E4B511B37a398DEE55",
           "value": 1 * 10**18,
       },
   )

   # Construct the signed extrinsic with the generated signature
   extrinsic = ws_provider.create_signed_extrinsic(
       call=call, keypair=keypair, signature=signature
   )

   # Submit the signed extrinsic
   result = ws_provider.submit_extrinsic(extrinsic=extrinsic)

   # Print the execution result
   print(result.extrinsic_hash)
### Custom RPC Requests
You can also make custom RPC requests with the [`rpc_request`](https://polkascan.github.io/py-substrate-interface/#substrateinterface.SubstrateInterface.rpc_request) method.
This is particularly useful for interacting with Phron's Ethereum JSON-RPC endpoints or Phron's custom RPC endpoints.
The Consensus and Finality page has examples for using the custom RPC calls through Python Substrate Interface to check the finality of a transaction given its transaction hash.
This tutorial is for educational purposes only. As such, any contracts or code created in this tutorial should not be used in production.The information presented herein has been provided by third parties and is made available solely for general information purposes. Phron does not endorse any project listed and described on the Phron Doc Website (). Phron does not warrant the accuracy, completeness or usefulness of this information. Any reliance you place on such information is strictly at your own risk. Phron disclaims all liability and responsibility arising from any reliance placed on this information by you or by anyone who may be informed of any of its contents. All statements and/or opinions expressed in these materials are solely the responsibility of the person or entity providing those materials and do not necessarily represent the opinion of Phron. The information should not be construed as professional or financial advice of any kind. Advice from a suitably qualified professional should always be sought in relation to any particular matter or circumstance. The information herein may link to or integrate with other websites operated or content provided by third parties, and such other websites may link to this website. Phron has no control over any such other websites or their content and will have no liability arising out of or related to such websites or their content. The existence of any such link does not constitute an endorsement of such websites, the content of the websites, or the operators of the websites. These links are being provided to you only as a convenience and you release and hold Phron harmless from any and all liability arising from your use of this information or the information provided by any third-party website or service.
# Dev Environments
# Chopsticks by Acala
Introduction
[Chopsticks](https://github.com/AcalaNetwork/chopsticks) provides a developer-friendly method of locally forking existing Substrate based chains. It allows for the replaying of blocks to easily examine how extrinsics effect state, the forking of multiple blocks for XCM testing, and more. This allows developers to test and experiment with their own custom blockchain configurations in a local development environment, without the need to deploy a live network.
Overall, Chopsticks aims to simplify the process of building blockchain applications on Substrate and make it accessible to a wider range of developers.
### Forking Phron with Chopsticks
To use Chopsticks, you can install it as a package with the [Node package manager](https://nodejs.org/en) or [Yarn](https://yarnpkg.com/):
```bash
npm i @acala-network/chopsticks@latest
```
Once installed, you can run commands with the Node package executor. For example, this runs Chopstick's base command:
```bash
npx @acala-network/chopsticks@latest
```
To run Chopsticks, you will need some sort of configuration, typically through a file. Chopsticks' source repository includes a set of [YAML](https://yaml.org/) configuration files that can be used to create a local copy of a variety of Substrate chains. You can download the configuration files from the [source repository's `configs` folder](https://github.com/AcalaNetwork/chopsticks).
Phron all have default files available:
{% tabs %}
{% tab title="Phron" %}
```javascript
endpoint: wss://testnet.phron.ai
mock-signature-host: true
db: ./db.sqlite
import-storage:
System:
Account:
-
-
- "0xf24FF3a9CF04c71Dbc94D0b566f7A27B94566cac"
- data:
free: "100000000000000000000000"
TechCommitteeCollective:
Members: ["0xf24FF3a9CF04c71Dbc94D0b566f7A27B94566cac"]
CouncilCollective:
Members: ["0xf24FF3a9CF04c71Dbc94D0b566f7A27B94566cac"]
TreasuryCouncilCollective:
Members: ["0xf24FF3a9CF04c71Dbc94D0b566f7A27B94566cac"]
AuthorFilter:
EligibleRatio: 100
EligibleCount: 100
```
{% endtab %}
{% endtabs %}
These are the settings that can be included in the config file:
| Option | Description |
| :------------------------: | :----------------------------------------------------------------------------------------------------------: |
| `genesis` | The link to a parachain's raw genesis file to build the fork from, instead of an endpoint. |
| `timestamp` | Timestamp of the block to fork from. |
| `endpoint` | The endpoint of the parachain to fork. |
| `block` | Use to specify at which block hash or number to replay the fork. |
| `wasm-override` | Path of the WASM to use as the parachain runtime, instead of an endpoint's runtime. |
| `db` | Path to the name of the file that stores or will store the parachain's database. |
| `config` | Path or URL of the config file. |
| `port` | The port to expose an endpoint on. |
| `build-block-mode` | How blocks should be built in the fork: batch, manual, instant. |
| `import-storage` | A pre-defined JSON/YAML storage file path to override in the parachain's storage. |
| `allow-unresolved-imports` | Whether to allow WASM unresolved imports when using a WASM to build the parachain. |
| `html` | Include to generate storage diff preview between blocks. |
| `mock-signature-host` | Mock signature host so that any signature starts with `0xdeadbeef` and filled by `0xcd` is considered valid. |
You can use the configuration file with the base command `npx @acala-network/chopsticks@latest` to fork assets by providing it with the `--config` flag.
You can use a raw GitHub URL of the default configuration files, a path to a local configuration file, or simply use the chain's name for the `--config` flag. For example, the following commands all use Phron's configuration in the same way:
{% tabs %}
{% tab title="Chain Name" %}
```bash
npx @acala-network/chopsticks@latest --config=phron
```
{% endtab %}
{% tab title="GitHub URL" %}
{% code overflow="wrap" %}
```bash
npx @acala-network/chopsticks@latest \
--config=https://raw.githubusercontent.com/AcalaNetwork/chopsticks/master/configs/phron.yml
```
{% endcode %}
{% endtab %}
{% tab title="Local File Path" %}
```bash
npx @acala-network/chopsticks@latest --config=configs/phron.yml
```
{% endtab %}
{% endtabs %}
> ## Note!
>
> If using a file path, make sure you've downloaded the Phron configuration file, or have created your own.
A configuration file is not necessary, however. All of the settings (except `genesis` and `timestamp`) can also be passed as flags to configure the environment completely in the command line. For example, the following command forks Phron at block 100.
{% code overflow="wrap" %}
```bash
npx @acala-network/chopsticks@latest --endpoint wss://testnet.phron.ai --block 100
```
{% endcode %}
#### Quickstart
The simplest way to fork Phron is through the configuration files that are stored in the Chopsticks GitHub repository:
{% tabs %}
{% tab title="Phron" %}
{% code overflow="wrap" %}
```bash
npx @acala-network/chopsticks@latest \
--config=https://raw.githubusercontent.com/AcalaNetwork/chopsticks/master/configs/phron.yml
```
{% endcode %}
{% endtab %}
{% endtabs %}
#### Interacting with a Fork
When running a fork, by default it will be accessible at:
```bash
ws://localhost:8000
```
You will be able to interact with the parachain via libraries such as [Polkadot.js](https://github.com/polkadot-js/common) and its [user interface, Polkadot.js Apps](https://github.com/polkadot-js/apps).
You can interact with Chopsticks via the [Polkadot.js Apps hosted user interface](https://polkadot.js.org/apps/#/explorer). To do so, visit the page and take the following steps:
1. Click the PhronesisTelem in the top left
2. Go to the bottom and open **Development**
3. Select the **Custom** endpoint and enter `ws://localhost:8000`
4. Click the **Switch** button
Click the PhronesisTelem in the top left
Custom endpoint
You should now be able to interact with the fork as you would an active parachain or relay chain.
> ## Note!
>
> If your browser cannot connect to the WebSocket endpoint provided by Chopsticks, you might need to allow insecure connections for the Polkadot.js Apps URL. Another solution is to run the [Docker version of Polkadot.js Apps](https://github.com/polkadot-js/apps#docker).
### Replaying Blocks
In the case where you would like to replay a block and retrieve its information to dissect the effects of an extrinsic, you can use the `npx @acala-network/chopsticks@latest run-block` command. Its following flags are:
| Flag | Description |
| :------------------------: | :------------------------------------------------------------------------------------: |
| `endpoint` | The endpoint of the parachain to fork. |
| `block` | Use to specify at which block hash or number to replay the fork. |
| `wasm-override` | Path of the WASM to use as the parachain runtime, instead of an endpoint's runtime. |
| `db` | Path to the name of the file that stores or will store the parachain's database. |
| `config` | Path or URL of the config file. |
| `output-path=/[file_path]` | Use to print out results to a JSON file instead of printing it out in the console. |
| `html` | Include to generate an HTML representation of the storage diff preview between blocks. |
| `open` | Whether to open the HTML representation. |
For example, running the following command will re-run Phron's block 1000, and write the storage diff and other data in a `phron-output.json` file:
```bash
npx @acala-network/chopsticks@latest run-block \
--endpoint wss://testnet.phron.ai \
--output-path=./phron-output.json \
--block 1000
```
### WebSocket Commands
Chopsticks' internal websocket server has special endpoints that allows the manipulation of the local Substrate chain. These are the methods that can be invoked:
Method
Parameters
Description
dev_newBlock
options
Generates one or more new blocks.
dev_setStorage
values, blockHash
Create or overwrite the value of any storage.
dev_timeTravel
date
Sets the timestamp of the block to the date value.
dev_setHead
hashOrNumber
Sets the head of the blockchain to a specific hash or number.
The parameters above are formatted in the following ways:
| Parameter | Format | Example |
| -------------- | ----------------------------------- | ---------------------------------------------------------------------- |
| `options` | `{ "to": number, "count": number }` | `{ "count": 5 }` |
| `values` | `Object` | `{ "Sudo": { "Key": "0x6Be02d1d3665660d22FF9624b7BE0551ee1Ac91b" } }` |
| `blockHash` | `string` | `"0x1a34506b33e918a0106b100db027425a83681e2332fe311ee99d6156d2a91697"` |
| `date` | `Date` | `"2030-08-15T00:00:00"` |
| `hashOrNumber` | `number \| string` | |
* **`options` { "to": number, "count": number }** - a JSON object where `"to"` will create blocks up to a certain value, and `"count"` will increase by a certain number of blocks. Use only one entry at a time within the JSON object
* **`values` Object** - a JSON object resembling the path to a storage value, similar to what you would retrieve via Polkadot.js
* **`blockHash` string** - optional, the blockhash at which the storage value is changed
* **`date` Date** - a Date string (compatible with the JavaScript Date library) that will change the time stamp from which the next blocks being created will be at. All future blocks will be sequentially after that point in time
* **`hashOrNumber` number | string** - if found, the chain head will be set to the block with the block number or block hash of this value
Each method can be invoked by connecting to the websocket (`ws://localhost:8000` by default) and sending the data and parameters in the following format. Replace `METHOD_NAME` with the name of the method, and replace or delete `PARAMETER_1` and `PARAMETER_2` with the parameter data relevant to the method:
```json
{
"jsonrpc": "2.0",
"id": 1,
"method": "METHOD_NAME",
"params": ["PARAMETER_1", "PARAMETER_2", "..."]
}
```
This tutorial is for educational purposes only. As such, any contracts or code created in this tutorial should not be used in production.The information presented herein has been provided by third parties and is made available solely for general information purposes. Phron does not endorse any project listed and described on the Phron Doc Website (). Phron does not warrant the accuracy, completeness or usefulness of this information. Any reliance you place on such information is strictly at your own risk. Phron disclaims all liability and responsibility arising from any reliance placed on this information by you or by anyone who may be informed of any of its contents. All statements and/or opinions expressed in these materials are solely the responsibility of the person or entity providing those materials and do not necessarily represent the opinion of Phron. The information should not be construed as professional or financial advice of any kind. Advice from a suitably qualified professional should always be sought in relation to any particular matter or circumstance. The information herein may link to or integrate with other websites operated or content provided by third parties, and such other websites may link to this website. Phron has no control over any such other websites or their content and will have no liability arising out of or related to such websites or their content. The existence of any such link does not constitute an endorsement of such websites, the content of the websites, or the operators of the websites. These links are being provided to you only as a convenience and you release and hold Phron harmless from any and all liability arising from your use of this information or the information provided by any third-party website or service.
# Smart Contracts Development
# Solidity Contracts
# Phron API
# Project Overview
Solidity is a high-level, object-oriented programming language specifically designed for implementing smart contracts on blockchain platforms like Ethereum. Smart contracts are self-executing programs with the contract's terms written directly into lines of code. These contracts automatically enforce and execute agreements once predefined conditions are met, without the need for intermediaries.
#### Key Features of Solidity:
1. **Statically Typed**: Variables are declared with specific data types, such as `uint`, `bool`, `address`, etc. This allows for more optimized and predictable code execution.
2. **Inheritance**: Solidity supports multiple inheritance, allowing developers to create modular, reusable code for smart contracts.
3. **Contract-Oriented**: Solidity is specifically built for writing smart contracts. Each contract has its own state and can interact with other contracts.
4. **EVM Compatibility**: Solidity compiles down to bytecode that runs on the Ethereum Virtual Machine (EVM). This makes it compatible with all Ethereum-based blockchains.
5. **Libraries**: Solidity allows developers to define reusable libraries, which help in reducing code duplication.
6. **Interfaces and Abstract Contracts**: These are used to define templates and expected behaviors for other contracts, providing structure and reusability across the system.
# Prerequisites
Before starting development, ensure that you have the following tools installed:
* **Node.js** (v14 or above)
* **NPM** or **Yarn** (for package management)
* **Solidity Compiler** (`solc`)
* **Truffle** or **Hardhat** (for smart contract development)
* **Phron** testnet for local testing
* **Metamask** or any other Ethereum wallet
Here’s a quick guide on installing and setting up the tools you need for Solidity smart contract development, along with code examples for using each tool:
#### 1. **Node.js (v14 or above)**
Node.js is required to run JavaScript-based tools like Truffle and Hardhat.
**Installation:**
* [Download Node.js](https://nodejs.org/) and install it for your operating system.
* Verify installation:
```bash
node -v
npm -v
```
#### 2. **NPM or Yarn (for package management)**
NPM comes with Node.js by default, but you can use Yarn as an alternative.
**Installation (NPM is included with Node.js):**
* Verify installation:
```bash
npm -v
```
**Installation (Yarn):**
```bash
npm install -g yarn
yarn -v
```
#### 3. **Solidity Compiler (solc)**
Solidity compiler (`solc`) is needed to compile smart contracts.
**Installation:**
* Using NPM:
```bash
npm install -g solc
```
* Verify installation:
```bash
solc --version
```
**Example:**
Compiling a contract with `solc`:
```bash
solc --bin --abi SimpleBank.sol -o build/
```
#### 4. **Truffle or Hardhat (for smart contract development)**
Both tools are widely used for developing, testing, and deploying smart contracts.
**Truffle Installation:**
```bash
npm install -g truffle
truffle version
```
**Hardhat Installation:**
```bash
npm install --save-dev hardhat
npx hardhat
```
**Example (Hardhat project setup):**
```bash
npx hardhat compile
npx hardhat run scripts/deploy.js
```
**Example (Truffle project setup):**
```bash
truffle init
truffle compile
truffle migrate
```
#### 5. Get a Phron end point from [Phron.ai.](https://testnet.phron.ai)
#### Nodes and JSON-RPC Endpoints
Generally speaking, a JSON-RPC is a remote procedure call (RPC) protocol that utilizes JSON to encode data. For Web3, they refer to the specific JSON-RPCs that DApp developers use to send requests and receive responses from blockchain nodes, making it a crucial element in interactions with smart contracts. They allow frontend user interfaces to seamlessly interact with the smart contracts and provide users with real-time feedback on their actions. They also allow developers to deploy their smart contracts in the first place!
To get a JSON-RPC to communicate with a Phron blockchain, you need to run a node. But that can be expensive, complicated, and a hassle. Fortunately, as long as you have *access* to a node, you can interact with the blockchain. Phron has a handful of free and paid node options. For this tutorial, we will be using the Phron's public node for Phron, but you are encouraged to get your own private endpoint.
```url
https://testnet.phron.ai
```
So now you have a URL. How do you use it? Over `HTTPS`, JSON-RPC requests are `POST` requests that include specific methods for reading and writing data, such as `eth_call` for executing a smart contract function in a read-only manner or `eth_sendRawTransaction` for submitting signed transactions to the network (calls that change the blockchain state). The entire JSON request structure will always have a structure similar to the following:
```json
{
"jsonrpc": "2.0",
"id": 1,
"method": "eth_getBalance",
"params": ["0xf24FF3a9CF04c71Dbc94D0b566f7A27B94566cac", "latest"]
}
```
This example is getting the balance (in DEV on Phron) of the `0xf24FF3a9CF04c71Dbc94D0b566f7A27B94566cac` account. Let's break down the elements:
* `jsonrpc` — the JSON-RPC API version, usually "2.0"
* `id` — an integer value that helps identify a response to a request. Can usually just keep it as \`
* `method` — the specific method to read/write data from/to the blockchain. You can see many of the RPC methods on our docs site
* `params` — an array of the input parameters expected by the specific `method`
There are also additional elements that can be added to JSON-RPC requests, but those four will be seen the most often.
Now, these JSON-RPC requests are pretty useful, but when writing code, it can be a hassle to create a JSON object over and over again. That's why there exist libraries that help abstract and facilitate the usage of these requests. Phron provides documentation on many libraries, and the one that we will be using in this tutorial is Ethers.js. Just understand that whenever we interact with the blockchain through the Ethers.js package, we're really using JSON-RPC!
#### 6. **Metamask or Other Ethereum Wallets**
Metamask is a browser-based Ethereum wallet for interacting with decentralized applications (dApps).
**Installation:**
* [Download Metamask](https://metamask.io/) and install the browser extension.
# Steps to Set Up
## Setting Up the Development Environment
#### 1. **Initialize the Project**
Create a new directory for your project and initialize it with `npm`:
```bash
mkdir MySolidityProject
cd MySolidityProject
npm init -y
```
This will generate a `package.json` file for managing dependencies and scripts.
#### 2. **Install Solidity and Hardhat Dependencies**
Hardhat is a powerful development environment for compiling, deploying, and testing Ethereum smart contracts. Install Hardhat along with `ethers.js` for interacting with Ethereum, and the necessary plugins:
```bash
npm install --save-dev hardhat @nomiclabs/hardhat-ethers ethers
```
This command installs:
* **Hardhat**: For development, testing, and deployment.
* **ethers.js**: A library for interacting with Ethereum.
* **@nomiclabs/hardhat-ethers**: A plugin that integrates Hardhat with `ethers.js`.
#### 3. **Create the Hardhat Configuration**
Run Hardhat’s initialization command to generate the basic configuration and project files:
```bash
npx hardhat
```
You will be prompted to select a task. Choose `Create a basic sample project` or `Create an advanced project`, depending on your needs. This will generate:
* `hardhat.config.js`: Your Hardhat configuration file.
* Sample contract, test, and script files.
#### 4. **Set Up the Folder Structure**
```bash
MySolidityProject/
├── contracts/ # Contains all the Solidity contracts
│ └── MyContract.sol # Example contract
├── scripts/ # Scripts for deployment and contract interaction
│ └── deploy.js # Script for contract deployment
├── test/ # Contains unit tests for smart contracts
│ └── test.js # Example test file
├── artifacts/ # Generated files (compiled contracts, ABIs, etc.)
├── cache/ # Cached files for faster compilation
├── node_modules/ # Installed npm packages
├── hardhat.config.js # Hardhat configuration file
└── package.json # Project dependencies and scripts
```
#### 5. **Creating a Sample Solidity Contract**
Inside the `contracts/` folder, create a simple Solidity contract, e.g., `MyContract.sol`:
```solidity
// SPDX-License-Identifier: MIT
pragma solidity ^0.8.0;
contract MyContract {
uint256 public value;
function setValue(uint256 _value) public {
value = _value;
}
function getValue() public view returns (uint256) {
return value;
}
}
```
#### 6. **Creating a Deployment Script**
In the `scripts/` folder, create a deployment script (`deploy.js`):
```javascript
javascriptCopy codeasync function main() {
const [deployer] = await ethers.getSigners();
console.log("Deploying contracts with the account:", deployer.address);
const MyContract = await ethers.getContractFactory("MyContract");
const myContract = await MyContract.deploy();
console.log("MyContract deployed to:", myContract.address);
}
main()
.then(() => process.exit(0))
.catch(error => {
console.error(error);
process.exit(1);
});
```
#### 7. **Running the Deployment**
To compile and deploy your contract locally:
1. Start a local Ethereum node using Hardhat:
```bash
npx hardhat node
```
2. Deploy your contract:
```bash
npx hardhat run scripts/deploy.js --network localhost
```
This will deploy your contract to a local test network.
#### 8. **Setting Up a Test File**
In the `test/` folder, create a test script (`test.js`) using Hardhat's testing framework and `ethers.js`:
```javascript
const { expect } = require("chai");
describe("MyContract", function () {
it("Should set and get the correct value", async function () {
const MyContract = await ethers.getContractFactory("MyContract");
const myContract = await MyContract.deploy();
await myContract.deployed();
// Set a value
await myContract.setValue(42);
// Test the value
expect(await myContract.getValue()).to.equal(42);
});
});
```
#### 9. **Running the Tests**
To run your tests:
```bash
npx hardhat test
```
#### 10. **Hardhat Network Configuration (Optional for Testnets)**
To deploy on a real test network , configure your `hardhat.config.js`:
```javascript
require("@nomiclabs/hardhat-ethers");
module.exports = {
solidity: "0.8.0",
networks: {
phron: {
url: `https://testnet.phron.ai`,
},
},
};
```
# Contract Architecture
#### Contract Interfaces
Interfaces in Solidity are used to define the structure of external functions without providing their internal logic. They are essential for creating interoperable contracts that follow a standard design, ensuring that different contracts can interact with one another seamlessly.
```solidity
interface IMyContract {
function transfer(address recipient, uint256 amount) external returns (bool);
function balanceOf(address account) external view returns (uint256);
}
```
* **`transfer(address recipient, uint256 amount)`**: Defines a function to transfer tokens to a specified recipient. It returns a boolean (`true`/`false`) to indicate whether the transfer was successful.
* **`balanceOf(address account)`**: Defines a function that returns the current balance of an account. It's a read-only function (`view`) that doesn't modify the state.
Interfaces allow for modularity and upgradeability by ensuring that any contract implementing this interface will have these two key functions, without enforcing their specific implementation details.
#### Modifiers
Modifiers are used to alter the behavior of functions. They allow you to add prerequisites or checks before the function’s execution proceeds. This helps streamline code by avoiding repetition of common checks and improving contract security.
```solidity
modifier onlyOwner() {
require(msg.sender == owner, "Caller is not the owner");
_;
}
```
* **`onlyOwner`**: This modifier restricts function access to only the contract's owner. The `require` statement checks that the caller (`msg.sender`) is the owner. If the condition fails, it reverts the transaction with an error message. The `_` in the modifier represents where the function body will be inserted when the modifier is applied. This is a common pattern for restricting administrative functions, ensuring only the owner can perform sensitive operations.
#### Events
Events are a logging mechanism in Solidity that allow contracts to emit information during execution. Off-chain services, like blockchain explorers and front-end applications, can listen to these events and react to them. They are a fundamental part of communication between the blockchain and external systems.
{% code overflow="wrap" %}
```solidity
event Transfer(address indexed from, address indexed to, uint256 value);
```
{% endcode %}
* **`Transfer`**: This event logs token transfers between accounts. It includes three key pieces of information:
* `from`: The address of the sender.
* `to`: The address of the recipient.
* `value`: The number of tokens transferred.
The `indexed` keyword allows these fields to be easily filtered in external event logs. Emitting events is gas-efficient and provides a way to track contract activity without modifying the blockchain state.
#### Storage Variables
Storage variables are used to hold the persistent state of the contract. These variables are stored directly on the blockchain and are essential for managing the contract’s data.
```solidity
address public owner;
mapping(address => uint256) private balances;
```
* **`owner`**: This variable stores the address of the contract owner, typically set during the contract’s deployment. Marked as `public`, it automatically generates a getter function, allowing anyone to view the owner’s address.
* **`balances`**: This is a mapping (a key-value data structure) that associates each account (`address`) with its token balance (`uint256`). Marked as `private`, this ensures that the balance data can only be accessed through functions explicitly defined in the contract, maintaining data security.
#### Example of How Everything Works Together
Here's an example of how interfaces, modifiers, events, and storage variables come together in a complete smart contract:
{% code overflow="wrap" %}
```solidity
// SPDX-License-Identifier: MIT
pragma solidity ^0.8.0;
interface IMyContract {
function transfer(address recipient, uint256 amount) external returns (bool);
function balanceOf(address account) external view returns (uint256);
}
contract MyToken is IMyContract {
address public owner;
mapping(address => uint256) private balances;
event Transfer(address indexed from, address indexed to, uint256 value);
modifier onlyOwner() {
require(msg.sender == owner, "Caller is not the owner");
_;
}
constructor() {
owner = msg.sender;
balances[owner] = 1000000; // Initial token supply to owner
}
function transfer(address recipient, uint256 amount) external override returns (bool) {
require(balances[msg.sender] >= amount, "Insufficient balance");
balances[msg.sender] -= amount;
balances[recipient] += amount;
emit Transfer(msg.sender, recipient, amount);
return true;
}
function balanceOf(address account) external view override returns (uint256) {
return balances[account];
}
function mint(uint256 amount) external onlyOwner {
balances[owner] += amount;
emit Transfer(address(0), owner, amount);
// Emitting a mint event as a "transfer" from the zero address
}
}
```
{% endcode %}
* **`IMyContract` interface** ensures that the contract implements the required functions (`transfer` and `balanceOf`).
* **`onlyOwner` modifier** restricts certain actions (like minting new tokens) to the contract’s owner.
* **`Transfer` event** provides a way to track token transfers, ensuring transparency.
* **`balances` storage variable** keeps track of how many tokens each account holds.
# Contract Functions
#### Key Functions in the Smart Contract
**1. `transfer`: Transfers tokens from the caller's account to the recipient.**
```solidity
function transfer(address recipient, uint256 amount) external returns (bool) {
require(balances[msg.sender] >= amount, "Insufficient balance");
balances[msg.sender] -= amount;
balances[recipient] += amount;
emit Transfer(msg.sender, recipient, amount);
return true;
}
```
* **Purpose**: To allow a user to send tokens from their balance to another address.
* **Inputs**:
* `recipient`: The address receiving the tokens.
* `amount`: The number of tokens to transfer.
* **Outputs**: Returns `true` if the transfer is successful.
* **Logic**: The function first checks if the sender has enough tokens, then deducts the specified amount from the sender’s balance and adds it to the recipient's balance. It also emits a `Transfer` event for transparency.
**2. `mint`: Allows the contract owner to mint new tokens and increase the total supply.**
{% code overflow="wrap" %}
```solidity
function mint(uint256 amount) external onlyOwner {
balances[owner] += amount;
emit Transfer(address(0), owner, amount);
// Mint event treated as a "transfer" from zero address
}
```
{% endcode %}
* **Purpose**: To create (mint) new tokens and add them to the owner's balance, increasing the total token supply.
* **Inputs**:
* `amount`: The number of tokens to be created and assigned to the owner's balance.
* **Outputs**: No return value, but an event `Transfer` is emitted to reflect the minting process (from address `0x0` to the owner).
* **Logic**: This function can only be called by the owner (enforced by the `onlyOwner` modifier). It adds the specified `amount` of tokens to the owner's balance and emits a `Transfer` event, treating it as if tokens were sent from the zero address to the owner.
**3. `burn`: Allows a user to burn tokens from their balance, reducing the total supply.**
{% code overflow="wrap" %}
```solidity
function burn(uint256 amount) external {
require(balances[msg.sender] >= amount, "Insufficient balance to burn");
balances[msg.sender] -= amount;
emit Transfer(msg.sender, address(0), amount);
// Burn event treated as a "transfer" to zero address
}
```
{% endcode %}
* **Purpose**: To allow users to burn (destroy) tokens from their balance, reducing the total supply.
* **Inputs**:
* `amount`: The number of tokens to burn.
* **Outputs**: No return value, but emits a `Transfer` event indicating that the tokens were transferred to the zero address (indicating they are burned).
* **Logic**: The function checks that the caller has sufficient tokens to burn. If the condition is met, the specified amount is deducted from the user's balance, and the tokens are effectively destroyed. A `Transfer` event is emitted to indicate the burn process, with the destination address being `0x0`.
**4. `balanceOf`: Returns the balance of a specified address.**
{% code overflow="wrap" %}
```solidity
function balanceOf(address account) external view returns (uint256) {
return balances[account];
}
```
{% endcode %}
* **Purpose**: To provide a way for anyone to check the token balance of a specific address.
* **Inputs**:
* `account`: The address whose balance is being queried.
* **Outputs**: Returns the current token balance of the specified `account`.
* **Logic**: This is a simple read-only function (`view`) that does not modify the contract’s state. It looks up the balance of the given address in the `balances` mapping and returns the value.
**5. `transferFrom`: Allows an approved spender to transfer tokens on behalf of the token owner.**
* **Purpose**: To allow a third-party (spender) to transfer tokens on behalf of the token owner, given that they’ve been granted approval.
* **Inputs**:
* `sender`: The address of the token owner who is authorizing the transfer.
* `recipient`: The address receiving the tokens.
* `amount`: The number of tokens to transfer.
* **Outputs**: Returns `true` if the transfer is successful.
* **Logic**: The function first checks that the sender has approved enough tokens (`allowances`) for the caller (spender) to transfer on their behalf. It also ensures the sender has sufficient balance. Upon success, it transfers the tokens and updates the allowance. A `Transfer` event is emitted for logging purposes.
**6. `approve`: Allows a token owner to approve a spender to transfer tokens on their behalf.**
{% code overflow="wrap" %}
```solidity
function approve(address spender, uint256 amount) external returns (bool) {
allowances[msg.sender][spender] = amount;
emit Approval(msg.sender, spender, amount);
return true;
}
```
{% endcode %}
* **Purpose**: To grant approval to a third-party (spender) to transfer tokens on behalf of the token owner.
* **Inputs**:
* `spender`: The address of the entity authorized to transfer tokens.
* `amount`: The number of tokens they are allowed to transfer.
* **Outputs**: Returns `true` if the approval is successful.
* **Logic**: The function updates the `allowances` mapping, allowing the specified `spender` to transfer up to `amount` tokens from the caller's account. The `Approval` event is emitted to notify off-chain services of the approval.
***
#### Summary of Key Functions
| **Function** | **Purpose** | **Inputs** | **Outputs** |
| -------------- | --------------------------------------------------------------------------------------- | ------------------------------------------------------------- | ---------------------------------------------- |
| `transfer` | Transfers tokens from the caller’s account to a recipient. | `recipient` (address), `amount` (uint256) | `true` if the transfer is successful. |
| `mint` | Allows the owner to mint new tokens and add them to their balance. | `amount` (uint256) | Emits a `Transfer` event from `0x0` to owner. |
| `burn` | Burns tokens from the caller's balance, reducing the total supply. | `amount` (uint256) | Emits a `Transfer` event from caller to `0x0`. |
| `balanceOf` | Returns the token balance of a specified account. | `account` (address) | Returns the balance as `uint256`. |
| `transferFrom` | Allows a spender to transfer tokens on behalf of the token owner if they have approval. | `sender` (address), `recipient` (address), `amount` (uint256) | `true` if the transfer is successful. |
| `approve` | Approves a third-party spender to transfer tokens on behalf of the token owner. | `spender` (address), `amount` (uint256) | `true` if the approval is successful. |
Each function serves a specific role in token management, ensuring that users can securely transfer, mint, burn, and authorize token transactions, all while maintaining transparency via events.
# Testing
#### Writing Unit Tests
Unit tests are essential to ensure your smart contract behaves correctly. Using **Mocha** and **Chai** in conjunction with **Hardhat** provides a robust framework for testing your Solidity contracts.
**Install Mocha/Chai**
To set up testing, install the required libraries:
```bash
npm install --save-dev mocha chai
```
***
#### Example Test Suite: Token Contract
Here's an improved example of a test suite for a token contract:
{% code overflow="wrap" %}
```javascript
const { expect } = require("chai");
describe("Token Contract", function () {
let Token, token, owner, addr1, addr2;
// Before each test, deploy a new token contract instance
beforeEach(async function () {
[owner, addr1, addr2] = await ethers.getSigners(); // Retrieve test accounts
Token = await ethers.getContractFactory("MyToken");
token = await Token.deploy(); // Deploy the contract
});
describe("Deployment", function () {
it("Should set the correct owner", async function () {
expect(await token.owner()).to.equal(owner.address);
});
it("Should assign the total supply of tokens to the owner", async function () {
const ownerBalance = await token.balanceOf(owner.address);
expect(await token.totalSupply()).to.equal(ownerBalance);
});
});
describe("Transactions", function () {
it("Should transfer tokens between accounts", async function () {
// Transfer 50 tokens from owner to addr1
await token.transfer(addr1.address, 50);
const addr1Balance = await token.balanceOf(addr1.address);
expect(addr1Balance).to.equal(50);
});
it("Should fail if sender doesn’t have enough tokens", async function () {
const initialOwnerBalance = await token.balanceOf(owner.address);
// Attempt to transfer 1 token from addr1 (has 0 tokens) to addr2
await expect(
token.connect(addr1).transfer(addr2.address, 1)
).to.be.revertedWith("Insufficient balance");
// Ensure owner's balance remains unchanged
expect(await token.balanceOf(owner.address)).to.equal(initialOwnerBalance);
});
it("Should update balances after transfers", async function () {
const initialOwnerBalance = await token.balanceOf(owner.address);
// Transfer 100 tokens from owner to addr1
await token.transfer(addr1.address, 100);
// Transfer 50 tokens from addr1 to addr2
await token.connect(addr1).transfer(addr2.address, 50);
const finalOwnerBalance = await token.balanceOf(owner.address);
expect(finalOwnerBalance).to.equal(initialOwnerBalance - 100);
const addr1Balance = await token.balanceOf(addr1.address);
expect(addr1Balance).to.equal(50);
const addr2Balance = await token.balanceOf(addr2.address);
expect(addr2Balance).to.equal(50);
});
});
});
```
{% endcode %}
#### Breakdown of the Test Cases:
1. **Deployment Tests**:
* **Ownership**: Verifies that the contract's owner is correctly assigned upon deployment.
* **Initial Token Distribution**: Confirms that the contract assigns the total token supply to the owner's balance.
2. **Transaction Tests**:
* **Successful Transfers**: Verifies that tokens can be transferred from one account to another and the balances are updated correctly.
* **Failed Transfers**: Ensures that a transfer will fail if the sender doesn't have enough tokens, reverting the transaction.
* **Balance Updates**: Checks that the balances are correctly updated after multiple transactions.
#### Running the Tests
To run the test suite, use the following command:
```bash
npx hardhat test
```
This will execute all test cases and display the results, ensuring that your contract behaves as expected under various conditions.
#### Improvements in this Version:
* **Modular Tests**: Divided tests into logical groups (e.g., `Deployment` and `Transactions`) for better organization and readability.
* **Edge Case Testing**: Added test cases for failure conditions (like insufficient balances) to ensure that your contract handles errors correctly.
* **Reusability**: Used `beforeEach` to deploy a fresh contract instance for each test, ensuring isolation between test cases and preventing state leakage.
This structure makes the tests more maintainable and easier to extend as your contract grows.
# Deployment
#### Deploying on a Local Network
1. **Compile the contract**:
```bash
npx hardhat compile
```
2. **Deploy the contract**: Create a script `/scripts/deploy.js`:
```javascript
async function main() {
const Contract = await ethers.getContractFactory("MyContract");
const contract = await Contract.deploy();
console.log("Contract deployed to:", contract.address);
}
main()
.then(() => process.exit(0))
.catch((error) => {
console.error(error);
process.exit(1);
});
```
3. **Run the deployment script**:
```bash
npx hardhat run scripts/deploy.js --network localhost
```
#### Deploying on Testnet
1. **Configure Networks in Hardhat**: Edit `hardhat.config.js` to include testnet configurations:
```javascript
codemodule.exports = {
networks: {
phron: {
url: "https://testnet.phron.ai",
}
},
solidity: "0.8.4",
};
```
# Security Considerations
#### Security Best Practices for Smart Contracts
When writing and deploying smart contracts, ensuring security is crucial. Below are some key security considerations that must be followed to mitigate potential vulnerabilities and protect user funds and data.
**1. Reentrancy Protection**
Reentrancy attacks occur when an external contract makes recursive calls to the original function before the first invocation is completed. This can lead to funds being drained. Use OpenZeppelin’s `nonReentrant` modifier from the `ReentrancyGuard` library to protect against reentrancy attacks.
**How it works**: The `nonReentrant` modifier prevents a contract from calling itself, directly or indirectly, ensuring that each function can only be called once per transaction.
```solidity
import "@openzeppelin/contracts/security/ReentrancyGuard.sol";
contract MyContract is ReentrancyGuard {
function withdraw() external nonReentrant onlyOwner {
(bool success, ) = owner.call{value: address(this).balance}("");
require(success, "Transfer failed.");
}
}
```
* **Improvement**: OpenZeppelin’s `ReentrancyGuard` is battle-tested and widely adopted, providing out-of-the-box protection without the need to manually implement custom reentrancy checks.
***
**2. Input Validation**
Always validate the inputs provided by users to prevent unintended behavior, especially when dealing with sensitive operations such as token transfers, withdrawals, or access controls. Ensuring the integrity of the data passed to the contract can prevent various attacks.
**Best practices**:
* Validate that addresses are not zero (`address(0)`).
* Ensure that numerical values like token amounts are within acceptable ranges.
* Use `require` statements to validate input conditions.
```solidity
function transfer(address recipient, uint256 amount) external {
require(recipient != address(0), "Invalid recipient address");
require(amount > 0, "Transfer amount must be greater than zero");
// Transfer logic here
}
```
* **Improvement**: Adding thorough input validation prevents invalid or malicious inputs from breaking the contract or leading to unexpected behavior.
***
**3. Safe Math (Overflow and Underflow Prevention)**
Solidity versions `0.8.0` and above include built-in overflow and underflow protection, making SafeMath libraries unnecessary for new versions. For older versions, you should use libraries like OpenZeppelin's `SafeMath` to prevent overflows and underflows.
**Why it’s important**: Overflow and underflow bugs can allow attackers to manipulate contract balances or bypass critical checks.
For Solidity 0.8.0+:
```solidity
function add(uint256 a, uint256 b) external pure returns (uint256) {
return a + b;
// Safe from overflow/underflow
}
```
For older Solidity versions:
```solidity
import "@openzeppelin/contracts/utils/math/SafeMath.sol";
contract MyContract {
using SafeMath for uint256;
function add(uint256 a, uint256 b) external pure returns (uint256) {
return a.add(b);
// Overflow protection via SafeMath
}
}
```
* **Improvement**: For new contracts, leverage Solidity’s built-in protections, simplifying your code and reducing dependencies.
***
**4. Ownership Control**
Restrict critical functions (such as withdrawing funds or changing contract state) to the owner or a trusted party. Using the `onlyOwner` modifier from OpenZeppelin’s `Ownable` contract ensures that only the contract owner can execute sensitive operations.
**How it works**: The `onlyOwner` modifier checks that the function caller is the contract owner, protecting critical functions from unauthorized access.
```solidity
import "@openzeppelin/contracts/access/Ownable.sol";
contract MyContract is Ownable {
function withdraw() external onlyOwner {
(bool success, ) = owner.call{value: address(this).balance}("");
require(success, "Transfer failed.");
}
}
```
* **Improvement**: OpenZeppelin’s `Ownable` provides well-tested access control patterns, making it easy to implement robust ownership control mechanisms.
***
#### Example: Secure Withdrawal Function
Incorporating the above best practices, here’s a secure `withdraw` function that follows reentrancy protection, ownership control, and proper input validation:
```solidity
import "@openzeppelin/contracts/access/Ownable.sol";
import "@openzeppelin/contracts/security/ReentrancyGuard.sol";
contract SecureContract is Ownable, ReentrancyGuard {
// Secure withdrawal function with reentrancy protection and ownership control
function withdraw() external nonReentrant onlyOwner {
uint256 contractBalance = address(this).balance;
require(contractBalance > 0, "No funds to withdraw");
(bool success, ) = owner.call{value: contractBalance}("");
require(success, "Transfer failed.");
}
}
```
* **Improvements**:
* **Reentrancy Protection**: The `nonReentrant` modifier ensures that reentrancy attacks are blocked.
* **Ownership Control**: Only the contract owner can execute the `withdraw` function.
* **Input Validation**: The contract checks that there is a positive balance before attempting to withdraw, preventing unnecessary gas expenditure on invalid transactions.
***
#### Additional Security Considerations:
* **Fallback Functions**: Ensure that fallback functions are properly secured, and consider using them only for receiving Ether.
* **Gas Limit Awareness**: Be mindful of gas limits, especially in loops or when interacting with external contracts.
* **Timelocks**: Consider using timelocks for critical operations to mitigate risks of sudden or malicious contract updates.
By following these security best practices, you significantly reduce the risk of vulnerabilities and ensure your smart contracts are robust and reliable.
# Using Foundry Start to End with Phron
### Introduction
Foundry has become an increasingly popular development environment for smart contracts because it requires only one language: Solidity. Phron offers introductory documentation on using Foundry with Phron networks, which is recommended to read to get an introduction to using Foundry. In this tutorial, we will dip our toes deeper into the library to get a more cohesive look at properly developing, testing, and deploying with Foundry.
In this demonstration, we will deploy two smart contracts. One is a token, and the other will depend on that token. We will also write unit tests to ensure the contracts work as expected. To deploy them, we will write a script that Foundry will use to determine the deployment logic. Finally, we will verify the smart contracts on Phron's blockchain explorer.
### Checking Prerequisites
To get started, you will need the following:
* Have an account with funds. You can get DEV tokens for testing on Phron once every 24 hours from the Phron Faucet
* To test out the examples in this guide on Phron, you will need to have your own endpoint and API key, which you can get from one of the supported Endpoint Providers
* Have [Foundry installed](https://book.getfoundry.sh/getting-started/installation)
* Have a Phron API Key
### Create a Foundry Project
The first step to start a Foundry project is, of course, to create it. If you have Foundry installed, you can run:
```bash
forge init foundry && cd foundry
```
This will have the `forge` utility initialize a new folder named `foundry` with a Foundry project initialized within it. The `script`, `src`, and `test` folders may have files in them already. Be sure to delete them, because we will be writing our own soon.
From here, there are a few things to do first before writing any code. First, we want to add a dependency to [OpenZeppelin's smart contracts](https://github.com/OpenZeppelin/openzeppelin-contracts), because they include helpful contracts to use when writing token smart contracts. To do so, add them using their GitHub repository name:
```bash
forge install OpenZeppelin/openzeppelin-contracts
```
This will add the OpenZeppelin git submodule to your `lib` folder. To be sure that this dependency is mapped, you can override the mappings in a special file, `remappings.txt`:
```bash
forge remappings > remappings.txt
```
Every line in this file is one of the dependencies that can be referenced in the project's smart contracts. Dependencies can be edited and renamed so that it's easier to reference different folders and files when working on smart contracts. It should look similar to this with OpenZeppelin installed properly:
```bash
ds-test/=lib/forge-std/lib/ds-test/src/
forge-std/=lib/forge-std/src/
openzeppelin-contracts/=lib/openzeppelin-contracts/
```
Finally, let's open up the `foundry.toml` file. In preparation for Etherscan verification and deployment, add this to the file:
```javascript
[profile.default]
src = 'src'
out = 'out'
libs = ['lib']
solc_version = '0.8.20'
[rpc_endpoints]
phronbase = "https://testnet.phron.ai"
phronapi = "INSERT_RPC_API_ENDPOINT"
[etherscan]
phronbase = { key = "${PHRONSCAN_API_KEY}" }
phronapi = { key = "${PHRONSCAN_API_KEY}" }
```
The first addition is a specification of the `solc_version`, underneath `profile.default`. The `rpc_endpoints` tag allows you to define which RPC endpoints to use when deploying to a named network, in this case, Phron. The `etherscan` tag allows you to add Etherscan API keys for smart contract verification, which we will review later.
### Add Smart Contracts
Smart contracts in Foundry destined for deployment by default belong in the `src` folder. In this tutorial, we'll write two smart contracts. Starting with the token:
```bash
touch MyToken.sol
```
Open the file and add the following to it:
```solidity
// SPDX-License-Identifier: MIT
pragma solidity ^0.8.0;
// Import OpenZeppelin Contract
import {ERC20} from "@openzeppelin/contracts/token/ERC20/ERC20.sol";
// This ERC-20 contract mints the specified amount of tokens to the contract creator
contract MyToken is ERC20 {
constructor(uint256 initialSupply) ERC20("MyToken", "MYTOK") {
_mint(msg.sender, initialSupply);
}
// An external minting function allows anyone to mint as many tokens as they want
function mint(uint256 toMint, address to) external {
require(toMint <= 1 ether);
_mint(to, toMint);
}
}
```
As you can see, the OpenZeppelin `ERC20` smart contract is imported by the mapping defined in `remappings.txt`.
The second smart contract, which we'll name `Container.sol`, will depend on this token contract. It is a simple contract that holds the ERC-20 token we'll deploy. You can create the file by executing:
```bash
touch Container.sol
```
Open the file and add the following to it:
{% code overflow="wrap" %}
```solidity
// SPDX-License-Identifier: MIT
pragma solidity ^0.8.0;
// Import OpenZeppelin Contract
import {MyToken} from "./MyToken.sol";
enum ContainerStatus {
Unsatisfied,
Full,
Overflowing
}
contract Container {
MyToken token;
uint256 capacity;
ContainerStatus public status;
constructor(MyToken _token, uint256 _capacity) {
token = _token;
capacity = _capacity;
status = ContainerStatus.Unsatisfied;
}
// Updates the status value based on the number of tokens that this contract has
function updateStatus() public {
address container = address(this);
uint256 balance = token.balanceOf(container);
if (balance < capacity) {
status = ContainerStatus.Unsatisfied;
} else if (balance == capacity) {
status = ContainerStatus.Full;
} else if (_isOverflowing(balance)) {
status = ContainerStatus.Overflowing;
}
}
// Returns true if the contract should be in an overflowing state, false if otherwise
function _isOverflowing(uint256 balance) internal view returns (bool) {
return balance > capacity;
}
}
```
{% endcode %}
The `Container` smart contract can have its status updated based on how many tokens it holds and what its initial capacity value was set to. If the number of tokens it holds is above its capacity, its status can be updated to `Overflowing`. If it holds tokens equal to capacity, its status can be updated to `Full`. Otherwise, the contract will start and stay in the `Unsatisfied` state.
`Container` requires a `MyToken` smart contract instance to function, so when we deploy it, we will need logic to ensure that it is deployed with a `MyToken` smart contract.
### Write Tests
Before we deploy anything to a TestNet or MainNet, however, it's good to test your smart contracts. There are many types of tests:
* **Unit tests** — allow you to test specific parts of a smart contract's functionality. When writing your own smart contracts, it can be a good idea to break functionality into different sections so that it is easier to unit test
* **Fuzz tests** — allow you to test a smart contract with a wide variety of inputs to check for edge cases
* **Integration tests** — allow you to test a smart contract when it works in conjunction with other smart contracts, so that you know it works as expected in a deployed environment
* **Forking tests** - integration tests that allows you to make a fork (a carbon copy of a network), so that you can simulate a series of transactions on a preexisting network
#### Unit Tests in Foundry
To get started with writing tests for this tutorial, make a new file in the `test` folder:
```bash
cd test
touch MyToken.t.sol
```
By convention, all of your tests should end with `.t.sol` and start with the name of the smart contract that it is testing. In practice, the test can be stored anywhere and is considered a test if it has a function that starts with the word *"test"*.
Let's start by writing a test for the token smart contract. Open up `MyToken.t.sol` and add:
```solidity
pragma solidity ^0.8.0;
import "forge-std/Test.sol";
import "../src/MyToken.sol";
contract MyTokenTest is Test {
MyToken public token;
// Runs before each test
function setUp() public {
token = new MyToken(100);
}
// Tests if minting during the constructor happens properly
function testConstructorMint() public {
assertEq(token.balanceOf(address(this)), 100);
}
}
```
Let's break down what's happening here. The first line is typical for a Solidity file: setting the Solidity version. The next two lines are imports. `forge-std/Test.sol` is the standard library that Forge (and thus Foundry) includes to help with testing. This includes the `Test` smart contract, certain assertions, and [forge cheatcodes](https://book.getfoundry.sh/forge/cheatcodes).
If you take a look at the `MyTokenTest` smart contract, you'll see two functions. The first is `setUp`, which is run before each test. So in this test contract, a new instance of `MyToken` is deployed every time a test function is run. You know if a function is a test function if it starts with the word *"test"*, so the second function, `testConstructorMint` is a test function.
Great! Let's write some more tests, but for `Container`.
```bash
touch Container.t.sol
```
And add the following:
```solidity
// SPDX-License-Identifier: UNLICENSED
pragma solidity ^0.8.0;
import "forge-std/Test.sol";
import {MyToken} from "../src/MyToken.sol";
import {Container, ContainerStatus} from "../src/Container.sol";
contract ContainerTest is Test {
MyToken public token;
Container public container;
uint256 constant CAPACITY = 100;
// Runs before each test
function setUp() public {
token = new MyToken(1000);
container = new Container(token, CAPACITY);
}
// Tests if the container is unsatisfied right after constructing
function testInitialUnsatisfied() public {
assertEq(token.balanceOf(address(container)), 0);
assertTrue(container.status() == ContainerStatus.Unsatisfied);
}
// Tests if the container will be "full" once it reaches its capacity
function testContainerFull() public {
token.transfer(address(container), CAPACITY);
container.updateStatus();
assertEq(token.balanceOf(address(container)), CAPACITY);
assertTrue(container.status() == ContainerStatus.Full);
}
}
```
This test smart contract has two tests, so when running the tests, there will be two deployments of both `MyToken` and `Container`, for four smart contracts. You can run the following command to see the result of the test:
```bash
forge test
```
When testing, you should see the following output:
{% code overflow="wrap" %}
```bash
forge test[⠊] Compiling...No files changed, compilation skipped
Ran 1 test for test/MyToken.t.sol:MyTokenTest[PASS] testConstructorMint() (gas: 10651)Suite result: ok. 1 passed; 0 failed; 0 skipped; finished in 361.83µs (39.46µs CPU time)
Ran 2 tests for test/Container.t.sol:ContainerTest[PASS] testContainerFull() (gas: 73204)[PASS] testInitialUnsatisfied() (gas: 18476)Suite result: ok. 2 passed; 0 failed; 0 skipped; finished in 422.00µs (128.67µs CPU time)Ran 2 test suites in 138.17ms (783.83µs CPU time): 3 tests passed, 0 failed, 0 skipped (3 total tests)
```
{% endcode %}
#### Test Harnesses in Foundry
Sometimes you'll want to unit test an `internal` function in a smart contract. To do so, you'll have to write a test harness smart contract, which inherits from the smart contract and exposes the internal function as a public one.
For example, in `Container`, there is an internal function named `_isOverflowing`, which checks to see if the smart contract has more tokens than its capacity. To test this, add the following test harness smart contract to the `Container.t.sol` file:
```solidity
contract ContainerHarness is Container {
constructor(MyToken _token, uint256 _capacity) Container(_token, _capacity) {}
function exposed_isOverflowing(uint256 balance) external view returns(bool) {
return _isOverflowing(balance);
}
}
```
Now, inside of the `ContainerTest` smart contract, you can add a new test that tests the previously unreachable `_isOverflowing` contract:
```solidity
// Tests for negative cases of the internal _isOverflowing function
function testIsOverflowingFalse() public {
ContainerHarness harness = new ContainerHarness(token , CAPACITY);
assertFalse(harness.exposed_isOverflowing(CAPACITY - 1));
assertFalse(harness.exposed_isOverflowing(CAPACITY));
assertFalse(harness.exposed_isOverflowing(0));
}
```
Now, when you run the test with `forge test`, you should see that `testIsOverflowingFalse` passes!
{% code overflow="wrap" %}
```bash
forge test[⠊] Compiling...[⠒] Compiling 1 files with 0.8.20[⠢] Solc 0.8.20 finished in 1.06sCompiler run successful
Ran 1 test for test/MyToken.t.sol:MyTokenTest[PASS] testConstructorMint() (gas: 10651)Suite result: ok. 1 passed; 0 failed; 0 skipped; finished in 498.00µs (48.96µs CPU time)
Ran 3 tests for test/Container.t.sol:ContainerTest[PASS] testContainerFull() (gas: 73238)[PASS] testInitialUnsatisfied() (gas: 18510)[PASS] testIsOverflowingFalse() (gas: 192130)Suite result: ok. 3 passed; 0 failed; 0 skipped; finished in 606.17µs (183.54µs CPU time)Ran 2 test suites in 138.29ms (1.10ms CPU time): 4 tests passed, 0 failed, 0 skipped (4 total tests)
```
{% endcode %}
#### Fuzzing Tests in Foundry
When you write a unit test, you can only use so many inputs to test. You can test edge cases, a few select values, and perhaps one or two random ones. But when working with inputs, there are nearly an infinite amount of different ones to test! How can you be sure that they work for every value? Wouldn't you feel safer if you could test 10000 different inputs instead of less than 10?
One of the best ways that developers can test many inputs is through fuzzing, or fuzz tests. Foundry automatically fuzz tests when an input in a test function is included. To illustrate this, add the following test to the `MyTokenTest` contract in `MyToken.t.sol`.
```solidity
// Fuzz tests for success upon minting tokens one ether or below
function testMintOneEtherOrBelow(uint256 amountToMint) public {
vm.assume(amountToMint <= 1 ether);
token.mint(amountToMint, msg.sender);
assertEq(token.balanceOf(msg.sender), amountToMint);
}
```
This test includes `uint256 amountToMint` as input, which tells Foundry to fuzz with `uint256` inputs! By default, Foundry will input 256 different inputs, but this can be configured with the [`FOUNDRY_FUZZ_RUNS` environment variable](https://book.getfoundry.sh/reference/config/testing#runs).
Additionally, the first line in the function uses `vm.assume` to only use inputs that are less than or equal to one ether since the `mint` function reverts if someone tries to mint more than one ether at a time. This cheatcode helps you direct the fuzzing into the right range.
Let's look at another fuzzing test to put in the `MyTokenTest` contract, but this time where we expect to fail:
```solidity
// Fuzz tests for failure upon minting tokens above one ether
function testFailMintAboveOneEther(uint256 amountToMint) public {
vm.assume(amountToMint > 1 ether);
token.mint(amountToMint, msg.sender);
}
```
In Foundry, when you want to test for a failure, instead of just starting your test function with the world *"test"*, you start it with *"testFail"*. In this test, we assume that the `amountToMint` is above one ether, which should fail!
Now run the tests:
```bash
forge test
```
You should see something similar to the following in the console:
{% code overflow="wrap" %}
```bash
forge test[⠊] Compiling...[⠊] Compiling 1 files with 0.8.20[⠒] Solc 0.8.20 finished in 982.65msCompiler run successful
Ran 3 tests for test/Container.t.sol:ContainerTest[PASS] testContainerFull() (gas: 73238)[PASS] testInitialUnsatisfied() (gas: 18510)[PASS] testIsOverflowingFalse() (gas: 192130)Suite result: ok. 3 passed; 0 failed; 0 skipped; finished in 446.25µs (223.67µs CPU time)
Ran 3 tests for test/MyToken.t.sol:MyTokenTest[PASS] testConstructorMint() (gas: 10651)[PASS] testFailMintAboveOneEther(uint256) (runs: 256, μ: 8462, ~: 8462)[PASS] testMintOneEtherOrBelow(uint256) (runs: 256, μ: 37939, ~: 39270)Suite result: ok. 3 passed; 0 failed; 0 skipped; finished in 10.78ms (18.32ms CPU time)Ran 2 test suites in 138.88ms (11.23ms CPU time): 6 tests passed, 0 failed, 0 skipped (6 total tests)
```
{% endcode %}
#### Forking Tests in Foundry
In Foundry, you can locally fork a network so that you can test out how the contracts would work in an environment with already deployed smart contracts. For example, if someone deployed smart contract `A` on Phron that required a token smart contract, you could fork the Phron network and deploy your own token to test how smart contract `A` would react to it.
> ### Note
>
> Phron's custom precompile smart contracts currently do not work in Foundry forks because precompiles are Substrate-based whereas typical smart contracts are completely based on the EVM. Learn more about forking on Phron and the differences between Phron and Ethereum.
In this tutorial, you will test how your `Container` smart contract interacts with an already deployed `MyToken` contract on Phron
Let's add a new test function to the `ContainerTest` smart contract in `Container.t.sol` called `testAlternateTokenOnPhronFork`:
```solidity
// Fork tests in the Phron environment
function testAlternateTokenOnPhronFork() public {
// Creates and selects a fork, returns a fork ID
uint256 phronFork = vm.createFork("phron");
vm.selectFork(phronFork);
assertEq(vm.activeFork(), phronFork);
// Get token that's already deployed & deploys a container instance
token = MyToken(0x359436610E917e477D73d8946C2A2505765ACe90);
container = new Container(token, CAPACITY);
// Mint tokens to the container & update container status
token.mint(CAPACITY, address(container));
container.updateStatus();
// Assert that the capacity is full, just like the rest of the time
assertEq(token.balanceOf(address(container)), CAPACITY);
assertTrue(container.status() == ContainerStatus.Full);
}
```
The first step (and thus first line) in this function is to have the test function fork a network with `vm.createFork`. Recall that `vm` is a cheat code provided by the Forge standard library. All that's necessary to create a fork is an RPC URL, or an alias for an RPC URL that's stored in the `foundry.toml` file. In this case, we added an RPC URL for "phron" in the setup step, so in the test function we will just pass the word `"phronbase"`. This cheat code function returns an ID for the fork created, which is stored in an `uint256` and is necessary for activating the fork.
On the second line, after the fork has been created, the environment will select and use the fork in the test environment with `vm.selectFork`. The third line just demonstrates that the current fork, retrieved with `vm.activeFork`, is the same as the Phron fork.
The fourth line of code retrieves an already deployed instance of `MyToken`, which is what's so useful about forking: you can use contracts that are already deployed.
The rest of the code tests capacity like you would expect a local test to. If you run the tests (with the `-vvvv` tag for extra logging), you'll see that it passes:
```bash
forge test -vvvv
```
{% code overflow="wrap" %}
```bash
forge test[PASS] testIsOverflowingFalse() (gas: 192130)Traces: [192130] ContainerTest::testIsOverflowingFalse() ├─ [151256] → new ContainerHarness@0xF62849F9A0B5Bf2913b396098F7c7019b51A820a │ └─ ← [Return] 522 bytes of code ├─ [421] ContainerHarness::exposed_isOverflowing(99) [staticcall] │ └─ ← [Return] false ├─ [0] VM::assertFalse(false) [staticcall] │ └─ ← [Return] ├─ [421] ContainerHarness::exposed_isOverflowing(100) [staticcall] │ └─ ← [Return] false ├─ [0] VM::assertFalse(false) [staticcall] │ └─ ← [Return] ├─ [421] ContainerHarness::exposed_isOverflowing(0) [staticcall] │ └─ ← [Return] false ├─ [0] VM::assertFalse(false) [staticcall] │ └─ ← [Return] └─ ← [Stop]Suite result: ok. 4 passed; 0 failed; 0 skipped; finished in 2.07s (2.07s CPU time)Ran 2 test suites in 2.44s (2.08s CPU time): 7 tests passed, 0 failed, 0 skipped (7 total tests)
```
{% endcode %}
That's it for testing! You can find the complete `Container.t.sol` and `MyToken.t.sol` files below:
Container.t.sol
```solidity
// SPDX-License-Identifier: UNLICENSED
pragma solidity ^0.8.0;
import "forge-std/Test.sol";
import {MyToken} from "../src/MyToken.sol";
import {Container, ContainerStatus} from "../src/Container.sol";
contract ContainerTest is Test {
MyToken public token;
Container public container;
uint256 constant CAPACITY = 100;
function setUp() public {
token = new MyToken(1000);
container = new Container(token, CAPACITY);
}
function testInitialUnsatisfied() public {
assertEq(token.balanceOf(address(container)), 0);
assertTrue(container.status() == ContainerStatus.Unsatisfied);
}
function testContainerFull() public {
token.transfer(address(container), CAPACITY);
container.updateStatus();
assertEq(token.balanceOf(address(container)), CAPACITY);
assertTrue(container.status() == ContainerStatus.Full);
}
function testIsOverflowingFalse() public {
ContainerHarness harness = new ContainerHarness(token , CAPACITY);
assertFalse(harness.exposed_isOverflowing(CAPACITY - 1));
assertFalse(harness.exposed_isOverflowing(CAPACITY));
assertFalse(harness.exposed_isOverflowing(0));
}
function testAlternateTokenOnPhronFork() public {
// Creates and selects a fork
uint256 phronFork = vm.createFork("phron");
vm.selectFork(phronFork);
assertEq(vm.activeFork(), phronFork);
// Get token that's already deployed & deploys a container instance
token = MyToken(0x93e1e9EC6c1A8736266A595EFe97B5673ea0fEAc);
container = new Container(token, CAPACITY);
// Mint tokens to the container & update container status
token.mint(CAPACITY, address(container));
container.updateStatus();
// Assert that the capacity is full
assertEq(token.balanceOf(address(container)), CAPACITY);
assertTrue(container.status() == ContainerStatus.Full);
}
}
contract ContainerHarness is Container {
constructor(MyToken _token, uint256 _capacity) Container(_token, _capacity) {}
function exposed_isOverflowing(uint256 balance) external view returns(bool) {
return _isOverflowing(balance);
}
}
```
MyToken.t.sol
```solidity
// SPDX-License-Identifier: UNLICENSED
pragma solidity ^0.8.0;
import "forge-std/Test.sol";
import "../src/MyToken.sol";
contract MyTokenTest is Test {
MyToken public token;
function setUp() public {
token = new MyToken(100);
}
function testConstructorMint() public {
assertEq(token.balanceOf(address(this)), 100);
}
function testMintOneEtherOrBelow(uint256 amountToMint) public {
vm.assume(amountToMint <= 1 ether);
token.mint(amountToMint, msg.sender);
assertEq(token.balanceOf(msg.sender), amountToMint);
}
function testFailMintAboveOneEther(uint256 amountToMint) public {
vm.assume(amountToMint > 1 ether);
token.mint(amountToMint, msg.sender);
}
}
```
### Deploy in Foundry with Solidity Scripts
Not only are tests in Foundry written in Solidity, the scripts are too! Like other developer environments, scripts can be written to help interact with deployed smart contracts or can help along a complex deployment process that would be difficult to do manually. Even though scripts are written in Solidity, they are never deployed to a chain. Instead, much of the logic is actually run off-chain, so don't worry about any additional gas costs for using Foundry instead of a JavaScript environment like Hardhat.
#### Deploy on Phron
In this tutorial, we will use Foundry's scripts to deploy the `MyToken` and `Container` smart contracts. To create the deployment scripts, create a new file in the `script` folder:
```bash
cd script
touch Container.s.sol
```
By convention, scripts should end with `s.sol` and have a name similar to the script they relate to. In this case, we are deploying the `Container` smart contract, so we have named the script `Container.s.sol`, though it's not the end of the world if you use a more suitable or descriptive name.
In this script, add:
```solidity
pragma solidity ^0.8.0;
import "forge-std/Script.sol";
import {MyToken} from "../src/MyToken.sol";
import {Container} from "../src/Container.sol";
contract ContainerDeployScript is Script {
// Runs the script; deploys MyToken and Container
function run() public {
// Get the private key from the .env
uint256 deployerPrivateKey = vm.envUint("PRIVATE_KEY");
vm.startBroadcast(deployerPrivateKey);
// Make a new token
MyToken token = new MyToken(1000);
// Make a new container
new Container(token, 500);
vm.stopBroadcast();
}
}
```
Let's break this script down. The first line is standard: declaring the solidity version. The imports include the two smart contracts you previously added, which will be deployed. This includes additional functionality to use in a script, including the `Script` contract.
Now let's look at the logic in the contract. There is a single function, `run`, which is where the script logic is hosted. In this `run` function, the `vm` object is used often. This is where all of the Forge cheatcodes are stored, which determines the state of the virtual machine that the solidity is run in.
In the first line within the `run` function, `vm.envUint` is used to get a private key from the system's environment variables (we will do this soon). In the second line, `vm.startBroadcast` starts a broadcast, which indicates that the following logic should take place on-chain. So when the `MyToken` and the `Container` contracts are instantiated with the `new` keyword, they are instantiated on-chain. The final line, `vm.stopBroadcast` ends the broadcast.
Before we run this script, let's set up some of our environment variables. Create a new `.env` file:
```bash
touch .env
```
And within this file, add the following:
```
PRIVATE_KEY=YOUR_PRIVATE_KEY
PHRONSCAN_API_KEY=YOUR_PHRONSCAN_API_KEY
```
> ### Note
>
> Foundry provides [additional options for handling your private key](https://book.getfoundry.sh/reference/forge/forge-script#wallet-options---raw). It is up to you to decide whether or not you would rather use it in the console, have it stored in your device's environment, using a hardware wallet, or using a keystore.
To add these environment variables, run the following command:
```bash
source .env
```
Now your script and project should be ready for deployment! Use the following command to do so:
{% code overflow="wrap" %}
```bash
forge script Container.s.sol:ContainerDeployScript --broadcast --verify -vvvv --legacy --rpc-url phron
```
{% endcode %}
This command runs the `ContainerDeployScript` contract as a script. The `--broadcast` option tells Forge to allow broadcasting of transactions, the `--verify` option tells Forge to verify to Phronscan when deploying, `-vvvv` makes the command output verbose, and `--rpc-url phronbase` sets the network to what phron`base` was set to in `foundry.toml`. The `--legacy` flag instructs Foundry to bypass EIP-1559. While all Phron networks support EIP-1559, Foundry will refuse to submit the transaction to phronbase and revert to a local simulation if you omit the `--legacy` flag.
You should see something like this as output:
{% code overflow="wrap" %}
```bash
Script ran successfully.Setting up 1 EVM.Simulated On-chain Traces: [488164] → new MyToken@0xAEe1a769b10d03a6CeB4D9DFd3aBB2EF807ee6aa ├─ emit Transfer(from: 0x0000000000000000000000000000000000000000, to: 0x3B939FeaD1557C741Ff06492FD0127bd287A421e, value: 1000) └─ ← [Return] 1980 bytes of code [133238] → new Container@0xeb1Ff38A645Eae4E64dFb93772D8129F88E11Ab1 └─ ← [Return] 432 bytes of codeChain 1287Estimated gas price: 0.125 gweiEstimated total gas used for script: 1670737Estimated amount required: 0.000208842125 ETHSending transactions [0 - 0].⠁ [00:00:00] [#############################################################>-------------------------------------------------------------] 1/2 txes (0.7s)Waiting for receipts.⠉ [00:00:22] [#######################################################################################################################] 1/1 receipts (0.0s)phron✅ [Success]Hash: 0x2ad8994c12af74bdcb04873e13d97dc543a2fa7390c1e194732ab43ec828cb3bContract Address: 0xAEe1a769b10d03a6CeB4D9DFd3aBB2EF807ee6aaBlock: 6717135Paid: 0.000116937 ETH (935496 gas * 0.125 gwei)Sending transactions [1 - 1].⠉ [00:00:23] [###########################################################################################################################] 2/2 txes (0.0s)Waiting for receipts.⠉ [00:00:21] [#######################################################################################################################] 1/1 receipts (0.0s)phron✅ [Success]Hash: 0x3bfb4cee2be4269badc57e0053d8b4d94d9d57d7936ecaa1e13ac1e2199f3b12Contract Address: 0xeb1Ff38A645Eae4E64dFb93772D8129F88E11Ab1Block: 6717137Paid: 0.000035502 ETH (284016 gas * 0.125 gwei)ONCHAIN EXECUTION COMPLETE & SUCCESSFUL.Total Paid: 0.000152439 ETH (1219512 gas * avg 0.125 gwei)
```
{% endcode %}
You should be able to see that your contracts were deployed, and are verified on Phronscan! For example, this is where my `Container.sol` contract was deployed.
The entire deployment script is available below:
Container.s.sol
```solidity
// SPDX-License-Identifier: UNLICENSED
pragma solidity ^0.8.0;
import "forge-std/Script.sol";
import {MyToken} from "../src/MyToken.sol";
import {Container} from "../src/Container.sol";
contract ContainerDeployScript is Script {
function run() public {
// Get the private key from the .env
uint256 deployerPrivateKey = vm.envUint("PRIVATE_KEY");
vm.startBroadcast(deployerPrivateKey);
// Make a new token
MyToken token = new MyToken(1000);
// Make a new container
new Container(token, 500);
vm.stopBroadcast();
}
}
```
#### Deploy on Phron MainNet
Let's say that you're comfortable with your smart contracts and you want to deploy on the Phron MainNet! The process isn't too different from what was just done, you just have to change the command's rpc-url from `phronbase` to `phron`, since you've already added Phron MainNet's information in the `foundry.toml` file:
{% code overflow="wrap" %}
```bash
forge script Container.s.sol:ContainerDeployScript --broadcast --verify -vvvv --legacy --rpc-url phron
```
{% endcode %}
It's important to note that there are additional, albeit more complex, [ways of handling private keys in Foundry](https://book.getfoundry.sh/reference/forge/forge-script#wallet-options---raw). Some of these methods can be considered safer than storing a production private key in environment variables.
That's it! You've gone from nothing to a fully tested, deployed, and verified Foundry project. You can now adapt this so that you can use Foundry in your own projects!
This tutorial is for educational purposes only. As such, any contracts or code created in this tutorial should not be used in production.The information presented herein has been provided by third parties and is made available solely for general information purposes. Phron does not endorse any project listed and described on the Phron Doc Website (). Phron does not warrant the accuracy, completeness or usefulness of this information. Any reliance you place on such information is strictly at your own risk. Phron disclaims all liability and responsibility arising from any reliance placed on this information by you or by anyone who may be informed of any of its contents. All statements and/or opinions expressed in these materials are solely the responsibility of the person or entity providing those materials and do not necessarily represent the opinion of Phron. The information should not be construed as professional or financial advice of any kind. Advice from a suitably qualified professional should always be sought in relation to any particular matter or circumstance. The information herein may link to or integrate with other websites operated or content provided by third parties, and such other websites may link to this website. Phron has no control over any such other websites or their content and will have no liability arising out of or related to such websites or their content. The existence of any such link does not constitute an endorsement of such websites, the content of the websites, or the operators of the websites. These links are being provided to you only as a convenience and you release and hold Phron harmless from any and all liability arising from your use of this information or the information provided by any third-party website or service.
# How to Build a DApp: Complete DApp Architecture
### Introduction
Decentralized applications, or DApps, have redefined how applications are built, managed, and interacted with in Web3. By leveraging blockchain technology, DApps provide a secure, transparent, and trustless system that enables peer-to-peer interactions without any central authority. At the core of a DApp's architecture are several main components that work in tandem to create a robust, decentralized ecosystem. These components include smart contracts, nodes, frontend user interfaces, and more.
In this tutorial, you'll come face-to-face with each major component by writing a full DApp that mints tokens. We'll also explore additional optional components of DApps that can enhance user experience for your future projects. You can view the complete project in its [monorepo on GitHub](https://github.com/jboetticher/complete-example-dapp).
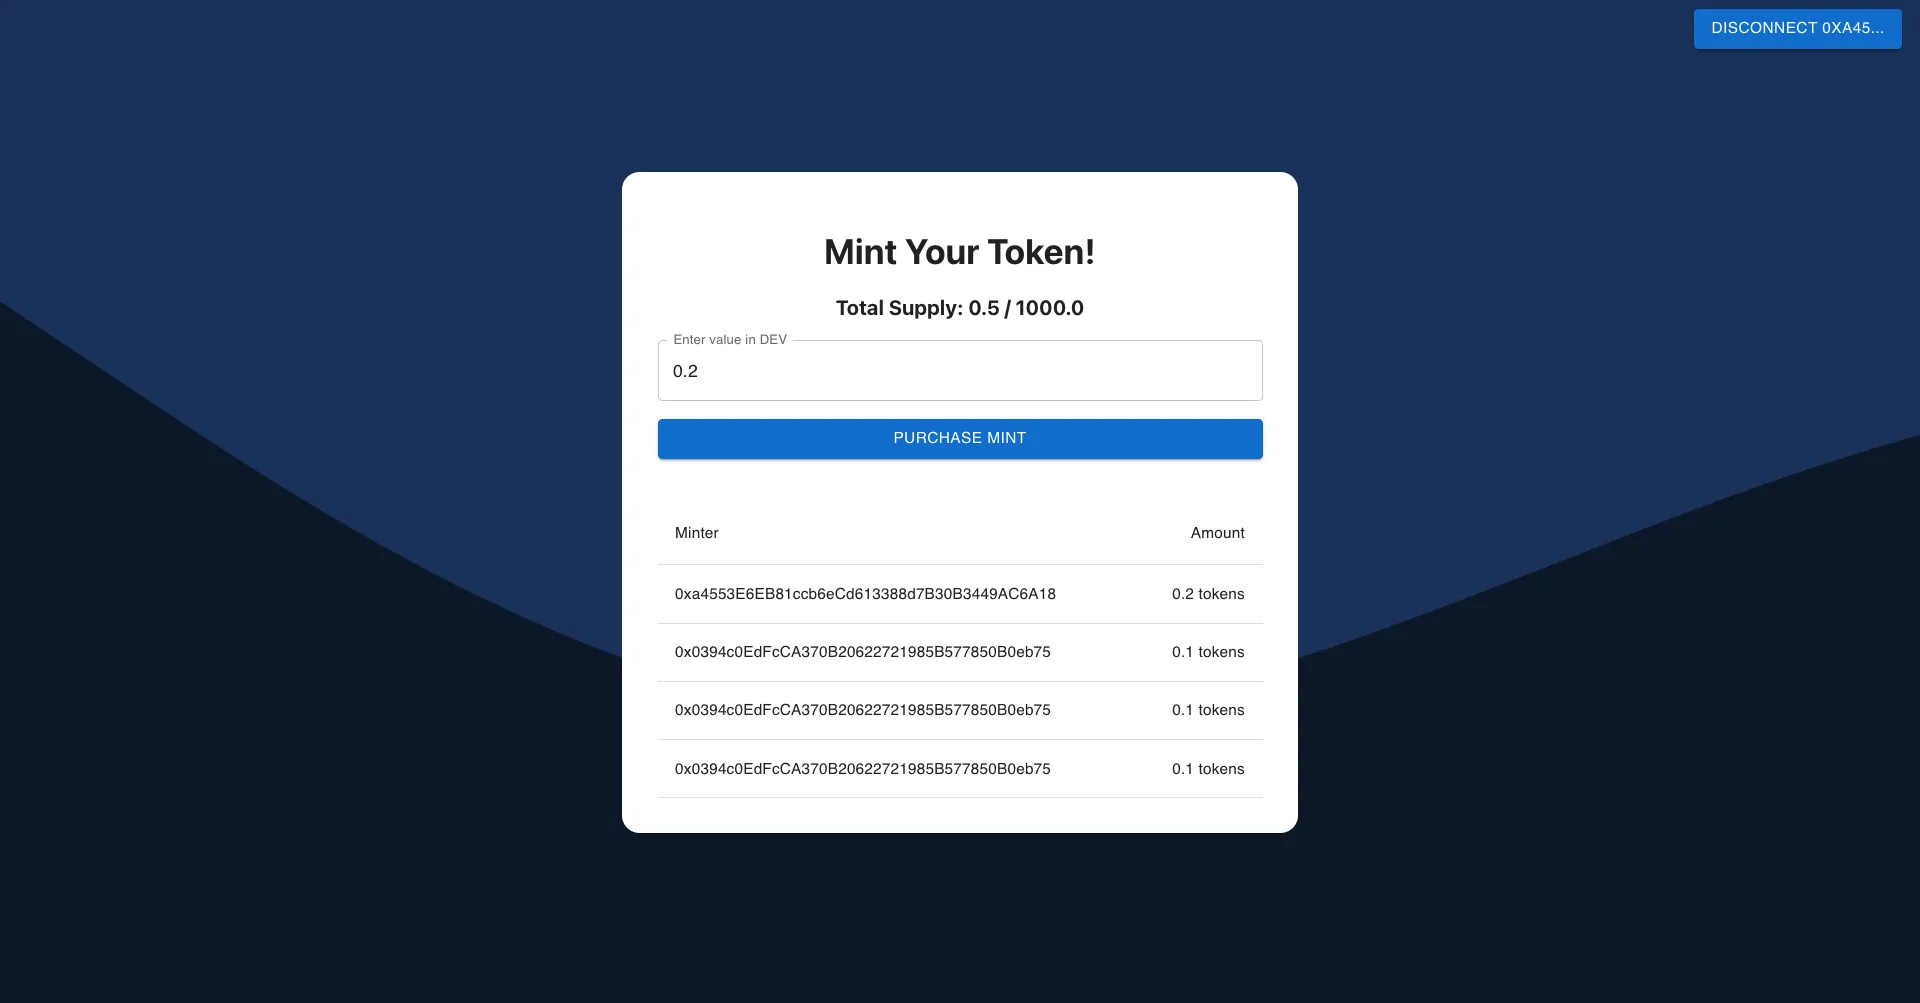
### Checking Prerequisites
To get started, you should have the following:
* A Phron account funded with DEV. You can get DEV tokens for testing on Phron once every 24 hours from the [Phron Faucet](https://faucet.phron.ai/)
* [Node.js](https://nodejs.org/en/download/package-manager) version 16 or newer installed
* [VS Code](https://code.visualstudio.com/) with Juan Blanco's [Solidity extension](https://marketplace.visualstudio.com/items?itemName=JuanBlanco.solidity) is a recommended IDE
* Understanding of JavaScript and React
* Novice familiarity with Solidity. If you are not familiar with writing Solidity, there are many resources out there, including [Solidity by Example](https://solidity-by-example.org/). A 15-minute skim should suffice for this tutorial
* A wallet like [MetaMask installed](https://chromewebstore.google.com/detail/metamask/nkbihfbeogaeaoehlefnkodbefgpgknn)
### Nodes and JSON-RPC Endpoints
Generally speaking, a JSON-RPC is a remote procedure call (RPC) protocol that utilizes JSON to encode data. For Web3, they refer to the specific JSON-RPCs that DApp developers use to send requests and receive responses from blockchain nodes, making it a crucial element in interactions with smart contracts. They allow frontend user interfaces to seamlessly interact with the smart contracts and provide users with real-time feedback on their actions. They also allow developers to deploy their smart contracts in the first place!
To get a JSON-RPC to communicate with a Phron blockchain, you need to run a node. But that can be expensive, complicated, and a hassle. Fortunately, as long as you have *access* to a node, you can interact with the blockchain. Phron has a handful of free and paid node options. For this tutorial, we will be using the Phron's public node for Phron, but you are encouraged to get your own private endpoint.
```url
https://testnet.phron.ai
```
So now you have a URL. How do you use it? Over `HTTPS`, JSON-RPC requests are `POST` requests that include specific methods for reading and writing data, such as `eth_call` for executing a smart contract function in a read-only manner or `eth_sendRawTransaction` for submitting signed transactions to the network (calls that change the blockchain state). The entire JSON request structure will always have a structure similar to the following:
```json
{
"jsonrpc": "2.0",
"id": 1,
"method": "eth_getBalance",
"params": ["0xf24FF3a9CF04c71Dbc94D0b566f7A27B94566cac", "latest"]
}
```
This example is getting the balance (in DEV on Phron) of the `0xf24FF3a9CF04c71Dbc94D0b566f7A27B94566cac` account. Let's break down the elements:
* `jsonrpc` — the JSON-RPC API version, usually "2.0"
* `id` — an integer value that helps identify a response to a request. Can usually just keep it as \`
* `method` — the specific method to read/write data from/to the blockchain. You can see many of the RPC methods on our docs site
* `params` — an array of the input parameters expected by the specific `method`
There are also additional elements that can be added to JSON-RPC requests, but those four will be seen the most often.
Now, these JSON-RPC requests are pretty useful, but when writing code, it can be a hassle to create a JSON object over and over again. That's why there exist libraries that help abstract and facilitate the usage of these requests. Phron provides documentation on many libraries, and the one that we will be using in this tutorial is Ethers.js. Just understand that whenever we interact with the blockchain through the Ethers.js package, we're really using JSON-RPC!
### Smart Contracts
Smart contracts are self-executing contracts with the terms of the agreement directly written into code. They serve as the decentralized backend of any DApp, automating and enforcing the business logic within the system.
If coming from traditional web development, smart contracts are meant to replace the backend with important caveats: the user must have the native currency (GLMR, MOVR, DEV, etc.) to make state-changing requests, storing information can be expensive, and **no information stored is private**.
When you deploy a smart contract onto Phron, you upload a series of instructions that can be understood by the EVM, or the Ethereum Virtual Machine. Whenever someone interacts with a smart contract, these transparent, tamper-proof, and immutable instructions are executed by the EVM to change the blockchain's state. Writing the instructions in a smart contract properly is very important since the blockchain's state defines the most crucial information about your DApp, such as who has what amount of money.
Since the instructions are difficult to write and make sense of at a low (assembly) level, we have smart contract languages such as Solidity to make it easier to write them. To help write, debug, test, and compile these smart contract languages, developers in the Ethereum community have created developer environments such as Hardhat and Foundry. Phron's developer site provides information on a plethora of developer environments.
This tutorial will use Hardhat for managing smart contracts.
#### Create a Hardhat Project
You can initialize a project with Hardhat using the following command:
```shell
npx hardhat init
```
When creating a JavaScript or TypeScript Hardhat project, you will be asked if you want to install the sample project's dependencies, which will install Hardhat and the [Hardhat Toolbox plugin](https://hardhat.org/hardhat-runner/plugins/nomicfoundation-hardhat-toolbox#hardhat-toolbox). You don't need all of the plugins that come wrapped up in the Toolbox, so instead you can install Hardhat, Ethers, and the Hardhat Ethers plugin, which is all you'll need for this tutorial:
```bash
npm install --save-dev hardhat @nomicfoundation/hardhat-ethers ethers@6
```
Before we start writing the smart contract, let's add a JSON-RPC URL to the config. Set the `hardhat.config.js` file with the following code, and replace `INSERT_YOUR_PRIVATE_KEY` with your funded account's private key.
{% hint style="warning" %}
### Remember
This is for testing purposes, **never store your private key in plain text with real funds**.
{% endhint %}
```javascript
require('@nomicfoundation/hardhat-ethers');
module.exports = {
solidity: '0.8.20',
networks: {
phron: {
url: 'https://testnet.phron.ai',
chainId: 7744,
accounts: ['INSERT_YOUR_PRIVATE_KEY']
}
}
};
```
#### Write Smart Contracts
Recall that we're making a DApp that allows you to mint a token for a price. Let's write a smart contract that reflects this functionality!
Once you've initialized a Hardhat project, you'll be able to write smart contracts in its `contracts` folder. This folder will have an initial smart contract, likely called `Lock.sol`, but you should delete it and add a new smart file called `MintableERC20.sol`.
The standard for tokens is called ERC-20, where ERC stands for "*Ethereum Request for Comment*". A long time ago, this standard was defined, and now most smart contracts that work with tokens expect tokens to have all of the functionality defined by ERC-20. Fortunately, you don't have to know it from memory since the OpenZeppelin smart contract team provides us with smart contract bases to use.
Install [OpenZeppelin smart contracts](https://docs.openzeppelin.com/contracts/4.x):
```bash
npm install @openzeppelin/contracts
```
Now, in your `MintableERC20.sol`, add the following code:
{% code overflow="wrap" %}
```solidity
// SPDX-License-Identifier: UNLICENSED
pragma solidity ^0.8.20;
import "@openzeppelin/contracts/token/ERC20/ERC20.sol";
import "@openzeppelin/contracts/access/Ownable.sol";
contract MintableERC20 is ERC20, Ownable {
constructor(address initialOwner) ERC20("Mintable ERC 20", "MERC") Ownable(initialOwner) {}
}
```
{% endcode %}
When writing smart contracts, you're going to have to compile them eventually. Every developer environment for smart contracts will have this functionality. In Hardhat, you can compile with:
```bash
npx hardhat compile
```
Everything should compile well, which should cause two new folders to pop up: `artifacts` and `cache`. These two folders hold information about the compiled smart contracts.
Let's continue by adding functionality. Add the following constants, errors, event, and function to your Solidity file:
```solidity
uint256 public constant MAX_TO_MINT = 1000 ether;
event PurchaseOccurred(address minter, uint256 amount);
error MustMintOverZero();
error MintRequestOverMax();
error FailedToSendEtherToOwner();
/**Purchases some of the token with native currency. */
function purchaseMint() payable external {
// Calculate amount to mint
uint256 amountToMint = msg.value;
// Check for no errors
if(amountToMint == 0) revert MustMintOverZero();
if(amountToMint + totalSupply() > MAX_TO_MINT) revert MintRequestOverMax();
// Send to owner
(bool success, ) = owner().call{value: msg.value}("");
if(!success) revert FailedToSendEtherToOwner();
// Mint to user
_mint(msg.sender, amountToMint);
emit PurchaseOccurred(msg.sender, amountToMint);
}
```
MintableERC20.sol file
```solidity
// SPDX-License-Identifier: UNLICENSED
pragma solidity ^0.8.20;
import "@openzeppelin/contracts/token/ERC20/ERC20.sol";
import "@openzeppelin/contracts/access/Ownable.sol";
contract MintableERC20 is ERC20, Ownable {
constructor(address initialOwner) ERC20("Mintable ERC 20", "MERC") Ownable(initialOwner) {}
uint256 public constant MAX_TO_MINT = 1000 ether;
event PurchaseOccurred(address minter, uint256 amount);
error MustMintOverZero();
error MintRequestOverMax();
error FailedToSendEtherToOwner();
/**Purchases some of the token with native gas currency. */
function purchaseMint() external payable {
// Calculate amount to mint
uint256 amountToMint = msg.value;
// Check for no errors
if (amountToMint == 0) revert MustMintOverZero();
if (amountToMint + totalSupply() > MAX_TO_MINT)
revert MintRequestOverMax();
// Send to owner
(bool success, ) = owner().call{value: msg.value}("");
if (!success) revert FailedToSendEtherToOwner();
// Mint to user
_mint(msg.sender, amountToMint);
emit PurchaseOccurred(msg.sender, amountToMint);
}
}
```
This function will allow a user to send the native Phron currency (like GLMR, MOVR, or DEV) as value because it is a payable function. Let's break down the function section by section.
1. It will figure out how much of the token to mint based on the value sent
2. Then it will check to see if the amount minted is 0 or if the total amount minted is over the `MAX_TO_MINT`, giving a descriptive error in both cases
3. The contract will then forward the value included with the function call to the owner of the contract (by default, the address that deployed the contract, which will be you)
4. Finally, tokens will be minted to the user, and an event will be emitted to pick up on later
To make sure that this works, let's use Hardhat again:
```bash
npx hardhat compile
```
You've now written the smart contract for your DApp! If this were a production app, we would write tests for it, but that is out of the scope of this tutorial. Let's deploy it next.
#### Deploy Smart Contracts
Under the hood, Hardhat is a Node project that uses the Ethers.js library to interact with the blockchain. You can also use Ethers.js in conjunction with Hardhat's tool to create scripts to do things like deploy contracts.
Your Hardhat project should already come with a script in the `scripts` folder, called `deploy.js`. Let's replace it with a similar, albeit simpler, script.
```javascript
const hre = require('hardhat');
async function main() {
const [deployer] = await hre.ethers.getSigners();
const MintableERC20 = await hre.ethers.getContractFactory('MintableERC20');
const token = await MintableERC20.deploy(deployer.address);
await token.waitForDeployment();
// Get and print the contract address
const myContractDeployedAddress = await token.getAddress();
console.log(`Deployed to ${myContractDeployedAddress}`);
}
main().catch((error) => {
console.error(error);
process.exitCode = 1;
});
```
This script uses Hardhat's instance of the Ethers library to get a contract factory of the `MintableERC20.sol` smart contract that we wrote earlier. It then deploys it and prints the resultant smart contract's address. Very simple to do with Hardhat and the Ethers.js library, but significantly more difficult using just JSON-RPC!
Let's run the contract on Phron (whose JSON-RPC endpoint we defined in the `hardhat.config.js` script earlier):
```bash
npx hardhat run scripts/deploy.js --network phron
```
You should see an output that displays the token address. Make sure to **save it for use later**!
{% hint style="warning" %}
### Challenge
Hardhat has a poor built-in solution for deploying smart contracts. It doesn't automatically save the transactions and addresses related to the deployment! This is why the [hardhat-deploy](https://www.npmjs.com/package/hardhat-deploy#1-hardhat-deploy) package was created. Can you implement it yourself? Or can you switch to a different developer environment, like [Foundry](https://github.com/foundry-rs/foundry)?
{% endhint %}
### Create a DApp Frontend
Frontends provide an interface for users to interact with blockchain-based applications. React, a popular JavaScript library for building user interfaces, is often used for developing DApp frontends due to its component-based architecture, which promotes reusable code and efficient rendering. The [useDApp package](https://usedapp.io/), an Ethers.js based React framework for DApps, further simplifies the process of building DApp frontends by providing a comprehensive set of hooks and components that streamline the integration of Ethereum blockchain functionality.
> ### Note
>
> Typically, a larger project will create separate GitHub repositories for their frontend and smart contracts, but this is a small enough project to create a monorepo.
#### Create a React Project with useDapp
Let's set up a new React project and install dependencies, which we can create within our Hardhat project's folder without much issue. The `create-react-app` package will create a new `frontend` directory for us:
```bash
npx create-react-app frontend
cd frontend
npm install ethers@5.6.9 @usedapp/core @mui/material @mui/system @emotion/react @emotion/styled
```
If you remember, Ethers.js is a library that assists with JSON-RPC communication. The useDApp package is a similar library that uses Ethers.js and formats them into React hooks so that they work better in frontend projects. We've also added two [MUI](https://mui.com/) packages for styling and components.
Let's set up the `App.js` file located in the `frontend/src` directory to add some visual structure:
```jsx
import { useEthers } from '@usedapp/core';
import { Button, Grid, Card } from '@mui/material';
import { Box } from '@mui/system';
const styles = {
box: { minHeight: '100vh', backgroundColor: '#1b3864' },
vh100: { minHeight: '100vh' },
card: { borderRadius: 4, padding: 4, maxWidth: '550px', width: '100%' },
alignCenter: { textAlign: 'center' },
};
function App() {
return (
{/* This is where we'll be putting our functional components! */}
);
}
export default App;
```
You can start the React project by running the following command from within the `frontend` directory:
```bash
npm run start
```
> ### Note
>
> At this point, you may see a couple compilation warnings, but as we continue to build the DApp, we'll make changes that will resolve the warnings.
Your frontend will be available at [localhost:3000](http://localhost:3000/).
At this point, our frontend project is set up well enough to start working on the functional code!
#### Providers, Signers, and Wallets
The frontend communicates with the blockchain using JSON-RPC, but we will be using Ethers.js. When using JSON-RPC, Ethers.js likes to abstract degrees of interaction with the blockchain into objects, such as providers, signers, and wallets.
Providers are the bridge between the frontend user interface and the blockchain network, facilitating communication and data exchange. They abstract the complexities of interacting with the blockchain, offering a simple API for the frontend to use. They are responsible for connecting the DApp to a specific blockchain node, allowing it to read data from the blockchain, and essentially contain the JSON-RPC URL.
Signers are a type of provider that contain a secret that can be used to sign transactions with. This allows the frontend to create transactions, sign them, and then send them with `eth_sendRawTransaction`. There are multiple types of signers, but we're most interested in wallet objects, which securely store and manage users' private keys and digital assets. Wallets such as MetaMask facilitate transaction signing with a universal and user-friendly process. They act as a user's representation within the DApp, ensuring that only authorized transactions are executed. The Ethers.js wallet object represents this interface within our frontend code.
Typically, a frontend using Ethers.js will require you to create a provider, connect to the user's wallet if applicable, and create a wallet object. This process can become unwieldy in larger projects, especially with the number of wallets that exist other than MetaMask.
Example of unwieldy MetaMask handling
```javascript
// Detect if the browser has MetaMask installed
let provider, signer;
if (typeof window.ethereum !== 'undefined') {
// Create a provider using MetaMask
provider = new ethers.BrowserProvider(window.ethereum);
// Connect to MetaMask
async function connectToMetaMask() {
try {
// Request access to the user's MetaMask account
const accounts = await window.ethereum.request({
method: 'eth_requestAccounts',
});
// Create a signer (wallet) using the provider
signer = provider.getSigner(accounts[0]);
} catch (error) {
console.error('Error connecting to MetaMask:', error);
}
}
// Call the function to connect to MetaMask
connectToMetaMask();
} else {
console.log('MetaMask is not installed');
}
// ... also the code for disconnecting from the site
// ... also the code that handles other wallets
```
Fortunately, we have installed the useDApp package, which simplifies many of the processes for us. This simultaneously abstracts what Ethers is doing as well, which is why we took a bit of time to explain them here.
**Create a Provider**
Let's do a bit of setup with the useDApp package. First, in your React frontend's `index.js` file, which is located in the `frontend/src` directory, add a `DAppProvider` object and its config. This essentially acts as the Ethers.js provider object, but can be used throughout your entire project by useDApp hooks:
```jsx
import React from 'react';
import ReactDOM from 'react-dom/client';
import App from './App';
import { DAppProvider, Phron } from '@usedapp/core';
import { getDefaultProvider } from 'ethers';
const config = {
readOnlyChainId: Phron.chainId,
readOnlyUrls: {
[Phron.chainId]: getDefaultProvider(
'https://testnet.phron.ai'
),
},
};
const root = ReactDOM.createRoot(document.getElementById('root'));
root.render(
);
```
**Connect to a Wallet**
Now in your `App.js` file, let's add a button that allows us to connect to MetaMask. We don't have to write any code that's wallet-specific, fortunately, since useDApp does it for us with the `useEthers` hook.
```jsx
function App() {
const { activateBrowserWallet, deactivate, account } = useEthers();
// Handle the wallet toggle
const handleWalletConnection = () => {
if (account) deactivate();
else activateBrowserWallet();
};
return (
);
};
```
Now there should be a button in the top right of your screen that connects your wallet to your frontend! Next, let's find out how we can read data from our smart contract.
#### Read Data from Smart Contracts
Reading from contracts is quite easy, as long as we know what we want to read. For our application, we will be reading the maximum amount of tokens that can be minted and the number of tokens that have already been minted. This way, we can display to our users how many tokens can still be minted and hopefully invoke some FOMO...
If you were just using JSON-RPC, you would use `eth_call` to get this data, but it's quite difficult to do this since you have to [encode your requests](https://docs.soliditylang.org/en/latest/abi-spec.html) in a non-straightforward method called ABI encoding. Fortunately, Ethers.js allows us to easily create objects that represent contracts in a human-readable way, so long as we have the ABI of the contract. And we have the ABI of the `MintableERC20.sol` contract, `MintableERC20.json`, within the `artifacts` directory of our Hardhat project!
So let's start by moving the `MintableERC20.json` file into our frontend directory. Every time you change and recompile the smart contract, you'll have to update the ABI in the frontend as well. Some projects will have developer setups that automatically pull ABIs from the same source, but in this case we will just copy it over:
```javascript
|--artifacts
|--@openzeppelin
|--build-info
|--contracts
|--MintableERC20.sol
|--MintableERC20.json // This is the file you're looking for!
...
|--cache
|--contracts
|--frontend
|--public
|--src
|--MintableERC20.json // Copy the file to here!
...
...
...
```
Now that we have the ABI, we can use it to create a contract instance of `MintableERC20.sol`, which we'll use to retrieve token data.
**Create a Smart Contract Instance**
Let's import the JSON file and the Ethers `Contract` object within `App.js`. We can create a contract object instance with an address and ABI, so replace `INSERT_CONTRACT_ADDRESS` with the address of the contract that you copied back when you deployed it:
```jsx
// ... other imports
import MintableERC20 from './MintableERC20.json';
import { Contract } from 'ethers';
const contractAddress = 'INSERT_CONTRACT_ADDRESS';
function App() {
const contract = new Contract(contractAddress, MintableERC20.abi);
// ...
}
```
App.js file
```jsx
import { useEthers } from '@usedapp/core';
import { Button, Grid, Card } from '@mui/material';
import { Box } from '@mui/system';
import { Contract } from 'ethers';
import MintableERC20 from './MintableERC20.json';
const styles = {
box: { minHeight: '100vh', backgroundColor: '#1b3864' },
vh100: { minHeight: '100vh' },
card: { borderRadius: 4, padding: 4, maxWidth: '550px', width: '100%' },
alignCenter: { textAlign: 'center' },
};
const contractAddress = 'INSERT_CONTRACT_ADDRESS';
function App() {
const contract = new Contract(contractAddress, MintableERC20.abi);
const { activateBrowserWallet, deactivate, account } = useEthers();
// Handle the wallet toggle
const handleWalletConnection = () => {
if (account) deactivate();
else activateBrowserWallet();
};
return (
);
}
export default App;
```
**Interact with the Contract Interface to Read Supply Data**
And let's create a new `SupplyComponent` within a new `SupplyComponent.js` file, which will use the contract interface to retrieve the token supply data and display it:
```jsx
import { useCall } from '@usedapp/core';
import { utils } from 'ethers';
import { Grid } from '@mui/material';
export default function SupplyComponent({ contract }) {
const totalSupply = useCall({ contract, method: 'totalSupply', args: [] });
const maxSupply = useCall({ contract, method: 'MAX_TO_MINT', args: [] });
const totalSupplyFormatted = totalSupply
? utils.formatEther(totalSupply.value.toString())
: '...';
const maxSupplyFormatted = maxSupply
? utils.formatEther(maxSupply.value.toString())
: '...';
const centeredText = { textAlign: 'center' };
return (
Total Supply: {totalSupplyFormatted} / {maxSupplyFormatted}
);
}
```
Notice that this component uses the `useCall` hook provided by the useDApp package. This call takes in the contract object we created earlier, a string method, and any relevant arguments for the read-only call and returns the output. While it required some setup, this one-liner is a lot simpler than the entire `use_call` RPC call that we would have had to do if we weren't using Ethers.js and useDApp.
Also note that we're using a utility format called `formatEther` to format the output values instead of displaying them directly. This is because our token, like gas currencies, is stored as an unsigned integer with a fixed decimal point of 18 figures. The utility function helps format this value into a way that we, as humans, expect.
Now we can spice up our frontend and call the read-only functions in the contract. We'll update the frontend so that we have a place to display our supply data:
```jsx
// ... other imports
import SupplyComponent from './SupplyComponent';
function App() {
// ...
return (
{/* Wrapper Components */}
{/* Button Component */}
);
}
export default App;
```
Our frontend should now display the correct data!
{% hint style="warning" %}
### Challenge
There's additonal information that could be helpful to display, such as the amount of tokens that the connected account currently has: `balanceOf(address)`. Can you add that to the frontend yourself?
{% endhint %}
#### Send Transactions
Now for the most important part of all DApps: the state-changing transactions. This is where money moves, where tokens are minted, and value passes.
If you recall from our smart contract, we want to mint some tokens by calling the `purchaseMint` function with some native currency. So we're going to need:
1. A text input that lets the user specify how much value to enter
2. A button that lets the user initiate the transaction signature
Let's create a new component called `MintingComponent` in a new file called `MintingComponent.js`. First, we'll tackle the text input, which will require us to add the logic to store the number of tokens to mint and a text field element.
```jsx
import { useState } from 'react';
import { useContractFunction, useEthers, Phron } from '@usedapp/core';
import { Button, CircularProgress, TextField, Grid } from '@mui/material';
import { utils } from 'ethers';
export default function MintingComponent({ contract }) {
const [value, setValue] = useState(0);
const textFieldStyle = { marginBottom: '16px' };
return (
<>
setValue(e.target.value)}
label='Enter value in DEV'
variant='outlined'
fullWidth
style={textFieldStyle}
/>
{/* This is where we'll add the button */}
);
}
```
Next, we'll need to create the button to send the transaction, which will call the `purchaseMint` of our contract. Interacting with the contract will be a bit more difficult since you're likely not as familiar with it. We've already done a lot of setup in the previous sections, so it doesn't actually take too much code:
```jsx
export default function MintingComponent({ contract }) {
// ...
// Mint transaction
const { account, chainId, switchNetwork } = useEthers();
const { state, send } = useContractFunction(contract, 'purchaseMint');
const handlePurchaseMint = async () => {
if (chainId !== Phron.chainId) {
await switchNetwork(Phron.chainId);
}
send({ value: utils.parseEther(value.toString()) });
};
const isMining = state?.status === 'Mining';
return (
<>
{/* ... */}
);
}
```
MintingComponent.js file
```jsx
import { useState } from 'react';
import { useContractFunction, useEthers, Phron } from '@usedapp/core';
import { Button, CircularProgress, TextField, Grid } from '@mui/material';
import { utils } from 'ethers';
export default function MintingComponent({ contract }) {
const [value, setValue] = useState(0);
const textFieldStyle = { marginBottom: '16px' };
const { account, chainId, switchNetwork } = useEthers();
const { state, send } = useContractFunction(contract, 'purchaseMint');
const handlePurchaseMint = async () => {
if (chainId !== Phron.chainId) {
await switchNetwork(Phron.chainId);
}
send({ value: utils.parseEther(value.toString()) });
};
const isMining = state?.status === 'Mining';
return (
<>
setValue(e.target.value)}
label='Enter value in DEV'
variant='outlined'
fullWidth
style={textFieldStyle}
/>
);
}
```
Let's break down the non-JSX code a bit:
1. The user's account information is being retrieved via `useEthers`, which can be done because useDApp provides this information throughout the entire project
2. The `useContractFunction` hook from useDApp is used to create a function, `send`, that will sign and send a transaction that calls the `purchaseMint` function on the contract defined by the `contract` object
3. Another function, `handlePurchaseMint`, is defined to help inject the native gas value defined by the `TextField` component into the `send` function. It first checks if the user has their wallet connected to Phron, and if not, it prompts the user to switch networks
4. A helper constant will determine whether or not the transaction is still in the `Mining` phase, that is, it hasn't finished
Now let's look at the visual component. The button will call the `handlePurchaseMint` on press, which makes sense. The button will also be disabled while the transaction happens and if the user hasn't connected to the DApp with their wallet (when the account value isn't defined).
This code essentially boils down to using the `useContractFunction` hook in conjunction with the `contract` object, which is a lot simpler than what it does under the hood! Let's add this component to the main `App.js` file.
```jsx
// ... other imports
import MintingComponent from './MintingComponent';
function App() {
// ...
return (
{/* Wrapper Components */}
{/* Button Component */}
);
}
export default App;
```
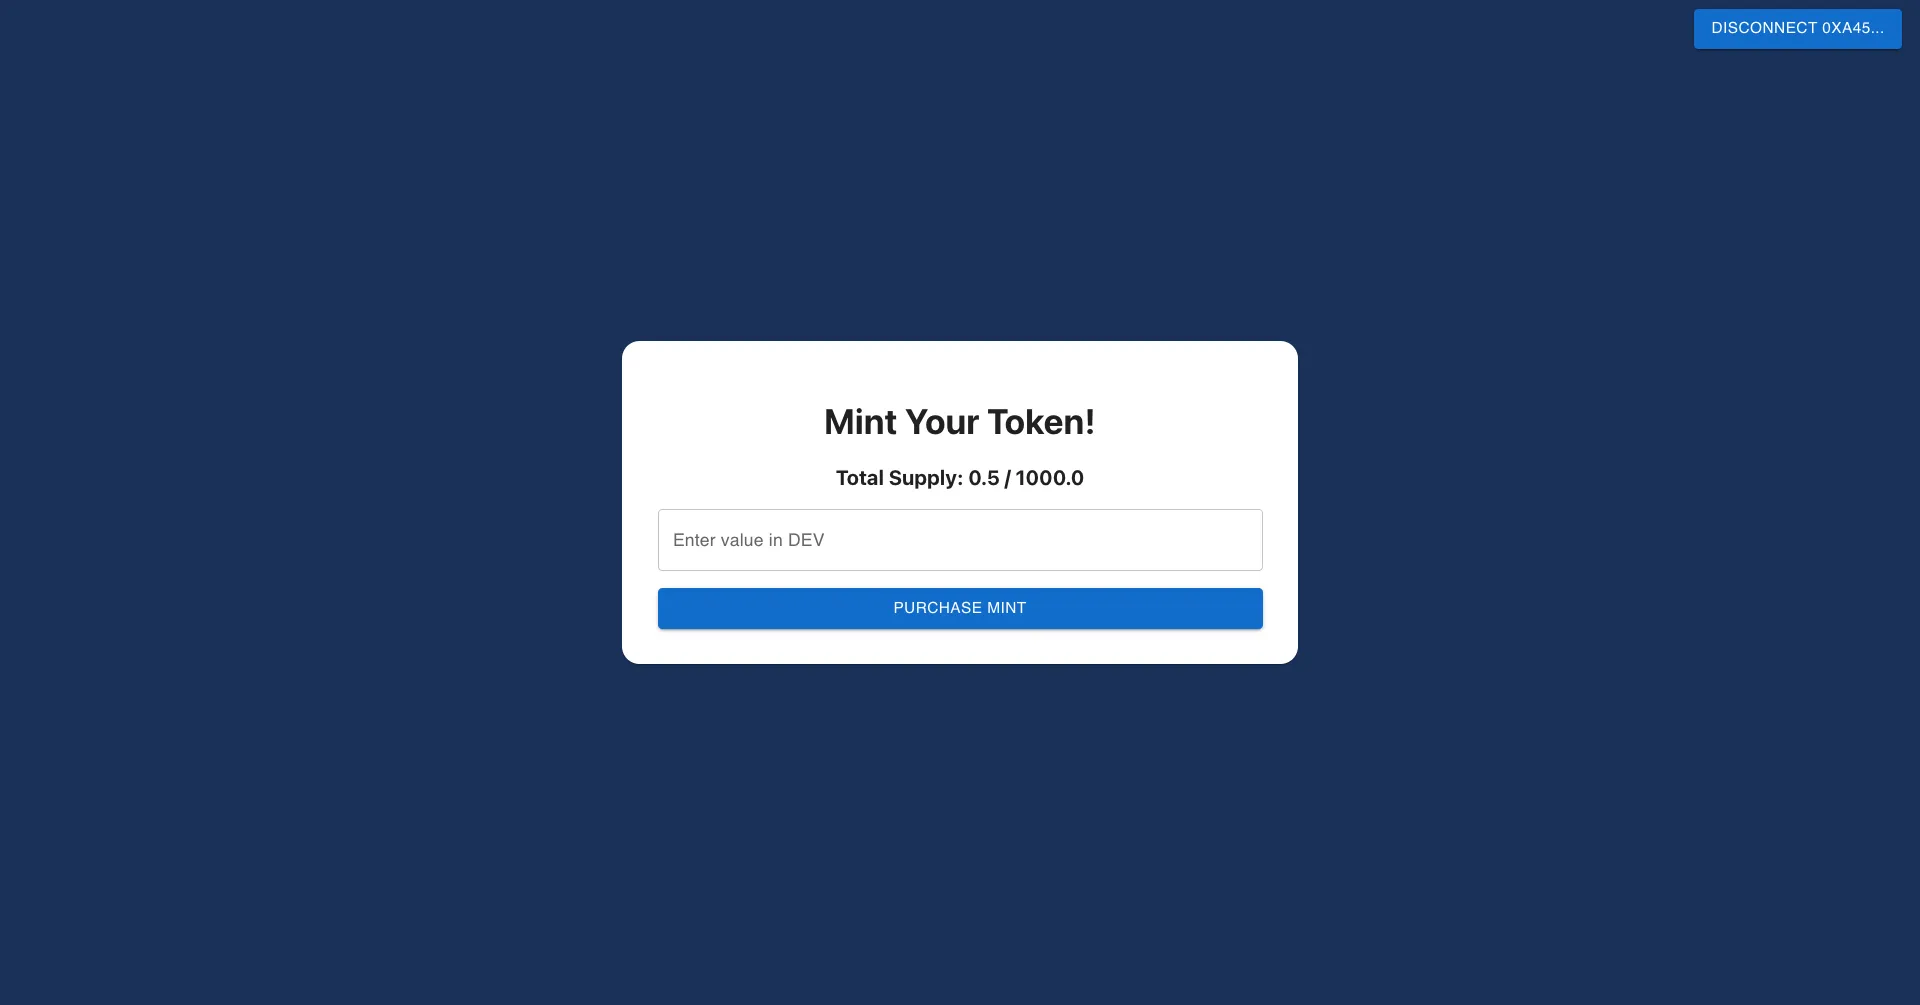
If you try entering a value like **0.1** and press the button, a MetaMask prompt should occur. Try it out!
#### Read Events from Contracts
A common way of listening to what happened in a transaction is through events, also known as logs. These logs are emitted by the smart contract through the `emit` and `event` keywords and can be very important in a responsive frontend. Often, DApps will use toast elements to represent events in real-time, but for this DApp, we will use a simple table.
We created an event in our smart contract: `event PurchaseOccurred(address minter, uint256 amount)`, so let's figure out how to display its information in the frontend.
Let's create a new component `PurchaseOccurredEvents` within a new file `PurchaseOccurredEvents.js` that reads the last five logs and displays them in a table:
```jsx
import { useLogs, useBlockNumber } from '@usedapp/core';
import { utils } from 'ethers';
import {
Grid,
Table,
TableBody,
TableCell,
TableContainer,
TableHead,
TableRow,
} from '@mui/material';
export default function PurchaseOccurredEvents({ contract }) {
return (
MinterAmount
{/* This is where we have to inject data from our logs! */}
);
}
```
This component so far creates an empty table, so let's use two new hooks to read those logs:
```jsx
export default function PurchaseOccurredEvents({ contract }) {
// Get block number to ensure that the useLogs doesn't search from 0, otherwise it will time out
const blockNumber = useBlockNumber();
// Create a filter & get the logs
const filter = { args: [null, null], contract, event: 'PurchaseOccurred' };
const logs = useLogs(filter, { fromBlock: blockNumber - 10000 });
const parsedLogs = logs?.value.slice(-5).map(log => log.data);
// ...
}
```
Here's what happens in this code:
1. The block number is received from the `useBlockNumber` hook, similar to using the JSON-RPC method `eth_blockNumber`
2. A filter is created to filter for all events with any arguments on the contract injected into the component with the event name `PurchaseOccurred`
3. Logs are queried for via the `useLogs` hook, similar to using the `eth_getLogs` JSON-RPC method. Note that we're only querying the last 10,000 blocks because otherwise the entire history of the blockchain would be queried and the RPC would timeout
4. The resultant logs are parsed, and the most recent five are selected
If we want to display them, we can do it like so:
```jsx
export default function PurchaseOccurredEvents({ contract }) {
// ...
return (
);
}
```
This too should be added to `App.js`.
```jsx
// ... other imports
import PurchaseOccurredEvents from './PurchaseOccurredEvents';
function App() {
// ...
return (
{/* Wrapper Components */}
{/* Button Component */}
);
}
export default App;
```
And, if you've done any transactions, you'll see that they'll pop up!
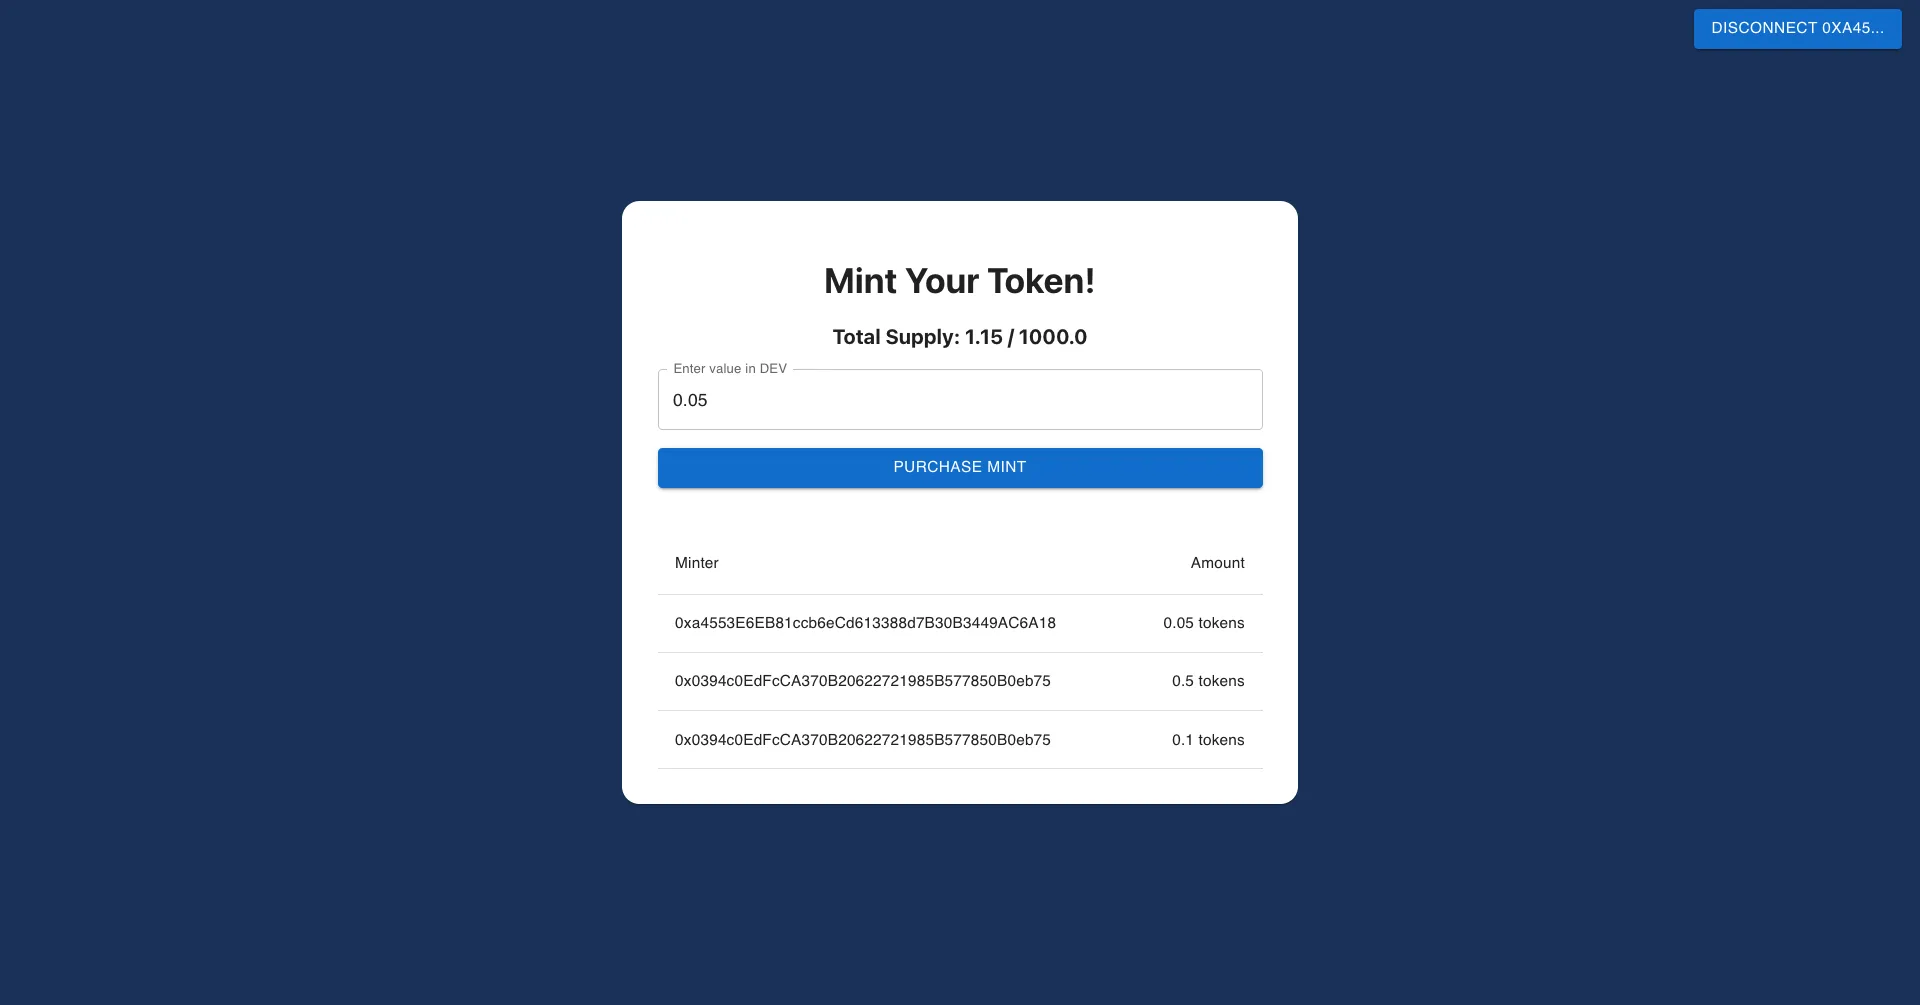
Now you've implemented three main components of DApp frontends: reading from storage, sending transactions, and reading logs. With these building blocks as well as the knowledge you gained with smart contracts and nodes, you should be able to cover 80% of DApps.
You can view the complete [example DApp on GitHub](https://github.com/jboetticher/complete-example-dapp).
### Conclusion
In this tutorial, we covered a wide range of topics and tools essential for successful DApp development. We started with Hardhat, a powerful development environment that simplifies the process of writing, testing, and deploying smart contracts. Ethers.js, a popular library for interacting with Ethereum nodes, was introduced to manage wallets and transactions.
We delved into the process of writing smart contracts, highlighting best practices and key considerations when developing on-chain logic. The guide then explored useDApp, a React-based framework, for creating a user-friendly frontend. We discussed techniques for reading data from contracts, executing transactions, and working with logs to ensure a seamless user experience.
Of course, there are more advanced (but optional) components of DApps that have popped up over time:
* Decentralized storage protocols — systems that store websites and files in a decentralized way
* Oracles — third-party services that provide external data to smart contracts within blockchains
* Indexing protocols — middleware that processes and organizes blockchain data, allowing it to be efficiently queried
An excellent Web2 to Web3 blogpost is available if you are interested in hearing about them in depth.
Hopefully, by reading this guide, you'll be well on your way to creating novel DApps on Phron!
This tutorial is for educational purposes only. As such, any contracts or code created in this tutorial should not be used in production.The information presented herein has been provided by third parties and is made available solely for general information purposes. Phron does not endorse any project listed and described on the Phron Doc Website (). Phron does not warrant the accuracy, completeness or usefulness of this information. Any reliance you place on such information is strictly at your own risk. Phron disclaims all liability and responsibility arising from any reliance placed on this information by you or by anyone who may be informed of any of its contents. All statements and/or opinions expressed in these materials are solely the responsibility of the person or entity providing those materials and do not necessarily represent the opinion of Phron. The information should not be construed as professional or financial advice of any kind. Advice from a suitably qualified professional should always be sought in relation to any particular matter or circumstance. The information herein may link to or integrate with other websites operated or content provided by third parties, and such other websites may link to this website. Phron has no control over any such other websites or their content and will have no liability arising out of or related to such websites or their content. The existence of any such link does not constitute an endorsement of such websites, the content of the websites, or the operators of the websites. These links are being provided to you only as a convenience and you release and hold Phron harmless from any and all liability arising from your use of this information or the information provided by any third-party website or service.
# Phron Toolkit
# Libraries
# Ethers.js
## Ethers.js JavaScript Library
### Introduction
The [Ethers.js](https://docs.ethers.org/v6) library provides a set of tools to interact with Ethereum Nodes with JavaScript, similar to Web3.js. Phron has an Ethereum-like API available that is fully compatible with Ethereum-style JSON-RPC invocations. Therefore, developers can leverage this compatibility and use the Ethers.js library to interact with a Phron node as if they were doing so on Ethereum. For more information on Ethers.js, check their [documentation site](https://docs.ethers.org/v6).
In this guide, you'll learn how to use the Ethers.js library to send a transaction and deploy a contract on Phron.
### Checking Prerequisites
For the examples in this guide, you will need to have the following:
* An account with funds. You can get DEV tokens for testing on Phron once every 24 hours from the Phron Faucet
* To test out the examples in this guide on Phron, you will need to have your own endpoint and API key, which you can get from one of the supported Endpoint Providers
> ### Note
>
> The examples in this guide assume you have a MacOS or Ubuntu 22.04-based environment and will need to be adapted accordingly for Windows.
### Installing Ethers.js
To get started, you'll need to start a basic JavaScript project. First, create a directory to store all of the files you'll be creating throughout this guide and initialize the project with the following command:
```bash
mkdir ethers-examples && cd ethers-examples && npm init --y
```
For this guide, you'll need to install the Ethers.js library and the Solidity compiler. To install both NPM packages, you can run the following command:
```bash
npm install ethers solc@0.8.0
```
### Setting up the Ethers Provider
Throughout this guide, you'll be creating a bunch of scripts that provide different functionality such as sending a transaction, deploying a contract, and interacting with a deployed contract. In most of these scripts you'll need to create an [Ethers provider](https://docs.ethers.org/v6/api/providers/) to interact with the network.
To configure your project for Phron, you will need to have your own endpoint and API key, which you can get from one of the supported Endpoint Providers.
To create a provider, you can take the following steps:
1. Import the `ethers` library
2. Define the `providerRPC` object, which can include the network configurations for any of the networks you want to send a transaction on. You'll include the `name`, `rpc`, and `chainId` for each network
3. Create the `provider` using the `ethers.JsonRpcProvider` method
```javascript
// 1. Import ethers
const ethers = require('ethers');
// 2. Define network configurations
const providerRPC = {
phron: {
name: 'phron',
rpc: 'INSERT_RPC_API_ENDPOINT', // Insert your RPC URL here
chainId: 7744, // 0x504 in hex,
},
};
// 3. Create ethers provider
const provider = new ethers.JsonRpcProvider(providerRPC.phron.rpc, {
chainId: providerRPC.phron.chainId,
name: providerRPC.phron.name,
});
```
Save this code snippet as you'll need it for the scripts that are used in the following sections.
### Send a Transaction
During this section, you'll be creating a couple of scripts. The first one will be to check the balances of your accounts before trying to send a transaction. The second script will actually send the transaction.
You can also use the balance script to check the account balances after the transaction has been sent.
#### Check Balances Script
You'll only need one file to check the balances of both addresses before and after the transaction is sent. To get started, you can create a `balances.js` file by running:
```bash
touch balances.js
```
Next, you will create the script for this file and complete the following steps:
1. Set up the Ethers provider
2. Define the `addressFrom` and `addressTo` variables
3. Create the asynchronous `balances` function which wraps the `provider.getBalance` method
4. Use the `provider.getBalance` function to fetch the balances for the `addressFrom` and `addressTo` addresses. You can also leverage the `ethers.formatEther` function to transform the balance into a more readable number in ETH
5. Lastly, run the `balances` function
```javascript
// 1. Add the Ethers provider logic here:
// {...}
// 2. Create address variables
const addressFrom = 'INSERT_FROM_ADDRESS';
const addressTo = 'INSERT_TO_ADDRESS';
// 3. Create balances function
const balances = async () => {
// 4. Fetch balances
const balanceFrom = ethers.formatEther(await provider.getBalance(addressFrom));
const balanceTo = ethers.formatEther(await provider.getBalance(addressTo));
console.log(`The balance of ${addressFrom} is: ${balanceFrom} DEV`);
console.log(`The balance of ${addressTo} is: ${balanceTo} DEV`);
};
// 5. Call the balances function
balances();
```
View the complete script
```javascript
// Import ethers
const ethers = require('ethers');
// Define network configurations
const providerRPC = {
development: {
name: 'phron-development',
rpc: 'http://localhost:9944',
chainId: 7744,
},
phron: {
name: 'phron',
rpc: 'https://testnet.phron.ai',
chainId: 7744,
},
};
// Create ethers provider
const provider = new ethers.JsonRpcProvider(providerRPC.phron.rpc, {
chainId: providerRPC.phron.chainId,
name: providerRPC.phron.name,
}); // Change to correct network
// Define addresses
const addressFrom = 'INSERT_FROM_ADDRESS';
const addressTo = 'INSERT_TO_ADDRESS';
// Create balances function
const balances = async () => {
// Fetch balances
const balanceFrom = ethers.formatEther(
await provider.getBalance(addressFrom)
);
const balanceTo = ethers.formatEther(await provider.getBalance(addressTo));
console.log(`The balance of ${addressFrom} is: ${balanceFrom} DEV`);
console.log(`The balance of ${addressTo} is: ${balanceTo} DEV`);
};
// Call the balances function
balances();
```
To run the script and fetch the account balances, you can run the following command:
```bash
node balances.js
```
If successful, the balances for the origin and receiving address will be displayed in your terminal in DEV.
#### Send Transaction Script
You'll only need one file for executing a transaction between accounts. For this example, you'll be transferring 1 DEV token from an origin address (from which you hold the private key) to another address. To get started, you can create a `transaction.js` file by running:
```bash
touch transaction.js
```
Next, you will create the script for this file and complete the following steps:
1. Set up the Ethers provider
2. Define the `privateKey` and the `addressTo` variables. The private key is required to create a wallet instance. **Note: This is for example purposes only. Never store your private keys in a JavaScript file**
3. Create a wallet using the `privateKey` and `provider` from the previous steps. The wallet instance is used to sign transactions
4. Create the asynchronous `send` function which wraps the transaction object and the `wallet.sendTransaction` method
5. Create the transaction object which only requires the recipient's address and the amount to send. Note that `ethers.parseEther` can be used, which handles the necessary unit conversions from Ether to Wei - similar to using `ethers.parseUnits(value, 'ether')`
6. Send the transaction using the `wallet.sendTransaction` method and then use `await` to wait until the transaction is processed and the transaction receipt is returned
7. Lastly, run the `send` function
{% code overflow="wrap" %}
```javascript
// 1. Add the Ethers provider logic here:
// {...}
// 2. Create account variables
const accountFrom = {
privateKey: 'INSERT_YOUR_PRIVATE_KEY',
};
const addressTo = 'INSERT_TO_ADDRESS';
// 3. Create wallet
let wallet = new ethers.Wallet(accountFrom.privateKey, provider);
// 4. Create send function
const send = async () => {
console.log(`Attempting to send transaction from ${wallet.address} to ${addressTo}`);
// 5. Create tx object
const tx = {
to: addressTo,
value: ethers.parseEther('1'),
};
// 6. Sign and send tx - wait for receipt
const createReceipt = await wallet.sendTransaction(tx);
await createReceipt.wait();
console.log(`Transaction successful with hash: ${createReceipt.hash}`);
};
// 7. Call the send function
send();
```
{% endcode %}
View the complete script
{% code overflow="wrap" %}
```javascript
// Import ethers
const ethers = require('ethers');
// Define network configurations
const providerRPC = {
development: {
name: 'phron-development',
rpc: 'http://localhost:9944',
chainId: 7744,
},
phronbase: {
name: 'phron',
rpc: 'https://testnet.phron.ai',
chainId: 7744,
},
};
// Create ethers provider
const provider = new ethers.JsonRpcProvider(providerRPC.phron.rpc, {
chainId: providerRPC.phron.chainId,
name: providerRPC.phron.name,
}); // Change to correct network
// Define accounts and wallet
const accountFrom = {
privateKey: 'INSERT_YOUR_PRIVATE_KEY',
};
const addressTo = 'INSERT_TO_ADDRESS';
const wallet = new ethers.Wallet(accountFrom.privateKey, provider);
// Create send function
const send = async () => {
console.log(
`Attempting to send transaction from ${wallet.address} to ${addressTo}`
);
// Create transaction
const tx = {
to: addressTo,
value: ethers.parseEther('1'),
};
// Send transaction and get hash
const createReceipt = await wallet.sendTransaction(tx);
await createReceipt.wait();
console.log(`Transaction successful with hash: ${createReceipt.hash}`);
};
// Call the send function
send();
```
{% endcode %}
To run the script, you can run the following command in your terminal:
```bash
node transaction.js
```
If the transaction was succesful, in your terminal you'll see the transaction hash has been printed out.
You can also use the `balances.js` script to check that the balances for the origin and receiving accounts have changed. The entire workflow would look like this:
{% code overflow="wrap" %}
```bash
node balances.jsThe balance of 0x3B939FeaD1557C741Ff06492FD0127bd287A421e is: 3604.673685275447543445 DEVThe balance of 0xFFA0352d300cdd8aCdA5c947D87CbCc3f0B3485A is: 0 DEVnode transaction.jsAttempting to send transaction from 0x3B939FeaD1557C741Ff06492FD0127bd287A421e to 0xFFA0352d300cdd8aCdA5c947D87CbCc3f0B3485ATransaction successful with hash: 0x01e42c627fe79b1d5649a64d39fceec34aba3904e37d768e74ec71fcd62b897fnode balances.jsThe balance of 0x3B939FeaD1557C741Ff06492FD0127bd287A421e is: 3603.673682650447543445 DEVThe balance of 0xFFA0352d300cdd8aCdA5c947D87CbCc3f0B3485A is: 1.0 DEV
```
{% endcode %}
### Deploy a Contract
The contract you'll be compiling and deploying in the next couple of sections is a simple incrementer contract, arbitrarily named `Incrementer.sol`. You can get started by creating a file for the contract:
```bash
touch Incrementer.sol
```
Next, you can add the Solidity code to the file:
```solidity
// SPDX-License-Identifier: MIT
pragma solidity ^0.8.0;
contract Incrementer {
uint256 public number;
constructor(uint256 _initialNumber) {
number = _initialNumber;
}
function increment(uint256 _value) public {
number = number + _value;
}
function reset() public {
number = 0;
}
}
```
The `constructor` function, which runs when the contract is deployed, sets the initial value of the number variable stored on-chain (the default is `0`). The `increment` function adds the `_value` provided to the current number, but a transaction needs to be sent, which modifies the stored data. Lastly, the `reset` function resets the stored value to zero.
> ### Note
>
> This contract is a simple example for illustration purposes only and does not handle values wrapping around.
#### Compile Contract Script
In this section, you'll create a script that uses the Solidity compiler to output the bytecode and interface (ABI) for the `Incrementer.sol` contract. To get started, you can create a `compile.js` file by running:
```bash
touch compile.js
```
Next, you will create the script for this file and complete the following steps:
1. Import the `fs` and `solc` packages
2. Using the `fs.readFileSync` function, you'll read and save the file contents of `Incrementer.sol` to `source`
3. Build the `input` object for the Solidity compiler by specifying the `language`, `sources`, and `settings` to be used
4. Using the `input` object, you can compile the contract using `solc.compile`
5. Extract the compiled contract file and export it to be used in the deployment script
```javascript
// 1. Import packages
const fs = require('fs');
const solc = require('solc');
// 2. Get path and load contract
const source = fs.readFileSync('Incrementer.sol', 'utf8');
// 3. Create input object
const input = {
language: 'Solidity',
sources: {
'Incrementer.sol': {
content: source,
},
},
settings: {
outputSelection: {
'*': {
'*': ['*'],
},
},
},
};
// 4. Compile the contract
const tempFile = JSON.parse(solc.compile(JSON.stringify(input)));
const contractFile = tempFile.contracts['Incrementer.sol']['Incrementer'];
// 5. Export contract data
module.exports = contractFile;
```
#### Deploy Contract Script
With the script for compiling the `Incrementer.sol` contract in place, you can then use the results to send a signed transaction that deploys it. To do so, you can create a file for the deployment script called `deploy.js`:
```bash
touch deploy.js
```
Next, you will create the script for this file and complete the following steps:
1. Import the contract file from `compile.js`
2. Set up the Ethers provider
3. Define the `privateKey` for the origin account. The private key is required to create a wallet instance. **Note: This is for example purposes only. Never store your private keys in a JavaScript file**
4. Create a wallet using the `privateKey` and `provider` from the previous steps. The wallet instance is used to sign transactions
5. Load the contract `bytecode` and `abi` for the compiled contract
6. Create a contract instance with signer using the `ethers.ContractFactory` function, providing the `abi`, `bytecode`, and `wallet` as parameters
7. Create the asynchronous `deploy` function that will be used to deploy the contract
8. Within the `deploy` function, use the `incrementer` contract instance to call `deploy` and pass in the initial value. For this example, you can set the initial value to `5`. This will send the transaction for contract deployment. To wait for a transaction receipt you can use the `deployed` method of the contract deployment transaction
9. Lastly, run the `deploy` function
```javascript
// 1. Import the contract file
const contractFile = require('./compile');
// 2. Add the Ethers provider logic here:
// {...}
// 3. Create account variables
const accountFrom = {
privateKey: 'INSERT_YOUR_PRIVATE_KEY',
};
// 4. Create wallet
let wallet = new ethers.Wallet(accountFrom.privateKey, provider);
// 5. Load contract information
const bytecode = contractFile.evm.bytecode.object;
const abi = contractFile.abi;
// 6. Create contract instance with signer
const incrementer = new ethers.ContractFactory(abi, bytecode, wallet);
// 7. Create deploy function
const deploy = async () => {
console.log(`Attempting to deploy from account: ${wallet.address}`);
// 8. Send tx (initial value set to 5) and wait for receipt
const contract = await incrementer.deploy(5);
const txReceipt = await contract.deploymentTransaction().wait();
console.log(`Contract deployed at address: ${txReceipt.contractAddress}`);
};
// 9. Call the deploy function
deploy();
```
View the complete script
```javascript
// Import ethers and compile
const ethers = require('ethers');
const contractFile = require('./compile');
// Define network configurations
const providerRPC = {
development: {
name: 'phron-development',
rpc: 'http://localhost:9944',
chainId: 7744,
},
phronbase: {
name: 'phron',
rpc: 'https://testnet.phron.ai',
chainId: 7744,
},
};
// Create ethers provider
const provider = new ethers.JsonRpcProvider(providerRPC.phron.rpc, {
chainId: providerRPC.phron.chainId,
name: providerRPC.phron.name,
}); // Change to correct network
// Define accounts and wallet
const accountFrom = {
privateKey: 'INSERT_YOUR_PRIVATE_KEY',
};
let wallet = new ethers.Wallet(accountFrom.privateKey, provider);
// Load contract info
const bytecode = contractFile.evm.bytecode.object;
const abi = contractFile.abi;
// Create contract instance with signer
const incrementer = new ethers.ContractFactory(abi, bytecode, wallet);
// Create deploy function
const deploy = async () => {
console.log(`Attempting to deploy from account: ${wallet.address}`);
// Send tx (initial value set to 5) and wait for receipt
const contract = await incrementer.deploy(5);
const txReceipt = await contract.deploymentTransaction().wait();
console.log(`Contract deployed at address: ${txReceipt.contractAddress}`);
};
// Call the deploy function
deploy();
```
To run the script, you can enter the following command into your terminal:
```bash
node deploy.js
```
If successful, the contract's address will be displayed in the terminal.
{% code overflow="wrap" %}
```bash
node deploy.jsAttempting to deploy from account: 0x3B939FeaD1557C741Ff06492FD0127bd287A421eContract deployed at address: 0x2B9c71fc2730B7353Dd3865ae26881Fa38FE598A
```
{% endcode %}
#### Read Contract Data (Call Methods)
Call methods are the type of interaction that don't modify the contract's storage (change variables), meaning no transaction needs to be sent. They simply read various storage variables of the deployed contract.
To get started, you can create a file and name it `get.js`:
```bash
touch get.js
```
Then you can take the following steps to create the script:
1. Import the `abi` from the `compile.js` file
2. Set up the Ethers provider
3. Create the `contractAddress` variable using the address of the deployed contract
4. Create an instance of the contract using the `ethers.Contract` function and passing in the `contractAddress`, `abi`, and `provider`
5. Create the asynchronous `get` function
6. Use the contract instance to call one of the contract's methods and pass in any inputs if necessary. For this example, you will call the `number` method which doesn't require any inputs. You can use `await` which will return the value requested once the request promise resolves
7. Lastly, call the `get` function
```javascript
// 1. Import the ABI
const { abi } = require('./compile');
// 2. Add the Ethers provider logic here:
// {...}
// 3. Contract address variable
const contractAddress = 'INSERT_CONTRACT_ADDRESS';
// 4. Create contract instance
const incrementer = new ethers.Contract(contractAddress, abi, provider);
// 5. Create get function
const get = async () => {
console.log(`Making a call to contract at address: ${contractAddress}`);
// 6. Call contract
const data = await incrementer.number();
console.log(`The current number stored is: ${data}`);
};
// 7. Call get function
get();
```
View the complete script
```javascript
// Import ethers and compile
const ethers = require('ethers');
const { abi } = require('./compile');
// Define network configurations
const providerRPC = {
development: {
name: 'phron-development',
rpc: 'http://localhost:9944',
chainId: 7744,
},
phronbase: {
name: 'phron',
rpc: 'https://testnet.phron.ai',
chainId: 7744,
},
};
const provider = new ethers.JsonRpcProvider(providerRPC.phron.rpc, {
chainId: providerRPC.phron.chainId,
name: providerRPC.phron.name,
}); // Change to correct network
// Contract address variable
const contractAddress = 'INSERT_CONTRACT_ADDRESS';
// Create contract instance
const incrementer = new ethers.Contract(contractAddress, abi, provider);
// Create get function
const get = async () => {
console.log(`Making a call to contract at address: ${contractAddress}`);
// Call contract
const data = await incrementer.number();
console.log(`The current number stored is: ${data}`);
};
// Call get function
get();
```
To run the script, you can enter the following command in your terminal:
```bash
node get.js
```
If successful, the value will be displayed in the terminal.
#### Interact with Contract (Send Methods)
Send methods are the type of interaction that modify the contract's storage (change variables), meaning a transaction needs to be signed and sent. In this section, you'll create two scripts: one to increment and one to reset the incrementer. To get started, you can create a file for each script and name them `increment.js` and `reset.js`:
```bash
touch increment.js reset.js
```
Open the `increment.js` file and take the following steps to create the script:
1. Import the `abi` from the `compile.js` file
2. Set up the Ethers provider
3. Define the `privateKey` for the origin account, the `contractAddress` of the deployed contract, and the `_value` to increment by. The private key is required to create a wallet instance. **Note: This is for example purposes only. Never store your private keys in a JavaScript file**
4. Create a wallet using the `privateKey` and `provider` from the previous steps. The wallet instance is used to sign transactions
5. Create an instance of the contract using the `ethers.Contract` function and passing in the `contractAddress`, `abi`, and `provider`
6. Create the asynchronous `increment` function
7. Use the contract instance to call one of the contract's methods and pass in any inputs if necessary. For this example, you will call the `increment` method which requires the value to increment by as an input. You can use `await` which will return the value requested once the request promise resolves
8. Lastly, call the `increment` function
```javascript
// 1. Import the contract ABI
const { abi } = require('./compile');
// 2. Add the Ethers provider logic here:
// {...}
// 3. Create variables
const accountFrom = {
privateKey: 'INSERT_YOUR_PRIVATE_KEY',
};
const contractAddress = 'INSERT_CONTRACT_ADDRESS';
const _value = 3;
// 4. Create wallet
let wallet = new ethers.Wallet(accountFrom.privateKey, provider);
// 5. Create contract instance with signer
const incrementer = new ethers.Contract(contractAddress, abi, wallet);
// 6. Create increment function
const increment = async () => {
console.log(
`Calling the increment by ${_value} function in contract at address: ${contractAddress}`
);
// 7. Sign and send tx and wait for receipt
const createReceipt = await incrementer.increment(_value);
await createReceipt.wait();
console.log(`Tx successful with hash: ${createReceipt.hash}`);
};
// 8. Call the increment function
increment();
```
View the complete script
```javascript
// Import ethers and compile
const ethers = require('ethers');
const { abi } = require('./compile');
// Define network configurations
const providerRPC = {
development: {
name: 'phron-development',
rpc: 'http://localhost:9944',
chainId: 7744,
},
phronbase: {
name: 'phron',
rpc: 'https://testnet.phron.ai',
chainId: 7744,
},
};
// Create ethers provider
const provider = new ethers.JsonRpcProvider(providerRPC.phron.rpc, {
chainId: providerRPC.phron.chainId,
name: providerRPC.phron.name,
}); // Change to correct network
// Create variables
const accountFrom = {
privateKey: 'INSERT_YOUR_PRIVATE_KEY',
};
const contractAddress = 'INSERT_CONTRACT_ADDRESS';
const _value = 3;
// Create wallet
let wallet = new ethers.Wallet(accountFrom.privateKey, provider);
// Create contract instance with signer
const incrementer = new ethers.Contract(contractAddress, abi, wallet);
// Create reset function
const increment = async () => {
console.log(
`Calling the increment by ${_value} function in contract at address: ${contractAddress}`
);
// Sign and send tx and wait for receipt
const createReceipt = await incrementer.increment(_value);
await createReceipt.wait();
console.log(`Tx successful with hash: ${createReceipt.hash}`);
};
// Call the reset function
increment();
```
To run the script, you can enter the following command in your terminal:
```bash
node increment.js
```
If successful, the transaction hash will be displayed in the terminal. You can use the `get.js` script alongside the `increment.js` script to make sure that value is changing as expected:
{% code overflow="wrap" %}
```bash
node get.jsMaking a call to contract at address: 0x2B9c71fc2730B7353Dd3865ae26881Fa38FE598AThe current number stored is: 5node increment.jsCalling the increment by 3 function in contract at address: 0x2B9c71fc2730B7353Dd3865ae26881Fa38FE598ATx successful with hash: 0xc7fe935db03cfacf56c5649cd79a566d1a7b68417f904f0095a1b1c203875bf2node get.jsMaking a call to contract at address: 0x2B9c71fc2730B7353Dd3865ae26881Fa38FE598AThe current number stored is: 8
```
{% endcode %}
Next you can open the `reset.js` file and take the following steps to create the script:
1. Import the `abi` from the `compile.js` file
2. Set up the Ethers provider
3. Define the `privateKey` for the origin account and the `contractAddress` of the deployed contract. The private key is required to create a wallet instance. **Note: This is for example purposes only. Never store your private keys in a JavaScript file**
4. Create a wallet using the `privateKey` and `provider` from the previous steps. The wallet instance is used to sign transactions
5. Create an instance of the contract using the `ethers.Contract` function and passing in the `contractAddress`, `abi`, and `provider`
6. Create the asynchronous `reset` function
7. Use the contract instance to call one of the contract's methods and pass in any inputs if necessary. For this example, you will call the `reset` method which doesn't require any inputs. You can use `await` which will return the value requested once the request promise resolves
8. Lastly, call the `reset` function
```javascript
// 1. Import the contract ABI
const { abi } = require('./compile');
// 2. Add the Ethers provider logic here:
// {...}
// 3. Create variables
const accountFrom = {
privateKey: 'INSERT_YOUR_PRIVATE_KEY',
};
const contractAddress = 'INSERT_CONTRACT_ADDRESS';
// 4. Create wallet
let wallet = new ethers.Wallet(accountFrom.privateKey, provider);
// 5. Create contract instance with signer
const incrementer = new ethers.Contract(contractAddress, abi, wallet);
// 6. Create reset function
const reset = async () => {
console.log(
`Calling the reset function in contract at address: ${contractAddress}`
);
// 7. sign and send tx and wait for receipt
const createReceipt = await incrementer.reset();
await createReceipt.wait();
console.log(`Tx successful with hash: ${createReceipt.hash}`);
};
// 8. Call the reset function
reset();
```
View the complete script
```javascript
// Import ethers and compile
const ethers = require('ethers');
const { abi } = require('./compile');
// Define network configurations
const providerRPC = {
development: {
name: 'phron-development',
rpc: 'http://localhost:9944',
chainId: 7744,
},
phron: {
name: 'phron',
rpc: 'https://testnet.phron.ai',
chainId: 7744,
},
};
// Create ethers provider
const provider = new ethers.JsonRpcProvider(providerRPC.phron.rpc, {
chainId: providerRPC.phron.chainId,
name: providerRPC.phron.name,
}); // Change to correct network
// Create variables
const accountFrom = {
privateKey: 'INSERT_YOUR_PRIVATE_KEY',
};
const contractAddress = 'INSERT_CONTRACT_ADDRESS';
// Create wallet
let wallet = new ethers.Wallet(accountFrom.privateKey, provider);
// Create contract instance with signer
const incrementer = new ethers.Contract(contractAddress, abi, wallet);
// Create reset function
const reset = async () => {
console.log(
`Calling the reset function in contract at address: ${contractAddress}`
);
// Sign and send tx and wait for receipt
const createReceipt = await incrementer.reset();
await createReceipt.wait();
console.log(`Tx successful with hash: ${createReceipt.hash}`);
};
// Call the reset function
reset();
```
To run the script, you can enter the following command in your terminal:
```bash
node reset.js
```
If successful, the transaction hash will be displayed in the terminal. You can use the `get.js` script alongside the `reset.js` script to make sure that value is changing as expected:
{% code overflow="wrap" %}
```bash
node get.jsMaking a call to contract at address: 0x2B9c71fc2730B7353Dd3865ae26881Fa38FE598AThe current number stored is: 8node reset.jsCalling the reset function in contract at address: 0x2B9c71fc2730B7353Dd3865ae26881Fa38FE598ATx successful with hash: 0xc452d21d8c2be6b81aadab7414103d68149c94a6399149ab8b79a58f0a3b5db7node get.jsMaking a call to contract at address: 0x2B9c71fc2730B7353Dd3865ae26881Fa38FE598AThe current number stored is: 0
```
{% endcode %}
This tutorial is for educational purposes only. As such, any contracts or code created in this tutorial should not be used in production.The information presented herein has been provided by third parties and is made available solely for general information purposes. Phron does not endorse any project listed and described on the Phron Doc Website (). Phron does not warrant the accuracy, completeness or usefulness of this information. Any reliance you place on such information is strictly at your own risk. Phron disclaims all liability and responsibility arising from any reliance placed on this information by you or by anyone who may be informed of any of its contents. All statements and/or opinions expressed in these materials are solely the responsibility of the person or entity providing those materials and do not necessarily represent the opinion of Phron. The information should not be construed as professional or financial advice of any kind. Advice from a suitably qualified professional should always be sought in relation to any particular matter or circumstance. The information herein may link to or integrate with other websites operated or content provided by third parties, and such other websites may link to this website. Phron has no control over any such other websites or their content and will have no liability arising out of or related to such websites or their content. The existence of any such link does not constitute an endorsement of such websites, the content of the websites, or the operators of the websites. These links are being provided to you only as a convenience and you release and hold Phron harmless from any and all liability arising from your use of this information or the information provided by any third-party website or service.
# Ethers.rs
## Ethers.rs Rust Library
### Introduction
The [Ethers.rs](https://ethers.rs/) library provides a set of tools to interact with Ethereum Nodes via the Rust programming language that works similar to Ethers.js. Phron has an Ethereum-like API available that is fully compatible with Ethereum-style JSON-RPC invocations. Therefore, developers can leverage this compatibility and use the Ethers.rs library to interact with a Phron node as if they were doing so on Ethereum. You can read more about how to use Ethers.rs on their [official crate documentation](https://docs.rs/crate/ethers/latest).
In this guide, you'll learn how to use the Ethers.rs library to send a transaction and deploy a contract on Phron.
### Checking Prerequisites
For the examples in this guide, you will need to have the following:
* An account with funds. You can get DEV tokens for testing on Phron once every 24 hours from the Phron Faucet
* To test out the examples in this guide on Phron, you will need to have your own endpoint and API key, which you can get from one of the supported Endpoint Providers
* Have [Rust installed](https://www.rust-lang.org/tools/install) on your device
* Have [solc installed](https://docs.soliditylang.org/en/v0.8.9/installing-solidity.html) on your device. Using [solc-select](https://github.com/crytic/solc-select) is recommended by the Ethers.rs package
> ### Note
>
> The examples in this guide assumes you have a MacOS or Ubuntu 20.04-based environment and will need to be adapted accordingly for Windows.
### Create a Rust Project
To get started, you can create a new Rust project with the Cargo tool:
```bash
cargo init ethers-examples && cd ethers-examples
```
For this guide, you'll need to install the Ethers.rs library among others. To tell the Rust project to install it, you must edit the `Cargo.toml` file that's included with the document to include it under dependencies:
```rust
[package]
name = "ethers-examples"
version = "0.1.0"
edition = "2021"
[dependencies]
ethers = "1.0.2"
ethers-solc = "1.0.2"
tokio = { version = "1", features = ["full"] }
serde_json = "1.0.89"
serde = "1.0.149"
```
This example is using the `ethers` and `ethers-solc` crate versions `1.0.2` for RPC interactions and Solidity compiling. It also includes the `tokio` crate to run asynchronous Rust environments, since interacting with RPCs requires asynchronous code. Finally, it includes the `serde_json` and `serde` crates to help serialize/deserialize this example's code.
If this is your first time using `solc-select`, you'll need to install and configure the Solidity version using the following commands:
```bash
solc-select install 0.8.17 && solc-select use 0.8.17
```
### Setting up the Ethers Provider and Client
Throughout this guide, you'll be writing multiple functions that provide different functionality such as sending a transaction, deploying a contract, and interacting with a deployed contract. In most of these scripts you'll need to use an [Ethers provider](https://docs.rs/ethers-providers/latest/ethers_providers/index.html) or an [Ethers signer client](https://docs.rs/ethers/1.0.2/ethers/middleware/struct.SignerMiddleware.html) to interact with the network.
To configure your project for Phron, you will need to have your own endpoint and API key, which you can get from one of the supported Endpoint Providers.
There are multiple ways to create a provider and signer, but the easiest way is through `try_from`. In the `src/main.rs` file, you can take the following steps:
1. Import `Provider` and `Http` from the `ethers` crate
2. Add a `Client` type for convenience, which will be used once you start to create the functions for sending a transaction and deploying a contract
3. Add a `tokio` attribute above `async fn main()` for asynchronous excution
4. Use `try_from` to attempt to instantiate a JSON-RPC provider object from an RPC endpoint
5. Use a private key to create a wallet object (the private key will be used to sign transactions). **Note: This is for example purposes only. Never store your private keys in a plain Rust file**
6. Wrap the provider and wallet together into a client by providing them to a `SignerMiddleware` object
```rust
// 1. Import ethers crate
use ethers::providers::{Provider, Http};
// 2. Add client type
type Client = SignerMiddleware, Wallet>;
// 3. Add annotation
#[tokio::main]
async fn main() -> Result<(), Box> {
// 4. Use try_from with RPC endpoint
let provider = Provider::::try_from(
"INSERT_RPC_API_ENDPOINT"
)?;
// 5. Use a private key to create a wallet
// Do not include the private key in plain text in any production code
// This is just for demonstration purposes
// Do not include '0x' at the start of the private key
let wallet: LocalWallet = "INSERT_YOUR_PRIVATE_KEY"
.parse::()?
.with_chain_id(Chain::Phron);
// 6. Wrap the provider and wallet together to create a signer client
let client = SignerMiddleware::new(provider.clone(), wallet.clone());
Ok(())
}
```
### Send a Transaction
During this section, you'll be creating a couple of functions, which will be contained in the same `main.rs` file to avoid additional complexity from implementing modules. The first function will be to check the balances of your accounts before trying to send a transaction. The second function will actually send the transaction. To run each of these functions, you will edit the `main` function and run the `main.rs` script.
You should already have your provider and client set up in `main.rs` in the way described in the previous section. In order to send a transaction, you'll need to add a few more lines of code:
1. Add `use ethers::{utils, prelude::*};` to your imports, which will provide you access to utility functions and the prelude imports all of the necessary data types and traits
2. As you'll be sending a transaction from one address to another, you can specify the sending and receiving addresses in the `main` function. **Note: the `address_from` value should correspond to the private key that is used in the `main` function**
```rust
// ...
// 1. Add to imports
use ethers::{utils, prelude::*};
// ...
#[tokio::main]
async fn main() -> Result<(), Box> {
// ...
// 2. Add from and to address
let address_from = "YOUR_FROM_ADDRESS".parse::()?
let address_to = "YOUR_TO_ADDRESS".parse::()?
}
```
#### Check Balances Function
Next, you will create the function for getting the sending and receiving accounts' balances by completing the following steps:
1. Create a new asynchronous function named `print_balances` that takes a provider object's reference and the sending and receiving addresses as input
2. Use the `provider` object's `get_balance` function to get the balances of the sending and receiving addresses of the transaction
3. Print the resultant balances for the sending and receiving addresses
4. Call the `print_balances` function in the `main` function
{% code overflow="wrap" %}
```rust
// ...
// 1. Create an asynchronous function that takes a provider reference and from and to address as input
async fn print_balances(provider: &Provider, address_from: Address, address_to: Address) -> Result<(), Box> {
// 2. Use the get_balance function
let balance_from = provider.get_balance(address_from, None).await?;
let balance_to = provider.get_balance(address_to, None).await?;
// 3. Print the resultant balance
println!("{} has {}", address_from, balance_from);
println!("{} has {}", address_to, balance_to);
Ok(())
}
#[tokio::main]
async fn main() -> Result<(), Box> {
// ...
// 4. Call print_balances function in main
print_balances(&provider).await?;
Ok(())
}
```
{% endcode %}
#### Send Transaction Script
For this example, you'll be transferring 1 DEV from an origin address (of which you hold the private key) to another address.
1. Create a new asynchronous function named `send_transaction` that takes a client object's reference and the sending and receiving addresses as input
2. Create the transaction object, and include the `to`, `value`, and `from`. When writing the `value` input, use the `ethers::utils::parse_ether` function
3. Use the `client` object to send the transaction
4. Print the transaction after it is confirmed
5. Call the `send_transaction` function in the `main` function
```rust
// ...
// 1. Define an asynchronous function that takes a client provider and the from and to addresses as input
async fn send_transaction(client: &Client, address_from: Address, address_to: Address) -> Result<(), Box> {
println!(
"Beginning transfer of 1 native currency from {} to {}.",
address_from, address_to
);
// 2. Create a TransactionRequest object
let tx = TransactionRequest::new()
.to(address_to)
.value(U256::from(utils::parse_ether(1)?))
.from(address_from);
// 3. Send the transaction with the client
let tx = client.send_transaction(tx, None).await?.await?;
// 4. Print out the result
println!("Transaction Receipt: {}", serde_json::to_string(&tx)?);
Ok(())
}
#[tokio::main]
async fn main() -> Result<(), Box> {
// ...
// 5. Call send_transaction function in main
send_transaction(&client, address_from, address_to).await?;
Ok(())
}
```
View the complete script
{% code overflow="wrap" %}
```rust
use ethers::providers::{Provider, Http};
use ethers::{utils, prelude::*};
type Client = SignerMiddleware, Wallet>;
#[tokio::main]
async fn main() -> Result<(), Box> {
let provider: Provider = Provider::::try_from("https://testnet.phron.ai")?; // Change to correct network
// Do not include the private key in plain text in any production code. This is just for demonstration purposes
let wallet: LocalWallet = "INSERT_PRIVATE_KEY"
.parse::()?
.with_chain_id(Chain::Phron); // Change to correct network
let client = SignerMiddleware::new(provider.clone(), wallet.clone());
let address_from = "INSERT_FROM_ADDRESS".parse::()?;
let address_to = "INSERT_TO_ADDRESS".parse::()?;
send_transaction(&client, &address_from, &address_to).await?;
print_balances(&provider, &address_from, &address_to).await?;
Ok(())
}
// Print the balance of a wallet
async fn print_balances(provider: &Provider, address_from: &Address, address_to: &Address) -> Result<(), Box> {
let balance_from = provider.get_balance(address_from.clone(), None).await?;
let balance_to = provider.get_balance(address_to.clone(), None).await?;
println!("{} has {}", address_from, balance_from);
println!("{} has {}", address_to, balance_to);
Ok(())
}
// Sends some native currency
async fn send_transaction(client: &Client, address_from: &Address, address_to: &Address) -> Result<(), Box> {
println!(
"Beginning transfer of 1 native currency {} to {}.",
address_from, address_to
);
let tx = TransactionRequest::new()
.to(address_to.clone())
.value(U256::from(utils::parse_ether(1)?))
.from(address_from.clone());
let tx = client.send_transaction(tx, None).await?.await?;
println!("Transaction Receipt: {}", serde_json::to_string(&tx)?);
Ok(())
}
```
{% endcode %}
To run the script, which will send the transaction and then check the balances once the transaction has been sent, you can run the following command:
```bash
cargo run
```
If the transaction was succesful, in your terminal you'll see the transaction details printed out along with the balance of your address.
{% code overflow="wrap" %}
```bash
cargo runCompiling ethers-examples v0.1.0 (/Users/phron/workspace/ethers-examples)Finished dev [unoptimized + debuginfo] target(s) in 32.76sRunning `target/debug/ethers-examples`Beginning transfer of 1 native currency 0x3b93…421e to 0xe773…8dde.Transaction Receipt: {"transactionHash":"0x6f2338c63286f8b27951ddb6748191149d82647b44a00465f1f776624f490ce9","transactionIndex":"0x0","blockHash":"0x8234eb2083e649ab45c7c5fcdf2026d8f47676f7e29305023d1d00cc349ba215","blockNumber":"0x7ac12d","from":"0x3b939fead1557c741ff06492fd0127bd287a421e","to":"0xe773f740828a968c8a9e1e8e05db486937768dde","cumulativeGasUsed":"0x5208","gasUsed":"0x5208","contractAddress":null,"logs":[],"status":"0x1","logsBloom":"0x00000000000000000000000000000000000000000000000000000000000000000000000000000000000000000000000000000000000000000000000000000000000000000000000000000000000000000000000000000000000000000000000000000000000000000000000000000000000000000000000000000000000000000000000000000000000000000000000000000000000000000000000000000000000000000000000000000000000000000000000000000000000000000000000000000000000000000000000000000000000000000000000000000000000000000000000000000000000000000000000000000000000000000000000000000000000000000000000000000000","type":"0x0","effectiveGasPrice":"0x7735940"}0x3b93…421e has 36017039844708655891250xe773…8dde has 1000000000000000000
```
{% endcode %}
### Deploy a Contract
The contract you'll be compiling and deploying in the next couple of sections is a simple incrementer contract, arbitrarily named `Incrementer.sol`. You can get started by creating a file for the contract:
```bash
touch Incrementer.sol
```
Next, you can add the Solidity code to the file:
```solidity
// SPDX-License-Identifier: MIT
pragma solidity ^0.8.0;
contract Incrementer {
uint256 public number;
constructor(uint256 _initialNumber) {
number = _initialNumber;
}
function increment(uint256 _value) public {
number = number + _value;
}
function reset() public {
number = 0;
}
}
```
The `constructor` function, which runs when the contract is deployed, sets the initial value of the number variable stored on-chain (the default is `0`). The `increment` function adds the `_value` provided to the current number, but a transaction needs to be sent, which modifies the stored data. Lastly, the `reset` function resets the stored value to zero.
> ### Note
>
> This contract is a simple example for illustration purposes only and does not handle values wrapping around.
During the rest of this section, you'll be creating a couple of functions, which will be contained in the `main.rs` file to avoid additional complexity from implementing modules. The first function will be to compile and deploy the contract. The remaining functions will interact with the deployed contract.
You should already have your provider and client set up in `main.rs` in the way described in the Setting up the Ethers Provider and Client section.
Before getting started with the contract deployment, you'll need to add a few more imports to your `main.rs` file:
```rust
use ethers_solc::Solc;
use ethers::{prelude::*};
use std::{path::Path, sync::Arc};
```
The `ethers_solc` import will be used to compile the smart contract. The `prelude` from Ethers imports some necessary data types and traits. Lastly, the `std` imports will enables you to store your smart contracts and wrap the client into an `Arc` type for thread safety.
#### Compile and Deploy Contract Script
This example function will compile and deploy the `Incrementer.sol` smart contract you created in the previous section. The `Incrementer.sol` smart contract should be in the root directory. In the `main.rs` file, you can take the following steps:
1. Create a new asynchronous function named `compile_deploy_contract` that takes a client object's reference as input, and returns an address in the form of `H160`
2. Define a variable named `source` as the path for the directory that hosts all of the smart contracts that should be compiled, which is the root directory
3. Use the `Solc` crate to compile all of the smart contracts in the root directory
4. Get the ABI and bytecode from the compiled result, searching for the `Incrementer.sol` contract
5. Create a contract factory for the smart contract using the ABI, bytecode, and client. The client must be wrapped into an `Arc` type for thread safety
6. Use the factory to deploy. For this example, the value `5` is used as the initial value in the constructor
7. Print out the address after the deployment
8. Return the address
9. Call the `compile_deploy_contract` function in `main`
{% code overflow="wrap" %}
```rust
// ...
// 1. Define an asynchronous function that takes a client provider as input and returns H160
async fn compile_deploy_contract(client: &Client) -> Result> {
// 2. Define a path as the directory that hosts the smart contracts in the project
let source = Path::new(&env!("CARGO_MANIFEST_DIR"));
// 3. Compile all of the smart contracts
let compiled = Solc::default()
.compile_source(source)
.expect("Could not compile contracts");
// 4. Get ABI & Bytecode for Incrementer.sol
let (abi, bytecode, _runtime_bytecode) = compiled
.find("Incrementer")
.expect("could not find contract")
.into_parts_or_default();
// 5. Create a contract factory which will be used to deploy instances of the contract
let factory = ContractFactory::new(abi, bytecode, Arc::new(client.clone()));
// 6. Deploy
let contract = factory.deploy(U256::from(5))?.send().await?;
// 7. Print out the address
let addr = contract.address();
println!("Incrementer.sol has been deployed to {:?}", addr);
// 8. Return the address
Ok(addr)
}
#[tokio::main]
async fn main() -> Result<(), Box> {
// ...
// 9. Call compile_deploy_contract function in main
let addr = compile_deploy_contract(&client).await?;
Ok(())
}
```
{% endcode %}
#### Read Contract Data (Call Methods)
Call methods are the type of interaction that don't modify the contract's storage (change variables), meaning no transaction needs to be sent. They simply read various storage variables of the deployed contract.
Rust is typesafe, which is why the ABI for the `Incrementer.sol` contract is required to generate a typesafe Rust struct. For this example, you should create a new file in the root of the Cargo project called `Incrementer_ABI.json`:
```bash
touch Incrementer_ABI.json
```
The ABI for `Incrementer.sol` is below, which should be copied and pasted into the `Incrementer_ABI.json` file:
```json
[
{
"inputs": [
{
"internalType": "uint256",
"name": "_value",
"type": "uint256"
}
],
"name": "increment",
"outputs": [],
"stateMutability": "nonpayable",
"type": "function"
},
{
"inputs": [],
"name": "number",
"outputs": [
{
"internalType": "uint256",
"name": "",
"type": "uint256"
}
],
"stateMutability": "view",
"type": "function"
},
{
"inputs": [],
"name": "reset",
"outputs": [],
"stateMutability": "nonpayable",
"type": "function"
}
]
```
Then you can take the following steps to create a function that reads and returns the `number` method of the `Incrementer.sol` contract:
1. Generate a type-safe interface for the `Incrementer` smart contract with the `abigen` macro
2. Create a new asynchronous function named `read_number` that takes a client object's reference and a contract address reference as input, and returns a U256
3. Create a new instance of the `Incrementer` object generated by the abigen macro with the client and contract address values
4. Call the `number` function in the new `Incrementer` object
5. Print out the resultant value
6. Return the resultant value
7. Call the `read_number` function in `main`
{% code overflow="wrap" %}
```solidity
// ...
// 1. Generate a type-safe interface for the Incrementer smart contract
abigen!(
Incrementer,
"./Incrementer_ABI.json",
event_derives(serde::Deserialize, serde::Serialize)
);
// 2. Define an asynchronous function that takes a client provider and address as input and returns a U256
async fn read_number(client: &Client, contract_addr: &H160) -> Result> {
// 3. Create contract instance
let contract = Incrementer::new(contract_addr.clone(), Arc::new(client.clone()));
// 4. Call contract's number function
let value = contract.number().call().await?;
// 5. Print out number
println!("Incrementer's number is {}", value);
// 6. Return the number
Ok(value)
}
// ...
#[tokio::main]
async fn main() -> Result<(), Box> {
// ...
// 7. Call read_number function in main
read_number(&client, &addr).await?;
Ok(())
}
```
{% endcode %}
View the complete script
{% code overflow="wrap" %}
```rust
use ethers::providers::{Provider, Http};
use ethers::{prelude::*};
use ethers_solc::Solc;
use std::{path::Path, sync::Arc};
type Client = SignerMiddleware, Wallet>;
#[tokio::main]
async fn main() -> Result<(), Box> {
let provider: Provider = Provider::::try_from("https://testnet.phron.ai")?; // Change to correct network
// Do not include the private key in plain text in any production code. This is just for demonstration purposes
// Do not include '0x' at the start of the private key
let wallet: LocalWallet = "INSERT_PRIVATE_KEY"
.parse::()?
.with_chain_id(Chain::Phron);
let client = SignerMiddleware::new(provider.clone(), wallet.clone());
// Deploy contract and read initial incrementer value
let addr = compile_deploy_contract(&client).await?;
read_number(&client, &addr).await?;
// Increment and read the incremented number
increment_number(&client, &addr).await?;
read_number(&client, &addr).await?;
// Reset the incremented number and read it
reset(&client, &addr).await?;
read_number(&client, &addr).await?;
Ok(())
}
// Need to install solc for this tutorial: https://github.com/crytic/solc-select
async fn compile_deploy_contract(client: &Client) -> Result> {
// Incrementer.sol is located in the root directory
let source = Path::new(&env!("INSERT_CARGO_MANIFEST_DIR"));
// Compile it
let compiled = Solc::default()
.compile_source(source)
.expect("Could not compile contracts");
// Get ABI & Bytecode for Incrementer.sol
let (abi, bytecode, _runtime_bytecode) = compiled
.find("Incrementer")
.expect("could not find contract")
.into_parts_or_default();
// Create a contract factory which will be used to deploy instances of the contract
let factory = ContractFactory::new(abi, bytecode, Arc::new(client.clone()));
// Deploy
let contract = factory.deploy(U256::from(5))?.send().await?;
let addr = contract.address();
println!("Incrementer.sol has been deployed to {:?}", addr);
Ok(addr)
}
// Generates a type-safe interface for the Incrementer smart contract
abigen!(
Incrementer,
"./Incrementer_ABI.json",
event_derives(serde::Deserialize, serde::Serialize)
);
async fn read_number(client: &Client, contract_addr: &H160) -> Result> {
// Create contract instance
let contract = Incrementer::new(contract_addr.clone(), Arc::new(client.clone()));
// Call contract's number function
let value = contract.number().call().await?;
// Print out value
println!("Incrementer's number is {}", value);
Ok(value)
}
async fn increment_number(client: &Client, contract_addr: &H160) -> Result<(), Box> {
println!("Incrementing number...");
// Create contract instance
let contract = Incrementer::new(contract_addr.clone(), Arc::new(client.clone()));
// Send contract transaction
let tx = contract.increment(U256::from(5)).send().await?.await?;
println!("Transaction Receipt: {}", serde_json::to_string(&tx)?);
Ok(())
}
async fn reset(client: &Client, contract_addr: &H160) -> Result<(), Box> {
println!("Resetting number...");
// Create contract instance
let contract = Incrementer::new(contract_addr.clone(), Arc::new(client.clone()));
// Send contract transaction
let tx = contract.reset().send().await?.await?;
println!("Transaction Receipt: {}", serde_json::to_string(&tx)?);
Ok(())
}
```
{% endcode %}
To run the script, which will deploy the contract and return the current value stored in the `Incrementer` contract, you can enter the following command into your terminal:
```bash
cargo run
```
If successful, you'll see the deployed contract's address and initial value set, which should be `5`, displayed in the terminal.
{% code overflow="wrap" %}
```bash
cargo runCompiling ethers-examples v0.1.0 (/Users/phron/workspace/ethers-examples)Finished dev [unoptimized + debuginfo] target(s) in 1.09sRunning `/Users/phron/workspace/ethers-examples/target/debug/ethers-examples`Incrementer.sol has been deployed to 0xeb8a4d5c7cd56c65c9dbd25f793b50a2c917bb5dIncrementer's number is 5
```
{% endcode %}
#### Interact with Contract (Send Methods)
Send methods are the type of interaction that modify the contract's storage (change variables), meaning a transaction needs to be signed and sent. In this section, you'll create two functions: one to increment and one to reset the incrementer. This section will also require the `Incrementer_ABI.json` file initialized when reading from the smart contract.
Take the following steps to create the function to increment:
1. Ensure that the abigen macro is called for the `Incrementer_ABI.json` somewhere in the `main.rs` file (if it is already in the `main.rs` file, you do not have to have a second one)
2. Create a new asynchronous function named `increment_number` that takes a client object's reference and an address as input
3. Create a new instance of the `Incrementer` object generated by the abigen macro with the client and contract address values
4. Call the `increment` function in the new `Incrementer` object by including a `U256` object as input. In this instance, the value provided is `5`
5. Call the `read_number` function in `main`
{% code overflow="wrap" %}
```solidity
// ...
// 1. Generate a type-safe interface for the Incrementer smart contract
abigen!(
Incrementer,
"./Incrementer_ABI.json",
event_derives(serde::Deserialize, serde::Serialize)
);
// 2. Define an asynchronous function that takes a client provider and address as input
async fn increment_number(client: &Client, contract_addr: &H160) -> Result<(), Box> {
println!("Incrementing number...");
// 3. Create contract instance
let contract = Incrementer::new(contract_addr.clone(), Arc::new(client.clone()));
// 4. Send contract transaction
let tx = contract.increment(U256::from(5)).send().await?.await?;
println!("Transaction Receipt: {}", serde_json::to_string(&tx)?);
Ok(())
}
// ...
#[tokio::main]
async fn main() -> Result<(), Box> {
// ...
// 5. Call increment_number function in main
increment_number(&client, &addr).await?;
Ok(())
}
```
{% endcode %}
View the complete script
{% code overflow="wrap" %}
```rust
use ethers::providers::{Provider, Http};
use ethers::{prelude::*};
use ethers_solc::Solc;
use std::{path::Path, sync::Arc};
type Client = SignerMiddleware, Wallet>;
#[tokio::main]
async fn main() -> Result<(), Box> {
let provider: Provider = Provider::::try_from("https://testnet.phron.ai")?; // Change to correct network
// Do not include the private key in plain text in any production code. This is just for demonstration purposes
// Do not include '0x' at the start of the private key
let wallet: LocalWallet = "INSERT_PRIVATE_KEY"
.parse::()?
.with_chain_id(Chain::Phron);
let client = SignerMiddleware::new(provider.clone(), wallet.clone());
// Deploy contract and read initial incrementer value
let addr = compile_deploy_contract(&client).await?;
read_number(&client, &addr).await?;
// Increment and read the incremented number
increment_number(&client, &addr).await?;
read_number(&client, &addr).await?;
// Reset the incremented number and read it
reset(&client, &addr).await?;
read_number(&client, &addr).await?;
Ok(())
}
// Need to install solc for this tutorial: https://github.com/crytic/solc-select
async fn compile_deploy_contract(client: &Client) -> Result> {
// Incrementer.sol is located in the root directory
let source = Path::new(&env!("INSERT_CARGO_MANIFEST_DIR"));
// Compile it
let compiled = Solc::default()
.compile_source(source)
.expect("Could not compile contracts");
// Get ABI & Bytecode for Incrementer.sol
let (abi, bytecode, _runtime_bytecode) = compiled
.find("Incrementer")
.expect("could not find contract")
.into_parts_or_default();
// Create a contract factory which will be used to deploy instances of the contract
let factory = ContractFactory::new(abi, bytecode, Arc::new(client.clone()));
// Deploy
let contract = factory.deploy(U256::from(5))?.send().await?;
let addr = contract.address();
println!("Incrementer.sol has been deployed to {:?}", addr);
Ok(addr)
}
// Generates a type-safe interface for the Incrementer smart contract
abigen!(
Incrementer,
"./Incrementer_ABI.json",
event_derives(serde::Deserialize, serde::Serialize)
);
async fn read_number(client: &Client, contract_addr: &H160) -> Result> {
// Create contract instance
let contract = Incrementer::new(contract_addr.clone(), Arc::new(client.clone()));
// Call contract's number function
let value = contract.number().call().await?;
// Print out value
println!("Incrementer's number is {}", value);
Ok(value)
}
async fn increment_number(client: &Client, contract_addr: &H160) -> Result<(), Box> {
println!("Incrementing number...");
// Create contract instance
let contract = Incrementer::new(contract_addr.clone(), Arc::new(client.clone()));
// Send contract transaction
let tx = contract.increment(U256::from(5)).send().await?.await?;
println!("Transaction Receipt: {}", serde_json::to_string(&tx)?);
Ok(())
}
async fn reset(client: &Client, contract_addr: &H160) -> Result<(), Box> {
println!("Resetting number...");
// Create contract instance
let contract = Incrementer::new(contract_addr.clone(), Arc::new(client.clone()));
// Send contract transaction
let tx = contract.reset().send().await?.await?;
println!("Transaction Receipt: {}", serde_json::to_string(&tx)?);
Ok(())
}
```
{% endcode %}
To run the script, you can enter the following command into your terminal:
```bash
cargo run
```
If successful, the transaction receipt will be displayed in the terminal. You can use the `read_number` function in the `main` function to make sure that value is changing as expected. If you're using the `read_number` function after incrementing, you'll also see the incremented number, which should be `10`.
{% code overflow="wrap" %}
```bash
cargo runCompiling ethers-examples v0.1.0 (/Users/phron/workspace/ethers-examples)Finished dev [unoptimized + debuginfo] target(s) in 1.09sRunning `/Users/phron/workspace/ethers-examples/target/debug/ethers-examples`Incrementer.sol has been deployed to 0xeb8a4d5c7cd56c65c9dbd25f793b50a2c917bb5dIncrementer's number is 5Incrementing number...Transaction Receipt: {"transactionHash":"0x6f5c204e74b96b6cf6057512ba142ad727718646d4ebb7abe8bbabada198dafb","transactionIndex":"0x0","blockHash":"0x635a8a234b30c6ee907198ddda3a1478ae52c6adbcc4a67353dd9597ee626950","blockNumber":"0x7ac238","from":"0x3b939fead1557c741ff06492fd0127bd287a421e","to":"0xeb8a4d5c7cd56c65c9dbd25f793b50a2c917bb5d","cumulativeGasUsed":"0x68a6","gasUsed":"0x68a6","contractAddress":null,"logs":[],"status":"0x1","logsBloom":"0x00000000000000000000000000000000000000000000000000000000000000000000000000000000000000000000000000000000000000000000000000000000000000000000000000000000000000000000000000000000000000000000000000000000000000000000000000000000000000000000000000000000000000000000000000000000000000000000000000000000000000000000000000000000000000000000000000000000000000000000000000000000000000000000000000000000000000000000000000000000000000000000000000000000000000000000000000000000000000000000000000000000000000000000000000000000000000000000000000000000000","type":"0x2","effectiveGasPrice":"0xba43b740"}Incrementer's number is 10
```
{% endcode %}
Next you can interact with the `reset` function:
1. Ensure that the abigen macro is called for the `Incrementer_ABI.json` somewhere in the `main.rs` file (if it is already in the `main.rs` file, you do not have to have a second one)
2. Create a new asynchronous function named `reset` that takes a client object's reference and an address as input
3. Create a new instance of the `Incrementer` object generated by the abigen macro with the client and contract address values
4. Call the `reset` function in the new `Incrementer` object
5. Call the `reset` function in `main`
{% code overflow="wrap" %}
```rust
// ...
// 1. Generate a type-safe interface for the Incrementer smart contract
abigen!(
Incrementer,
"./Incrementer_ABI.json",
event_derives(serde::Deserialize, serde::Serialize)
);
// 2. Define an asynchronous function that takes a client provider and address as input
async fn reset(client: &Client, contract_addr: &H160) -> Result<(), Box> {
println!("Resetting number...");
// 3. Create contract instance
let contract = Incrementer::new(contract_addr.clone(), Arc::new(client.clone()));
// 4. Send contract transaction
let tx = contract.reset().send().await?.await?;
println!("Transaction Receipt: {}", serde_json::to_string(&tx)?);
Ok(())
}
// ...
#[tokio::main]
async fn main() -> Result<(), Box> {
// ...
// 5. Call reset function in main
reset(&client, &addr).await?;
Ok(())
}
```
{% endcode %}
If successful, the transaction receipt will be displayed in the terminal. You can use the `read_number` function in the `main` function to make sure that value is changing as expected. If you're using the `read_number` function after resetting the number, you should see `0` printed to the terminal.
{% code overflow="wrap" %}
```bash
cargo runCompiling ethers-examples v0.1.0 (/Users/phron/workspace/ethers-examples)Finished dev [unoptimized + debuginfo] target(s) in 1.09sRunning `/Users/phron/workspace/ethers-examples/target/debug/ethers-examples`Incrementer.sol has been deployed to 0xeb8a4d5c7cd56c65c9dbd25f793b50a2c917bb5dIncrementer's number is 5Incrementing number...Transaction Receipt: {"transactionHash":"0x6f5c204e74b96b6cf6057512ba142ad727718646d4ebb7abe8bbabada198dafb","transactionIndex":"0x0","blockHash":"0x635a8a234b30c6ee907198ddda3a1478ae52c6adbcc4a67353dd9597ee626950","blockNumber":"0x7ac238","from":"0x3b939fead1557c741ff06492fd0127bd287a421e","to":"0xeb8a4d5c7cd56c65c9dbd25f793b50a2c917bb5d","cumulativeGasUsed":"0x68a6","gasUsed":"0x68a6","contractAddress":null,"logs":[],"status":"0x1","logsBloom":"0x00000000000000000000000000000000000000000000000000000000000000000000000000000000000000000000000000000000000000000000000000000000000000000000000000000000000000000000000000000000000000000000000000000000000000000000000000000000000000000000000000000000000000000000000000000000000000000000000000000000000000000000000000000000000000000000000000000000000000000000000000000000000000000000000000000000000000000000000000000000000000000000000000000000000000000000000000000000000000000000000000000000000000000000000000000000000000000000000000000000000","type":"0x2","effectiveGasPrice":"0xba43b740"}Incrementer's number is 10Resetting number...Transaction Receipt: {"transactionHash":"0xf1010597c6ab3d3cfcd6e8e68bf2eddf4ed38eb93a3052591c88b675ed1e83a4","transactionIndex":"0x0","blockHash":"0x5d4c09abf104cbd88e80487c170d8709aae7475ca84c1f3396f3e35222fbe87f","blockNumber":"0x7ac23b","from":"0x3b939fead1557c741ff06492fd0127bd287a421e","to":"0xeb8a4d5c7cd56c65c9dbd25f793b50a2c917bb5d","cumulativeGasUsed":"0x53c4","gasUsed":"0x53c4","contractAddress":null,"logs":[],"status":"0x1","logsBloom":"0x000000000000000000000000000000000000000000000000000000000000000000000000000000000000000000000000000000000000000000000000000000000000000000000000000000000000000000000000000000000000000000000000000000000000000000000000000000000000000000000000000000000000000000000000000000000000000000000000000000000000000000000000000000000000000000000000000000000000000000000000000000000000000000000000000000000000000000000000000000000000000000000000000000000000000000000000000000000000000000000000000000000000000000000000000000000","type":"0x2","effectiveGasPrice":"0xba43b740"}Incrementer's number is 0
```
{% endcode %}
View the complete script
{% code overflow="wrap" %}
```rust
use ethers::providers::{Provider, Http};
use ethers::{prelude::*};
use ethers_solc::Solc;
use std::{path::Path, sync::Arc};
type Client = SignerMiddleware, Wallet>;
#[tokio::main]
async fn main() -> Result<(), Box> {
let provider: Provider = Provider::::try_from("https://testnet.phron.ai")?; // Change to correct network
// Do not include the private key in plain text in any production code. This is just for demonstration purposes
// Do not include '0x' at the start of the private key
let wallet: LocalWallet = "INSERT_PRIVATE_KEY"
.parse::()?
.with_chain_id(Chain::Phron);
let client = SignerMiddleware::new(provider.clone(), wallet.clone());
// Deploy contract and read initial incrementer value
let addr = compile_deploy_contract(&client).await?;
read_number(&client, &addr).await?;
// Increment and read the incremented number
increment_number(&client, &addr).await?;
read_number(&client, &addr).await?;
// Reset the incremented number and read it
reset(&client, &addr).await?;
read_number(&client, &addr).await?;
Ok(())
}
// Need to install solc for this tutorial: https://github.com/crytic/solc-select
async fn compile_deploy_contract(client: &Client) -> Result> {
// Incrementer.sol is located in the root directory
let source = Path::new(&env!("INSERT_CARGO_MANIFEST_DIR"));
// Compile it
let compiled = Solc::default()
.compile_source(source)
.expect("Could not compile contracts");
// Get ABI & Bytecode for Incrementer.sol
let (abi, bytecode, _runtime_bytecode) = compiled
.find("Incrementer")
.expect("could not find contract")
.into_parts_or_default();
// Create a contract factory which will be used to deploy instances of the contract
let factory = ContractFactory::new(abi, bytecode, Arc::new(client.clone()));
// Deploy
let contract = factory.deploy(U256::from(5))?.send().await?;
let addr = contract.address();
println!("Incrementer.sol has been deployed to {:?}", addr);
Ok(addr)
}
// Generates a type-safe interface for the Incrementer smart contract
abigen!(
Incrementer,
"./Incrementer_ABI.json",
event_derives(serde::Deserialize, serde::Serialize)
);
async fn read_number(client: &Client, contract_addr: &H160) -> Result> {
// Create contract instance
let contract = Incrementer::new(contract_addr.clone(), Arc::new(client.clone()));
// Call contract's number function
let value = contract.number().call().await?;
// Print out value
println!("Incrementer's number is {}", value);
Ok(value)
}
async fn increment_number(client: &Client, contract_addr: &H160) -> Result<(), Box> {
println!("Incrementing number...");
// Create contract instance
let contract = Incrementer::new(contract_addr.clone(), Arc::new(client.clone()));
// Send contract transaction
let tx = contract.increment(U256::from(5)).send().await?.await?;
println!("Transaction Receipt: {}", serde_json::to_string(&tx)?);
Ok(())
}
async fn reset(client: &Client, contract_addr: &H160) -> Result<(), Box> {
println!("Resetting number...");
// Create contract instance
let contract = Incrementer::new(contract_addr.clone(), Arc::new(client.clone()));
// Send contract transaction
let tx = contract.reset().send().await?.await?;
println!("Transaction Receipt: {}", serde_json::to_string(&tx)?);
Ok(())
}
```
{% endcode %}
This tutorial is for educational purposes only. As such, any contracts or code created in this tutorial should not be used in production.The information presented herein has been provided by third parties and is made available solely for general information purposes. Phron does not endorse any project listed and described on the Phron Doc Website (). Phron does not warrant the accuracy, completeness or usefulness of this information. Any reliance you place on such information is strictly at your own risk. Phron disclaims all liability and responsibility arising from any reliance placed on this information by you or by anyone who may be informed of any of its contents. All statements and/or opinions expressed in these materials are solely the responsibility of the person or entity providing those materials and do not necessarily represent the opinion of Phron. The information should not be construed as professional or financial advice of any kind. Advice from a suitably qualified professional should always be sought in relation to any particular matter or circumstance. The information herein may link to or integrate with other websites operated or content provided by third parties, and such other websites may link to this website. Phron has no control over any such other websites or their content and will have no liability arising out of or related to such websites or their content. The existence of any such link does not constitute an endorsement of such websites, the content of the websites, or the operators of the websites. These links are being provided to you only as a convenience and you release and hold Phron harmless from any and all liability arising from your use of this information or the information provided by any third-party website or service.
# viem
## viem TypeScript Ethereum Library
### Introduction
[viem](https://viem.sh/) is a modular TypeScript library that allows developers to interact with abstractions over the JSON-RPC API, making it easy to interact with Ethereum nodes. Since Phron has an Ethereum-like API available that is fully compatible with Ethereum-style JSON RPC invocations, developers can leverage this compatibility to interact with Phron nodes. For more information on viem, check out their [documentation site](https://viem.sh/docs/getting-started.html).
In this guide, you'll learn how to use viem to send a transaction and deploy a contract on the Phron TestNet.
### Checking Prerequisites
For the examples in this guide, you will need to have the following:
* An account with funds. You can get DEV tokens for testing on Phron once every 24 hours from the Phron Faucet
* To test out the examples in this guide on Phron, you will need to have your own endpoint and API key, which you can get from one of the supported Endpoint Providers
> ### Note
>
> The examples in this guide assume you have a MacOS or Ubuntu 22.04-based environment and will need to be adapted accordingly for Windows.
### Installing viem
To get started, you'll need to create a basic TypeScript project. First, create a directory to store all of the files you'll be creating throughout this guide, and initialize the project with the following command:
```bash
mkdir viem-examples && cd viem-examples && npm init --y
```
For this guide, you'll need to install the viem library and the Solidity compiler. To install both packages, you can run the following command:
```bash
npm install typescript ts-node viem solc@0.8.0
```
You can create a TypeScript configuration file by running:
```bash
npx tsc --init
```
> ### Note
>
> This tutorial was created using Node.js v18.18.0.
### Set Up a viem Client (Provider)
Throughout this guide, you'll be creating a bunch of scripts that provide different functionality, such as sending a transaction, deploying a contract, and interacting with a deployed contract. In most of these scripts, you'll need to create a [viem client](https://docs.ethers.org/v6/api/providers/) to interact with the network.
You can create a viem client for reading chain data, like balances or contract data, using the `createPublicClient` function, or you can create a viem client for writing chain data, like sending transactions, using the `createWalletClient` function.
#### For Reading Chain Data
To create a client for reading chain data, you can take the following steps:
1. Import the `createPublicClient` and `http` functions from `viem` and the network you want to interact with from `viem/chains`. The chain can be any of the following: `phron`
2. Create the `client` using the `createPublicClient` function and pass in the network and the HTTP RPC endpoint
```basic
import { createPublicClient, http } from 'viem';
import { phron } from 'viem/chains';
const rpcUrl = 'INSERT_RPC_API_ENDPOINT'
const publicClient = createPublicClient({
chain: phron,
transport: http(rpcUrl),
});
```
#### For Writing Chain Data
To create a client for writing chain data, you can take the following steps:
1. Import the `createWalletClient` and `http` functions from `viem`, the `privateKeyToAccount` function for loading your accounts via their private keys, and the network you want to interact with from `viem/chains`. The chain can be any of the following: `phron`
2. Create your account using the `privateKeyToAccount` function
3. Create the `client` using the `createWalletClient` function and pass in the account, network, and the HTTP RPC endpoint
{% hint style="warning" %}
### Remember
This is for demo purposes only. Never store your private key in a TypeScript file.
{% endhint %}
```visual-basic
import { createWalletClient, http } from 'viem';
import { privateKeyToAccount } from 'viem/accounts';
import { phron } from 'viem/chains';
const account = privateKeyToAccount('INSERT_PRIVATE_KEY');
const rpcUrl = 'INSERT_RPC_API_ENDPOINT'
const walletClient = createWalletClient({
account,
chain: phron,
transport: http(rpcUrl),
});
```
> ### Note
>
> To interact with browser-based wallets, you can use the following code to create an account:
>
> ```javascript
> const [account] = await window.ethereum.request({
> method: 'eth_requestAccounts',
> });
> const walletClient = createWalletClient({
> account,
> chain: phron,
> transport: custom(window.ethereum),
> });
> ```
```javascript
const [account] = await window.ethereum.request({
method: 'eth_requestAccounts',
});
const walletClient = createWalletClient({
account,
chain: phron,
transport: custom(window.ethereum),
});
```
### Send a Transaction
During this section, you'll be creating a couple of scripts. The first one will be to check the balances of your accounts before trying to send a transaction. The second script will actually send the transaction.
You can also use the balance script to check the account balances after the transaction has been sent.
#### Check Balances Script
You'll only need one file to check the balances of both addresses before and after the transaction is sent. To get started, you can create a `balances.ts` file by running:
```bash
touch balances.ts
```
Next, you will create the script for this file and complete the following steps:
1. Update your imports to include the `createPublicClient`, `http`, and `formatEther` functions from `viem` and the network you want to interact with from `viem/chains`
2. Set up a public viem client, which can be used for reading chain data, such as account balances
3. Define the `addressFrom` and `addressTo` variables
4. Create the asynchronous `balances` function that wraps the `publicClient.getBalance` method
5. Use the `publicClient.getBalance` function to fetch the balances for the `addressFrom` and `addressTo` addresses. You can also leverage the `formatEther` function to transform the balance into a more readable number (in GLMR, MOVR, or DEV)
6. Lastly, run the `balances` function
```javascript
// 1. Imports
import { createPublicClient, http, formatEther } from 'viem';
import { phron } from 'viem/chains';
// 2. Create a public client for reading chain data
const rpcUrl = 'https://testnet.phron.ai';
const publicClient = createPublicClient({
chain: phron,
transport: http(rpcUrl),
});
// 3. Create address variables
const addressFrom = 'INSERT_FROM_ADDRESS';
const addressTo = 'INSERT_TO_ADDRESS';
// 4. Create balances function
const balances = async () => {
// 5. Fetch balances
const balanceFrom = formatEther(
await publicClient.getBalance({ address: addressFrom })
);
const balanceTo = formatEther(
await publicClient.getBalance({ address: addressTo })
);
console.log(`The balance of ${addressFrom} is: ${balanceFrom} DEV`);
console.log(`The balance of ${addressTo} is: ${balanceTo} DEV`);
};
// 6. Call the balances function
balances();
```
To run the script and fetch the account balances, you can run the following command:
```bash
npx ts-node balances.ts
```
If successful, the balances for the origin and receiving address will be displayed in your terminal in DEV.
{% code overflow="wrap" %}
```bash
npx ts-node balances.tsThe balance of 0x3B939FeaD1557C741Ff06492FD0127bd287A421e is: 3601.72 DEVThe balance of 0x78F34038c82638E0563b974246D421154C26b004 is: 0 DEV
```
{% endcode %}
#### Send Transaction Script
You'll only need one file to execute a transaction between accounts. For this example, you'll be transferring 1 DEV token from an origin address (from which you hold the private key) to another address. To get started, you can create a `transaction.ts` file by running:
```bash
touch transaction.ts
```
Next, you will create the script for this file and complete the following steps:
1. Update your imports to include the `createWalletClient`, `http`, and `parseEther` functions from `viem`, the `privateKeyToAccount` function from `viem/accounts`, and the network you want to interact with from `viem/chains`
2. Set up a viem wallet client for writing chain data, which can be used along with your private key to send transactions. **Note: This is for example purposes only. Never store your private keys in a TypeScript file**
3. Set up a public viem client for reading chain data, which will be used to wait for the transaction receipt
4. Define the `addressTo` variable
5. Create the asynchronous `send` function, which wraps the transaction object and the `walletClient.sendTransaction` method
6. Use the `walletClient.sendTransaction` function to sign and send the transaction. You'll need to pass in the transaction object, which only requires the recipient's address and the amount to send. Note that `parseEther` can be used, which handles the necessary unit conversions from Ether to Wei, similar to using `parseUnits(value, decimals)`. Use `await` to wait until the transaction is processed and the transaction hash is returned
7. Use the `publicClient.waitForTransactionReceipt` function to wait for the transaction receipt, signaling that the transaction has been completed. This is particularly helpful if you need the transaction receipt or if you're running the `balances.ts` script directly after this one to check if the balances have been updated as expected
8. Lastly, run the `send` function
```javascript
// 1. Imports
import { createPublicClient, createWalletClient, http, parseEther } from 'viem';
import { privateKeyToAccount } from 'viem/accounts';
import { phron } from 'viem/chains';
// 2. Create a wallet client for writing chain data
const account = privateKeyToAccount('INSERT_PRIVATE_KEY');
const rpcUrl = 'https://testnet.phron.ai';
const walletClient = createWalletClient({
account,
chain: phron,
transport: http(rpcUrl),
});
// 3. Create a public client for reading chain data
const publicClient = createPublicClient({
chain: phron,
transport: http(rpcUrl),
});
// 4. Create to address variable
const addressTo = 'INSERT_ADDRESS';
// 5. Create send function
const send = async () => {
console.log(
`Attempting to send transaction from ${account.address} to ${addressTo}`
);
// 6. Sign and send tx
const hash = await walletClient.sendTransaction({
to: addressTo,
value: parseEther('1'),
});
// 7. Wait for the transaction receipt
await publicClient.waitForTransactionReceipt({
hash,
});
console.log(`Transaction successful with hash: ${hash}`);
};
// 8. Call the send function
send();
```
To run the script, you can run the following command in your terminal:
```bash
npx ts-node transaction.ts
```
If the transaction was successful, in your terminal you'll see the transaction hash has been printed out.
> ### Note
>
> Viem requires that you prepend your private key with `0x`. Many wallets omit this `0x`, so verify you've included it as you replace `INSERT_PRIVATE_KEY`.
You can also use the `balances.ts` script to check that the balances for the origin and receiving accounts have changed. The entire workflow would look like this:
{% code overflow="wrap" %}
```shell
npx ts-node balances.tsThe balance of 0x3B939FeaD1557C741Ff06492FD0127bd287A421e is: 3601.72 DEVThe balance of 0x78F34038c82638E0563b974246D421154C26b004 is: 0 DEV
npx ts-node transaction.ts Attempting to send transaction from 0x3B939FeaD1557C741Ff06492FD0127bd287A421e to 0x78F34038c82638E0563b974246D421154C26b004 Transaction successful with hash: 0xc482d907b2ae4ca1202c6cc5b486694b8439a9853caad9c2cdafec39defa1968 npx ts-node balances.ts The balance of 0x3B939FeaD1557C741Ff06492FD0127bd287A421e is: 3600.72 DEV The balance of 0x78F34038c82638E0563b974246D421154C26b004 is: 1 DEV
```
{% endcode %}
### Deploy a Contract
The contract you'll be compiling and deploying in the next couple of sections is a simple incrementer contract, arbitrarily named `Incrementer.sol`. You can get started by creating a file for the contract:
```bash
touch Incrementer.sol
```
Next, you can add the Solidity code to the file:
```solidity
// SPDX-License-Identifier: MIT
pragma solidity ^0.8.0;
contract Incrementer {
uint256 public number;
constructor(uint256 _initialNumber) {
number = _initialNumber;
}
function increment(uint256 _value) public {
number = number + _value;
}
function reset() public {
number = 0;
}
}
```
The `constructor` function, which runs when the contract is deployed, sets the initial value of the number variable stored on-chain (the default is `0`). The `increment` function adds the `_value` provided to the current number, but a transaction needs to be sent, which modifies the stored data. Lastly, the `reset` function resets the stored value to zero.
> ### Note
>
> This contract is a simple example for illustration purposes only and does not handle values wrapping around.
#### Compile Contract Script
In this section, you'll create a script that uses the Solidity compiler to output the bytecode and interface (ABI) for the `Incrementer.sol` contract. To get started, you can create a `compile.ts` file by running:
```bash
touch compile.ts
```
Next, you will create the script for this file and complete the following steps:
1. Import the `fs` and `solc` packages
2. Using the `fs.readFileSync` function, you'll read and save the file contents of `Incrementer.sol` to `source`
3. Build the `input` object for the Solidity compiler by specifying the `language`, `sources`, and `settings` to be used
4. Using the `input` object, you can compile the contract using `solc.compile`
5. Extract the compiled contract file and export it to be used in the deployment script
```javascript
// 1. Import packages
const fs = require('fs');
const solc = require('solc');
// 2. Get path and load contract
const source = fs.readFileSync('Incrementer.sol', 'utf8');
// 3. Create input object
const input = {
language: 'Solidity',
sources: {
'Incrementer.sol': {
content: source,
},
},
settings: {
outputSelection: {
'*': {
'*': ['*'],
},
},
},
};
// 4. Compile the contract
const tempFile = JSON.parse(solc.compile(JSON.stringify(input)));
const contractFile = tempFile.contracts['Incrementer.sol']['Incrementer'];
// 5. Export contract data
export default contractFile;
```
#### Deploy Contract Script
With the script for compiling the `Incrementer.sol` contract in place, you can then use the results to send a signed transaction that deploys it. To do so, you can create a file for the deployment script called `deploy.ts`:
```bash
touch deploy.ts
```
Next, you will create the script for this file and complete the following steps:
1. Update your imports to include the `createPublicClient`, `createWalletClient`, and `http` functions from `viem`, the `privateKeyToAccount` function from `viem/accounts`, the network you want to interact with from `viem/chains`, and the `contractFile` from the `compile.ts` file you created in the Compile Contract Script section
2. Set up a viem wallet client for writing chain data, which will be used along with your private key to deploy the `Incrementer` contract. **Note: This is for example purposes only. Never store your private keys in a TypeScript file**
3. Set up a public viem client for reading chain data, which will be used to read the transaction receipt for the deployment
4. Load the contract `bytecode` and `abi` for the compiled contract
5. Create the asynchronous `deploy` function that will be used to deploy the contract via the `walletClient.deployContract` method
6. Use the `walletClient.deployContract` function to sign and send the transaction. You'll need to pass in the contract's ABI and bytecode, the account to deploy the transaction from, and the initial value for the incrementer. Use `await` to wait until the transaction is processed and the transaction hash is returned
7. Use the `publicClient.readContract` function to get the transaction receipt for the deployment. Use `await` to wait until the transaction is processed and the contract address is returned
8. Lastly, run the `deploy` function
```javascript
// 1. Update imports
import { createPublicClient, createWalletClient, http } from 'viem';
import { privateKeyToAccount } from 'viem/accounts';
import { phron } from 'viem/chains';
import contractFile from './compile';
// 2. Create a wallet client for writing chain data
// The private key must be prepended with `0x` to avoid errors
const account = privateKeyToAccount('INSERT_PRIVATE_KEY');
const rpcUrl = 'https://testnet.phron.ai';
const walletClient = createWalletClient({
account,
chain: phron,
transport: http(rpcUrl),
});
// 3. Create a public client for reading chain data
const publicClient = createPublicClient({
chain: phron,
transport: http(rpcUrl),
});
// 4. Load contract information
const bytecode = contractFile.evm.bytecode.object;
const abi = contractFile.abi;
const _initialNumber = 5;
// 5. Create deploy function
const deploy = async () => {
console.log(`Attempting to deploy from account: ${account.address}`);
// 6. Send tx (initial value set to 5)
const contract = await walletClient.deployContract({
abi,
account,
bytecode,
args: [_initialNumber],
});
// 7. Get the transaction receipt for the deployment
const transaction = await publicClient.waitForTransactionReceipt({
hash: contract,
});
console.log(`Contract deployed at address: ${transaction.contractAddress}`);
};
// 8. Call the deploy function
deploy();
```
To run the script, you can enter the following command into your terminal:
```bash
npx ts-node deploy.ts
```
If successful, the contract's address will be displayed in the terminal.
{% code overflow="wrap" %}
```shell
npx ts-node deploy.tsAttempting to deploy from account: 0x3B939FeaD1557C741Ff06492FD0127bd287A421eContract deployed at address: 0x4503b1086c6780e888194fd9caebca5f65b210c9
```
{% endcode %}
#### Read Contract Data (Call Methods)
Call methods are the type of interaction that doesn't modify the contract's storage (change variables), meaning no transaction needs to be sent. They simply read various storage variables of the deployed contract.
To get started, you can create a file and name it `get.ts`:
```bash
touch get.ts
```
Then you can take the following steps to create the script:
1. Update your imports to include the `createPublicClient` and `http` functions from `viem`, the network you want to interact with from `viem/chains`, and the `contractFile` from the `compile.ts` file you created in the Compile Contract Script section
2. Set up a public viem client for reading chain data, which will be used to read the current number of the `Incrementer` contract
3. Create the `contractAddress` variable using the address of the deployed contract and the `abi` variable using the `contractFile` from the `compile.ts` file
4. Create the asynchronous `get` function
5. Call the contract using the `publicClient.readContract` function, passing in the `abi`, the name of the function, the `contractAddress`, and any arguments (if needed). You can use `await`, which will return the value requested once the request promise resolves
6. Lastly, call the `get` function
```javascript
// 1. Update imports
import { createPublicClient, http } from 'viem';
import { phron } from 'viem/chains';
import contractFile from './compile';
// 2. Create a public client for reading chain data
const rpcUrl = 'https://testnet.phron.ai';
const client = createPublicClient({
chain: phron,
transport: http(rpcUrl),
});
// 3. Create contract variables
const contractAddress = 'INSERT_CONTRACT_ADDRESS';
const abi = contractFile.abi;
// 4. Create get function
const get = async () => {
console.log(`Making a call to contract at address: ${contractAddress}`);
// 5. Call contract
const data = await client.readContract({
abi,
functionName: 'number',
address: contractAddress,
args: [],
});
console.log(`The current number stored is: ${data}`);
};
// 6. Call get function
get();
```
To run the script, you can enter the following command in your terminal:
```bash
npx ts-node get.ts
```
If successful, the value will be displayed in the terminal.
{% code overflow="wrap" %}
```bash
npx ts-node get.tsMaking a call to contract at address: 0x4503b1086c6780e888194fd9caebca5f65b210c9The current number stored is: 5
```
{% endcode %}
#### Interact with Contract (Send Methods)
Send methods are the type of interactions that modify the contract's storage (change variables), meaning a transaction needs to be signed and sent. In this section, you'll create two scripts: one to increment and one to reset the incrementer. To get started, you can create a file for each script and name them `increment.ts` and `reset.ts`:
```bash
touch increment.ts reset.ts
```
Open the `increment.ts` file and take the following steps to create the script:
1. Update your imports to include the `createWalletClient` and `http` functions from `viem`, the network you want to interact with from `viem/chains`, and the `contractFile` from the `compile.ts` file you created in the Compile Contract Script section
2. Set up a viem wallet client for writing chain data, which will be used along with your private key to send a transaction. **Note: This is for example purposes only. Never store your private keys in a TypeScript file**
3. Set up a public viem client for reading chain data, which will be used to wait for the transaction receipt
4. Create the `contractAddress` variable using the address of the deployed contract, the `abi` variable using the `contractFile` from the `compile.ts` file, and the `_value` to increment the contract by
5. Create the asynchronous `increment` function
6. Call the contract using the `walletClient.writeContract` function, passing in the `abi`, the name of the function, the `contractAddress`, and the `_value`. You can use `await`, which will return the transaction hash once the request promise resolves
7. Use the `publicClient.waitForTransactionReceipt` function to wait for the transaction receipt, signaling that the transaction has been completed. This is particularly helpful if you need the transaction receipt or if you're running the `get.ts` script directly after this one to check that the current number has been updated as expected
8. Lastly, call the `increment` function
{% code overflow="wrap" %}
```javascript
// 1. Update imports
import { createPublicClient, createWalletClient, http } from 'viem';
import { privateKeyToAccount } from 'viem/accounts';
import { phron } from 'viem/chains';
import contractFile from './compile';
// 2. Create a wallet client for writing chain data
const account = privateKeyToAccount('INSERT_PRIVATE_KEY');
const rpcUrl = 'https://testnet.phron.ai';
const walletClient = createWalletClient({
account,
chain: phron,
transport: http(rpcUrl),
});
// 3. Create a public client for reading chain data
const publicClient = createPublicClient({
chain: phron,
transport: http(rpcUrl),
});
// 4. Create contract variables
const contractAddress = 'INSERT_CONTRACT_ADDRESS';
const abi = contractFile.abi;
const _value = 3;
// 5. Create increment function
const increment = async () => {
console.log(
`Calling the increment by ${_value} function in contract at address: ${contractAddress}`
);
// 6. Call contract
const hash = await walletClient.writeContract({
abi,
functionName: 'increment',
address: contractAddress,
args: [_value],
});
// 7. Wait for the transaction receipt
await publicClient.waitForTransactionReceipt({
hash,
});
console.log(`Tx successful with hash: ${hash}`);
};
// 8. Call increment function
increment();
```
{% endcode %}
To run the script, you can enter the following command in your terminal:
```bash
npx ts-node increment.ts
```
If successful, the transaction hash will be displayed in the terminal. You can use the `get.ts` script alongside the `increment.ts` script to make sure that value is changing as expected.
{% code overflow="wrap" %}
```shell
npx ts-node get.tsMaking a call to contract at address: 0x4503b1086c6780e888194fd9caebca5f65b210c9The current number stored is: 5npx ts-node increment.tsCalling the increment by 3 function in contract at address: 0x4503b1086c6780e888194fd9caebca5f65b210c9Tx successful with hash: 0x041c9767e7a96f60f372341647430560569fd6ff64a27b4b9c6241e55dde57e1npx ts-node get.tsMaking a call to contract at address: 0x4503b1086c6780e888194fd9caebca5f65b210c9The current number stored is: 8
```
{% endcode %}
Next, you can open the `reset.ts` file and take the following steps to create the script:
1. Update your imports to include the `createWalletClient` and `http` functions from `viem`, the network you want to interact with from `viem/chains`, and the `contractFile` from the `compile.ts` file you created in the Compile Contract Script section
2. Set up a viem wallet client for writing chain data, which will be used along with your private key to send a transaction. **Note: This is for example purposes only. Never store your private keys in a TypeScript file**
3. Set up a public viem client for reading chain data, which will be used to wait for the transaction receipt
4. Create the `contractAddress` variable using the address of the deployed contract and the `abi` variable using the `contractFile` from the `compile.ts` file to increment the contract by
5. Create the asynchronous `reset` function
6. Call the contract using the `walletClient.writeContract` function, passing in the `abi`, the name of the function, the `contractAddress`, and an empty array for the arguments. You can use `await`, which will return the transaction hash once the request promise resolves
7. Use the `publicClient.waitForTransactionReceipt` function to wait for the transaction receipt, signaling that the transaction has been completed. This is particularly helpful if you need the transaction receipt or if you're running the `get.ts` script directly after this one to check that the current number has been reset to `0`
8. Lastly, call the `reset` function
```javascript
// 1. Update imports
import { createPublicClient, createWalletClient, http } from 'viem';
import { privateKeyToAccount } from 'viem/accounts';
import { phron } from 'viem/chains';
import contractFile from './compile';
// 2. Create a wallet client for writing chain data
const account = privateKeyToAccount('INSERT_PRIVATE_KEY');
const rpcUrl = 'https://testnet.phron.ai';
const walletClient = createWalletClient({
account,
chain: phron,
transport: http(rpcUrl),
});
// 3. Create a public client for reading chain data
const publicClient = createPublicClient({
chain: phron,
transport: http(rpcUrl),
});
// 4. Create contract variables
const contractAddress = 'INSERT_CONTRACT_ADDRESS';
const abi = contractFile.abi;
// 5. Create reset function
const reset = async () => {
console.log(
`Calling the reset function in contract at address: ${contractAddress}`
);
// 6. Call contract
const hash = await walletClient.writeContract({
abi,
functionName: 'reset',
address: contractAddress,
args: [],
});
// 7. Wait for the transaction receipt
await publicClient.waitForTransactionReceipt({
hash,
});
console.log(`Tx successful with hash: ${hash}`);
};
// 8. Call reset function
reset();
```
To run the script, you can enter the following command in your terminal:
```bash
npx ts-node reset.ts
```
If successful, the transaction hash will be displayed in the terminal. You can use the `get.ts` script alongside the `reset.ts` script to make sure that value is changing as expected.
{% code overflow="wrap" %}
```bash
npx ts-node get.tsMaking a call to contract at address: 0x4503b1086c6780e888194fd9caebca5f65b210c9The current number stored is: 8npx ts-node reset.tsCalling the reset function in contract at address: 0x4503b1086c6780e888194fd9caebca5f65b210c9Tx successful with hash: 0xc1a772131ccf6a03675ff3e88798a6e70a99e145eeb0e98170ff2e3345ee14a7npx ts-node get.tsMaking a call to contract at address: 0x4503b1086c6780e888194fd9caebca5f65b210c9The current number stored is: 0
```
{% endcode %}
This tutorial is for educational purposes only. As such, any contracts or code created in this tutorial should not be used in production.The information presented herein has been provided by third parties and is made available solely for general information purposes. Phron does not endorse any project listed and described on the Phron Doc Website (). Phron does not warrant the accuracy, completeness or usefulness of this information. Any reliance you place on such information is strictly at your own risk. Phron disclaims all liability and responsibility arising from any reliance placed on this information by you or by anyone who may be informed of any of its contents. All statements and/or opinions expressed in these materials are solely the responsibility of the person or entity providing those materials and do not necessarily represent the opinion of Phron. The information should not be construed as professional or financial advice of any kind. Advice from a suitably qualified professional should always be sought in relation to any particular matter or circumstance. The information herein may link to or integrate with other websites operated or content provided by third parties, and such other websites may link to this website. Phron has no control over any such other websites or their content and will have no liability arising out of or related to such websites or their content. The existence of any such link does not constitute an endorsement of such websites, the content of the websites, or the operators of the websites. These links are being provided to you only as a convenience and you release and hold Phron harmless from any and all liability arising from your use of this information or the information provided by any third-party website or service.
# Web3.js
## Web3.js JavaScript Library
### Introduction
[Web3.js](https://web3js.readthedocs.io/) is a set of libraries that allow developers to interact with Ethereum nodes using HTTP, IPC, or WebSocket protocols with JavaScript. Phron has an Ethereum-like API available that is fully compatible with Ethereum-style JSON-RPC invocations. Therefore, developers can leverage this compatibility and use the Web3.js library to interact with a Phron node as if they were doing so on Ethereum.
In this guide, you'll learn how to use the Web3.js library to send a transaction and deploy a contract on Phron.
### Checking Prerequisites
For the examples in this guide, you will need to have the following:
* An account with funds. You can get DEV tokens for testing on Phron once every 24 hours from the Phron Faucet
* To test out the examples in this guide on Phron, you will need to have your own endpoint and API key, which you can get from one of the supported Endpoint Providers
> ### Note
>
> The examples in this guide assume you have a MacOS or Ubuntu 22.04-based environment and will need to be adapted accordingly for Windows.
### Installing Web3.js
To get started, you'll need to start a basic JavaScript project. First, create a directory to store all of the files you'll be creating throughout this guide, and initialize the project with the following command:
```bash
mkdir web3-examples && cd web3-examples && npm init --y
```
For this guide, you'll need to install the Web3.js library and the Solidity compiler. To install both NPM packages, you can run the following command:
```bash
npm install web3 solc@0.8.0
```
### Setup Web3.js with Phron
You can configure Web3.js to work with any of the Phron networks. To configure your project for Phron, you will need to have your own endpoint and API key, which you can get from one of the supported Endpoint Providers.
The simplest way to get started with each of the networks is as follows:
```javascript
const { Web3 } = require('web3');
// Create Web3 instance
const web3 = new Web3('INSERT_RPC_API_ENDPOINT'); // Insert your RPC URL here
```
Save this code snippet, as you'll need it for the scripts that are used in the following sections.
### Send a Transaction
During this section, you'll be creating a couple of scripts. The first one will be to check the balances of your accounts before trying to send a transaction. The second script will actually send the transaction.
You can also use the balance script to check the account balances after the transaction has been sent.
#### Check Balances Script
You'll only need one file to check the balances of both addresses before and after the transaction is sent. To get started, you can create a `balances.js` file by running:
```bash
touch balances.js
```
Next, you will create the script for this file and complete the following steps:
1. Set up the Web3 provider
2. Define the `addressFrom` and `addressTo` variables
3. Create the asynchronous `balances` function, which wraps the `web3.eth.getBalance` method
4. Use the `web3.eth.getBalance` function to fetch the balances for the `addressFrom` and `addressTo` addresses. You can also leverage the `web3.utils.fromWei` function to transform the balance into a more readable number in DEV
5. Lastly, run the `balances` function
```javascript
// 1. Add the Web3 provider logic
// {...}
// 2. Create address variables
const addressFrom = 'INSERT_FROM_ADDRESS';
const addressTo = 'INSERT_TO_ADDRESS';
// 3. Create balances function
const balances = async () => {
// 4. Fetch balance info
const balanceFrom = web3.utils.fromWei(
await web3.eth.getBalance(addressFrom),
'ether'
);
const balanceTo = web3.utils.fromWei(
await web3.eth.getBalance(addressTo),
'ether'
);
console.log(`The balance of ${addressFrom} is: ${balanceFrom} DEV`);
console.log(`The balance of ${addressTo} is: ${balanceTo} DEV`);
};
// 5. Call balances function
balances();
```
View the complete script
```javascript
const { Web3 } = require('web3');
// 1. Add the Web3 provider logic here:
const providerRPC = {
development: 'http://localhost:9944',
phron: 'https://testnet.phron.ai',
};
const web3 = new Web3(providerRPC.phron); // Change to correct network
// 2. Create address variables
const addressFrom = 'INSERT_FROM_ADDRESS';
const addressTo = 'INSERT_TO_ADDRESS';
// 3. Create balances function
const balances = async () => {
// 4. Fetch balance info
const balanceFrom = web3.utils.fromWei(await web3.eth.getBalance(addressFrom), 'ether');
const balanceTo = web3.utils.fromWei(await web3.eth.getBalance(addressTo), 'ether');
console.log(`The balance of ${addressFrom} is: ${balanceFrom} DEV`);
console.log(`The balance of ${addressTo} is: ${balanceTo} DEV`);
};
// 5. Call balances function
balances();
```
To run the script and fetch the account balances, you can run the following command:
```bash
node balances.js
```
If successful, the balances for the origin and receiving address will be displayed in your terminal in DEV.
#### Send Transaction Script
You'll only need one file to execute a transaction between accounts. For this example, you'll be transferring 1 DEV token from an origin address (from which you hold the private key) to another address. To get started, you can create a `transaction.js` file by running:
```bash
touch transaction.js
```
Next, you will create the script for this file and complete the following steps:
1. Set up the Web3 provider
2. Define the `accountFrom`, including the `privateKey`, and the `addressTo` variables. The private key is required to create a wallet instance. **Note: This is for example purposes only. Never store your private keys in a JavaScript file**
3. Create the asynchronous `send` function, which wraps the transaction object, and the sign and send transaction functions
4. Create and sign the transaction using the `web3.eth.accounts.signTransaction` function. Pass in the `gas`, `addressTo`, `value`, `gasPrice`, and `nonce` for the transaction along with the sender's `privateKey`
5. Send the signed transaction using the `web3.eth.sendSignedTransaction` method and pass in the raw transaction. Then use `await` to wait until the transaction is processed and the transaction receipt is returned
6. Lastly, run the `send` function
```javascript
// 1. Add the Web3 provider logic
// {...}
// 2. Create account variables
const accountFrom = {
privateKey: 'INSERT_YOUR_PRIVATE_KEY',
address: 'INSERT_PUBLIC_ADDRESS_OF_PK',
};
const addressTo = 'INSERT_TO_ADDRESS'; // Change addressTo
// 3. Create send function
const send = async () => {
console.log(
`Attempting to send transaction from ${accountFrom.address} to ${addressTo}`
);
// 4. Sign transaction with PK
const createTransaction = await web3.eth.accounts.signTransaction(
{
gas: 21000,
to: addressTo,
value: web3.utils.toWei('1', 'ether'),
gasPrice: await web3.eth.getGasPrice(),
nonce: await web3.eth.getTransactionCount(accountFrom.address),
},
accountFrom.privateKey
);
// 5. Send transaction and wait for receipt
const createReceipt = await web3.eth.sendSignedTransaction(
createTransaction.rawTransaction
);
console.log(
`Transaction successful with hash: ${createReceipt.transactionHash}`
);
};
// 6. Call send function
send();
```
View the complete script
```javascript
const { Web3 } = require('web3');
// 1. Add the Web3 provider logic
const providerRPC = {
development: 'http://localhost:9944',
phron: 'https://testnet.phron.ai',
};
const web3 = new Web3(providerRPC.phron); // Change to correct network
// 2. Create account variables
const accountFrom = {
privateKey: 'INSERT_YOUR_PRIVATE_KEY',
address: 'INSERT_PUBLIC_ADDRESS_OF_PK',
};
const addressTo = 'INSERT_TO_ADDRESS';
// 3. Create send function
const send = async () => {
console.log(
`Attempting to send transaction from ${accountFrom.address} to ${addressTo}`
);
// 4. Sign transaction with PK
const createTransaction = await web3.eth.accounts.signTransaction(
{
gas: 21000,
to: addressTo,
value: web3.utils.toWei('1', 'ether'),
gasPrice: await web3.eth.getGasPrice(),
nonce: await web3.eth.getTransactionCount(accountFrom.address),
},
accountFrom.privateKey
);
// 5. Send transaction and wait for receipt
const createReceipt = await web3.eth.sendSignedTransaction(
createTransaction.rawTransaction
);
console.log(
`Transaction successful with hash: ${createReceipt.transactionHash}`
);
};
// 6. Call send function
send();
```
To run the script, you can run the following command in your terminal:
```bash
node transaction.js
```
If the transaction was successful, in your terminal, you'll see the transaction hash has been printed out.
You can also use the `balances.js` script to check that the balances for the origin and receiving accounts have changed. The entire workflow would look like this:
{% code overflow="wrap" %}
```bash
node balances.jsThe balance of 0x3B939FeaD1557C741Ff06492FD0127bd287A421e is: 3603.67979115380310679 DEVThe balance of 0xe29A0699e079FeBEe94A02f35C31B026f90F6040 is: 0. DEVnode transaction.jsAttempting to send transaction from 0x3B939FeaD1557C741Ff06492FD0127bd287A421e to 0xe29A0699e079FeBEe94A02f35C31B026f90F6040Transaction successful with hash: 0xf1d628ed12c5f40e03e29aa2c23c8c09680ee595c60607c7363a81c0be8ef3cbnode balances.jsThe balance of 0x3B939FeaD1557C741Ff06492FD0127bd287A421e is: 3602.67978852880310679 DEVThe balance of 0xe29A0699e079FeBEe94A02f35C31B026f90F6040 is: 1 DEV
```
{% endcode %}
#### Common Errors When Sending Transactions
When sending a transaction with Web3.js, it is important that you have all of the required data for the transaction. You'll need to provide the `from` address or the `nonce` of the sender, the `gas` or `gasLimit`, and the `gasPrice`.
If you do not specify the `from` address or the `nonce` of the sender, you may receive the following error:
{% code overflow="wrap" %}
```bash
UnableToPopulateNonceError: Invalid value given "UnableToPopulateNonceError". Error: unable to populate nonce, no from address available.
```
{% endcode %}
To fix this, simply add either the `from` or `nonce` field to the transaction object.
If you do not specify the gas correctly, you may receive the following error:
{% code overflow="wrap" %}
```bash
MissingGasError: Invalid value given "gas: 0x5208, gasPrice: undefined, maxPriorityFeePerGas: undefined, maxFeePerGas: undefined". Error: "gas" is missing.
```
{% endcode %}
To resolve this error, you'll need to make sure that you've provided a `gasPrice` for the transaction. You can use `await web3.eth.getGasPrice()` to programmatically get this value.
### Deploy a Contract
The contract you'll be compiling and deploying in the next couple of sections is a simple incrementer contract, arbitrarily named `Incrementer.sol`. You can get started by creating a file for the contract:
```bash
touch Incrementer.sol
```
Next, you can add the Solidity code to the file:
```solidity
// SPDX-License-Identifier: MIT
pragma solidity ^0.8.0;
contract Incrementer {
uint256 public number;
constructor(uint256 _initialNumber) {
number = _initialNumber;
}
function increment(uint256 _value) public {
number = number + _value;
}
function reset() public {
number = 0;
}
}
```
The `constructor` function, which runs when the contract is deployed, sets the initial value of the number variable stored on-chain (the default is `0`). The `increment` function adds the `_value` provided to the current number, but a transaction needs to be sent, which modifies the stored data. Lastly, the `reset` function resets the stored value to zero.
> ### Note
>
> This contract is a simple example for illustration purposes only and does not handle values wrapping around.
#### Compile Contract Script
In this section, you'll create a script that uses the Solidity compiler to output the bytecode and interface (ABI) for the `Incrementer.sol` contract. To get started, you can create a `compile.js` file by running:
```bash
touch compile.js
```
Next, you will create the script for this file and complete the following steps:
1. Import the `fs` and `solc` packages
2. Using the `fs.readFileSync` function, you'll read and save the file contents of `Incrementer.sol` to `source`
3. Build the `input` object for the Solidity compiler by specifying the `language`, `sources`, and `settings` to be used
4. Using the `input` object, you can compile the contract using `solc.compile`
5. Extract the compiled contract file and export it to be used in the deployment script
```javascript
// 1. Import packages
const fs = require('fs');
const solc = require('solc');
// 2. Get path and load contract
const source = fs.readFileSync('Incrementer.sol', 'utf8');
// 3. Create input object
const input = {
language: 'Solidity',
sources: {
'Incrementer.sol': {
content: source,
},
},
settings: {
outputSelection: {
'*': {
'*': ['*'],
},
},
},
};
// 4. Compile the contract
const tempFile = JSON.parse(solc.compile(JSON.stringify(input)));
const contractFile = tempFile.contracts['Incrementer.sol']['Incrementer'];
// 5. Export contract data
module.exports = contractFile;
```
#### Deploy Contract Script
With the script for compiling the `Incrementer.sol` contract in place, you can then use the results to send a signed transaction that deploys it. To do so, you can create a file for the deployment script called `deploy.js`:
```bash
touch deploy.js
```
Next, you will create the script for this file and complete the following steps:
1. Import the contract file from `compile.js`
2. Set up the Web3 provider
3. Define the `accountFrom`, including the `privateKey`, and the `addressTo` variables. The private key is required to create a wallet instance. **Note: This is for example purposes only. Never store your private keys in a JavaScript file**
4. Save the `bytecode` and `abi` for the compiled contract
5. Create the asynchronous `deploy` function that will be used to deploy the contract
6. Create the contract instance using the `web3.eth.Contract` function
7. Create the constructor and pass in the `bytecode` and the initial value for the incrementer. For this example, you can set the initial value to `5`
8. Create and sign the transaction using the `web3.eth.accounts.signTransaction` function. Pass in the `data`, `gas`, `gasPrice`, and `nonce` for the transaction along with the sender's `privateKey`
9. Send the signed transaction using the `web3.eth.sendSignedTransaction` method and pass in the raw transaction. Then use `await` to wait until the transaction is processed and the transaction receipt is returned
10. Lastly, run the `deploy` function
```javascript
// 1. Import the contract file
const contractFile = require('./compile');
// 2. Add the Web3 provider logic
// {...}
// 3. Create address variables
const accountFrom = {
privateKey: 'INSERT_YOUR_PRIVATE_KEY',
address: 'INSERT_PUBLIC_ADDRESS_OF_PK',
};
// 4. Get the bytecode and API
const bytecode = contractFile.evm.bytecode.object;
const abi = contractFile.abi;
// 5. Create deploy function
const deploy = async () => {
console.log(`Attempting to deploy from account ${accountFrom.address}`);
// 6. Create contract instance
const incrementer = new web3.eth.Contract(abi);
// 7. Create constructor transaction
const incrementerTx = incrementer.deploy({
data: bytecode,
arguments: [5],
});
// 8. Sign transaction with PK
const createTransaction = await web3.eth.accounts.signTransaction(
{
data: incrementerTx.encodeABI(),
gas: await incrementerTx.estimateGas(),
gasPrice: await web3.eth.getGasPrice(),
nonce: await web3.eth.getTransactionCount(accountFrom.address),
},
accountFrom.privateKey
);
// 9. Send transaction and wait for receipt
const createReceipt = await web3.eth.sendSignedTransaction(
createTransaction.rawTransaction
);
console.log(`Contract deployed at address: ${createReceipt.contractAddress}`);
};
// 10. Call deploy function
deploy();
```
View the complete script
```javascript
// 1. Import web3 and the contract file
const { Web3 } = require('web3');
const contractFile = require('./compile');
// 2. Add the Web3 provider logic
const providerRPC = {
development: 'http://localhost:9944',
phron: 'https://testnet.phron.ai',
};
const web3 = new Web3(providerRPC.phron); // Change to correct network
// 3. Create address variables
const accountFrom = {
privateKey: 'INSERT_YOUR_PRIVATE_KEY',
address: 'INSERT_PUBLIC_ADDRESS_OF_PK',
};
// 4. Get the bytecode and API
const bytecode = contractFile.evm.bytecode.object;
const abi = contractFile.abi;
// 5. Create deploy function
const deploy = async () => {
console.log(`Attempting to deploy from account ${accountFrom.address}`);
// 6. Create contract instance
const incrementer = new web3.eth.Contract(abi);
// 7. Create constructor transaction
const incrementerTx = incrementer.deploy({
data: bytecode,
arguments: [5],
});
// 8. Sign transaction with PK
const createTransaction = await web3.eth.accounts.signTransaction(
{
data: incrementerTx.encodeABI(),
gas: await incrementerTx.estimateGas(),
gasPrice: await web3.eth.getGasPrice(),
nonce: await web3.eth.getTransactionCount(accountFrom.address),
},
accountFrom.privateKey
);
// 9. Send transaction and wait for receipt
const createReceipt = await web3.eth.sendSignedTransaction(
createTransaction.rawTransaction
);
console.log(`Contract deployed at address: ${createReceipt.contractAddress}`);
};
// 10. Call deploy function
deploy();
```
To run the script, you can enter the following command into your terminal:
```bash
node deploy.js
```
If successful, the contract's address will be displayed in the terminal.
{% code overflow="wrap" %}
```bash
node deploy.jsAttempting to deploy from account 0x3B939FeaD1557C741Ff06492FD0127bd287A421eContract deployed at address: 0x6dcb33a7f6235e74fd553b50c96f900707142892
```
{% endcode %}
#### Read Contract Data (Call Methods)
Call methods are the type of interaction that doesn't modify the contract's storage (change variables), meaning no transaction needs to be sent. They simply read various storage variables of the deployed contract.
To get started, you can create a file and name it `get.js`:
```bash
touch get.js
```
Then you can take the following steps to create the script:
1. Import the `abi` from the `compile.js` file
2. Set up the Web3 provider
3. Create the `contractAddress` variable using the address of the deployed contract
4. Create an instance of the contract using the `web3.eth.Contract` function and passing in the `abi` and `contractAddress`
5. Create the asynchronous `get` function
6. Use the contract instance to call one of the contract's methods and pass in any inputs if necessary. For this example, you will call the `number` method which doesn't require any inputs. You can use `await`, which will return the value requested once the request promise resolves
7. Lastly, call the `get` function
```javascript
// 1. Import the contract ABI
const { abi } = require('./compile');
// 2. Add the Web3 provider logic
// {...}
// 3. Create address variables
const contractAddress = 'INSERT_CONTRACT_ADDRESS';
// 4. Create contract instance
const incrementer = new web3.eth.Contract(abi, contractAddress);
// 5. Create get function
const get = async () => {
console.log(`Making a call to contract at address: ${contractAddress}`);
// 6. Call contract
const data = await incrementer.methods.number().call();
console.log(`The current number stored is: ${data}`);
};
// 7. Call get function
get();
```
View the complete script
```javascript
// 1. Import Web3js and the contract ABI
const { Web3 } = require('web3');
const { abi } = require('./compile');
// 2. Add the Web3 provider logic
const providerRPC = {
development: 'http://localhost:9944',
phron: 'https://testnet.phron.ai',
};
const web3 = new Web3(providerRPC.phron); // Change to correct network
// 3. Create address variables
const contractAddress = 'INSERT_CONTRACT_ADDRESS';
// 4. Create contract instance
const incrementer = new web3.eth.Contract(abi, contractAddress);
// 5. Create get function
const get = async () => {
console.log(`Making a call to contract at address: ${contractAddress}`);
// 6. Call contract
const data = await incrementer.methods.number().call();
console.log(`The current number stored is: ${data}`);
};
// 7. Call get function
get();
```
To run the script, you can enter the following command in your terminal:
```bash
node get.js
```
If successful, the value will be displayed in the terminal.
#### Interact with Contract (Send Methods)
Send methods are the type of interaction that modifies the contract's storage (change variables), meaning a transaction needs to be signed and sent. In this section, you'll create two scripts: one to increment and one to reset the incrementer. To get started, you can create a file for each script and name them `increment.js` and `reset.js`:
```bash
touch increment.js reset.js
```
Open the `increment.js` file and take the following steps to create the script:
1. Import the `abi` from the `compile.js` file
2. Set up the Web3 provider
3. Define the `privateKey` for the origin account, the `contractAddress` of the deployed contract, and the `_value` to increment by. The private key is required to create a wallet instance. **Note: This is for example purposes only. Never store your private keys in a JavaScript file**
4. Create an instance of the contract using the `web3.eth.Contract` function and passing in the `abi` and `contractAddress`
5. Use the contract instance to build the increment transaction using the `methods.increment` function and passing in the `_value` as an input
6. Create the asynchronous `increment` function
7. Use the contract instance and the increment transaction you previously created to sign the transaction with the sender's private key. You'll use the `web3.eth.accounts.signTransaction` function and specify the `to` address, `data`, `gas`, `gasPrice`, and `nonce` for the transaction
8. Send the signed transaction using the `web3.eth.sendSignedTransaction` method and pass in the raw transaction. Then use `await` to wait until the transaction is processed and the transaction receipt is returned
9. Lastly, call the `increment` function
```javascript
// 1. Import the contract ABI
const { abi } = require('./compile');
// 2. Add the Web3 provider logic
// {...}
// 3. Create variables
const accountFrom = {
privateKey: 'INSERT_YOUR_PRIVATE_KEY',
address: 'INSERT_PUBLIC_ADDRESS_OF_PK',
};
const contractAddress = 'INSERT_CONTRACT_ADDRESS';
const _value = 3;
// 4. Create contract instance
const incrementer = new web3.eth.Contract(abi, contractAddress);
// 5. Build the increment transaction
const incrementTx = incrementer.methods.increment(_value);
// 6. Create increment function
const increment = async () => {
console.log(
`Calling the increment by ${_value} function in contract at address: ${contractAddress}`
);
// 7. Sign transaction with PK
const createTransaction = await web3.eth.accounts.signTransaction(
{
to: contractAddress,
data: incrementTx.encodeABI(),
gas: await incrementTx.estimateGas(),
gasPrice: await web3.eth.getGasPrice(),
nonce: await web3.eth.getTransactionCount(accountFrom.address),
},
accountFrom.privateKey
);
// 8. Send transaction and wait for receipt
const createReceipt = await web3.eth.sendSignedTransaction(
createTransaction.rawTransaction
);
console.log(`Tx successful with hash: ${createReceipt.transactionHash}`);
};
// 9. Call increment function
increment();
```
View the complete script
```javascript
// 1. Import Web3js and the contract ABI
const { Web3 } = require('web3');
const { abi } = require('./compile');
// 2. Add the Web3 provider logic
const providerRPC = {
development: 'http://localhost:9944',
phron: 'https://testnet.phron.ai',
};
const web3 = new Web3(providerRPC.phron); // Change to correct network
// 3. Create variables
const accountFrom = {
privateKey: 'INSERT_YOUR_PRIVATE_KEY',
address: 'INSERT_PUBLIC_ADDRESS_OF_PK',
};
const contractAddress = 'INSERT_CONTRACT_ADDRESS';
const _value = 3;
// 4. Create contract instance
const incrementer = new web3.eth.Contract(abi, contractAddress);
// 5. Build increment transaction
const incrementTx = incrementer.methods.increment(_value);
// 6. Create increment function
const increment = async () => {
console.log(
`Calling the increment by ${_value} function in contract at address: ${contractAddress}`
);
// 7. Sign transaction with PK
const createTransaction = await web3.eth.accounts.signTransaction(
{
to: contractAddress,
data: incrementTx.encodeABI(),
gas: await incrementTx.estimateGas(),
gasPrice: await web3.eth.getGasPrice(),
nonce: await web3.eth.getTransactionCount(accountFrom.address),
},
accountFrom.privateKey
);
// 8. Send transaction and wait for receipt
const createReceipt = await web3.eth.sendSignedTransaction(
createTransaction.rawTransaction
);
console.log(`Tx successful with hash: ${createReceipt.transactionHash}`);
};
// 9. Call increment function
increment();
```
To run the script, you can enter the following command in your terminal:
```bash
node increment.js
```
If successful, the transaction hash will be displayed in the terminal. You can use the `get.js` script alongside the `increment.js` script to make sure that value is changing as expected:
{% code overflow="wrap" %}
```bash
node get.jsMaking a call to contract at address: 0x6dcb33a7f6235e74fd553b50c96f900707142892The current number stored is: 5node increment.jsCalling the increment by 3 function in contract at address: 0x6dcb33a7f6235e74fd553b50c96f900707142892Tx successful with hash: 0xb03d1426376e7efc49d8b6c69aaf91e548578db7fd4a9ba575dbd8030821f6a3node get.jsMaking a call to contract at address: 0x6dcb33a7f6235e74fd553b50c96f900707142892The current number stored is: 8
```
{% endcode %}
Next, you can open the `reset.js` file and take the following steps to create the script:
1. Import the `abi` from the `compile.js` file
2. Set up the Web3 provider
3. Define the `privateKey` for the origin account and the `contractAddress` of the deployed contract. The private key is required to create a wallet instance. **Note: This is for example purposes only. Never store your private keys in a JavaScript file**
4. Create an instance of the contract using the `web3.eth.Contract` function and passing in the `abi` and `contractAddress`
5. Use the contract instance to build the reset transaction using the `methods.reset` function
6. Create the asynchronous `reset` function
7. Use the contract instance and the reset transaction you previously created to sign the transaction with the sender's private key. You'll use the `web3.eth.accounts.signTransaction` function and specify the `to` address, `data`, `gas`, `gasPrice`, and `nonce` for the transaction
8. Send the signed transaction using the `web3.eth.sendSignedTransaction` method and pass in the raw transaction. Then use `await` to wait until the transaction is processed and the transaction receipt is returned
9. Lastly, call the `reset` function
```javascript
// 1. Import the contract ABI
const { abi } = require('./compile');
// 2. Add the Web3 provider logic
// {...}
// 3. Create variables
const accountFrom = {
privateKey: 'INSERT_YOUR_PRIVATE_KEY',
address: 'INSERT_PUBLIC_ADDRESS_OF_PK',
};
const contractAddress = 'INSERT_CONTRACT_ADDRESS';
// 4. Create a contract instance
const incrementer = new web3.eth.Contract(abi, contractAddress);
// 5. Build reset transaction
const resetTx = incrementer.methods.reset();
// 6. Create reset function
const reset = async () => {
console.log(
`Calling the reset function in contract at address: ${contractAddress}`
);
// 7. Sign transaction with PK
const createTransaction = await web3.eth.accounts.signTransaction(
{
to: contractAddress,
data: resetTx.encodeABI(),
gas: await resetTx.estimateGas(),
gasPrice: await web3.eth.getGasPrice(),
nonce: await web3.eth.getTransactionCount(accountFrom.address),
},
accountFrom.privateKey
);
// 8. Send transaction and wait for receipt
const createReceipt = await web3.eth.sendSignedTransaction(
createTransaction.rawTransaction
);
console.log(`Tx successful with hash: ${createReceipt.transactionHash}`);
};
// 9. Call reset function
reset();
```
View the complete script
```javascript
// 1. Import Web3js and the contract ABI
const { Web3 } = require('web3');
const { abi } = require('./compile');
// 2. Add the Web3 provider logic
const providerRPC = {
development: 'http://localhost:9944',
phron: 'https://testnet.phron.ai',
};
const web3 = new Web3(providerRPC.phron); // Change to correct network
// 3. Create variables
const accountFrom = {
privateKey: 'INSERT_YOUR_PRIVATE_KEY',
address: 'INSERT_PUBLIC_ADDRESS_OF_PK',
};
const contractAddress = 'INSERT_CONTRACT_ADDRESS';
// 4. Create contract instance
const incrementer = new web3.eth.Contract(abi, contractAddress);
// 5. Build reset transaction
const resetTx = incrementer.methods.reset();
// 6. Create reset function
const reset = async () => {
console.log(`Calling the reset function in contract at address: ${contractAddress}`);
// 7. Sign transaction with PK
const createTransaction = await web3.eth.accounts.signTransaction(
{
to: contractAddress,
data: resetTx.encodeABI(),
gas: await resetTx.estimateGas(),
gasPrice: await web3.eth.getGasPrice(),
nonce: await web3.eth.getTransactionCount(accountFrom.address),
},
accountFrom.privateKey
);
// 8. Send transaction and wait for receipt
const createReceipt = await web3.eth.sendSignedTransaction(createTransaction.rawTransaction);
console.log(`Tx successful with hash: ${createReceipt.transactionHash}`);
};
// 9. Call reset function
reset();
```
To run the script, you can enter the following command in your terminal:
```bash
node reset.js
```
If successful, the transaction hash will be displayed in the terminal. You can use the `get.js` script alongside the `reset.js` script to make sure that value is changing as expected:
{% code overflow="wrap" %}
```bash
node get.jsMaking a call to contract at address: 0x6dcb33a7f6235e74fd553b50c96f900707142892The current number stored is: 8node reset.jsCalling the reset function in contract at address: 0x6dcb33a7f6235e74fd553b50c96f900707142892Tx successful with hash: 0x557e908ca4da05d5af50983dbc116fbf8049bb2e86b9ec1e9f7d3f516b8a4c55node get.jsMaking a call to contract at address: 0x6dcb33a7f6235e74fd553b50c96f900707142892The current number stored is: 0
```
{% endcode %}
This tutorial is for educational purposes only. As such, any contracts or code created in this tutorial should not be used in production.The information presented herein has been provided by third parties and is made available solely for general information purposes. Phron does not endorse any project listed and described on the Phron Doc Website (). Phron does not warrant the accuracy, completeness or usefulness of this information. Any reliance you place on such information is strictly at your own risk. Phron disclaims all liability and responsibility arising from any reliance placed on this information by you or by anyone who may be informed of any of its contents. All statements and/or opinions expressed in these materials are solely the responsibility of the person or entity providing those materials and do not necessarily represent the opinion of Phron. The information should not be construed as professional or financial advice of any kind. Advice from a suitably qualified professional should always be sought in relation to any particular matter or circumstance. The information herein may link to or integrate with other websites operated or content provided by third parties, and such other websites may link to this website. Phron has no control over any such other websites or their content and will have no liability arising out of or related to such websites or their content. The existence of any such link does not constitute an endorsement of such websites, the content of the websites, or the operators of the websites. These links are being provided to you only as a convenience and you release and hold Phron harmless from any and all liability arising from your use of this information or the information provided by any third-party website or service.
# Web3.py
## Web3.py Python Library
### Introduction
[Web3.py](https://web3py.readthedocs.io/) is a set of libraries that allow developers to interact with Ethereum nodes using HTTP, IPC, or WebSocket protocols with Python. Phron has an Ethereum-like API available that is fully compatible with Ethereum-style JSON-RPC invocations. Therefore, developers can leverage this compatibility and use the Web3.py library to interact with a Phron python3 as if they were doing so on Ethereum.
In this guide, you'll learn how to use the Web3.py library to send a transaction and deploy a contract on Phron.
### Checking Prerequisites
For the examples in this guide, you will need to have the following:
* An account with funds. You can get DEV tokens for testing on Phron once every 24 hours from the Phron Faucet
* To test out the examples in this guide on Phron, you will need to have your own endpoint and API key, which you can get from one of the supported Endpoint Providers
> ### Note
>
> The examples in this guide assume you have a MacOS or Ubuntu 22.04-based environment and will need to be adapted accordingly for Windows.
### Create a Python Project
To get started, you can create a directory to store all of the files you'll be creating throughout this guide:
```bash
mkdir web3-examples && cd web3-examples
```
For this guide, you'll need to install the Web3.py library and the Solidity compiler. To install both packages, you can run the following command:
```bash
pip3 install web3 py-solc-x solc-select
```
### Setup Web3.py with Phron
Throughout this guide, you'll be creating a bunch of scripts that provide different functionalities, such as sending a transaction, deploying a contract, and interacting with a deployed contract. In most of these scripts, you'll need to create a [Web3.py provider](https://web3py.readthedocs.io/en/stable/providers.html) to interact with the network.
To configure your project for Phron, you will need to have your own endpoint and API key, which you can get from one of the supported Endpoint Providers.
To create a provider, you can take the following steps:
1. Import the `web3` library
2. Create the `web3` provider using the `Web3(Web3.HTTPProvider())` method and providing the endpoint URL
```python
# 1. Import web3.py
from web3 import Web3
# 2. Create web3.py provider
web3 = Web3(Web3.HTTPProvider("INSERT_RPC_API_ENDPOINT")) # Insert your RPC URL here
```
Save this code snippet, as you'll need it for the scripts that are used in the following sections.
### Send a Transaction
During this section, you'll be creating a couple of scripts. The first one will be to check the balances of your accounts before trying to send a transaction. The second script will actually send the transaction.
You can also use the balance script to check the account balances after the transaction has been sent.
#### Check Balances Script
You'll only need one file to check the balances of both addresses before and after the transaction is sent. To get started, you can create a `balances.py` file by running:
```bash
touch balances.py
```
Next, you will create the script for this file and complete the following steps:
1. Set up the Web3 provider
2. Define the `address_from` and `address_to` variables
3. Get the balance for the accounts using the `web3.eth.get_balance` function and format the results using the `web3.from_wei`
```python
from web3 import Web3
# 1. Add the Web3 provider logic here:
provider_rpc = {
"development": "http://localhost:9944",
"phron": "https://testnet.phron.ai",
}
web3 = Web3(Web3.HTTPProvider(provider_rpc["phron"])) # Change to correct network
# 2. Create address variables
address_from = 'INSERT_FROM_ADDRESS'
address_to = 'INSERT_TO_ADDRESS'
# 3. Fetch balance data
balance_from = web3.from_wei(
web3.eth.get_balance(Web3.to_checksum_address(address_from)), "ether"
)
balance_to = web3.from_wei(
web3.eth.get_balance(Web3.to_checksum_address(address_to)), "ether"
)
print(f"The balance of { address_from } is: { balance_from } DEV")
print(f"The balance of { address_to } is: { balance_to } DEV")
```
To run the script and fetch the account balances, you can run the following command:
```bash
python3 balances.py
```
If successful, the balances for the origin and receiving address will be displayed in your terminal in ETH.
#### Send Transaction Script
You'll only need one file for executing a transaction between accounts. For this example, you'll be transferring 1 DEV token from an origin address (from which you hold the private key) to another address. To get started, you can create a `transaction.py` file by running:
```bash
touch transaction.py
```
Next, you will create the script for this file and complete the following steps:
1. Add imports, including Web3.py and the `rpc_gas_price_strategy`, which will be used in the following steps to get the gas price used for the transaction
2. Set up the Web3 provider
3. Define the `account_from`, including the `private_key`, and the `address_to` variables. The private key is required to sign the transaction. **Note: This is for example purposes only. Never store your private keys in a Python file**
4. Use the [Web3.py Gas Price API](https://web3py.readthedocs.io/en/stable/gas_price.html) to set a gas price strategy. For this example, you'll use the imported `rpc_gas_price_strategy`
5. Create and sign the transaction using the `web3.eth.account.sign_transaction` function. Pass in the `nonce` `gas`, `gasPrice`, `to`, and `value` for the transaction along with the sender's `private_key`. To get the `nonce` you can use the `web3.eth.get_transaction_count` function and pass in the sender's address. To predetermine the `gasPrice` you'll use the `web3.eth.generate_gas_price` function. For the `value`, you can format the amount to send from an easily readable format to Wei using the `web3.to_wei` function
6. Using the signed transaction, you can then send it using the `web3.eth.send_raw_transaction` function and wait for the transaction receipt by using the `web3.eth.wait_for_transaction_receipt` function
```python
# 1. Add imports
from web3.gas_strategies.rpc import rpc_gas_price_strategy
from web3 import Web3
# 2. Add the Web3 provider logic here:
provider_rpc = {
"development": "http://localhost:9944",
"phron": "https://testnet.phron.ai",
}
web3 = Web3(Web3.HTTPProvider(provider_rpc["phron"])) # Change to correct network
# 3. Create address variables
account_from = {
'private_key': 'INSERT_YOUR_PRIVATE_KEY',
'address': 'INSERT_PUBLIC_ADDRESS_OF_PK',
}
address_to = 'INSERT_TO_ADDRESS'
print(
f'Attempting to send transaction from { account_from["address"] } to { address_to }'
)
# 4. Set the gas price strategy
web3.eth.set_gas_price_strategy(rpc_gas_price_strategy)
# 5. Sign tx with PK
tx_create = web3.eth.account.sign_transaction(
{
"nonce": web3.eth.get_transaction_count(
Web3.to_checksum_address(account_from["address"])
),
"gasPrice": web3.eth.generate_gas_price(),
"gas": 21000,
"to": Web3.to_checksum_address(address_to),
"value": web3.to_wei("1", "ether"),
},
account_from["private_key"],
)
# 6. Send tx and wait for receipt
tx_hash = web3.eth.send_raw_transaction(tx_create.rawTransaction)
tx_receipt = web3.eth.wait_for_transaction_receipt(tx_hash)
print(f"Transaction successful with hash: { tx_receipt.transactionHash.hex() }")
```
To run the script, you can run the following command in your terminal:
```bash
python3 transaction.py
```
If the transaction was succesful, in your terminal you'll see the transaction hash has been printed out.
You can also use the `balances.py` script to check that the balances for the origin and receiving accounts have changed. The entire workflow would look like this:
{% code overflow="wrap" fullWidth="false" %}
```bash
python3 balances.pyThe balance of 0x3B939FeaD1557C741Ff06492FD0127bd287A421e is: 3563.79 DEVThe balance of 0x9Bf5Ae10540a1ab9B363bEA02A9406E6b2efA9af is: 0 DEVpython3 transaction.pyAttempting to send transaction from 0x3B939FeaD1557C741Ff06492FD0127bd287A421e to 0x9Bf5Ae10540a1ab9B363bEA02A9406E6b2efA9afTransaction successful with hash: 0xac70452510657ed43c27510578d3ce4b3b880d4cca1a24ade1497c6e0ee7f5d6python3 balances.pyThe balance of 0x3B939FeaD1557C741Ff06492FD0127bd287A421e is: 3562.79 DEVThe balance of 0x9Bf5Ae10540a1ab9B363bEA02A9406E6b2efA9af is: 1 DEV
```
{% endcode %}
### Deploy a Contract
The contract you'll be compiling and deploying in the next couple of sections is a simple incrementer contract, arbitrarily named `Incrementer.sol`. You can get started by creating a file for the contract:
```bash
touch Incrementer.sol
```
Next, you can add the Solidity code to the file:
```solidity
// SPDX-License-Identifier: MIT
pragma solidity ^0.8.0;
contract Incrementer {
uint256 public number;
constructor(uint256 _initialNumber) {
number = _initialNumber;
}
function increment(uint256 _value) public {
number = number + _value;
}
function reset() public {
number = 0;
}
}
```
The `constructor` function, which runs when the contract is deployed, sets the initial value of the number variable stored on-chain (the default is `0`). The `increment` function adds the `_value` provided to the current number, but a transaction needs to be sent, which modifies the stored data. Lastly, the `reset` function resets the stored value to zero.
> ### Note
>
> This contract is a simple example for illustration purposes only and does not handle values wrapping around.
#### Compile Contract Script
In this section, you'll create a script that uses the Solidity compiler to output the bytecode and interface (ABI) for the `Incrementer.sol` contract. To get started, you can create a `compile.py` file by running:
```bash
touch compile.py
```
Next, you will create the script for this file and complete the following steps:
1. Import the `solcx` package
2. **Optional** - If you haven't already installed the Solidity compiler, you can do so with by using the `solcx.install_solc` function
3. Compile the `Incrementer.sol` function using the `solcx.compile_files` function
4. Export the contract's ABI and bytecode
```solidity
# 1. Import solcx
import solcx
# 2. If you haven't already installed the Solidity compiler, uncomment the following line
# solcx.install_solc()
# 3. Compile contract
temp_file = solcx.compile_files(
'Incrementer.sol',
output_values=['abi', 'bin'],
# solc_version='0.8.19'
)
# 4. Export contract data
abi = temp_file['Incrementer.sol:Incrementer']['abi']
bytecode = temp_file['Incrementer.sol:Incrementer']['bin']
```
> ### Note
>
> If you see an error stating that `Solc is not installed`, uncomment step 2 described in the code snippet.
#### Deploy Contract Script
With the script for compiling the `Incrementer.sol` contract in place, you can then use the results to send a signed transaction that deploys it. To do so, you can create a file for the deployment script called `deploy.py`:
```bash
touch deploy.py
```
Next, you will create the script for this file and complete the following steps:
1. Add imports, including Web3.py and the ABI and bytecode of the `Incrementer.sol` contract
2. Set up the Web3 provider
3. Define the `account_from`, including the `private_key`. The private key is required to sign the transaction. **Note: This is for example purposes only. Never store your private keys in a Python file**
4. Create a contract instance using the `web3.eth.contract` function and passing in the ABI and bytecode of the contract
5. Build a constructor transaction using the contract instance and passing in the value to increment by. For this example, you can use `5`. You'll then use the `build_transaction` function to pass in the transaction information including the `from` address and the `nonce` for the sender. To get the `nonce` you can use the `web3.eth.get_transaction_count` function
6. Sign the transaction using the `web3.eth.account.sign_transaction` function and pass in the constructor transaction and the `private_key` of the sender
7. Using the signed transaction, you can then send it using the `web3.eth.send_raw_transaction` function and wait for the transaction receipt by using the `web3.eth.wait_for_transaction_receipt` function
```solidity
# 1. Add imports
from compile import abi, bytecode
from web3 import Web3
# 2. Add the Web3 provider logic here:
provider_rpc = {
"development": "http://localhost:9944",
"phron": "https://testnet.phron.ai",
}
web3 = Web3(Web3.HTTPProvider(provider_rpc["phron"])) # Change to correct network
# 3. Create address variable
account_from = {
'private_key': 'INSERT_YOUR_PRIVATE_KEY',
'address': 'INSERT_PUBLIC_ADDRESS_OF_PK',
}
print(f'Attempting to deploy from account: { account_from["address"] }')
# 4. Create contract instance
Incrementer = web3.eth.contract(abi=abi, bytecode=bytecode)
# 5. Build constructor tx
construct_txn = Incrementer.constructor(5).build_transaction(
{
"from": Web3.to_checksum_address(account_from["address"]),
"nonce": web3.eth.get_transaction_count(
Web3.to_checksum_address(account_from["address"])
),
}
)
# 6. Sign tx with PK
tx_create = web3.eth.account.sign_transaction(
construct_txn, account_from["private_key"]
)
# 7. Send tx and wait for receipt
tx_hash = web3.eth.send_raw_transaction(tx_create.rawTransaction)
tx_receipt = web3.eth.wait_for_transaction_receipt(tx_hash)
print(f"Contract deployed at address: { tx_receipt.contractAddress }")
```
To run the script, you can enter the following command into your terminal:
```
python3 deploy.py
```
If successful, the contract's address will be displayed in the terminal.
{% code overflow="wrap" %}
```bash
python3 deploy.pyAttempting to deploy from account: 0x3B939FeaD1557C741Ff06492FD0127bd287A421eContract deployed at address: 0xFef3cFb8eE1FE727b3848E551ae5DC8903237B08
```
{% endcode %}
#### Read Contract Data (Call Methods)
Call methods are the type of interaction that don't modify the contract's storage (change variables), meaning no transaction needs to be sent. They simply read various storage variables of the deployed contract.
To get started, you can create a file and name it `get.py`:
```bash
touch get.py
```
Then you can take the following steps to create the script:
1. Add imports, including Web3.py and the ABI of the `Incrementer.sol` contract
2. Set up the Web3 provider
3. Define the `contract_address` of the deployed contract
4. Create a contract instance using the `web3.eth.contract` function and passing in the ABI and address of the deployed contract
5. Using the contract instance, you can then call the `number` function
```solidity
# 1. Import the ABI
from compile import abi
from web3 import Web3
# 2. Add the Web3 provider logic here:
provider_rpc = {
"development": "http://localhost:9944",
"phron": "https://testnet.phron.ai",
}
web3 = Web3(Web3.HTTPProvider(provider_rpc["phron"])) # Change to correct network
# 3. Create address variable
contract_address = 'INSERT_CONTRACT_ADDRESS'
print(f"Making a call to contract at address: { contract_address }")
# 4. Create contract instance
Incrementer = web3.eth.contract(address=contract_address, abi=abi)
# 5. Call Contract
number = Incrementer.functions.number().call()
print(f"The current number stored is: { number } ")
```
To run the script, you can enter the following command in your terminal:
```bash
python3 get.py
```
If successful, the value will be displayed in the terminal.
#### Interact with Contract (Send Methods)
Send methods are the type of interaction that modify the contract's storage (change variables), meaning a transaction needs to be signed and sent. In this section, you'll create two scripts: one to increment and one to reset the incrementer. To get started, you can create a file for each script and name them `increment.py` and `reset.py`:
```bash
touch increment.py reset.py
```
Open the `increment.py` file and take the following steps to create the script:
1. Add imports, including Web3.py and the ABI of the `Incrementer.sol` contract
2. Set up the Web3 provider
3. Define the `account_from`, including the `private_key`, the `contract_address` of the deployed contract, and the `value` to increment by. The private key is required to sign the transaction. **Note: This is for example purposes only. Never store your private keys in a Python file**
4. Create a contract instance using the `web3.eth.contract` function and passing in the ABI and address of the deployed contract
5. Build the increment transaction using the contract instance and passing in the value to increment by. You'll then use the `build_transaction` function to pass in the transaction information including the `from` address and the `nonce` for the sender. To get the `nonce` you can use the `web3.eth.get_transaction_count` function
6. Sign the transaction using the `web3.eth.account.sign_transaction` function and pass in the increment transaction and the `private_key` of the sender
7. Using the signed transaction, you can then send it using the `web3.eth.send_raw_transaction` function and wait for the transaction receipt by using the `web3.eth.wait_for_transaction_receipt` function
```solidity
# 1. Add imports
from compile import abi
from web3 import Web3
# 2. Add the Web3 provider logic here:
provider_rpc = {
"development": "http://localhost:9944",
"phron": "https://testnet.phron.ai",
}
web3 = Web3(Web3.HTTPProvider(provider_rpc["phron"])) # Change to correct network
# 3. Create variables
account_from = {
'private_key': 'INSERT_YOUR_PRIVATE_KEY',
'address': 'INSERT_PUBLIC_ADDRESS_OF_PK',
}
contract_address = 'INSERT_CONTRACT_ADDRESS'
value = 3
print(
f"Calling the increment by { value } function in contract at address: { contract_address }"
)
# 4. Create contract instance
Incrementer = web3.eth.contract(address=contract_address, abi=abi)
# 5. Build increment tx
increment_tx = Incrementer.functions.increment(value).build_transaction(
{
"from": Web3.to_checksum_address(account_from["address"]),
"nonce": web3.eth.get_transaction_count(
Web3.to_checksum_address(account_from["address"])
),
}
)
# 6. Sign tx with PK
tx_create = web3.eth.account.sign_transaction(increment_tx, account_from["private_key"])
# 7. Send tx and wait for receipt
tx_hash = web3.eth.send_raw_transaction(tx_create.rawTransaction)
tx_receipt = web3.eth.wait_for_transaction_receipt(tx_hash)
print(f"Tx successful with hash: { tx_receipt.transactionHash.hex() }")
```
To run the script, you can enter the following command in your terminal:
```
python3 increment.py
```
If successful, the transaction hash will be displayed in the terminal. You can use the `get.py` script alongside the `increment.py` script to make sure that value is changing as expected:
{% code overflow="wrap" %}
```bash
python get.pyMaking a call to contract at address: 0xFef3cFb8eE1FE727b3848E551ae5DC8903237B08The current number stored is: 5python increment.pyCalling the increment by 3 function in contract at address: 0xFef3cFb8eE1FE727b3848E551ae5DC8903237B08Tx successful with hash: 0x47757fd97e3ef8db973e335d1f2d19c46b37d0dbd53fea1636ec559ccf119a13python get.pyMaking a call to contract at address: 0xFef3cFb8eE1FE727b3848E551ae5DC8903237B08The current number stored is: 8
```
{% endcode %}
Next you can open the `reset.py` file and take the following steps to create the script:
1. Add imports, including Web3.py and the ABI of the `Incrementer.sol` contract
2. Set up the Web3 provider
3. Define the `account_from`, including the `private_key`, and the `contract_address` of the deployed contract. The private key is required to sign the transaction. **Note: This is for example purposes only. Never store your private keys in a Python file**
4. Create a contract instance using the `web3.eth.contract` function and passing in the ABI and address of the deployed contract
5. Build the reset transaction using the contract instance. You'll then use the `build_transaction` function to pass in the transaction information including the `from` address and the `nonce` for the sender. To get the `nonce` you can use the `web3.eth.get_transaction_count` function
6. Sign the transaction using the `web3.eth.account.sign_transaction` function and pass in the reset transaction and the `private_key` of the sender
7. Using the signed transaction, you can then send it using the `web3.eth.send_raw_transaction` function and wait for the transaction receipt by using the `web3.eth.wait_for_transaction_receipt` function
```solidity
# 1. Add imports
from compile import abi
from web3 import Web3
# 2. Add the Web3 provider logic here:
provider_rpc = {
"development": "http://localhost:9944",
"phron": "https://testnet.phron.ai",
}
web3 = Web3(Web3.HTTPProvider(provider_rpc["phron"])) # Change to correct network
# 3. Create variables
account_from = {
'private_key': 'INSERT_YOUR_PRIVATE_KEY',
'address': 'INSERT_PUBLIC_ADDRESS_OF_PK',
}
contract_address = 'INSERT_CONTRACT_ADDRESS'
print(f"Calling the reset function in contract at address: { contract_address }")
# 4. Create contract instance
Incrementer = web3.eth.contract(address=contract_address, abi=abi)
# 5. Build reset tx
reset_tx = Incrementer.functions.reset().build_transaction(
{
"from": Web3.to_checksum_address(account_from["address"]),
"nonce": web3.eth.get_transaction_count(
Web3.to_checksum_address(account_from["address"])
),
}
)
# 6. Sign tx with PK
tx_create = web3.eth.account.sign_transaction(reset_tx, account_from["private_key"])
# 7. Send tx and wait for receipt
tx_hash = web3.eth.send_raw_transaction(tx_create.rawTransaction)
tx_receipt = web3.eth.wait_for_transaction_receipt(tx_hash)
print(f"Tx successful with hash: { tx_receipt.transactionHash.hex() }")
```
To run the script, you can enter the following command in your terminal:
```
python3 reset.py
```
If successful, the transaction hash will be displayed in the terminal. You can use the `get.py` script alongside the `reset.py` script to make sure that value is changing as expected:
{% code overflow="wrap" %}
```bash
python get.pyMaking a call to contract at address: 0xFef3cFb8eE1FE727b3848E551ae5DC8903237B08The current number stored is: 8python reset.pyCalling the reset function in contract at address: 0xFef3cFb8eE1FE727b3848E551ae5DC8903237B08Tx successful with hash: 0x152f07430b524838da848b44d58577db252681fba6fbeaf117b2f9d432e301b2python get.pyMaking a call to contract at address: 0xFef3cFb8eE1FE727b3848E551ae5DC8903237B08The current number stored is: 0
```
{% endcode %}
This tutorial is for educational purposes only. As such, any contracts or code created in this tutorial should not be used in production.The information presented herein has been provided by third parties and is made available solely for general information purposes. Phron does not endorse any project listed and described on the Phron Doc Website (). Phron does not warrant the accuracy, completeness or usefulness of this information. Any reliance you place on such information is strictly at your own risk. Phron disclaims all liability and responsibility arising from any reliance placed on this information by you or by anyone who may be informed of any of its contents. All statements and/or opinions expressed in these materials are solely the responsibility of the person or entity providing those materials and do not necessarily represent the opinion of Phron. The information should not be construed as professional or financial advice of any kind. Advice from a suitably qualified professional should always be sought in relation to any particular matter or circumstance. The information herein may link to or integrate with other websites operated or content provided by third parties, and such other websites may link to this website. Phron has no control over any such other websites or their content and will have no liability arising out of or related to such websites or their content. The existence of any such link does not constitute an endorsement of such websites, the content of the websites, or the operators of the websites. These links are being provided to you only as a convenience and you release and hold Phron harmless from any and all liability arising from your use of this information or the information provided by any third-party website or service.
# Dev Environments
# OpenZeppelin
# Overview
## OpenZeppelin
### Introduction
[OpenZeppelin](https://www.openzeppelin.com/) is well known in the Ethereum developer community as their set of audited smart contracts and libraries are a standard in the industry. For example, most of the tutorials that show developers how to deploy an ERC-20 token use OpenZeppelin contracts.
You can find more information about OpenZeppelin on their [documentation site](https://docs.openzeppelin.com/).
As part of its Ethereum compatibility features, OpenZeppelin products can be seamlessly used on Phron. This page will provide information on different OpenZeppelin solutions that you can test.
### OpenZeppelin on Phron
Currently, the following OpenZeppelin products/solutions work on the different networks available on Phron:
| **Product** | Phron |
| --------------------- | ----- |
| Contracts & libraries | ✓ |
| Contracts Wizard | ✓ |
| Defender | ✓ |
You will find a corresponding tutorial for each product in the following links:
* **Contracts Wizard** — where you'll find a guide on how to use OpenZeppelin web-based wizard to create different token contracts with different functionalities
* **Contracts & libraries** — where you'll find tutorials to deploy the most common token contracts using OpenZeppelin's templates: ERC-20, ERC-721 and ERC-1155
* **Defender** — where you'll find a guide on how to use OpenZeppelin Defender to manage your smart contracts in the Phron TestNet. This guide can also be adapted for Phron
This tutorial is for educational purposes only. As such, any contracts or code created in this tutorial should not be used in production.The information presented herein has been provided by third parties and is made available solely for general information purposes. Phron does not endorse any project listed and described on the Phron Doc Website (). Phron does not warrant the accuracy, completeness or usefulness of this information. Any reliance you place on such information is strictly at your own risk. Phron disclaims all liability and responsibility arising from any reliance placed on this information by you or by anyone who may be informed of any of its contents. All statements and/or opinions expressed in these materials are solely the responsibility of the person or entity providing those materials and do not necessarily represent the opinion of Phron. The information should not be construed as professional or financial advice of any kind. Advice from a suitably qualified professional should always be sought in relation to any particular matter or circumstance. The information herein may link to or integrate with other websites operated or content provided by third parties, and such other websites may link to this website. Phron has no control over any such other websites or their content and will have no liability arising out of or related to such websites or their content. The existence of any such link does not constitute an endorsement of such websites, the content of the websites, or the operators of the websites. These links are being provided to you only as a convenience and you release and hold Phron harmless from any and all liability arising from your use of this information or the information provided by any third-party website or service.
# Contract Wizard
## Using OpenZeppelin Contracts and Remix To Deploy To Phron
### Introduction
[OpenZeppelin](https://www.openzeppelin.com/) contracts and libraries have become a standard in the industry. They help developers minimize risk, as their open-source code templates are battle-tested for Ethereum and other blockchains. Their code includes the most used implementations of ERC standards and add-ons and often appears in guides and tutorials around the community.
Because Phron is fully Ethereum compatible, all of OpenZeppelin's contracts and libraries can be implemented without any changes.
This guide is divided into two sections. The first part describes the OpenZeppelin Contracts Wizard, a great online tool to help you create smart contracts using OpenZeppelin code. The second section provides a step-by-step guide on how you can deploy these contracts using [Remix](https://remix.ethereum.org/) on Phron.
### OpenZeppelin Contract Wizard
OpenZeppelin has developed an online web-based interactive contract generator tool that is probably the easiest and fastest way to write your smart contract using OpenZeppelin code, called [Contracts Wizard](https://docs.openzeppelin.com/contracts/5.x/wizard).
Currently, the Contracts Wizard support the following ERC standards:
* [**ERC-20**](https://ethereum.org/en/developers/docs/standards/tokens/erc-20) — a fungible token standard that follows [EIP-20](https://eips.ethereum.org/EIPS/eip-20). Fungible means that all tokens are equivalent and interchangeable that is, of equal value. One typical example of fungible tokens is fiat currencies, where each equal-denomination bill has the same value
* [**ERC-721**](https://ethereum.org/en/developers/docs/standards/tokens/erc-721) — a non-fungible token contract that follows [EIP-721](https://eips.ethereum.org/EIPS/eip-721). Non-fungible means that each token is different, and therefore, unique. An ERC-721 token can represent ownership of that unique item, whether it is a collectible item in a game, real estate, and so on
* [**ERC-1155**](https://docs.openzeppelin.com/contracts/5.x/erc1155) — also known as the multi-token contract, because it can represent both fungible and non-fungible tokens in a single smart contract. It follows [EIP-1155](https://eips.ethereum.org/EIPS/eip-1155)
The wizard is comprised of the following sections:
1. **Token standard selection** — shows all the different standards supported by the wizard
2. **Settings** — provides the baseline settings for each token standard, such as token name, symbol, pre-mint (token supply when the contract is deployed), and URI (for non-fungible tokens)
3. **Features** — list of all features available for each token standard. You can find more information about the different features in the following links:
* [ERC-20](https://docs.openzeppelin.com/contracts/5.x/api/token/erc20)
* [ERC-721](https://docs.openzeppelin.com/contracts/5.x/api/token/erc721)
* [ERC-1155](https://docs.openzeppelin.com/contracts/5.x/api/token/erc1155)
4. **Access Control** — list of all the available [access control mechanisms](https://docs.openzeppelin.com/contracts/5.x/access-control) for each token standard
5. **Interactive code display** — shows the smart contract code with the configuration as set by the user

Once you have set up your contract with all the settings and features, it is just as easy as copying and pasting the code into your contract file.
### Deploying OpenZeppelin Contracts on Phron
This section goes through the steps for deploying OpenZeppelin contracts on Phron. It covers the following contracts:
* ERC-20 (fungible tokens)
* ERC-721 (non-fungible tokens)
* ERC-1155 (multi-token standard)
All the code of the contracts was obtained using OpenZeppelin [Contract Wizard](https://docs.openzeppelin.com/contracts/5.x/wizard).
#### Checking Prerequisites
The steps described in this section assume you have [MetaMask](https://metamask.io/) installed and connected to the Phron TestNet. If you're adapting this guide for Phron, make sure you're connected to the correct network. Contract deployment is done using the [Remix IDE](https://remix.ethereum.org/) via the **Injected Provider** environment. You can find corresponding tutorials in the following links:
* Interacting with Phron using MetaMask
* Interacting with Phron using Remix
#### Deploying an ERC-20 Token
For this example, an ERC-20 token will be deployed to Phron. The final code used combines different contracts from OpenZeppelin:
* **`ERC20.sol`** — ERC-20 token implementation with the optional features from the base interface. Includes the supply mechanism with a `mint` function but needs to be explicitly called from within the main contract
* **`Ownable.sol`** — extension to restrict access to certain functions
The mintable ERC-20 OpenZeppelin token contract provides a `mint` function that the owner of the contract can only call. By default, the owner is the contract's deployer address. There is also a premint of `1000` tokens sent to the contract's deployer configured in the `constructor` function.
The first step is to go to [Remix](https://remix.ethereum.org/) and take the following steps:
1. Click on the **Create New File** icon and set a file name. For this example, it was set to `ERC20.sol`
2. Make sure the file was created successfully. Click on the file to open it up in the text editor
3. Write your smart contract using the file editor. For this example, the following code was used:
```solidity
// SPDX-License-Identifier: MIT
// Compatible with OpenZeppelin Contracts ^5.0.0
pragma solidity ^0.8.20;
import "@openzeppelin/contracts/token/ERC20/ERC20.sol";
import "@openzeppelin/contracts/access/Ownable.sol";
import "@openzeppelin/contracts/token/ERC20/extensions/ERC20Permit.sol";
contract MyToken is ERC20, Ownable, ERC20Permit {
constructor(address initialOwner)
ERC20("MyToken", "MTK")
Ownable(initialOwner)
ERC20Permit("MyToken")
{
_mint(msg.sender, 1000 * 10 ** decimals());
}
function mint(address to, uint256 amount) public onlyOwner {
_mint(to, amount);
}
}
```
This ERC-20 token smart contract was extracted from the Contract Wizard, setting a premint of `1000` tokens and activating the `Mintable` and `Permit` features.

Once your smart contract is written, you can compile it by taking the following steps:
1. Head to the **Solidity Compiler**
2. Click on the compile button
3. Alternatively, you can check the **Auto compile** feature

With the contract compiled, you are ready to deploy it taking the following steps:
1. Head to the **Deploy & Run Transactions** tab
2. Change the environment to **Injected Provider**. This will use MetaMask's injected provider. Consequently, the contract will be deployed to whatever network MetaMask is connected to. MetaMask might show a pop-up outlining that Remix is trying to connect to your wallet
3. Select the proper contract to deploy. In this example, it is the `MyToken` contract inside the `ERC20.sol` file
4. Enter the address of the initial owner and click on the **Deploy** button. Review the transaction information in MetaMask and confirm it
5. After a few seconds, the transaction should get confirmed, and you should see your contract under **Deployed Contracts**

And that is it! You've deployed an ERC-20 token contract using OpenZeppelin's contracts and libraries. Next, you can interact with your token contract via Remix, or add it to MetaMask.
#### Deploying an ERC-721 Token
For this example, an ERC-721 token will be deployed to Phron. The final code used combines different contracts from OpenZeppelin:
* **`ERC721.sol`** — ERC-721 token implementation with the optional features from the base interface. Includes the supply mechanism with a `_mint` function but needs to be explicitly called from within the main contract
* **`ERC721Burnable.sol`** — extension to allow tokens to be destroyed by their owners (or approved addresses)
* **`ERC721Enumerable.sol`** — extension to allow on-chain enumeration of tokens
* **`Ownable.sol`** — extension to restrict access to certain functions
The mintable ERC-721 OpenZeppelin token contract provides a `mint` function that can only be called by the owner of the contract. By default, the owner is the contract's deployer address.
As with the ERC-20 contract, the first step is to go to [Remix](https://remix.ethereum.org/) and create a new file. For this example, the file name will be `ERC721.sol`.
Next, you'll need to write the smart contract and compile it. For this example, the following code is used:
```solidity
// SPDX-License-Identifier: MIT
// Compatible with OpenZeppelin Contracts ^5.0.0
pragma solidity ^0.8.20;
import "@openzeppelin/contracts/token/ERC721/ERC721.sol";
import "@openzeppelin/contracts/token/ERC721/extensions/ERC721Enumerable.sol";
import "@openzeppelin/contracts/token/ERC721/extensions/ERC721Burnable.sol";
import "@openzeppelin/contracts/access/Ownable.sol";
contract MyToken is ERC721, ERC721Enumerable, ERC721Burnable, Ownable {
constructor(address initialOwner)
ERC721("MyToken", "MTK")
Ownable(initialOwner)
{}
function _baseURI() internal pure override returns (string memory) {
return "Test";
}
function safeMint(address to, uint256 tokenId) public onlyOwner {
_safeMint(to, tokenId);
}
// The following functions are overrides required by Solidity
function _update(address to, uint256 tokenId, address auth)
internal
override(ERC721, ERC721Enumerable)
returns (address)
{
return super._update(to, tokenId, auth);
}
function _increaseBalance(address account, uint128 value)
internal
override(ERC721, ERC721Enumerable)
{
super._increaseBalance(account, value);
}
function supportsInterface(bytes4 interfaceId)
public
view
override(ERC721, ERC721Enumerable)
returns (bool)
{
return super.supportsInterface(interfaceId);
}
}
```
This ERC-721 token smart contract was extracted from the Contract Wizard, setting the `Base URI` as `Test` and activating the `Mintable`, `Burnable`, and `Enumerable` features.
With the contract compiled, next you will need to:
1. Head to the **Deploy & Run Transactions** tab
2. Change the environment to **Injected Provider**. This will use MetaMask's injected provider. Consequently, the contract will be deployed to whatever network MetaMask is connected to. MetaMask might show a pop-up outlining that Remix is trying to connect to your wallet
3. Select the proper contract to deploy. In this example, it is the `MyToken` contract inside the `ERC721.sol` file
4. Enter the address of the initial owner and click on the **Deploy** button. Review the transaction information in MetaMask and confirm it
5. After a few seconds, the transaction should get confirmed, and you should see your contract under **Deployed Contracts**

And that is it! You've deployed an ERC-721 token contract using OpenZeppelin's contracts and libraries. Next, you can interact with your token contract via Remix, or add it to MetaMask.
#### Deploying an ERC-1155 Token
For this example, an ERC-1155 token will be deployed to Phron. The final code used combines different contracts from OpenZeppelin:
* **`ERC1155.sol`** — ERC-1155 token implementation with the optional features from the base interface. Includes the supply mechanism with a `_mint` function but needs to be explicitly called from within the main contract
* **`Pausable.sol`** — extension to allows pausing tokens transfer, mintings and burnings
* **`Ownable.sol`** — extension to restrict access to certain functions
OpenZeppelin's ERC-1155 token contract provides a `_mint` function that can only be called in the `constructor` function. Therefore, this example creates 1000 tokens with an ID of `0`, and 1 unique token with an ID of `1`.
The first step is to go to [Remix](https://remix.ethereum.org/) and create a new file. For this example, the file name will be `ERC1155.sol`.
As shown for the [ERC-20 token](https://docs.moonbeam.network/builders/ethereum/dev-env/openzeppelin/contracts/#deploying-an-erc-20-token), you'll need to write the smart contract and compile it. For this example, the following code is used:
```solidity
// SPDX-License-Identifier: MIT
// Compatible with OpenZeppelin Contracts ^5.0.0
pragma solidity ^0.8.20;
import "@openzeppelin/contracts/token/ERC1155/ERC1155.sol";
import "@openzeppelin/contracts/access/Ownable.sol";
import "@openzeppelin/contracts/token/ERC1155/extensions/ERC1155Pausable.sol";
contract MyToken is ERC1155, Ownable, ERC1155Pausable {
constructor() ERC1155("") Ownable() {
_mint(msg.sender, 0, 1000 * 10 ** 18, "");
_mint(msg.sender, 1, 1, "");
}
function setURI(string memory newuri) public onlyOwner {
_setURI(newuri);
}
function pause() public onlyOwner {
_pause();
}
function unpause() public onlyOwner {
_unpause();
}
// The following function is an override required by Solidity
function _update(address from, address to, uint256[] memory ids, uint256[] memory values)
internal
override(ERC1155, ERC1155Pausable)
{
super._update(from, to, ids, values);
}
}
```
This ERC-1155 token smart contract was extracted from the Contract Wizard, setting no `Base URI` and activating `Pausable` feature. The constructor function was modified to include the minting of both a fungible and a non-fungible token.
With the contract compiled, next you will need to:
1. Head to the **Deploy & Run Transactions** tab
2. Change the environment to **Injected Provider**. This will use MetaMask's injected provider. Consequently, the contract will be deployed to whatever network MetaMask is connected to. MetaMask might show a pop-up outlining that Remix is trying to connect to your wallet
3. Select the proper contract to deploy. In this example, it is the `MyToken` contract inside the `ERC1155.sol` file
4. Enter the address of the initial owner and click on the **Deploy** button. Review the transaction information in MetaMask and confirm it
5. After a few seconds, the transaction should get confirmed, and you should see your contract under **Deployed Contracts**

And that is it! You've deployed an ERC-1155 token contract using OpenZeppelin's contracts and libraries. Next, you can interact with your token contract via Remix.
This tutorial is for educational purposes only. As such, any contracts or code created in this tutorial should not be used in production.The information presented herein has been provided by third parties and is made available solely for general information purposes. Phron does not endorse any project listed and described on the Phron Doc Website (). Phron does not warrant the accuracy, completeness or usefulness of this information. Any reliance you place on such information is strictly at your own risk. Phron disclaims all liability and responsibility arising from any reliance placed on this information by you or by anyone who may be informed of any of its contents. All statements and/or opinions expressed in these materials are solely the responsibility of the person or entity providing those materials and do not necessarily represent the opinion of Phron. The information should not be construed as professional or financial advice of any kind. Advice from a suitably qualified professional should always be sought in relation to any particular matter or circumstance. The information herein may link to or integrate with other websites operated or content provided by third parties, and such other websites may link to this website. Phron has no control over any such other websites or their content and will have no liability arising out of or related to such websites or their content. The existence of any such link does not constitute an endorsement of such websites, the content of the websites, or the operators of the websites. These links are being provided to you only as a convenience and you release and hold Phron harmless from any and all liability arising from your use of this information or the information provided by any third-party website or service.
# Defender
## OpenZeppelin Defender
### Introduction
[OpenZeppelin Defender](https://docs.openzeppelin.com/defender) is a web-based application that allows developers to perform and automate smart contract operations in a secure way. Defender V2 offers the following components:
* [**Code Inspector**](https://defender.openzeppelin.com/v2/#/code) — Automatic code analysis powered by AI models and tools developed by OpenZeppelin engineers
* [**Audit**](https://defender.openzeppelin.com/v2/#/audit) — Manage the smart contract audit process and track issues and resolutions
* [**Deploy**](https://defender.openzeppelin.com/v2/#/deploy) — Manage deployments and upgrades to ensure secure releases
* [**Monitor**](https://defender.openzeppelin.com/v2/#/monitor) — to monitor your smart contract's events, functions, and transactions, and receive notifications via email
* [**Incident Response**](https://defender.openzeppelin.com/v2/#/incident-response) — Configure predefined incident response scenarios triggered automatically by monitors or on-demand
* [**Actions**](https://defender.openzeppelin.com/v2/#/actions/automatic) — Create automated actions to perform on-chain and off-chain operations
* [**Access Control**](https://defender.openzeppelin.com/v2/#/access-control/contracts) — Manage smart contract accounts, roles, and permissions easily
OpenZeppelin Defender can be used on Phron, and the Phron TestNet. This guide will show you how to get started with Defender and demonstrate using OpenZeppelin Actions and Access Control to pause a smart contract on Phron.
### Getting Started with Defender
This section goes through the steps for getting started with OpenZeppelin Defender on Phron.
#### Checking Prerequisites
The steps described in this section assume you have [MetaMask](https://metamask.io/) installed and connected to the Phron TestNet. If you haven't connected MetaMask to the TestNet, check out our MetaMask integration guide.
In addition, you need to sign up for a free OpenZeppelin Defender account, which you can do on the main [Defender website](https://defender.openzeppelin.com/v2/#/overview).
#### Deploying the Pausable Box Contract
The contract used in this guide is an extension of the `Box.sol` contract used in the [upgrading smart contracts guide](https://docs.openzeppelin.com/learn/upgrading-smart-contracts) from the OpenZeppelin documentation. Also, the contract was made upgradable and [pausable](https://docs.openzeppelin.com/contracts/4.x/api/security#Pausable) to take full advantage of the Admin component. You can deploy your contract using the following code and following the [upgrading smart contracts guide](https://docs.openzeppelin.com/learn/upgrading-smart-contracts):
```solidity
// SPDX-License-Identifier: MIT
pragma solidity ^0.8.0;
import "@openzeppelin/contracts-upgradeable/security/PausableUpgradeable.sol";
import "@openzeppelin/contracts-upgradeable/access/OwnableUpgradeable.sol";
contract PausableBox is Initializable, PausableUpgradeable, OwnableUpgradeable {
uint256 private value;
// Emitted when the stored value changes
event ValueChanged(uint256 newValue);
// Initialize
function initialize() initializer public {
__Ownable_init(_msgSender());
__Pausable_init_unchained();
}
// Stores a new value in the contract
function store(uint256 newValue) whenNotPaused public {
value = newValue;
emit ValueChanged(newValue);
}
// Reads the last stored value
function retrieve() public view returns (uint256) {
return value;
}
function pause() public onlyOwner {
_pause();
}
function unpause() public onlyOwner {
_unpause();
}
}
```
> ### Note
>
> After deploying the above contract using Remix or another tool such as Hardhat, you'll need to call the `initialize` function to properly set the owner of the upgradeable contract. If you don't call this function, the owner will be set to the zero address, and you will be unable to proceed with the remainder of this tutorial.
### Using the Access Control Component
This section goes through the steps for getting started with the [OpenZeppelin Defender Access Control component](https://defender.openzeppelin.com/v2/#/access-control/contracts) to manage smart contracts on Phron.
#### Importing Your Contract
The first step to using Defender Access Control is to add the contract you want to manage. To do so, take the following steps:
1. Click on the **Access Control** menu item
2. Click **Add Contract**
3. Add a name for your contract
4. Select the **Network** on which the contract is deployed. For the demo,Phron is selected
5. Paste the contract address
6. If you have verified your contract, the ABI will be automatically imported. Otherwise, paste the contract ABI. This can be obtained either in [Remix](https://remix.ethereum.org/) or in the `.json` file generally created after the compilation process (for example, in Hardhat)
7. Once you've checked all the information, click on the **Create** button
If everything was successfully imported, you should see your contract on the **Access Control Contracts** main screen. You should see the address that you used to deploy the Pausable Box contract in the **Owner** field. If you see `0x0000000000000000000000000000000000000000`, this means that you didn't call the `initialize` function after deploying the Pausable Box contract. To simplify a later step, take a moment to add your address to your Defender Address Book by hovering over the address in the **Owner** field and clicking **Import into Defender 2.0**.

Then, you can add your address to the Defender Address Book as follows:
1. Enter a name for your address
2. Select the relevant network that the address pertains to
3. Paste the address
4. Review all the information and press **Create**
#### Create a Contract Proposal
Proposals are actions to be carried out in the contract. You can propose any function of the contract to be enacted, including but not limited to:
* **Pause** — available if the pause feature is detected. Pauses token transfers, minting, and burning
* **Upgrade** — available if the upgrade feature is detected. Allows for a contract to be [upgraded via a proxy contract](https://docs.openzeppelin.com/learn/upgrading-smart-contracts)
* **Admin action** — call to any function in the managed contract
In this case, a new proposal is created to pause the contract. To do so, take the following steps:
1. Click on the **Actions** menu item
2. Click **Transaction Proposals**
3. Enter a name for the proposal
4. Optionally, you may enter a description of the proposal
5. Select the target contract from the dropdown of imported contracts
6. Select the function to be carried out as part of the proposal
7. Select the desired approval process. For demo purposes, a simple approval process consisting of only the owner will be created in the following step

To create a simple new approval process consisting of only the contract owner, take the following steps:
1. Enter a name for the approval process
2. Select **EOA**
3. Select the owner of the Pausable Box contract
4. Review all information and press **Save Changes**

The last step remaining is to submit the transaction proposal. To do so, take the following steps:
1. Press **Connect Wallet** and connect your EVM account to Defender
2. Press **Submit Transaction Proposal**

#### Approve a Contract Proposal
Press **Continue**, and you'll be taken to the proposal status page. Here, you'll be able to execute the proposal. Press **Approve and Execute**, and confirm the transaction in your EVM wallet. Once the transaction is processed, the status should show **Executed**.

If all went smoothly, your Pausable Box Contract is now paused. If you'd like to try out additional scenarios, you can try creating a proposal to unpause your contract. And that's it! You're now well on your way to mastering OpenZeppelin Defender to manage your smart contracts on Phron. For more information, be sure to check out the [OpenZeppelin Defender Docs](https://docs.openzeppelin.com/defender/).
This tutorial is for educational purposes only. As such, any contracts or code created in this tutorial should not be used in production.The information presented herein has been provided by third parties and is made available solely for general information purposes. Phron does not endorse any project listed and described on the Phron Doc Website (). Phron does not warrant the accuracy, completeness or usefulness of this information. Any reliance you place on such information is strictly at your own risk. Phron disclaims all liability and responsibility arising from any reliance placed on this information by you or by anyone who may be informed of any of its contents. All statements and/or opinions expressed in these materials are solely the responsibility of the person or entity providing those materials and do not necessarily represent the opinion of Phron. The information should not be construed as professional or financial advice of any kind. Advice from a suitably qualified professional should always be sought in relation to any particular matter or circumstance. The information herein may link to or integrate with other websites operated or content provided by third parties, and such other websites may link to this website. Phron has no control over any such other websites or their content and will have no liability arising out of or related to such websites or their content. The existence of any such link does not constitute an endorsement of such websites, the content of the websites, or the operators of the websites. These links are being provided to you only as a convenience and you release and hold Phron harmless from any and all liability arising from your use of this information or the information provided by any third-party website or service.
# Ape
## Using Ape to Deploy To Phron
### Introduction
[Ape](https://docs.apeworx.io/ape/stable) is an Ethereum development environment that helps Python developers manage and automate the recurring tasks inherent to building smart contracts and DApps. Ape can directly interact with Phron's Ethereum API, so you can also use Ape to deploy smart contracts on Phron.
This guide will walk you through using Ape to compile, deploy, and interact with Ethereum smart contracts on the Phron TestNet.
### Checking Prerequisites
To get started, ensure you have the following:
* MetaMask installed and connected to Phron
* An account with funds. You can get DEV tokens for testing on Phron once every 24 hours from the [Phron Faucet](https://faucet.phron.ai/)
* To test out the examples in this guide on Phron, you will need to have your own endpoint and API key, which you can get from one of the supported Endpoint Providers
### Creating an Ape Project
If you don't already have an Ape project, you must install Ape and create a new one. You can follow the steps below to get started and create an empty project:
1. Create a directory for your project
```bash
mkdir ape && cd ape
```
2. If you don't have `pipx` installed, install it
```bash
python3 -m pip install --user pipx
python3 -m pipx ensurepath
```
3. [Install Ape using `pipx`](https://ape.readthedocs.io/en/stable/install.html)
```bash
pipx install eth-ape
```
4. Create a project
```bash
ape init
```
5. Enter a name for your project
```bash
ape initPlease enter project name: ape-demo
SUCCESS: ape-demo is written in ape-config.yaml
lsape-config.yaml contracts scripts tests
```
Your Ape project contains a bare-bones `ape-config.yaml` file for customizing specific settings and the following empty directories:
* `contracts` - an empty directory for storing smart contracts
* `scripts` - an empty directory for storing Python scripts, such as deployment scripts and scripts to interact with your deployed contracts
* `tests` - an empty directory for pytest testing scripts
### Configure Accounts
You'll need to import an account before you can deploy smart contracts or interact with previously deployed contracts from your Ape project. You can run the following command, which will import your account and give it a name:
```bash
ape accounts import INSERT_ACCOUNT_NAME
```
You'll then be prompted to enter your private key and add a password to encrypt your account.
{% code overflow="wrap" %}
```bash
ape accounts import aliceEnter Private Key:Create Passphrase to encrypt account:Repeat for confirmation:SUCCESS: A new account '0x097D9Eea23DE2D3081169e0225173d0C55768338' has been added with the id 'alice'
```
{% endcode %}
> ### Note
>
> If you wish to use a mnemonic instead, you can append the `--use-mnemonic` option to the import command.
### Create Smart Contracts
Now that you have set up your account, you can start writing smart contracts. As a basic example, you can use the following `Box` contract to store a value you can retrieve later.
Start by creating a file named `Box.sol` inside the contracts directory:
```bash
touch contracts/Box.sol
```
Open the file and add the following contract to it:
```solidity
// SPDX-License-Identifier: MIT
pragma solidity ^0.8.1;
contract Box {
uint256 private value;
event ValueChanged(uint256 newValue);
function store(uint256 newValue) public {
value = newValue;
emit ValueChanged(newValue);
}
function retrieve() public view returns (uint256) {
return value;
}
}
```
You can store any additional contracts in the `contracts` directory.
### Compile the Solidity Contract
Before compiling the Solidity, you must install the Solidity compiler plugin. Running the following command will install the latest version of the plugin:
```bash
ape plugins install solidity
```
To use a specific version of Solidity or a specific EVM version, you can modify your `ape-config.yaml` file as follows:
```yaml
solidity:
version: INSERT_VERSION
evm_version: INSERT_VERSION
```
For more information on the Solidity plugin, please refer to the [README of the `ape-solidity` repository on GitHub](https://github.com/ApeWorX/ape-solidity/blob/main/README.md).
With the Solidity plugin installed, the next step is to compile the smart contract:
```bash
ape compile
```
{% code overflow="wrap" %}
```bash
ape compileINFO: Compiling 'Box.sol'.INFO: Compiling using Solidity compiler '0.8.23+commit.f704f362'.
```
{% endcode %}
After compilation, you can find the bytecode and ABI for your contracts in the `.build` directory.
### Test the Contract
Before you deploy your contract, you can test it out directly inside your Ape project using the [pytest framework](https://docs.pytest.org/en/latest) to make sure it works as you expect.
You should already have a `tests` directory where you'll create your tests, but if not, please create one, as all tests must be located in a directory named `tests`. Additionally, each test file name must start with `test_` and end with `.py`. So, first, you can create a test file for the `Box.sol` contract:
```bash
touch tests/test_box.py
```
In addition to the test file, you can create a `conftest.py` file that will define a couple of essential [fixtures](https://docs.pytest.org/en/stable/explanation/fixtures.html). Fixtures allow you to define functions that set up the necessary environment or resources to run your tests. Note that while the `Box.sol` contract is simple, incorporating fixtures into your testing process is good practice.
To create the file, you can run the following command:
```bash
touch tests/conftest.py
```
Since your tests will rely on the injection of the fixtures, you must define the fixtures first. When defining fixtures, you need to apply the `pytest.fixture` decorator above each function. For this example, you'll create two fixtures: one that defines the owner of the contract and one that deploys the contract from the owner's account.
The `owner` fixture will use the built-in `accounts` fixture to take the first account in the list of test accounts provided by Ape and return it. The `box` fixture will deploy the `Box` contract type using the built-in `project` fixture, you simply have to provide the name of the contract and use the `owner` fixture to deploy it.
tests/conftest.py
```python
import pytest
@pytest.fixture
def owner(accounts):
return accounts[0]
@pytest.fixture
def box(owner, project):
return owner.deploy(project.Box)
```
Now that you've created the fixtures, you can start creating your tests. Each test function name must start with `test_` and describe what the test does. For this example, you can use `test_store_value`, as you'll create a test for the `store` function. The test will store a value and then retrieve it, asserting that the retrieved value is equal to the value passed into the `store` function.
To use the `owner` and `box` fixtures, you must pass them into your test function, which will inject the fixtures automatically for you to use. The `owner` account will be used to call the `store` function of the `box` contract instance.
tests/test\_box.py
```python
def test_store_value(box, owner):
new_value = 5
box.store(new_value, sender=owner)
assert box.retrieve() == new_value
```
And that's it! That's all you'll need inside your test file. You can use the following command to run the test:
```bash
ape test
```
The results of running the test will be printed to the terminal.
{% code overflow="wrap" %}
```bash
ape test===================== test session starts ======================platform darwin -- Python 3.10.4, pytest-7.2.1, pluggy-1.4.0rootdir: /Users/phron/apeplugins: eth-ape-0.7.7, web3-6.15.1collected 1 item
tests/test_box.py . [100%]
====================== 1 passed in 0.70s =======================
```
{% endcode %}
Now that you have confidence in your contract, the next step is to deploy it.
### Deploy the Contract
To deploy your contracts, create a deployment script named `deploy.py` inside of the `scripts` directory:
```bash
touch scripts/deploy.py
```
Next, you'll need to write the deployment script. You'll need to load the account you will use to deploy the contract and access it by its name using the project manager.
scripts/deploy.py
```python
from ape import project, accounts
def main():
# Load your account by its name
account = accounts.load("alice")
# Deploy the contract using your account
return account.deploy(project.Box)
```
Now you're ready to deploy the `Box` contract! To configure your project for Phron, you will need to have your own endpoint and API key, which you can get from one of the supported Endpoint Providers.
Take the following steps to initiate and send the deployment transaction:
1. Run the deployment script using the `ape run deploy` command
```bash
ape run deploy --network INSERT_RPC_API_ENDPOINT
```
>
Note
> For the ape run deploy command to work as intended, the deployment script must be named deploy.py and stored in the scripts directory, and the script must define a main() method.
>
1. Review the transaction details and enter **y** to sign the transaction
2. Enter your passphrase for your account
3. Enter **y** to leave your account unlocked or **n** to lock it
After you follow the prompts and submit the transaction, the transaction hash, total fees paid, and contract address will be displayed in the terminal.
{% code overflow="wrap" %}
```bash
ape run deploy --network https://testnet.phron.ai : Connecting to a 'phron' node.
DynamicFeeTransaction: chainId: 7744 from: 0x097D9Eea23DE2D3081169e0225173d0C55768338 gas: 123964 nonce: 372 value: 0 data: 0x307836...303333 type: 2 maxFeePerGas: 125000000 maxPriorityFeePerGas: 0 accessList: []
Sign: [y/N]: yEnter passphrase to unlock 'alice' []:Leave 'alice' unlocked? [y/N]: nINFO: Confirmed 0x365cd903e7fac5ad1f815d7a6f211b1aa32bd7d78630c2e81d67514cfb9e55bb (total fees paid = 15326250000000)SUCCESS: Contract 'Box' deployed to: 0x68039277300E8B104dDf848029dCA04C2EFe8610
```
{% endcode %}
Congratulations! Your contract is live! Save the address to interact with your contract in the following section.
### Interact with the Contract
You can interact with contracts using the Ape console for quick debugging and testing, or write a script.
#### Using The Ape Console
To interact with your newly deployed contract, you can launch the Ape console by running:
```bash
ape console --network INSERT_RPC_API_ENDPOINT
```
Next, you'll need to create a contract instance using the contract's address:
```bash
box = Contract("INSERT_CONTRACT_ADDRESS")
```
{% code overflow="wrap" %}
```bash
ape console --network https://testnet.phron.ai : Connecting to a 'phron' node.
alice = accounts.load("alice") box = Contract("0x68039277300E8B104dDf848029dCA04C2EFe8610")
```
{% endcode %}
Now, you can interact with your contract instance! For example, you can set the variable to be stored in the `Box` contract using the following commands:
1. Call the `store` method by passing in a value to store and the account you want to use to send the transaction:
```bash
box.store(4, sender=alice)
```
2. Review the transaction details and enter **y** to sign the transaction
3. If you previously locked your account, you must enter your passphrase to unlock it. Otherwise, Ape will use the cached key for your account
4. If you unlocked your account in the previous step, you'll be asked if you want to leave your account unlocked. You can enter **y** to leave it unlocked or **n** to lock it
After you follow the prompts and submit the transaction, the transaction hash and total fees paid will be displayed in the terminal.
{% code overflow="wrap" %}
```bash
box.store(4, sender=alice)DynamicFeeTransaction: chainId: 7744 to: 0x68039277300E8B104dDf848029dCA04C2EFe8610 from: 0x097D9Eea23DE2D3081169e0225173d0C55768338 gas: 45668 nonce: 373 value: 0 data: 0x307836...303034 type: 2 maxFeePerGas: 125000000 maxPriorityFeePerGas: 0 accessList: []
Sign: [y/N]: yEnter passphrase to unlock 'alice' []:Leave 'alice' unlocked? [y/N]: nINFO: Confirmed 0xd2e8305f22f33c1ab8ccaaef94252a93ff0f69c9bf98503fc2744bf257f1ef67 (total fees paid = 5573750000000) Receipt 0xd2e8305f22f33c1ab8ccaaef94252a93ff0f69c9bf98503fc2744bf257f1ef67
```
{% endcode %}
Then, you can retrieve the stored value by calling the `retrieve` method:
```bash
box.retrieve()
```
The number you just stored in the previous steps will be printed to the console.
contract.retrieve() 4
#### Using a Script
You can also write a script to interact with your newly deployed contract. To get started, you can create a new file in the `scripts` directory:
```bash
touch scripts/store-and-retrieve.py
```
Next, you can write a script that stores and retrieves a value. Note that when creating a contract instance to interact with, you must pass in the address of the deployed contract.
scripts/store-and-retrieve.py
```python
from ape import Contract, accounts
def main():
account = accounts.load("alice")
box = Contract("INSERT_CONTRACT_ADDRESS")
store = box.store(4, sender=account)
print("Transaction hash for updating the stored value:", store.txn_hash)
retrieve = box.retrieve()
print("Stored value:", retrieve)
```
Now, you can run the script to set the stored value and retrieve it:
1. Run the script
```bash
ape run store-and-retrieve --network INSERT_RPC_API_ENDPOINT
```
2. Review the transaction details and enter **y** to sign the transaction
3. If you previously locked your account, you must enter your passphrase to unlock it. Otherwise, Ape will use the cached key for your account
4. If you unlocked your account in the previous step, you'll be asked if you want to leave your account unlocked. You can enter **y** to leave it unlocked or **n** to lock it
Once completed, you should see a transaction hash and a value of `4` printed to the console.
{% code overflow="wrap" %}
```bash
ape run store-and-retrieve --network https://testnet.phron.ai : chainId: 7744 to: 0x68039277300E8B104dDf848029dCA04C2EFe8610 from: 0x097D9Eea23DE2D3081169e0225173d0C55768338 gas: 25974 nonce: 374 value: 0 data: 0x307836...303035 type: 2 maxFeePerGas: 125000000 maxPriorityFeePerGas: 0 accessList: []
Sign: [y/N]: yEnter passphrase to unlock 'alice' []:Leave 'alice' unlocked? [y/N]: nINFO: Confirmed 0x6d74e48c23fd48438bf48baad34e235693c737bd880ef0077c0fb996f3896f5f (total fees paid = 3086250000000)Transaction hash for updating the stored value: 0x6d74e48c23fd48438bf48baad34e235693c737bd880ef0077c0fb996f3896f5fStored value: 5
```
{% endcode %}
Congratulations! You have successfully deployed and interacted with a contract using Ape!
This tutorial is for educational purposes only. As such, any contracts or code created in this tutorial should not be used in production.The information presented herein has been provided by third parties and is made available solely for general information purposes. Phron does not endorse any project listed and described on the Phron Doc Website (). Phron does not warrant the accuracy, completeness or usefulness of this information. Any reliance you place on such information is strictly at your own risk. Phron disclaims all liability and responsibility arising from any reliance placed on this information by you or by anyone who may be informed of any of its contents. All statements and/or opinions expressed in these materials are solely the responsibility of the person or entity providing those materials and do not necessarily represent the opinion of Phron. The information should not be construed as professional or financial advice of any kind. Advice from a suitably qualified professional should always be sought in relation to any particular matter or circumstance. The information herein may link to or integrate with other websites operated or content provided by third parties, and such other websites may link to this website. Phron has no control over any such other websites or their content and will have no liability arising out of or related to such websites or their content. The existence of any such link does not constitute an endorsement of such websites, the content of the websites, or the operators of the websites. These links are being provided to you only as a convenience and you release and hold Phron harmless from any and all liability arising from your use of this information or the information provided by any third-party website or service.
# Brownie
## Using Brownie to Deploy To Phron
### Introduction
[Brownie](https://eth-brownie.readthedocs.io/) is an Ethereum development environment that helps Python developers manage and automate the recurring tasks inherent to building smart contracts and DApps. Brownie can directly interact with Phron's Ethereum API so it can also be used to deploy smart contracts on Phron.
This guide will cover how to use Brownie to compile, deploy, and interact with Ethereum smart contracts on the Phron TestNet.
**Please note that Brownie is no longer actively maintained.** You can check out [Ape](https://docs.apeworx.io/ape/stable) as an alternative Python Ethereum development environment.
### Checking Prerequisites
To get started, you will need the following:
* Have MetaMask installed and connected to Phron
* Have an account with funds. You can get DEV tokens for testing on Phron once every 24 hours from the [Phron Faucet](https://faucet.phron.ai/).
* To test out the examples in this guide on Phron, you will need to have your own endpoint and API key, which you can get from one of the supported Endpoint Providers
For this guide, Python version 3.9.10, pip version 22.0.3, and pipx version 1.0.0 were used.
### Creating a Brownie Project
You will need to install Brownie and create a Brownie project if you don't already have one. You can choose to either create an empty project or use a [Brownie mix](https://eth-brownie.readthedocs.io/en/stable/init.html?highlight=brownie%20mix#creating-a-project-from-a-template), which is essentially a template to build your project on. For this example, you can create an empty project. You can get started by completing the following steps:
1. Create a directory for your project
```bash
mkdir brownie && cd brownie
```
2. If you don't already have `pipx` installed, go ahead and install it
```bash
python3 -m pip install --user pipx
python3 -m pipx ensurepath
```
3. [Install Brownie using `pipx`](https://eth-brownie.readthedocs.io/en/stable/install.html), which is used to run executables installed locally in your project. Brownie will be installed into a virtual environment and be available directly from the command line
```bash
pipx install eth-brownie
```
> ### Note
>
> A common error while installing Brownie on Ubuntu is:
```bash
pip seemed to fail to build package:
pyyaml==5.4.1
Some possibly relevant errors from pip install:
error: subprocess-exited-with-error
AttributeError: cython_sources
Error installing eth-brownie.
```
This can be resolved by using the following command:
```bash
pip3 install wheel && \
pip3 install --no-build-isolation "Cython<3" "pyyaml==5.4.1" && \
pip3 install --upgrade --no-cache-dir eth-brownie
```
1. Create a project
```bash
brownie init
```
phron@ubuntu:~$ brownie init
Brownie v1.19.1 - Python development framework for Ethereum

SUCCESS: A new Brownie project has been initialized at /home/moonbeam/brownie

phron@ubuntu:~$ ls
build contracts interfaces reports scripts tests
Your Brownie project should contain the following empty directories:
* **build** - for project data such as contract artifacts from compilation
* **contracts** - to store the smart contract files
* **interfaces** - for smart contract interfaces that are required for your project
* **reports** - for JSON report files for use in the [Brownie GUI](https://eth-brownie.readthedocs.io/en/stable/gui.html)
* **scripts** - where Python scripts used for deploying contracts or other automated tasks will live
* **tests** - to store Python scripts for testing your project. Brownie uses the `pytest` framework for unit testing
Another important file to note that is not included in an empty project is the `brownie-config.yaml` configuration file. The configuration file is optional and comes in handy when customizing specific settings such as a default network, compiler version and settings, and more.
### Network Configuration
To deploy to a Phron network, you'll need to add and configure the network. Network configurations in Brownie are added from the command line. Brownie can be used with both development and live environments.
Phron are supported out of the box with Brownie as of version 1.19.3. To view the complete list of supported networks, you can run the following command:
```bash
brownie networks list
```
```bash
brownie networks list
Phron ├─Mainnet: Phron
```
If you're looking to deploy a contract to a Phron development node you'll need to add the network configurations. Under the hood, Brownie uses Ganache for development environments. However, since a Phron development node acts as your own personal development environment, Ganache isn't needed. Therefore, you can configure a development node as a "live" network.
To add Phron development node configurations, you can run the following command:
{% code overflow="wrap" %}
```bash
brownie networks add Phron phron-dev host=http://127.0.0.1:9944 name=Development chainid=7744
```
{% endcode %}
If you successfully added the network, you'll see a success message along with the network details in the terminal.
To deploy to a Phron network, or run tests on a specific network, you can specify the network by appending the following to the given command:
```bash
--network phron-main
```
If you would like to set a default network, you can do so by adding the following snippet to the `brownie-config.yaml` configuration file:
```bash
networks:
default: phron-main
```
> ### Note
>
> Keep in mind that the `brownie-config.yaml` file isn't automatically created, you can optionally create it yourself.
#### Setting your Networks RPC URLs
It is recommended that you override the default Brownie RPC URLs to your own RPC endpoint or the public Phron network endpoints. You can override the default Brownie RPC URL for each network as follows:
```bash
brownie networks modify phron-main host=INSERT_RPC_API_ENDPOINT
```
{% code overflow="wrap" %}
```bash
brownie networks modify phron-main host=https://testnet.phron.ai
SUCCESS: Network 'Mainnet' has been modified └─Mainnet ├─id: phron-main ├─chainid: 7744 ├─explorer: https://testnet.phronscan.io/ ├─host: https://testnet.phronscan └─multicall2: 0x1337BedC9D22ecbe766dF105c9623922A27963EC
```
{% endcode %}
### Account Configuration
Before you can deploy a contract, you'll need to configure your account, which is also done from the command line. To add a new account you can run:
```bash
brownie accounts new INSERT_ACCOUNT_NAME
```
Make sure to replace `INSERT_ACCOUNT_NAME` with your name of choice. For this example, `alice` will be used as the account name.
You'll be prompted to enter in your private key and a password to encrypt the account with. If the account was successfully configured, you'll see your account address printed to the terminal.
{% code overflow="wrap" %}
```bash
brownie accounts new aliceBrownie v1.19.1 - Python development framework for Ethereum
Enter the private key you wish to add: 0x5b92d6e98884f76de468fa3f6278f880748bebc13595d45af5bdc4da702133Enter the password to encrypt this account with: SUCCESS: A new account 'Oxf24FF3a9CF04c71Dbc94D06566f7A27B94566cac' has been generated with the id 'alice'
```
{% endcode %}
### The Contract File
Next you can create a contract inside of the `contracts` directory. The smart contract that you'll deploy as an example will be called `Box`, it will let you store a value that can be retrieved later. You can create a `Box.sol` contract by running the following command:
```bash
cd contracts && touch Box.sol
```
Open the file and add the following contract to it:
```solidity
// contracts/Box.sol
pragma solidity ^0.8.1;
contract Box {
uint256 private value;
// Emitted when the stored value changes
event ValueChanged(uint256 newValue);
// Stores a new value in the contract
function store(uint256 newValue) public {
value = newValue;
emit ValueChanged(newValue);
}
// Reads the last stored value
function retrieve() public view returns (uint256) {
return value;
}
}
```
### Compiling Solidity
To compile the contract you can simply run:
```bash
brownie compile
```
{% code overflow="wrap" %}
```bash
brownie compileBrownie v1.19.1 - Python development framework for Ethereum
New compatible solc version available: 0.8.4Compiling contracts... Solc version: 0.8.4 Optimizer: Enabled Runs: 200 EVM Version: IstanbulGenerating build data... - BoxProject has been compiled. Build artifacts saved at /home/phron/brownie/build/contracts
```
{% endcode %}
> ### Note
>
> The first time you compile your contracts it may take longer than usual while the `solc` binary is installed.
After compilation, you'll find the build artifacts in the `build/contracts` directory. The artifacts contain the bytecode and metadata of the contract, which are `.json` files. The `build` directory should already be in the `.gitignore` file but if it's not, it’s a good idea to add it there.
If you want to specify the compiler version or compilation settings, you can do so in the `brownie-config.yaml` file. Please note that if you haven't already created this file, you will need to do so. Then you can specify the compiler like so:
```javascript
compiler:
evm_version: null
solc:
version: 0.8.13
optimizer:
enabled: true
runs: 200
```
> ### Note
>
> You can view the list of [EVM versions supported by Brownie](https://github.com/eth-brownie/brownie/blob/master/docs/compile.rst#the-evm-version) in their documentation.
Your contracts will only be compiled again if Brownie notices that a change has been made. To force a new compilation, you can run:
```bash
brownie compile --all
```
### Deploying the Contract
In order to deploy the `Box.sol` smart contract, you will need to write a simple deployment script. You can create a new file under the `scripts` directory and name it `deploy.py`:
```bash
cd scripts && touch deploy.py
```
Next, you need to write your deployment script. To get started start, take the following steps:
1. Import the `Box` contract and the `accounts` module from `brownie`
2. Load your account using `accounts.load()` which decrypts a keystore file and returns the account information for the given account name
3. Use the `deploy` method that exists within this instance to instantiate the smart contract specifying the `from` account and the `gas_limit`
```python
# scripts/deploy.py
from brownie import Box, accounts
def main():
account = accounts.load("alice")
return Box.deploy({"from": account, "gas_limit": "200000"})
```
You can now deploy the `Box.sol` contract using the `run` command and specifying the network:
```bash
brownie run scripts/deploy.py --network phron-main
```
After a few seconds, the contract is deployed, and you should see the address in the terminal.
{% code overflow="wrap" %}
```bash
brownie run scripts/deploy.py --network phron-testnetBrownie v1.19.1 - Python development framework for Ethereum
BrownieProject is the active project.
Running 'scripts/deploy.py: :mainEnter password for "alice":Transaction sent: Oxf091d0415d1a4614ccd76a5f5f985fdf6abbd68d7481647fb3144dfecffb333Gas price: 1.0 gwei Gas limit: 200000 Nonce: 15298Box.constructor confirmed Block: 1901367 Gas used: 103095 (51.55%)Box deployed at: OxccA4aDdD51Af1E76beZaBE5FD04A82EB6063C65
```
{% endcode %}
Congratulations, your contract is live! Save the address, as you will use it to interact with this contract instance in the next step.
### Interacting with the Contract
You can interact with contracts using the Brownie console for quick debugging and testing or you can also write a script to interact.
#### Using Brownie Console
To interact with your newly deployed contract, you can launch the Brownie `console` by running:
```bash
brownie console --network phron-main
```
The contract instance will automatically be accessible from the console. It will be wrapped in a `ContractContainer` which also enables you to deploy new contract instances. To access the deployed contract you can use `Box[0]`. To call the `store` method and set the value to `5`, you can take the following steps:
1. Create a variable for the contract
```bash
box = Box[0]
```
2. Call the `store` method using your account and set the value to `5`
```bash
box.store(5, {'from': accounts.load('alice'), 'gas_limit': '50000'})
```
3. Enter the password for your account
The transaction will be signed by your account and broadcasted to the network. Now, you can retrieve the value by taking these steps:
1. Call the `retrieve` method
```bash
box.retrieve({'from': accounts.load('alice')})
```
2. Enter your password
You should see `5` or the value you have stored initially.
{% code overflow="wrap" %}
```bash
brownie console --network phron-testnetBrownie v1.19.1 - Python development framework for Ethereum
BrownieProject is the active project.Brownie environment is ready.box = Box[0]
box. store(5, {'from': accounts. load('alice"), 'gas-limit: "50000").Enter password for "alice":Transaction sent: 0x2418038735934917861dfa77068fe6dadd0b3c7e4362d6f73c1712aaf6a89aGas price: 1.0 gwei Box.store confirmed Gas limit: 50000 Nonce: 15299Box.store confirmed Block: 1901372 Gas used: 44593 (89.19%)
Transaction '0×24180387359349178b1dfa770e68fe6dadd0b3c7e4362d6f73c1712aaf6a89a'box.retrieve ({'from': accounts. load('alice")})Enter password for "alice":5
```
{% endcode %}
#### Using a Script
You can also write a script to interact with your newly deployed contract. To get started, you can create a new file in the `scripts` directory:
```bash
cd scripts && touch store-and-retrieve.py
```
Next, you need to write your script that will store and then retrieve a value. To get started, take the following steps:
1. Import the `Box` contract and the `accounts` module from `brownie`
2. Load your account using `accounts.load()` which decrypts a keystore file and returns the account information for the given account name
3. Create a variable for the `Box` contract
4. Use the `store` and `retrieve` functions to store a value and then retrieve it and print it to the console
```python
# scripts/store-and-retrieve.py
from brownie import Box, accounts
def main():
account = accounts.load("alice")
box = Box[0]
store = box.store(5, {"from": accounts.load("alice"), "gas_limit": "50000"})
retrieve = box.retrieve({"from": accounts.load("alice")})
print("Transaction hash for updating the stored value: " + store)
print("Stored value: " + retrieve)
```
To run the script, you can use the following command:
```bash
brownie run scripts/store-and-retrieve.py --network phron-main
```
You'll need to enter the password for Alice to send the transaction to update the stored value. Once the transaction goes through, you should see a transaction hash and a value of `5` printed to the console.
Congratulations, you have successfully deployed and interacted with a contract using Brownie!
This tutorial is for educational purposes only. As such, any contracts or code created in this tutorial should not be used in production.The information presented herein has been provided by third parties and is made available solely for general information purposes. Phron does not endorse any project listed and described on the Phron Doc Website (). Phron does not warrant the accuracy, completeness or usefulness of this information. Any reliance you place on such information is strictly at your own risk. Phron disclaims all liability and responsibility arising from any reliance placed on this information by you or by anyone who may be informed of any of its contents. All statements and/or opinions expressed in these materials are solely the responsibility of the person or entity providing those materials and do not necessarily represent the opinion of Phron. The information should not be construed as professional or financial advice of any kind. Advice from a suitably qualified professional should always be sought in relation to any particular matter or circumstance. The information herein may link to or integrate with other websites operated or content provided by third parties, and such other websites may link to this website. Phron has no control over any such other websites or their content and will have no liability arising out of or related to such websites or their content. The existence of any such link does not constitute an endorsement of such websites, the content of the websites, or the operators of the websites. These links are being provided to you only as a convenience and you release and hold Phron harmless from any and all liability arising from your use of this information or the information provided by any third-party website or service.
# Foundry
## Using Foundry to Deploy To Phron
### Introduction
[Foundry](https://github.com/foundry-rs/foundry) is an Ethereum development environment written in Rust that helps developers manage dependencies, compile projects, run tests, deploy contracts, and interact with blockchains from the command line. Foundry can directly interact with Phron's Ethereum API so it can be used to deploy smart contracts into Phron.
Four tools make up Foundry:
* [**Forge**](https://book.getfoundry.sh/forge) - compiles, tests, and deploys contracts
* [**Cast**](https://book.getfoundry.sh/cast) - a command line interface for interacting with contracts
* [**Anvil**](https://book.getfoundry.sh/anvil) - a local TestNet node for development purposes that can fork preexisting networks
* [**Chisel**](https://book.getfoundry.sh/chisel) - a Solidity REPL for quickly testing Solidity snippets
This guide will cover how to use Foundry to compile, deploy, and debug Ethereum smart contracts on the Phron TestNet.
### Checking Prerequisites
To get started, you will need the following:
* Have an account with funds. You can get DEV tokens for testing on Phron once every 24 hours from the [Phron Faucet](https://faucet.phron.ai/)
* To test out the examples in this guide on Phron, you will need to have your own endpoint and API key, which you can get from one of the supported Endpoint Providers
* Have [Foundry installed](https://book.getfoundry.sh/getting-started/installation)
### Creating a Foundry Project
You will need to create a Foundry project if you don't already have one. You can create one by completing the following steps:
1. Install Foundry if you haven't already. If on Linux or MacOS, you can run these commands:
```bash
curl -L https://foundry.paradigm.xyz | bash
foundryup
```
If on Windows, you'll have to install Rust and then build Foundry from source:
2. Create the project, which will create a folder with three folders within it, and open it:
```bash
forge init foundry && cd foundry
```
With the default project created, you should see three folders.
* `lib` - all of the project's dependencies in the form of git submodules
* `src` - where to put your smart contracts (with functionality)
* `test` - where to put the forge tests for your project, which are written in Solidity
In addition to these three folders, a git project will also be created along with a prewritten `.gitignore` file with relevant file types and folders ignored.
### The Source Folder
The `src` folder may already contain `Counter.sol`, a minimal Solidity contract. Feel free to delete it. To avoid errors, you should also delete the `Counter.s.sol` file in the `scripts` folder and the `Counter.t.sol` file in the `test` folder. In the following steps, you will be deploying an ERC-20 contract. In the contracts directory, you can create the `MyToken.sol` file:
```bash
cd src
touch MyToken.sol
```
Open the file and add the following contract to it:
```solidity
pragma solidity ^0.8.0;
// Import OpenZeppelin Contract
import "@openzeppelin/contracts/token/ERC20/ERC20.sol";
// This ERC-20 contract mints the specified amount of tokens to the contract creator
contract MyToken is ERC20 {
constructor(uint256 initialSupply) ERC20("MyToken", "MYTOK") {
_mint(msg.sender, initialSupply);
}
}
```
Before you attempt to compile, install OpenZeppelin contracts as a dependency. You may have to commit previous changes to git beforehand. By default, Foundry uses git submodules instead of npm packages, so the traditional npm import path and command are not used. Instead, use the name of OpenZeppelin's GitHub repository:
```bash
forge install OpenZeppelin/openzeppelin-contracts
```
### Compiling Solidity
Once all dependencies have been installed, you can compile the contract:
```bash
forge build
```
{% code overflow="wrap" %}
```bash
forge build[⠒] Compiling...[⠰] Compiling 30 files with 0.8.23[⠔] Solc 0.8.23 finished in 2.29sCompiler run successful!
```
{% endcode %}
After compilation, two folders will be created: `out` and `cache`. The ABI and bytecode for your contracts will be contained within the `out` folder. These two folders are already ignored by the `.gitignore` included in the default Foundry project initialization.
### Deploying the Contract
There are two primary ways to deploy contracts using Foundry. The first is the straightforward command `forge create`. There's also the more flexible and powerful option of foundry scripting, which runs simulations before any deployments. In the following sections, `forge create` and foundry scripting will both be covered.
#### Using Forge Create
Deploying the contract with `forge create` takes a single command, but you must include an RPC endpoint, a funded private key, and constructor arguments. `MyToken.sol` asks for an initial supply of tokens in its constructor, so each of the following commands includes 100 as a constructor argument. You can deploy the `MyToken.sol` contract using the following command for the correct network:
```bash
forge create --rpc-url INSERT_RPC_API_ENDPOINT \
--constructor-args 100 \
--private-key INSERT_YOUR_PRIVATE_KEY \
src/MyToken.sol:MyToken
```
After you've deployed the contract and a few seconds have passed, you should see the address in the terminal.
{% code overflow="wrap" %}
```bash
forge create --rpc-url https://testnet.phron.ai \ --constructor-args 100 \ --private-key INSERT_PRIVATE_KEY \ src/MyToken.sol:MyToken
[⠒] Compiling...No files changed, compilation skippedDeployer: 0x3B939FeaD1557C741Ff06492FD0127bd287A421eDeployed to: 0xc111402Aa1136ff6224106709ae51864512eC68fTransaction hash: 0xd77fc26aa296e81f35718b5878cda98e8371f6bf33b0f57e7d92997a36cf6465
```
{% endcode %}
Congratulations! Your contract is live! Save the address, as you will use it to interact with this contract instance in the next step.
#### Deploying via Solidity Scripting
Solidity scripting is a more powerful and flexible way to deploy contracts than [`forge create`](https://docs.moonbeam.network/builders/ethereum/dev-env/foundry/#deploying-the-contract). Writing a Solidity script is identical to writing a typical Solidity smart contract, though you won't ever deploy this contract.
You can tailor the behavior of `forge script` with various parameters. All components are optional except for local simulation, which is a required part of every run. The `forge script` command will attempt to execute all applicable steps in the following order:
1. **Local simulation** - simulate the transaction(s) in a local EVM
2. **Onchain simulation** - simulate the transaction(s) via the provided RPC URL
3. **Broadcasting** - when the `--broadcast` flag is provided, and simulations succeed, the transaction(s) are dispatched
4. **Verification** - API-based smart contract verification when the `--verify` flag and a valid API key are provided
Now, go ahead and write the script. In the script folder, create a file named `MyToken.s.sol`. Copy and paste the contents of the below file.
```solidity
// SPDX-License-Identifier: UNLICENSED
pragma solidity ^0.8.13;
import "forge-std/Script.sol";
import "../src/MyToken.sol";
contract MyScript is Script {
function run() external {
uint256 deployerPrivateKey = INSERT_PRIVATE_KEY;
vm.startBroadcast(deployerPrivateKey);
MyToken mytoken = new MyToken(1000000000);
vm.stopBroadcast();
}
}
```
{% hint style="warning" %}
### Remember
Remember never to store a production private key in a file, as shown above. This example is strictly for demonstration purposes.
{% endhint %}
Notice that even though the above script is not being deployed, it still requires all the typical formatting for a Solidity contract, such as the pragma statement.
You can deploy the `MyToken.sol` contract with the below command. Remember that it will execute all relevant steps in order. For this example, Foundry will first attempt a local simulation and a simulation against the provided RPC before deploying the contract. Foundry won't proceed with the deployment if any of the simulations fail.
{% code overflow="wrap" %}
```bash
forge script script/MyToken.s.sol --rpc-url https://testnet.phron.ai --broadcast
```
{% endcode %}
If your script's execution succeeds, your terminal should resemble the output below.
{% code overflow="wrap" %}
```bash
forge script script/MyToken.s.sol --rpc-url https://testnet.phron.ai --broadcast[⠒] Compiling...Script ran successfully.EIP-3855 is not supported in one or more of the RPCs used. Unsupported Chain IDs: 7744.Contracts deployed with a Solidity version equal or higher than 0.8.20 might not work properly.For more information, please see https://eips.ethereum.org/EIPS/eip-3855## Setting up 1 EVM.==========================
Chain 1287Estimated gas price: 3.25 gweiEstimated total gas used for script: 1346155Estimated amount required: 0.00437500375 ETH==========================
Finding wallets for all the necessary addresses...Sending transactions [0 - 0].⠁ [00:00:00] [#################################################] 1/1 txes (0.0s)Waiting for receipts. ⠉ [00:00:25] [#############################################] 1/1 receipts (0.0s)##### phron
✅ [Success]Hash: 0x95766ca2c8bc94171f9de783652d62468f004d686eb5ab82b3546774eee301bc Contract Address: 0x2A19aD12E9e8479207B78c39f5bCc848D386b9DABlock: 5881522Paid: 0.00309613125 ETH (990762 gas * 3.125 gwei)ONCHAIN EXECUTION COMPLETE & SUCCESSFUL.Total Paid: 0.00309613125 ETH (990762 gas * avg 3.125 gwei)Transactions saved to: /Users/ubuntu-jammy/foundry/foundry/broadcast/MyToken.s.sol/1287/run-latest.jsonSensitive values saved to: /Users/ubuntu-jammy/foundry/foundry/cache/MyToken.s.sol/1287/run-latest.json
```
{% endcode %}
And that's it! For more information about Solidity scripting with Foundry, be sure to check out [Foundry's documentation site](https://book.getfoundry.sh/tutorials/solidity-scripting).
### Interacting with the Contract
Foundry includes cast, a CLI for performing Ethereum RPC calls.
Try to retrieve your token's name using Cast, where `INSERT_YOUR_CONTRACT_ADDRESS` is the address of the contract that you deployed in the previous section:
```bash
cast call INSERT_YOUR_CONTRACT_ADDRESS "name()" --rpc-url INSERT_RPC_API_ENDPOINT
```
You should get this data in hexadecimal format:
{% code overflow="wrap" %}
```bash
0x000000000000000000000000000000000000000000000000000000000000002000000000000000000000000000000000000000000000000000000000000000074d79546f6b656e00000000000000000000000000000000000000000000000000
```
{% endcode %}
This is far from readable, but you can use Cast to convert it into your desired format. In this case, the data is text, so you can convert it into ASCII characters to see "My Token":
{% code overflow="wrap" %}
```bash
cast --to-ascii 0x000000000000000000000000000000000000000000000000000000000000002000 000000000000000000000000000000000000000000000000000000000000074d7954 6f6b656e00000000000000000000000000000000000000000000000000
MyToken
```
{% endcode %}
{% code overflow="wrap" %}
```bash
cast --to-ascii 0x000000000000000000000000000000000000000000000000000000000000002000000000000000000000000000000000000000000000000000000000000000074d79546f6b656e00000000000000000000000000000000000000000000000000
```
{% endcode %}
You can also mutate data with cast as well. Try burning tokens by sending them to the zero address.
```bash
cast send --private-key INSERT_YOUR_PRIVATE_KEY \
--rpc-url INSERT_RPC_API_ENDPOINT \
--chain 7744 \
INSERT_YOUR_CONTRACT_ADDRESS \
"transfer(address,uint256)" 0x0000000000000000000000000000000000000001 1
```
The transaction will be signed by your Phron account and be broadcast to the network. The output should look similar to:
{% code overflow="wrap" %}
```bash
cast send --private-key INSERT_PRIVATE_KEY \ --rpc-url https://testnet.phron.ai \ --chain 7744 \ INSERT_CONTRACT_ADDRESS \ "transfer(address,uint256)" 0x0000000000000000000000000000000000000001 1
blockHash 0x6f99fac1bb49feccb7b0476e0ffcd3cef4c456aa9111e193ce11c7a1ab62314eblockNumber 5892860contractAddresscumulativeGasUsed 51332effectiveGasPrice 3125000000gasUsed 51332logs [{"address":"0xc111402aa1136ff6224106709ae51864512ec68f","topics":["0xddf252ad1be2c89b69 c2b068fc378daa952ba7f163c4a11628f55a4df523b3ef", "0x0000000000000000000000003b939fead155 7c741ff06492fd0127bd287a421e", "0x0000000000000000000000000000000000000000000000000000000000000001"], "data":"0x0000000000000000000000000000000000000 000000000000000000000000001", "blockHash":"0x6f99fac1bb49feccb7b0476e0ffcd3cef4c4 56aa9111e193ce11c7a1ab62314e", "blockNumber":"0x59eafc", "transactionHash":"0xdd5f11be68d5 2967356ccf34b9a4b2632d0d5ac8932ff27e72c544320dec33e3", "transactionIndex":"0x0","logIndex":"0x0","transactionLogIndex":"0x0","removed":false}]logsBloom 0x000000000000000000000000000000000000000000000000000000000000000000000000000000004 00000000000000000000000000000000000000000040000000000000000000000000008000000000000 00000004000000000000000000000000000000000000000100000000000000000000000000000000001 00000010000000000000000000000000000000000000000000000000000000002000000040000000000 00000000000000000000000000000000000000000000000000000000002000000000000000000000000 00000000000000000000000000004000000000000000000000000000000000000000000000000000000 0001000000rootstatus 1transactionHash 0xdd5f11be68d52967356ccf34b9a4b2632d0d5ac8932ff27e72c544320dec33e3transactionIndex 0type 2
```
{% endcode %}
Congratulations, you have successfully deployed and interacted with a contract using Foundry!
### Forking with Anvil
As previously mentioned, [Anvil](https://book.getfoundry.sh/anvil) is a local TestNet node for development purposes that can fork preexisting networks. Forking Phron allows you to interact with live contracts deployed on the network.
There are some limitations to be aware of when forking with Anvil. Since Anvil is based on an EVM implementation, you cannot interact with any of the Phron precompiled contracts and their functions. Precompiles are a part of the Substrate implementation and therefore cannot be replicated in the simulated EVM environment. This prohibits you from interacting with cross-chain assets on Phron and Substrate-based functionality such as staking and governance.
To fork Phron, you will need to have your own endpoint and API key which you can get from one of the supported Endpoint Providers.
To fork Phron from the command line, you can run the following command from within your Foundry project directory:
```bash
anvil --fork-url INSERT_RPC_API_ENDPOINT
```
Your forked instance will have 10 development accounts that are pre-funded with 10,000 test tokens. The forked instance is available at `http://127.0.0.1:8545/`. The output in your terminal should resemble the following:
{% code overflow="wrap" %}
```bash
anvil --fork-url https://testnet.phron.ai
Available Accounts==================(0) "0xf39Fd6e51aad88F6F4ce6aB8827279cffFb92266" (10000.000000000000000000 ETH)(1) "0x70997970C51812dc3A010C7d01b50e0d17dc79C8" (10000.000000000000000000 ETH)(2) "0x3C44CdDdB6a900fa2b585dd299e03d12FA4293BC" (10000.000000000000000000 ETH)(3) "0x90F79bf6EB2c4f870365E785982E1f101E93b906" (10000.000000000000000000 ETH)(4) "0x15d34AAf54267DB7D7c367839AAf71A00a2C6A65" (10000.000000000000000000 ETH)(5) "0x9965507D1a55bcC2695C58ba16FB37d819B0A4dc" (10000.000000000000000000 ETH)(6) "0x976EA74026E726554dB657fA54763abd0C3a0aa9" (10000.000000000000000000 ETH)(7) "0x14dC79964da2C08b23698B3D3cc7Ca32193d9955" (10000.000000000000000000 ETH)(8) "0x23618e81E3f5cdF7f54C3d65f7FBc0aBf5B21E8f" (10000.000000000000000000 ETH)(9) "0xa0Ee7A142d267C1f36714E4a8F75612F20a79720" (10000.000000000000000000 ETH)
Private Keys==================(0) 0xac0974bec39a17e36ba4a6b4d238ff944bacb478cbed5efcae784d7bf4f2ff80(1) 0x59c6995e998f97a5a0044966f0945389dc9e86dae88c7a8412f4603b6b78690d(2) 0x5de4111afa1a4b94908f83103eb1f1706367c2e68ca870fc3fb9a804cdab365a(3) 0x7c852118294e51e653712a81e05800f419141751be58f605c371e15141b007a6(4) 0x47e179ec197488593b187f80a00eb0da91f1b9d0b13f8733639f19c30a34926a(5) 0x8b3a350cf5c34c9194ca85829a2df0ec3153be0318b5e2d3348e872092edffba(6) 0x92db14e403b83dfe3df233f83dfa3a0d7096f21ca9b0d6d6b8d88b2b4ec1564e(7) 0x4bbbf85ce3377467afe5d46f804f221813b2bb87f24d81f60f1fcdbf7cbf4356(8) 0xdbda1821b80551c9d65939329250298aa3472ba22feea921c0cf5d620ea67b97(9) 0x2a871d0798f97d79848a013d4936a73bf4cc922c825d33c1cf7073dff6d409c6
Wallet==================Mnemonic: test test test test test test test test test test test junkDerivation path: m/44'/60'/0'/0/
Fork==================Endpoint: https://testnet.phron.networkBlock number: 5892944Block hash: 0xc9579299f55d507c305d5357d4c1b9d9c550788ddb471b0231d8d0146e7144b7Chain ID: 7744
Base Fee==================125000000
Gas Limit==================30000000
Genesis Timestamp==================1705278817
Listening on 127.0.0.1:8545
```
{% endcode %}
To verify you have forked the network, you can query the latest block number:
{% code overflow="wrap" %}
```bash
curl --data '{"method":"eth_blockNumber","params":[],"id":1,"jsonrpc":"2.0"}' -H "Content-Type: application/json" -X POST localhost:8545
```
{% endcode %}
If you convert the `result` from [hex to decimal](https://www.rapidtables.com/convert/number/hex-to-decimal.html), you should get the latest block number from the time you forked the network. You can cross reference the block number using a block explorer.
From here you can deploy new contracts to your forked instance of Phron or interact with contracts already deployed. Building off of the previous example in this guide, you can make a call using Cast to check the balance of the minted MYTOK tokens in the account you deployed the contract with:
{% code overflow="wrap" %}
```bash
cast call INSERT_CONTRACT_ADDRESS "balanceOf(address)(uint256)" INSERT_YOUR_ADDRESS --rpc-url http://localhost:8545
```
{% endcode %}
### Using Chisel
Chisel is a Solidity REPL or shell. It allows a developer to write Solidity directly in the console for testing small snippets of code, letting developers skip the project setup and contract deployment steps for what should be a quick process.
Since Chisel is mainly useful for quick testing, it can be used outside of a Foundry project. But, if executed within a Foundry project, it will keep the configurations within `foundry.toml` when running.
For this example, you will be testing out some of the features of `abi` within Solidity because it is complex enough to demonstrate how Chisel could be useful. To get started using Chisel, run the following in the command line to start the shell:
```bash
chisel
```
In the shell, you can write Solidity code as if it were running within a function:
```bash
bytes memory myData = abi.encode(100, true, "Develop on Phron");
```
Let's say you were interested in how `abi` encoded data because you're looking into how to most efficiently store data on the blockchain and thus save gas. To view how the `myData` is stored in memory, you can use the following command while in the Chisel shell:
```bash
!memdump
```
`memdump` will dump all of the data in your current session. You'll likely see something like this below. If you aren't good at reading hexadecimal or if you don't know how ABI encoding works, then you might not be able to find where the `myData` variable has been stored.
{% code overflow="wrap" %}
```bash
chisel
Welcome to Chisel! Type `!help` to show available commands. bytes memory myData = abi.encode(100, true, "Develop on Phron");
!memdump[0x00:0x20]: 0x0000000000000000000000000000000000000000000000000000000000000000[0x20:0x40]: 0x0000000000000000000000000000000000000000000000000000000000000000[0x40:0x60]: 0x0000000000000000000000000000000000000000000000000000000000000140[0x60:0x80]: 0x0000000000000000000000000000000000000000000000000000000000000000[0x80:0xa0]: 0x00000000000000000000000000000000000000000000000000000000000000a0[0xa0:0xc0]: 0x0000000000000000000000000000000000000000000000000000000000000064[0xc0:0xe0]: 0x0000000000000000000000000000000000000000000000000000000000000001[0xe0:0x100]: 0x0000000000000000000000000000000000000000000000000000000000000060[0x100:0x120]: 0x0000000000000000000000000000000000000000000000000000000000000013[0x120:0x140]: 0x446576656c6f70206f6e204d6f6f6e6265616d00000000000000000000000000
```
{% endcode %}
Fortunately, Chisel lets you easily figure out where this information is stored. Using the `!rawstack` command, you can find the location in the stack where the value of a variable:
```bash
!rawstack myData
```
In this situation, since bytes is over 32 bytes in length, the memory pointer is displayed instead. But that's exactly what's needed since you already know the entirety of the stack from the `!memdump` command.
{% code overflow="wrap" %}
```bash
chisel
Welcome to Chisel! Type `!help` to show available commands. bytes memory myData = abi.encode(100, true, "Develop on Phron");
!memdump[0x00:0x20]: 0x0000000000000000000000000000000000000000000000000000000000000000[0x20:0x40]: 0x0000000000000000000000000000000000000000000000000000000000000000[0x40:0x60]: 0x0000000000000000000000000000000000000000000000000000000000000140[0x60:0x80]: 0x0000000000000000000000000000000000000000000000000000000000000000[0x80:0xa0]: 0x00000000000000000000000000000000000000000000000000000000000000a0[0xa0:0xc0]: 0x0000000000000000000000000000000000000000000000000000000000000064[0xc0:0xe0]: 0x0000000000000000000000000000000000000000000000000000000000000001[0xe0:0x100]: 0x0000000000000000000000000000000000000000000000000000000000000060[0x100:0x120]: 0x0000000000000000000000000000000000000000000000000000000000000013[0x120:0x140]: 0x446576656c6f70206f6e204d6f6f6e6265616d00000000000000000000000000 !rawstack myData
Type: bytes32 └ Data: 0x0000000000000000000000000000000000000000000000000000000000000080
```
{% endcode %}
The `!rawstack` command shows that the `myData` variable is stored at `0x80`, so when comparing this with the memory dump retrieved from the `!memdump` command, it looks like `myData` is stored like this:
```bash
[0x80:0xa0]: 0x00000000000000000000000000000000000000000000000000000000000000a0
[0xa0:0xc0]: 0x0000000000000000000000000000000000000000000000000000000000000064
[0xc0:0xe0]: 0x0000000000000000000000000000000000000000000000000000000000000001
[0xe0:0x100]: 0x0000000000000000000000000000000000000000000000000000000000000060
[0x100:0x120]: 0x0000000000000000000000000000000000000000000000000000000000000013
[0x120:0x140]: 0x446576656c6f70206f6e204d6f6f6e6265616d00000000000000000000000000
```
At first glance, this makes sense, since `0xa0` has a value of `0x64` which is equal to 100, and `0xc0` has a value of `0x01` which is equal to true. If you want to learn more about how ABI-encoding works, the [Solidity documentation for ABI is helpful](https://docs.soliditylang.org/en/v0.8.18/abi-spec.html). In this case, there are a lot of zeros in this method of data packing, so as a smart contract developer you might instead try to use structs or pack the data together more efficiently with bitwise code.
Since you're done with this code, you can clear the state of Chisel so that it doesn't mess with any future logic that you want to try out (while running the same instance of Chisel):
```bash
!clear
```
There's an even easier way to test with Chisel. When writing code that ends with a semicolon (`;`), Chisel will run it as a statement, storing its value in Chisel's runtime state. But if you only needed to see how the ABI-encoded data was represented, then you could get away with running the code as an expression. To try this out with the same `abi` example, write the following in the Chisel shell:
```bash
abi.encode(100, true, "Develop on Phron")
```
You should see something like the following:
{% code overflow="wrap" %}
```bash
!clearCleared session! abi.encode(100, true, "Develop on Phron")Type: dynamic bytes├ Hex (Memory):├─ Length ([0x00:0x20]): 0x00000000000000000000000000000000000000000000000000000000000000a0├─ Contents ([0x20:..]): 0x000000000000000000000000000000000000000000000000000000000000006400000000000000000000000000000000000000000000000000000000000000010000000000000000000000000000000000000000000000000000000000000060000000000000000000000000000000000000000000000000000000000000000134446576656c6f70206f6e204d6f6f6e6265616d00000000000000000000000000├ Hex (Tuple Encoded):├─ Pointer ([0x00:0x20]): 0x0000000000000000000000000000000000000000000000000000000000000020├─ Length ([0x20:0x40]): 0x00000000000000000000000000000000000000000000000000000000000000a0└─ Contents ([0x40:..]): 0x000000000000000000000000000000000000000000000000000000000000006400000000000000000000000000000000000000000000000000000000000000010000000000000000000000000000000000000000000000000000000000000060000000000000000000000000000000000000000000000000000000000000000134446576656c6f70206f6e204d6f6f6e6265616d00000000000000000000000000
```
{% endcode %}
While it doesn't display the data in the same way, you still get the contents of the data, and it also further breaks down how the information is coded, such as letting you know that the `0xa0` value defines the length of the data.
By default, when you leave the Chisel shell, none of the data is persisted. But you can instruct chisel to do so. For example, you can take the following steps to store a variable:
1. Store a `uint256` in Chisel
```bash
uint256 myNumber = 101;
```
2. Store the session with `!save`. For this example, you can use the number `1` as a save ID
```bash
!save 1
```
3. Quit the session
```bash
!quit
```
Then to view and interact with your stored Chisel states, you can take the following steps:
1. View a list of saved Chisel states
```bash
chisel list
```
2. Load your stored states
```bash
chisel load 1
```
3. View the `uint256` saved in Chisel from the previous set of steps
```bash
!rawstack myNumber
```
{% code overflow="wrap" %}
```bash
uint256 myNumber = 101; !save 1 Saved session to cache with ID = 1 !quitchisel list⚒️ Chisel Sessions├─ "2024-01-15 01:17:34" - chisel-1.jsonchisel load 1Welcome to Chisel! Type `!help` to show available commands. !rawstack myNumberType: bytes32└ Data: 0x0000000000000000000000000000000000000000000000000000000000000065
```
{% endcode %}
You can even fork networks while using Chisel:
```
!fork https://testnet.phronscan.io
```
Then, for example, you can query the balance of one of Phron's collators:
```solidity
0x12E7BCCA9b1B15f33585b5fc898B967149BDb9a5.balance
```
{% code overflow="wrap" %}
```bash
!fork https://testnet.phron.networkSet fork URL to https://testnet.phronscan.io 0x12E7BCCA9b1B15f33585b5fc898B967149BDb9a5.balanceType: uint├ Hex: 0x000000000000000000000000000000000000000000000358affd3d76ebb78555└ Decimal: 15803094286802091476309
```
{% endcode %}
If you want to learn more about Chisel, download Foundry and refer to its [official reference page](https://book.getfoundry.sh/reference/chisel).
### Foundry With Hardhat
Often, there will be the case where a project that you wish to integrate with has all of its setup within Hardhat, making it an arduous task to convert the entirety of the project into Foundry. This additional work is avoidable by creating a hybrid project that uses both Hardhat and Foundry features together. This is possible with Hardhat's [hardhat-foundry plugin](https://hardhat.org/hardhat-runner/plugins/nomicfoundation-hardhat-foundry).
To convert your preexisting Foundry project to a hybrid project, you will essentially have to install a Hardhat project into the same folder:
```bash
npm init
npm install --save-dev hardhat @nomicfoundation/hardhat-foundry
npx hardhat init
```
For more information, please refer to our documentation on [Creating a Hardhat Project](https://docs.moonbeam.network/builders/ethereum/dev-env/hardhat/#creating-a-hardhat-project).
After initializing the new Hardhat project, a few new folders and files should appear: `contracts`, `hardhat.config.js`, `scripts`, and `test/Lock.js`. You'll need to make a few modifications to create a hybrid project:
1. Edit the `hardhat.config.js` file within your repository. Open it up, and at the top, add the following:
```bash
require("@nomicfoundation/hardhat-foundry");
```
After adding the `hardhat-foundry` plugin, the typical `contracts` folders for Hardhat will not work because now Hardhat expects all smart contracts to be stored within Foundry's `src` folder
2. Move all smart contracts within the `contracts` folder into the `src` folder, and then delete the `contracts` folder
3. Edit the `foundry.toml` file to ensure that dependencies installed via Git submodules and npm can be compiled by the Forge tool. Edit the `profile.default` to ensure that the `libs` entry has both `lib` and `node_modules`:
```javascript
[profile.default]
src = 'src'
out = 'out'
libs = ['lib', 'node_modules']
solc = '0.8.20'
evm_version = 'london'
```
Now both `forge build` and `npx hardhat compile` should work regardless of the dependencies.
Both `forge test` and `npx hardhat test` should now be able to access all smart contracts and dependencies. `forge test` will only test the Solidity tests, whereas `npx hardhat test` will only test the JavaScript tests. If you would like to use them in conjunction, then you can create a new script within your `package.json` file:
```json
"scripts": {
"test": "npx hardhat test && forge test"
}
```
You can run this command with:
```bash
npm run test
```
Finally, while not necessary, it could be worthwhile to move all JavaScript scripts from the `scripts` folder into Foundry's `script` folder and delete the `scripts` folder so that you don't have two folders that serve the same purpose.
This tutorial is for educational purposes only. As such, any contracts or code created in this tutorial should not be used in production.The information presented herein has been provided by third parties and is made available solely for general information purposes. Phron does not endorse any project listed and described on the Phron Doc Website (). Phron does not warrant the accuracy, completeness or usefulness of this information. Any reliance you place on such information is strictly at your own risk. Phron disclaims all liability and responsibility arising from any reliance placed on this information by you or by anyone who may be informed of any of its contents. All statements and/or opinions expressed in these materials are solely the responsibility of the person or entity providing those materials and do not necessarily represent the opinion of Phron. The information should not be construed as professional or financial advice of any kind. Advice from a suitably qualified professional should always be sought in relation to any particular matter or circumstance. The information herein may link to or integrate with other websites operated or content provided by third parties, and such other websites may link to this website. Phron has no control over any such other websites or their content and will have no liability arising out of or related to such websites or their content. The existence of any such link does not constitute an endorsement of such websites, the content of the websites, or the operators of the websites. These links are being provided to you only as a convenience and you release and hold Phron harmless from any and all liability arising from your use of this information or the information provided by any third-party website or service.
# Hardhat
## Using Hardhat to Deploy To Phron
### Introduction
[Hardhat](https://hardhat.org/) is a flexible and extensible Ethereum development environment that streamlines the smart contract development process. Since Phron is Ethereum-compatible, you can use Hardhat to develop and deploy smart contracts on Phron.
Hardhat takes a task-based approach to development, where you can define and execute [tasks](https://hardhat.org/hardhat-runner/docs/advanced/create-task) that perform specific actions. These actions include compiling and deploying contracts, running tests, and more. Tasks are highly configurable, so you can create, customize, and execute tasks that are tailored to meet your needs.
You can also extend Hardhat's functionality through the use of [plugins](https://hardhat.org/hardhat-runner/plugins). Plugins are external extensions that integrate with Hardhat to provide additional features and tools for your workflow. For example, there are plugins for common Ethereum libraries, like Ethers.js and viem, a plugin that extends the Chai assertion library to include Ethereum-specific functionality, and more. All of these plugins can be used to extend your Hardhat project on Phron.
This guide will provide a brief introduction to Hardhat and show you how to use Hardhat to compile, deploy, and debug Ethereum smart contracts on the Phron TestNet.
Please note that although Hardhat comes with a [Hardhat Network](https://hardhat.org/docs#hardhat-network) component, which provides a local development environment, you should use a local Phron development node instead. You can connect a Phron development node to Hardhat just like you would with any other network.
### Checking Prerequisites
To get started, you will need the following:
* Have MetaMask installed and connected to Phron
* Have an account with funds. You can get DEV tokens for testing on Phron once every 24 hours from the [Phron Faucet](https://faucet.phron.ai/)
* To test out the examples in this guide on Phron, you will need to have your own endpoint and API key, which you can get from one of the supported Endpoint Providers
### Create a Hardhat Project
You will need to create a Hardhat project if you don't already have one. You can create one by completing the following steps:
1. Create a directory for your project
```bash
mkdir hardhat && cd hardhat
```
2. Initialize the project, which will create a `package.json` file
```bash
npm init -y
```
3. Install Hardhat
```bash
npm install hardhat
```
4. Create a Hardhat project
```bash
npx hardhat init
```
> ### Note
>
> `npx` is used to run executables installed locally in your project. Although Hardhat can be installed globally, it is recommended to install it locally in each project so that you can control the version on a project-by-project basis.
1. A menu will appear, which will allow you to create a new project or use a sample project. For this example, you can choose **Create an empty hardhat.config.js**, which will create a Hardhat configuration file for your project
{% code overflow="wrap" %}
```bash
npx hardhat init888 888 888 888 888888 888 888 888 888888 888 888 888 8888888888888 8888b. 888d888 .d88888 88888b. 8888b. 888888888 888 "88b 888P" d88" 888 888 "88b "88b 888888 888 .d888888 888 888 888 888 888 .d888888 888888 888 888 888 888 Y88b 888 888 888 888 888 Y88b.888 888 "Y888888 888 "Y88888 888 888 "Y888888 "Y888
👷 Welcome to Hardhat v2.22.2 👷
What do you want to do? … Create a JavaScript project Create a TypeScript project Create a TypeScript project (with Viem) Quit
```
{% endcode %}
### Hardhat Configuration File
The Hardhat configuration file is the entry point into your Hardhat project. It defines various settings and options for your Hardhat project, such as the Solidity compiler version to use and the networks you can deploy your contracts to.
To start, your `hardhat.config.js` should resemble the following:
```javascript
/** @type import('hardhat/config').HardhatUserConfig */
module.exports = {
solidity: '0.8.20',
};
```
For this example, you can leave the Solidity compiler version to `0.8.20`; however, if you are using a different contract that requires a newer version, don't forget to update the version here.
Next, you'll need to modify your configuration file to add the network configurations for the network you want to deploy your contract to. For Phron networks, you'll need to specify the following:
* `url` - the RPC endpoint of the node
* `chainId` - the chain ID, which is used to validate the network
* `accounts` - the accounts that can be used to deploy and interact with contracts. You can either enter an array of the private keys for your accounts or use an [HD Wallet](https://github.com/ethereumbook/ethereumbook/blob/develop/05wallets.asciidoc#hierarchical-deterministic-wallets-bip-32bip-44)
For this example, the network will be Phron, but you can modify the configuration to use any of the Phron networks:
```javascript
module.exports = {
solidity: '0.8.20',
networks: {
phron: {
url: 'INSERT_RPC_API_ENDPOINT', // Insert your RPC URL here
chainId: 7744, // (hex: 0x504),
accounts: ['INSERT_PRIVATE_KEY'],
},
},
};
```
{% hint style="warning" %}
### Remember
This is for demo purposes only. Never store your private key in a JavaScript file.
{% endhint %}
If you are planning on using any plugins with your project, you'll need to install the plugin and import it into the `hardhat.config.js` file. Once a plugin has been imported, it becomes part of the [Hardhat Runtime Environment](https://hardhat.org/hardhat-runner/docs/advanced/hardhat-runtime-environment), and you can leverage the plugin's functionality within tasks, scripts, and more.
For this example, you can install the `hardhat-ethers` plugin and import it into the configuration file. This plugin provides a convenient way to use the Ethers.js library to interact with the network.
```bash
npm install @nomicfoundation/hardhat-ethers ethers
```
Additionally, you'll need to install the `hardhat-ignition-ethers` plugin to enable deployment of smart contracts with Hardhat Ignition. You can install it with the following command:
```bash
npm install --save-dev @nomicfoundation/hardhat-ignition-ethers
```
To import both plugins, add the following `require` statements to the top of the Hardhat configuration file:
```javascript
/** @type import('hardhat/config').HardhatUserConfig */
require('@nomicfoundation/hardhat-ethers');
require('@nomicfoundation/hardhat-ignition-ethers');
const privateKey = 'INSERT_PRIVATE_KEY';
module.exports = {
solidity: '0.8.20',
networks: {
phron: {
url: 'https://',
chainId: 1287, // 0x507 in hex,
accounts: [privateKey]
}
}
};
```
For more information on the available configuration options, please refer to Hardhat's documentation on [Configuration](https://hardhat.org/hardhat-runner/docs/config#networks-configuration).
### The Contract File
Now that you've configured your project, you can begin the development process by creating your smart contract. The contract will be a simple one that will let you store a value that can be retrieved later, called `Box`.
To add the contract, you'll take the following steps:
1. Create a `contracts` directory
```bash
mkdir contracts
```
2. Create a `Box.sol` file
```bash
touch contracts/Box.sol
```
3. Open the file and add the following contract to it:
```solidity
// contracts/Box.sol
// SPDX-License-Identifier: MIT
pragma solidity ^0.8.1;
contract Box {
uint256 private value;
// Emitted when the stored value changes
event ValueChanged(uint256 newValue);
// Stores a new value in the contract
function store(uint256 newValue) public {
value = newValue;
emit ValueChanged(newValue);
}
// Reads the last stored value
function retrieve() public view returns (uint256) {
return value;
}
}
```
### Compile the Contract
The next step is to compile the `Box.sol` smart contract. For this, you can use the built-in `compile` task, which will look for Solidity files in the `contracts` directory and compile them using the version and compiler settings defined in the `hardhat.config.js` file.
To use the `compile` task, all you have to do is run:
```bash
npx hardhat compile
```
{% code overflow="wrap" %}
```bash
npx hardhat compileCompiled 1 Solidity files successfully (evm target: paris).ls -lartifactscachecontractshardhat.config.jsnode_modulespackage.jsonpackage-lock.json
```
{% endcode %}
After compilation, an `artifacts` directory is created that holds the bytecode and metadata of the contract, which are `.json` files. It’s a good idea to add this directory to a `.gitignore` file.
If you make changes to the contract after you've compiled it, you can compile it again using the same command. Hardhat will look for any changes and recompile the contract. If no changes are found, nothing will be compiled. If needed, you can force a compilation using the `clean` task, which will clear the cache and delete the old artifacts.
### Deploy the Contract
To deploy the contract, you'll use Hardhat Ignition, a declarative framework for deploying smart contracts. Hardhat Ignition is designed to make it easy to manage recurring tasks surrounding smart contract deployment and testing. For more information, be sure to check out the [Hardhat Ignition docs](https://hardhat.org/ignition/docs/getting-started#overview).
To set up the proper file structure for your Ignition module, create a folder named `ignition` and a subdirectory called `modules`. Then add a new file to it called `Box.js`. You can take all three of these steps with the following command:
```bash
mkdir ignition ignition/modules && touch ignition/modules/Box.js
```
Next, you can write your Hardhat Ignition module. To get started, take the following steps:
1. Import the `buildModule` function from the Hardhat Ignition module
2. Export a module using `buildModule`
3. Use the `getAccount` method to select the deployer account
4. Deploy the `Box` contract
5. Return an object from the module. This makes the `Box` contract accessible for interaction in Hardhat tests and scripts
```javascript
// 1. Import the `buildModule` function from the Hardhat Ignition module
const { buildModule } = require("@nomicfoundation/hardhat-ignition/modules");
// 2. Export a module using `buildModule`
module.exports = buildModule("BoxModule", (m) => {
// 3. Use the `getAccount` method to select the deployer account
const deployer = m.getAccount(0);
// 4. Deploy the `Box` contract
const box = m.contract("Box", [], {
from: deployer,
});
// 5. Return an object from the module
return { box };
});
```
To run the script and deploy the `Box.sol` contract, use the following command, which requires you to specify the network name as defined in your `hardhat.config.js`. If you don't specify a network, hardhat will deploy the contract to a local hardhat network by default.
```bash
npx hardhat ignition deploy ./ignition/modules/Box.js --network phron
```
> ### Note
>
> If you're using another Phron network, make sure that you specify the correct network. The network name needs to match how it's defined in the `hardhat.config.js` file.
You'll be prompted to confirm the network you wish to deploy to. After a few seconds after you confirm, the contract is deployed, and you'll see the contract address in the terminal.
```bash
npx hardhat ignition deploy ./ignition/modules/Box.js --network phron
✅ Confirm deploy to network phron (7744)? … yesHardhat Ignition 🚀
Deploying [ BoxModule ]
Batch #1Executed BoxModule#Box
[ BoxModule ] successfully deployed 🚀
Deployed Addresses
BoxModule#Box - 0xfBD78CE8C9E1169851119754C4Ea2f70AB159289
```
Congratulations, your contract is live! Save the address, as you will use it to interact with this contract instance in the next step.
### Interact with the Contract
There are a couple of ways that you can interact with your newly deployed contract using Hardhat: you can use the `console` task, which spins up an interactive JavaScript console, or you can create another script and use the `run` task to execute it.
#### Using the Hardhat Console
The [Hardhat console](https://hardhat.org/hardhat-runner/docs/guides/hardhat-console) uses the same execution environment as the tasks and scripts, so it automatically uses the configurations and plugins defined in the `hardhat.config.js`.
To launch the Hardhat `console`, you can run:
```bash
npx hardhat console --network phron
```
Next, you can take the following steps, entering one line at a time:
1. Create a local instance of the `Box.sol` contract
```bash
const Box = await ethers.getContractFactory('Box');
```
2. Connect the local instance to the deployed contract, using the address of the contract
```bash
const box = await Box.attach('0xfBD78CE8C9E1169851119754C4Ea2f70AB159289');
```
3. Interact with the attached contract. For this example, you can call the `store` method and store a simple value
```bash
await box.store(5);
```
The transaction will be signed by your account configured in the `hardhat.config.js` file and broadcasted to the network. The output should look similar to:
{% code overflow="wrap" %}
```bash
npx hardhat console --network phron
Welcome to Node.js v20.9.0.Type ".help" for more information. const Box = await ethers.getContractFactory('Box');undefined
const box = await Box.attach('0xfBD78CE8C9E1169851119754C4Ea2f70AB159289');undefined
await box.store(5);ContractTransactionResponse {
provider: HardhatEthersProvider { ... },
blockNumber: null,
blockHash: null,
index: undefined,
hash: '0x1c49a64a601fc5dd184f0a368a91130cb49203ec0f533c6fcf20445c68e20264',
type: 2,
to: '0xa84caB60db6541573a091e5C622fB79e175E17be',
from: '0x3B939FeaD1557C741Ff06492FD0127bd287A421e',
nonce: 87,
gasLimit: 45881n,
gasPrice: 1107421875n,
maxPriorityFeePerGas: 1n,
maxFeePerGas: 1107421875n,
data: '0x6057361d0000000000000000000000000000000000000000000000000000000000000005',
value: 0n,
chainId: 5678n,
signature: Signature { r: "0x9233b9cc4ae6879b7e08b9f1a4bfb175c8216eee0099966eca4a305c7f369ecc", s: "0x7663688633006b5a449d02cb08311569fadf2f9696bd7fe65417860a3b5fc57d", yParity: 0, networkV: null },
accessList: [],
blobVersionedHashes: null
} await box.retrieve();5n
```
{% endcode %}
Notice your address labeled `from`, the address of the contract, and the `data` that is being passed. Now, you can retrieve the value by running:
```bash
await box.retrieve();
```
You should see `5`, or the value you initially stored.
#### Using a Script
Similarly to the deployment script, you can create a script to interact with your deployed contract, store it in the `scripts` directory, and run it using the built-in `run` task.
To get started, create a `set-value.js` file in the `scripts` directory:
```bash
mkdir scripts && touch scripts/set-value.js
```
Now paste the following contract into the `set-value.js` file:
```javascript
// scripts/set-value.js
async function main() {
// Create instance of the Box contract
const Box = await ethers.getContractFactory('Box');
// Connect the instance to the deployed contract
const box = await Box.attach('0xfBD78CE8C9E1169851119754C4Ea2f70AB159289');
// Store a new value
await box.store(2);
// Retrieve the value
const value = await box.retrieve();
console.log(`The new value is: ${value}`);
}
main()
.then(() => process.exit(0))
.catch(error => {
console.error(error);
process.exit(1);
});
```
To run the script, you can use the following command:
```bash
npx hardhat run --network phron scripts/set-value.js
```
The script should return `2` as the value.
```bash
npx hardhat run --network phron scripts/set-value.js
The new value is: 2
```
### Hardhat Forking
You can [fork](https://hardhat.org/hardhat-network/docs/guides/forking-other-networks) any EVM-compatible chain using Hardhat, including Phron. Forking simulates the live Phron network locally, enabling you to interact with deployed contracts on Phron in a local test environment. Since Hardhat forking is based on an EVM implementation, you can interact with the fork using standard Ethereum JSON-RPC methods supported by Phron and [Hardhat](https://hardhat.org/hardhat-network/docs/reference#json-rpc-methods-support).
There are some limitations to be aware of when using Hardhat forking. You cannot interact with any of the Phron precompiled contracts or their functions. Precompiles are a part of the Substrate implementation and therefore cannot be replicated in the simulated EVM environment. This prohibits you from interacting with cross-chain assets on Phron and Substrate-based functionality such as staking and governance.
There is currently an issue related to forking Phron, so in order to fix the issue, you'll need to manually patch Hardhat first. You can find out more information by following the [issue on GitHub](https://github.com/NomicFoundation/hardhat/issues/2395#issuecomment-1043838164) as well as the related [PR](https://github.com/NomicFoundation/hardhat/pull/2313).
#### Patching Hardhat
Before getting started, you'll need to apply a temporary patch to workaround an RPC error until Hardhat fixes the root issue. The error is as follows:
{% code overflow="wrap" %}
```bash
Error HH604: Error running JSON-RPC server: Invalid JSON-RPC response's result.
Errors: Invalid value null supplied to : RpcBlockWithTransactions | null/transactions: RpcTransaction Array/0: RpcTransaction/accessList: Array<{ address: DATA, storageKeys: Array | null }> | undefined, Invalid value null supplied to : RpcBlockWithTransactions | null/transactions: RpcTransaction Array/1: RpcTransaction/accessList: Array<{ address: DATA, storageKeys: Array | null }> | undefined, Invalid value null supplied to : RpcBlockWithTransactions | null/transactions: RpcTransaction Array/2: RpcTransaction/accessList: Array<{ address: DATA, storageKeys: Array | null }> | undefined
```
{% endcode %}
To patch Hardhat, you'll need to open the `node_modules/hardhat/internal/hardhat-network/jsonrpc/client.js` file of your project. Next, you'll add an `addAccessList` function and update the `_perform` and `_performBatch` functions.
To get started, you can remove the preexisting `_perform` and `_performBatch` functions and, in their place, add the following code snippet:
```javascript
addAccessList(method, rawResult) {
if (
method.startsWith('eth_getBlock') &&
rawResult &&
rawResult.transactions?.length
) {
rawResult.transactions.forEach((t) => {
if (t.accessList == null) t.accessList = [];
});
}
}
async _perform(method, params, tType, getMaxAffectedBlockNumber) {
const cacheKey = this._getCacheKey(method, params);
const cachedResult = this._getFromCache(cacheKey);
if (cachedResult !== undefined) {
return cachedResult;
}
if (this._forkCachePath !== undefined) {
const diskCachedResult = await this._getFromDiskCache(
this._forkCachePath,
cacheKey,
tType
);
if (diskCachedResult !== undefined) {
this._storeInCache(cacheKey, diskCachedResult);
return diskCachedResult;
}
}
const rawResult = await this._send(method, params);
this.addAccessList(method, rawResult);
const decodedResult = (0, decodeJsonRpcResponse_1.decodeJsonRpcResponse)(
rawResult,
tType
);
const blockNumber = getMaxAffectedBlockNumber(decodedResult);
if (this._canBeCached(blockNumber)) {
this._storeInCache(cacheKey, decodedResult);
if (this._forkCachePath !== undefined) {
await this._storeInDiskCache(this._forkCachePath, cacheKey, rawResult);
}
}
return decodedResult;
}
async _performBatch(batch, getMaxAffectedBlockNumber) {
// Perform Batch caches the entire batch at once.
// It could implement something more clever, like caching per request
// but it's only used in one place, and those other requests aren't
// used anywhere else.
const cacheKey = this._getBatchCacheKey(batch);
const cachedResult = this._getFromCache(cacheKey);
if (cachedResult !== undefined) {
return cachedResult;
}
if (this._forkCachePath !== undefined) {
const diskCachedResult = await this._getBatchFromDiskCache(
this._forkCachePath,
cacheKey,
batch.map((b) => b.tType)
);
if (diskCachedResult !== undefined) {
this._storeInCache(cacheKey, diskCachedResult);
return diskCachedResult;
}
}
const rawResults = await this._sendBatch(batch);
const decodedResults = rawResults.map((result, i) => {
this.addAccessList(batch[i].method, result);
return (0, decodeJsonRpcResponse_1.decodeJsonRpcResponse)(
result,
batch[i].tType
);
});
const blockNumber = getMaxAffectedBlockNumber(decodedResults);
if (this._canBeCached(blockNumber)) {
this._storeInCache(cacheKey, decodedResults);
if (this._forkCachePath !== undefined) {
await this._storeInDiskCache(this._forkCachePath, cacheKey, rawResults);
}
}
return decodedResults;
}
```
Then you can use [patch-package](https://www.npmjs.com/package/patch-package) to automatically patch the package by running the following command:
```bash
npx patch-package hardhat
```
A `patches` directory will be created, and now you should be all set to fork Phron without running into any errors.
#### Forking Phron
You can fork Phron from the command line or configure your Hardhat project to always run the fork from your `hardhat.config.js` file. To fork Phron, you will need to have your own endpoint and API key, which you can get from one of the supported Endpoint Providers.
To fork Phron from the command line, you can run the following command from within your Hardhat project directory:
```bash
npx hardhat node --fork INSERT_RPC_API_ENDPOINT
```
If you prefer to configure your Hardhat project, you can update your `hardhat.config.js` file with the following configurations:
```javascript
...
networks: {
hardhat: {
forking: {
url: 'INSERT_RPC_API_ENDPOINT',
},
},
},
...
```
When you spin up the Hardhat fork, you'll have 20 development accounts that are pre-funded with 10,000 test tokens. The forked instance is available at `http://127.0.0.1:8545/`. The output in your terminal should resemble the following:
{% code overflow="wrap" %}
```bash
Private Key: Oxdbda1821b80551c9d65939329250298aa3472ba22feea921c0cf5d620ea67b97Account #9: Oxa0Ee7A142d267C1f36714E4a8F75612F20a79720 (10000 ETH)Private Key: 0x2a871d0798f97d79848a013d4936a73bf4cc922c825d33c1cf7073dff6d409c6Account #10: OxBcd4042DE499D14e55001CcbB24a551F3b954096 (10000 ETH)Private Key: Oxf214f2b2cd398c806f84e317254e0f0b801d0643303237d97a22a48e01628897Account #11: 0x71bE63f3384f5fb98995898A86B02Fb2426c5788 (10000 ETH)Private Key: 0x701b615bbdfb9de65240bc28bd21bbc0d996645a3dd57e7b12bc2bdf6f192c82Account #12: OxFABBOac9d68B0B445fB7357272F202C5651694a (10000 ETH)Private Key: Oxa267530f49f8280200edf313ee7af6b827f2a8bce2897751d06a843f644967b1Account #13: 0x1CBd3b2770909D4e10f157cABC84C7264073C9Ec (10000 ETH)Private Key: 0x47c99abed3324a2707c28affff1267e45918ec8c3f20b8aa892e8b065d2942ddAccount #14: OxdF3e18d64BC6A983f673Ab319CCaE4f1a5707097 (10000 ETH)Private Key: Oxc526ee95bf44d8fc405a158bb884d9d1238d990612e9f33d006bb0789009aaaAccount #15: Oxcd3B766CCDd6AE721141F452C550Ca635964ce71 (10000 ETH)Private Key: 0x8166f546bab6da521a8369cab06c5d2b9e46670292d85c875ee9ec20e84ffb61Account #16: 0×2546BcD3c84621e976D8185a91A922aE77ECEc30 (10000 ETH)Private Key: Oxea6c44ac03bff858b476bba40716402b03e41b8e97e276d1baec7c37d42484a0Account #17: OxbDA5747bFD65F08deb54cb465eB87D40e51B197E (10000 ETH)Private Key: 0x689af8efa8c651a91ad287602527f3af2fe9f6501a7ac4b06166765a93e037fdAccount #18: OxdD2FD4581271e230360230F9337D5c0430Bf44C0 (10000 ETH)Private Key: Oxde9be858da4a475276426320d5e9262ecfc3ba460bfac56360bfa6c4c28b4ee0Account #19: 0×8626f6940E2eb28930eFb4CeF49B2d1F2C9C1199 (10000 ETH)Private Key: Oxdf57089febbacf7ba0bc227dafbffa9fc08a93fdc68e1e42411a14efcf23656eWARNING: These accounts, and their private keys, are publicly known.
Any funds sent to them on Mainnet or any other live network WILL BE LOST.
```
{% endcode %}
To verify you have forked the network, you can query the latest block number:
{% code overflow="wrap" %}
```bash
curl --data '{"method":"eth_blockNumber","params":[],"id":1,"jsonrpc":"2.0"}' -H "Content-Type: application/json" -X POST localhost:8545
```
{% endcode %}
If you convert the `result` from [hex to decimal](https://www.rapidtables.com/convert/number/hex-to-decimal.html), you should get the latest block number from the time you forked the network. You can cross-reference the block number using a block explorer.
From here, you can deploy new contracts to your forked instance of Phron or interact with contracts already deployed by creating a local instance of the deployed contract.
To interact with an already deployed contract, you can create a new script in the `scripts` directory using `ethers`. Because you'll be running it with Hardhat, you don't need to import any libraries. Inside the script, you can access a live contract on the network using the following snippet:
```javascript
const hre = require('hardhat');
async function main() {
const provider = new ethers.JsonRpcProvider(
'http://127.0.0.1:8545/'
);
const contract = new ethers.Contract(
'INSERT_CONTRACT_ADDRESS',
'INSERT_CONTRACT_ABI',
provider
);
}
main().catch((error) => {
console.error(error);
process.exitCode = 1;
});
```
This tutorial is for educational purposes only. As such, any contracts or code created in this tutorial should not be used in production.The information presented herein has been provided by third parties and is made available solely for general information purposes. Phron does not endorse any project listed and described on the Phron Doc Website (). Phron does not warrant the accuracy, completeness or usefulness of this information. Any reliance you place on such information is strictly at your own risk. Phron disclaims all liability and responsibility arising from any reliance placed on this information by you or by anyone who may be informed of any of its contents. All statements and/or opinions expressed in these materials are solely the responsibility of the person or entity providing those materials and do not necessarily represent the opinion of Phron. The information should not be construed as professional or financial advice of any kind. Advice from a suitably qualified professional should always be sought in relation to any particular matter or circumstance. The information herein may link to or integrate with other websites operated or content provided by third parties, and such other websites may link to this website. Phron has no control over any such other websites or their content and will have no liability arising out of or related to such websites or their content. The existence of any such link does not constitute an endorsement of such websites, the content of the websites, or the operators of the websites. These links are being provided to you only as a convenience and you release and hold Phron harmless from any and all liability arising from your use of this information or the information provided by any third-party website or service.
# Remix
## Using Remix to Deploy to Phron
### Introduction
[Remix](https://remix.ethereum.org/) is an integrated development environment (IDE) for developing smart contracts on Ethereum and Ethereum-compatible chains. It provides an easy-to-use interface for writing, compiling, and deploying smart contracts. Given Phron’s Ethereum compatibility features, you can use Remix directly with any Phron network.
This guide walks through the process of creating and deploying a Solidity smart contract to a Phron development node using the Remix IDE.
If you're familiar with Remix, you can skip ahead to the Connect Remix to Phron section to learn how to use Remix with Phron.
### Checking Prerequisites
For the purposes of this guide, you'll need to have the following:
* A locally running Phron development node
* MetaMask installed and connected to your development node
If you followed the guides above, you should have a local Phron node, which will begin to author blocks as transactions arrive.

Your development node comes with 10 pre-funded accounts. You should have MetaMask connected to your Phron development node and have imported at least one of the pre-funded accounts. You can refer to the Import Accounts section of the MetaMask docs for step-by-step instructions on how to import a development account.
If you're adapting this guide for Phron, make sure you are connected to the correct network and have an account with funds. You can get DEV tokens for testing on Phron once every 24 hours from the [Phron Faucet](https://faucet.phron.ai/).
### Get Familiar with Remix
If you navigate to , you'll see that the layout of Remix is split into four sections:
1. The plugin panel
2. The side panel
3. The main panel
4. The terminal

The plugin panel displays icons for each of the preloaded plugins, the plugin manager, and the settings menu. You'll see a few icons there for each of the preloaded plugins, which are the **File explorer**, **Search in files**, **Solidity compiler**, and **Deploy and run transactions** plugins. As additional plugins are activated, their icons will appear in this panel.
The side panel displays the content of the plugin that is currently being viewed. By default, you'll see the File explorer plugin, which displays the default workspace and some preloaded files and folders. However, if you select one of the other icons from the plugin panel, you'll see the content for the selected plugin.
The main panel is automatically loaded with the **Home** tab, which contains links to a variety of resources. You can close this tab at any time and reopen it by clicking on the blue Remix icon in the top left corner of the plugin panel. The main panel is where you'll be able to see each of the files you're working with. For example, you can double-click on any file in the **File explorer** side panel and it will appear as a tab in the main panel.
The terminal panel is similar to a standard terminal that you have on your OS; you can execute scripts from it, and logs are printed to it. All transactions and contract interactions are automatically logged to the terminal. You can also interact with the [Ethers](https://docs.ethers.org/v6) and [Web3](https://web3js.org/#) JavaScript libraries directly from the terminal.
### Add a Smart Contract to the File Explorer
For this example, you will create a new file that contains an ERC-20 token contract. This will be a simple ERC-20 contract based on the current [OpenZeppelin ERC-20 template](https://docs.openzeppelin.com/contracts/4.x/erc20). The contract will create a `MyToken` token with the `MYTOK` symbol that mints the entirety of the initial supply to the creator of the contract.
From the **File explorer** tab on the plugin panel, you can create a new file by taking the following steps:
1. Click on the file icon
2. Enter the name of the contract: `MyToken.sol`

The main panel will switch to an empty file where you can add the Solidity code for the contract. Paste the `MyToken.sol` smart contract into the new file:
```solidity
// SPDX-License-Identifier: MIT
pragma solidity ^0.8.0;
import "@openzeppelin/contracts/token/ERC20/ERC20.sol";
contract MyToken is ERC20 {
constructor(uint256 initialSupply) ERC20("MyToken", "MYTOK") {
_mint(msg.sender, initialSupply);
}
}
```

### Compile a Solidity Smart Contract
Before you compile a contract, make sure you've selected the file of the contract from the **File explorer** tab. Then, select the **Solidity Compiler** option from the plugin panel.
Make sure that the compiler version in the top-left corner meets the version defined in your contract and the version defined in [OpenZeppelin's `ERC20.sol` contract](https://github.com/OpenZeppelin/openzeppelin-contracts/blob/master/contracts/token/ERC20/ERC20.sol). For example, the `MyToken.sol` contract requires Solidity ^0.8.0, but at the time of writing, OpenZeppelin's `ERC20.sol` contract requires ^0.8.20, so the compiler needs to be set to version 0.8.20 or newer.
The Solidity compiler plugin also lets you change some settings and apply advanced configurations for the compiler. If you're planning on iterating over the smart contract, you can check the **Auto compile** box, and whenever you make a change, the contract will automatically be recompiled.
Additionally, from the **Advanced Configurations** menu, you can change the EVM version, enable optimizations, and set the number of times the bytecode is expected to be run throughout the contract's lifetime; the default is set to 200 times. For more information on contract optimization, please refer to the [Solidity docs on The Optimizer](https://docs.soliditylang.org/en/latest/using-the-compiler.html#optimizer-options).
For this example, no additional configurations are needed. To compile the `MyToken.sol` contract, simply click on the **Compile MyToken.sol** contract. If the compilation was successful, you'll see a green check mark appear on the plugin panel next to the **Solidity compiler** plugin.

#### Debug Compilation Errors
If you tried to compile your smart contract but there was an error or warning, you can easily debug the issue with the help of ChatGPT directly from the Solidity compiler plugin in Remix.
For example, if you only provided the token name to the ERC-20 constructor but forgot the token symbol and tried to compile the contract, an error would appear in the side panel. You can scroll down to read the error, and you'll see that there is also an **ASK GPT** button. To get help debugging the issue, you can click on **ASK GPT**, and a response will be returned in the Remix terminal that will guide you in the right direction to try and fix the issue. If you need additional help, you can go straight to the source and ask [ChatGPT](https://chat.openai.com/) directly.

Once you successfully fix the issue and recompile the contract, you'll see a green check mark appear on the plugin panel next to the **Solidity compiler** plugin.

### Deploy a Solidity Smart Contract
The **Deploy and run transactions** plugin enables you to configure contract deployment options, deploy contracts, and interact with deployed contracts.
The side panel consists of the following deployment options:
* Environment - allows you to choose the execution environment for deployment
* Account - the account from which the deployment transaction will be sent
* Gas Limit - the maximum amount of gas that the deployment transaction can consume
* Value - the amount of the native asset to send along with the deployment transaction
* Contract - the contract to deploy
* Deploy - sends the deployment transaction to the specified environment using the selected account, gas limit, value, and the values for any constructor arguments
* At Address - allows you to interact with an existing contract by specifying its address
The following section will cover how to configure the environment for deployment to be Phron.
#### Connect Remix to Phron
To deploy the smart contract to Phron, you'll need to make sure that you've connected your wallet to your Phron development node or the Phron network of your choice. Then, from the **Deploy and run transactions** tab, you can connect Remix to your wallet by selecting your wallet from the **ENVIRONMENT** dropdown. For example, if you have Trust Wallet installed, you'll see **Injected Provider - TrustWallet** from the dropdown. Aside from injected providers, you can also connect to Phron via WalletConnect.
For this example, MetaMask will be used. You should already have MetaMask installed and connected to your local Phron development node. If not, please refer to the Interacting with Phron Using MetaMask guide for step-by-step instructions.
From the **ENVIRONMENT** dropdown, select **Injected Provider - MetaMask**.

MetaMask will pop up automatically and prompt you to connect to Remix. You'll need to:
1. Select the account you want to connect to Remix
2. Click **Next**
3. Click **Connect** to connect your account to Remix

Once you've connected MetaMask to Remix, the side panel will update to reveal the network and account you're connected to. For a Phron development node, you should see **Custom (1281) network**.

#### Deploy the Contract to Phron
Now that you've connected your wallet, you're ready to deploy the contract. Since you're deploying a simple ERC-20 token smart contract, the default gas limit set by Remix of 3 million is more than enough, and you don't need to specify a value to send along with the deployment. As such, you can take the following steps to deploy the contract:
1. Make sure the **ENVIRONMENT** is set to **Injected Provider - MetaMask**
2. Make sure the connected account is the one you want to deploy the transaction from
3. Use the default **GAS LIMIT** of `3000000`
4. Leave the **VALUE** as `0`
5. Make sure `MyToken.sol` is the selected contract
6. Expand the **DEPLOY** dropdown
7. Specify the initial supply. For this example, you can set it to 8 million tokens. Since this contract uses the default of 18 decimals, the value to put in the box is `8000000000000000000000000`
8. Click **transact** to send the deployment transaction
9. MetaMask will pop up, and you can click **Confirm** to deploy the contract
Once the transaction has been deployed, you'll see details about the deployment transaction in the Remix terminal. Additionally, the contract will appear under the **Deployed Contracts** section of the side panel.
### Interact with Deployed Smart Contracts
Once you've deployed a smart contract or accessed an existing contract via the **At Address** button, the contract will appear under the **Deployed Contracts** section of the side panel. You can expand the contract to view all of the contract's functions you can interact with.
To interact with a given function, you can click on the function name, which will be contained in an orange, red, or blue button. Orange buttons are for functions that write to the blockchain and are non-payable; red buttons are for functions that write to the blockchain and are payable; and blue buttons are for functions that read data from the blockchain.
Depending on the function you're interacting with, you may need to input parameter values. If the function requires inputs, you'll be able to enter them by expanding the function and entering a value for each of the parameters.
If the function you're interacting with is payable, you'll be able to enter an amount in the **VALUE** field towards the top of the side panel, in the same value field used for contracts that have payable constructors.
#### Call the Smart Contract Functions
If you expand the **MYTOKEN** contract dropdown, you'll be able to see all of the available functions you can interact with. To interact with a given function, you can provide any inputs, if needed, and then click on the button containing the function name you want to interact with.
For example, if you wanted to call the `tokenSupply` function, you wouldn't need to sign a transaction, as you'd get a response right away.

On the other hand, if you call the `approve` function, which will approve an account as a spender of a given amount of MYTOK tokens, you'll need to submit the approval in MetaMask. To test this out, you can take the following steps:
1. Set the **spender** to an account that you want to be able to spend tokens on your behalf. For this example, you can use Bob's account (one of the pre-funded development accounts): `0x3Cd0A705a2DC65e5b1E1205896BaA2be8A07c6e0`
2. Enter the amount the spender can spend. For this example, you can approve Bob to spend 10 MYTOK by entering in `10000000000000000000`
3. Press **transact**
4. MetaMask will pop up and you'll need to review the details of the approval and submit the approval
To view your balance or approvals, or transfer MYTOKs, you can add the MYTOK to your wallet. For information on how to add a token to MetaMask, you can refer to the Add an ERC-20 Token section of our MetaMask documentation.
This tutorial is for educational purposes only. As such, any contracts or code created in this tutorial should not be used in production.The information presented herein has been provided by third parties and is made available solely for general information purposes. Phron does not endorse any project listed and described on the Phron Doc Website (). Phron does not warrant the accuracy, completeness or usefulness of this information. Any reliance you place on such information is strictly at your own risk. Phron disclaims all liability and responsibility arising from any reliance placed on this information by you or by anyone who may be informed of any of its contents. All statements and/or opinions expressed in these materials are solely the responsibility of the person or entity providing those materials and do not necessarily represent the opinion of Phron. The information should not be construed as professional or financial advice of any kind. Advice from a suitably qualified professional should always be sought in relation to any particular matter or circumstance. The information herein may link to or integrate with other websites operated or content provided by third parties, and such other websites may link to this website. Phron has no control over any such other websites or their content and will have no liability arising out of or related to such websites or their content. The existence of any such link does not constitute an endorsement of such websites, the content of the websites, or the operators of the websites. These links are being provided to you only as a convenience and you release and hold Phron harmless from any and all liability arising from your use of this information or the information provided by any third-party website or service.
# Scaffold-PHR
## Using Scaffold-ETH 2 to Deploy a DApp on Phron
### Introduction
[Scaffold-ETH 2](https://github.com/scaffold-eth/scaffold-eth-2) is a collection of commonly used Ethereum development tools to quickly deploy a Solidity smart contract and launch a DApp with a React frontend.
Scaffold-ETH 2 consists of several sub-components, including [Hardhat](https://hardhat.org/docs) for creating, deploying, and testing smart contracts and [Next.js](https://nextjs.org/docs) for building a React frontend. These components can be used on Phron networks with some slight modifications.
This guide will walk through the steps to deploy and run the default example contract and DApp that Scaffold-ETH 2 comes with on a Phron network.
### Checking Prerequisites
To get started, you will need the following:
* An account with funds. You can get DEV tokens for testing on Phron once every 24 hours from the [Phron Faucet](https://faucet.phron.ai/)
* A Phronscan API key
* To test out the examples in this guide on Phron, you will need to have your own endpoint and API key, which you can get from one of the supported Endpoint Providers
#### Installing Scaffold-ETH 2
First, download [Scaffold-ETH 2 from GitHub](https://github.com/scaffold-eth/scaffold-eth-2).
From the command line, enter:
```bash
git clone https://github.com/scaffold-eth/scaffold-eth-2.git
```
After the download completes, run:
```bash
yarn install
```
### The Development Process with Scaffold-ETH 2
The process for developing a project with Scaffold-ETH 2 can be outlined as follows:
1. Update the network configurations in Hardhat for Phron
2. Add your smart contracts to the `packages/hardhat/contracts`
3. Edit your deployment scripts in the `packages/hardhat/deploy`
4. Deploy your smart contracts to Phron
5. Verify your smart contracts with the Etherscan plugin and your Phronscan API key
6. Configure your frontend to target Phron in the `packages/nextjs/scaffold.config.ts` file
7. Edit your frontend as needed in the `packages/nextjs/pages` directory
In this guide, you can use the default contract and frontend that you get out of the box when you clone the Scaffold-ETH 2 repository. All you'll have to do is modify these components for Phron.
### The Hardhat Component
In the following sections, you'll update the network configurations in the Hardhat configuration file to target the Phron-based network you want to interact with, and deploy and verify the example contract to that network.
#### Configure Hardhat for Phron
You can begin by making modifications to the Hardhat component under the `packages/hardhat` folder. You'll primarily be editing the `hardhat.config.js` file to configure it for Phron. However, you'll also need to create a `.env` file to store a couple of variables that will be consumed by the `hardhat.config.js` file.
You can refer to the `.env.example` file for the variables that are already used in the `hardhat.config.js` file. For Phron, you'll only need to create two variables: `DEPLOYED_PRIVATE_KEY` and `ETHERSCAN_API_KEY`.
Check out the Etherscan Plugins documentation to learn how to generate a Phronscan API key.
To get started, create a `.env` file:
```bash
touch packages/hardhat/.env
```
Edit your `.env` file to include the following variables:
```bash
DEPLOYER_PRIVATE_KEY=INSERT_PRIVATE_KEY
ETHERSCAN_API_KEY=INSERT_PHRONSCAN_API_KEY
```
The private key you add to your `.env` file corresponds to the account that will deploy and interact with the smart contracts in your Hardhat project. Additionally, the Etherscan API key will correspond to your Phronscan API key and will be used to verify your deployed smart contracts. To learn how to generate a Phronscan API key, check out the Etherscan Plugins documentation.
With the environment variables taken care of, next you can modify the `hardhat.config.js` file for Phronscan:
1. Set the constant `defaultNetwork` to the network you are deploying the smart contract to
```
defaultNetwork = 'phron';
```
2. Add the network configurations for the Phron network you want to interact with under the `networks` configuration object
```javascript
phron: {
url: "INSERT_RPC_API_ENDPOINT",
accounts: [deployerPrivateKey],
},
```
For more information on using Hardhat with Phron, please check the dedicated Hardhat page for more details.
#### Deploy Your Contract to Phron
After all the modifications to the configuration files are done, you can deploy your contract to the configured Phron-based network.
First, you can compile your contract by running:
```bash
yarn compile
```

Then, you can run the following command from the root directory of your project:
```bash
yarn deploy
```

> ### Note
>
> If you did not set the `defaultNetwork` config in the `hardhat.config.js` file, you can append `--network INSERT_NETWORK` to the command. For example, the following command would deploy a contract to Phron.
```bash
yarn deploy --network phron
```
#### Verify Your Deployed Contract
If you would also like to use Scaffold-ETH 2 to verify the deployed smart contract and have entered your Phronscan API key into the `.env` file, you can go ahead and verify your deployed contract.
If the smart contract you are verifying has constructor method parameters, you will also need to append the parameters used to the end of the command.
You can use the following command to verify the smart contract:
```bash
yarn verify --api-url https://testnet.phronscan.io
```
> ### Note
>
> If you did not set the `defaultNetwork` configuration in the `hardhat.config.js` file, you can append `--network INSERT_NETWORK` to the command. For example, the following command would verify a contract on Phron.
```bash
yarn verify --network phron --api-url https://testnet.phronscan.io
```
After a short wait, the console output will display the verification result and, if successful, the URL to the verified contract on Phronscan.
For more information about verifying smart contracts on Phron using the Hardhat Etherscan plugin, please refer to the Etherscan Plugins page.
### The Next.js Component
In the following sections, you'll modify the Next.js configuration so that it targets the Phron-based network that your contract has been deployed to, and then you'll launch the dApp.
#### Configure the DApp for Phron
To target the Phron network that you deployed your smart contract to, you'll need to edit the configurations in the `packages/nextjs/scaffold.config.ts` file. More specifically, you'll need to modify the `targetNetworks` array in the `scaffoldConfig` object. You can use the [list of chains that viem provides](https://github.com/wevm/viem/blob/main/src/chains/index.ts) to specify the chain(s) you've deployed your contract to.
```bash
targetNetworks: [chains.phron],
```
That's all you have to do to configure Next.js! Next, you can launch the dApp.
#### Launch the DApp
After all the modifications to the configuration files are done, you can launch the example dApp. To do so, you can run:
```bash
yarn start
```

This will launch the React-based DApp frontend at by default. You can then point your browser to and interact with the React frontend by connecting your wallet or checking out the contract debugger page.

And that's it! Now that you have the basics down, feel free to create and deploy your own smart contracts and modify the frontend to fit your dApp's needs! For more information, you can check out the [Scaffold-ETH 2 docs](https://docs.scaffoldeth.io/).
This tutorial is for educational purposes only. As such, any contracts or code created in this tutorial should not be used in production.The information presented herein has been provided by third parties and is made available solely for general information purposes. Phron does not endorse any project listed and described on the Phron Doc Website (). Phron does not warrant the accuracy, completeness or usefulness of this information. Any reliance you place on such information is strictly at your own risk. Phron disclaims all liability and responsibility arising from any reliance placed on this information by you or by anyone who may be informed of any of its contents. All statements and/or opinions expressed in these materials are solely the responsibility of the person or entity providing those materials and do not necessarily represent the opinion of Phron. The information should not be construed as professional or financial advice of any kind. Advice from a suitably qualified professional should always be sought in relation to any particular matter or circumstance. The information herein may link to or integrate with other websites operated or content provided by third parties, and such other websites may link to this website. Phron has no control over any such other websites or their content and will have no liability arising out of or related to such websites or their content. The existence of any such link does not constitute an endorsement of such websites, the content of the websites, or the operators of the websites. These links are being provided to you only as a convenience and you release and hold Phron harmless from any and all liability arising from your use of this information or the information provided by any third-party website or service.
# Tenderly
## Using Tenderly on Phron
### Introduction
[Tenderly](https://tenderly.co/) is a Web3 development platform that contains a suite of tools designed to help developers throughout the DApp development life cycle. With Tenderly, you can build, debug, test, optimize, monitor, set up alerts, and view analytics for your smart contracts on Phron.
The Tenderly platform provides the following features:
* [**Contract Verification**](https://docs.tenderly.co/contract-verification) - as it is essential to verify your smart contracts to take full advantage of all of Tenderly's features, Tenderly provides several methods of verification. You can verify smart contracts through [the Tenderly dashboard](https://docs.tenderly.co/contract-verification/dashboard), [the Tenderly CLI and Foundry](https://docs.tenderly.co/contract-verification/foundry), or [the Tenderly Hardhat plugin](https://docs.tenderly.co/contract-verification/hardhat)
* [**Debugger**](https://docs.tenderly.co/debugger) - use the visual debugger to inspect transactions and get better insight into the behavior of your code. With the debugger, you can review a transaction's stack trace, view the calls made in a transaction, step through a contract, and review decoded inputs, outputs, and state variables. You can use the debugger on the Tenderly dashboard or the [Tenderly Debugger Chrome Extension](https://docs.tenderly.co/debugger/tenderly-debugger-extension)
* [**Gas Profiler**](https://docs.tenderly.co/debugger#gas-profiler) - view how much gas you're spending on a granular level, so you can optimize your smart contracts and reduce transaction gas costs
* [**Simulator**](https://docs.tenderly.co/simulator-ui) - simulate transactions in a forked development environment to learn how your transactions will behave without having to send them on-chain. This way, you can know the outcome of the transaction and make sure it works as expected before sending it to the network. You can experiment with different parameters, simulate historical and current transactions, and edit the contract source code. You can access the simulator from the Tenderly dashboard or you can use the [Tenderly Simulation API](https://docs.tenderly.co/reference/api#tag/Simulations) to take advantage of the simulator programmatically
* [**Forks**](https://docs.tenderly.co/forks) - this feature simulates the live Phron network in an isolated environment, which enables you to interact with deployed contracts and live on-chain data. Forking also takes transaction simulations a step further by enabling you to chain multiple simulations together chronologically. This allows for the testing of complex transaction scenarios where one transaction depends upon another, with the benefit of using live on-chain data. There are some limitations to be aware of when using Tenderly's forking feature. You cannot interact with any of the Phron precompiled contracts and their functions. Precompiles are a part of the Substrate implementation and therefore cannot be replicated in the simulated EVM environment. This prohibits you from interacting with cross-chain assets on Phron and Substrate-based functionality such as staking and governance
* [**Alerting**](https://docs.tenderly.co/alerts/intro-to-alerts) - configure real-time alerts to notify you whenever a specific event occurs, allowing you to stay informed about what's going on with your smart contracts
* [**Web3 Actions**](https://docs.tenderly.co/web3-actions/intro-to-web3-actions) - create programmable functions in JavaScript or TypeScript that are executed automatically by Tenderly when a specific smart contract or chain event occurs
* [**Analytics**](https://docs.tenderly.co/analytics/general-analytics) - visualize transaction and on-chain data to get useful insights into what's going on with your project. You can use Tenderly's analytics builder or create custom queries and scripts to meet your analytic needs
* [**Sandbox**](https://sandbox.tenderly.co/) - write, compile, execute, and debug your smart contracts directly in your browser with baked-in JavaScript and Solidity editors. Every time you run your code, Tenderly creates a temporary fork that comes with 10 pre-funded accounts, each with 100 tokens for testing purposes
> ### Note
>
> Phron is fully supported by Tenderly with the exception of the Web3 Gateway. Phron is not currently supported by Tenderly. For more information, check out Tenderly's documentation on [Supported Networks](https://docs.tenderly.co/supported-networks-and-languages#supported-networks).
### Getting Started
The Tenderly dashboard provides access to the all-in-one Web3 development platform. To get started with the dashboard, you'll need to [sign up](https://dashboard.tenderly.co/register) for an account. Once you've signed up, you'll be able to start exploring your Tenderly dashboard.

If you prefer not to set up an account, you can also access limited features using [Tenderly's explorer](https://dashboard.tenderly.co/explorer). Without an account, you can still gain insights for contracts and transactions. However, you won't be able to simulate transactions or create forked environments.
To interact with Tenderly's features programmatically, you can check out the [Tenderly CLI](https://github.com/Tenderly/tenderly-cli) GitHub repository for more information.
The following sections will show you how to get started with Tenderly on Phron. For more detailed documentation, please refer to [Tenderly's documentation site](https://docs.tenderly.co/).
#### Create a Sandbox
To deploy contracts to Phron with a Tenderly Sandbox, you can navigate to [sandbox.tenderly.co](https://sandbox.tenderly.co/) and take the following steps:
1. Enter your smart contract into the Solidity editor on the left-hand side
2. Select Phron from the **Network** menu, adjust any of the compilation settings, and specify the block to run your code on if needed
3. Update the JavaScript editor on the right-hand side for your contract. [Ethers.js](/build-with-phronai/sdks-and-tools/ethereum/libraries/ethers.js) and [Web3.js](/build-with-phronai/sdks-and-tools/ethereum/libraries/web3.js) are included in the Sandbox by default and can be instantiated with `ethers` and `web3`, respectively. It's also important to note that the Sandbox includes [global variables](https://docs.tenderly.co/tenderly-sandbox#available-javascript-global-variables) to ease development, so you don't need to worry about updating the RPC URL for Phron
4. Click on **RUN** when you're ready to compile your contract and execute your code
If your code contained logic to deploy your contract or send a transaction, you'll see the transaction(s) appear under the **Simulated Transactions** section on the bottom left-hand side.

#### Add a Contract
A good place to start with the Tenderly dashboard is to add a deployed smart contract. Once you've added a contract, you'll be able to create transaction simulations and forks, use the debugger, set up monitoring and alerts, and more.
To add a new contract, you can click on **Contracts** on the left-side panel and click **Add Contract**. A pop-up will appear and you can take the following steps:
1. Enter the contract address
2. Choose Phron as the network, depending on which network you've deployed your smart contract to
3. (Optional) You can give your contract a name
4. (Optional) You can toggle the **Add more** slider to on if you'd like to add additional contracts. This will allow you to add more contracts after the initial contract has been added
5. Finally to add the contract to the dashboard, click **Add contract**

After a contract has been added, it will appear in the list of contracts on the **Contracts** dashboard. If the contract hasn't been verified yet, the dashboard will display an **Unverified** status along with a **Verify** button.

To take full advantage of the Tenderly tool set, it is recommended that you verify your smart contracts, which you can do by clicking on **Verify**. You can choose to verify your contract by uploading the contract's JSON, ABI, or source code. For more information, please refer to Tenderly's documentation on [Smart Contract Verification](https://docs.tenderly.co/contract-verification#verifying-a-smart-contract).
#### Create a Fork
Tenderly's forking feature simulates the live Phron network in an isolated environment, which enables you to interact with deployed contracts and live on-chain data.
There are some limitations to be aware of when using Tenderly's forking feature. You cannot interact with any of the Phron precompiled contracts and their functions. Precompiles are a part of the Substrate implementation and therefore cannot be replicated in the simulated EVM environment. This prohibits you from interacting with cross-chain assets on Phron and Substrate-based functionality such as staking and governance.
Tenderly makes creating a fork through the dashboard quite simple. To get started, click on **Forks** on the left-side menu and then click **Create Fork**. From there, you can take the following steps:
1. Select Phron from the **Network** dropdown
2. (Optional) Give your fork a name
3. If you only need data up until a specific block, you can toggle the **Use Latest Block** slider to off and specify the block number. Otherwise, you can leave the slider as is to include all blocks up until the latest block
4. Click **Create**
Once you've created your fork, you can start using it by deploying a contract to it or creating a transaction simulation using it.
To deploy a contract to your fork, you can click on the **Deploy Contract** button, upload your contract's source code, and set the compiler configurations. Once you submit the deployment, you'll see the transaction of your deployment appear under the **Simulated Transactions** tab and can click on the simulation for more information.
To create additional simulations, you can click the **New Simulation** button and enter in the configurations for the simulation. For more information on simulations, please refer to Tenderly's [Simulator UI Overview](https://docs.tenderly.co/simulator-ui/using-simulation-ui) documentation.
Now that you've learned how to get started with a few of Tenderly's features on Phron, please feel free to dive in and check out the other tools available in their development platform. You can visit [Tenderly's documentation site](https://docs.tenderly.co/) for more information. You can also check out Phron's tutorial on Using Tenderly to Simulate and Debug Transactions.
This tutorial is for educational purposes only. As such, any contracts or code created in this tutorial should not be used in production.The information presented herein has been provided by third parties and is made available solely for general information purposes. Phron does not endorse any project listed and described on the Phron Doc Website (). Phron does not warrant the accuracy, completeness or usefulness of this information. Any reliance you place on such information is strictly at your own risk. Phron disclaims all liability and responsibility arising from any reliance placed on this information by you or by anyone who may be informed of any of its contents. All statements and/or opinions expressed in these materials are solely the responsibility of the person or entity providing those materials and do not necessarily represent the opinion of Phron. The information should not be construed as professional or financial advice of any kind. Advice from a suitably qualified professional should always be sought in relation to any particular matter or circumstance. The information herein may link to or integrate with other websites operated or content provided by third parties, and such other websites may link to this website. Phron has no control over any such other websites or their content and will have no liability arising out of or related to such websites or their content. The existence of any such link does not constitute an endorsement of such websites, the content of the websites, or the operators of the websites. These links are being provided to you only as a convenience and you release and hold Phron harmless from any and all liability arising from your use of this information or the information provided by any third-party website or service.
# thirdweb
## Using thirdweb on Phron
### Introduction
[thirdweb](https://thirdweb.com/) is a complete Web3 development framework that provides everything you need to develop smart contracts, build dApps, and more.
With thirdweb, you can access tools to help you through every phase of the dApp development cycle. You can create your own custom smart contracts or use any of thirdweb's prebuilt contracts to get started quickly. From there, you can use thirdweb's CLI to deploy your smart contracts. Then you can interact with your smart contracts by creating a Web3 application using the language of your choice, including but not limited to React and TypeScript.
This guide will show you some of the thirdweb features you can use to develop smart contracts and dApps on Phron. To check out all of the features thirdweb has to offer, please refer to the [thirdweb documentation site](https://portal.thirdweb.com/). For a comprehensive step-by-step tutorial for building a dApp on Phron with thirdweb, be sure to check out Phron's thirdweb tutorial in the tutorials section.
### Create Contract
To create a new smart contract using the [thirdweb CLI](https://portal.thirdweb.com/cli), follow these steps:
1. In your CLI, run the following command:
```bash
npx thirdweb create contract
```
2. Input your preferences for the command line prompts:
1. Give your project a name
2. Choose your preferred framework: **Hardhat** or **Foundry**
3. Name your smart contract
4. Choose the type of base contract: **Empty**, [**ERC20**](https://portal.thirdweb.com/solidity/base-contracts/erc20base), [**ERC721**](https://portal.thirdweb.com/solidity/base-contracts/erc721base), or [**ERC1155**](https://portal.thirdweb.com/solidity/base-contracts/erc1155base)
5. Add any desired [extensions](https://portal.thirdweb.com/solidity/extensions)
3. Once created, navigate to your project’s directory and open in your preferred code editor
4. If you open the `contracts` folder, you will find your smart contract; this is your smart contract written in Solidity
The following is code for an `ERC721Base` contract without specified extensions. It implements all of the logic inside the [`ERC721Base.sol`](https://github.com/thirdweb-dev/contracts/blob/main/contracts/base/ERC721Base.sol) contract; which implements the [`ERC721A`](https://github.com/thirdweb-dev/contracts/blob/main/contracts/eip/ERC721A.sol) standard.
```solidity
// SPDX-License-Identifier: MIT
pragma solidity ^0.8.0;
import '@thirdweb-dev/contracts/base/ERC721Base.sol';
contract Contract is ERC721Base {
constructor(
string memory _name,
string memory _symbol,
address _royaltyRecipient,
uint128 _royaltyBps
) ERC721Base(_name, _symbol, _royaltyRecipient, _royaltyBps) {}
}
```
This contract inherits the functionality of `ERC721Base` through the following steps:
* Importing the `ERC721Base` contract
* Inheriting the contract by declaring that your contract is an `ERC721Base` contract
* Implementing any required methods, such as the constructor
5. After modifying your contract with your desired custom logic, you can deploy it to Phron using [Deploy](https://portal.thirdweb.com/contracts/deploy/overview). That will be covered in the next section!
Alternatively, you can deploy a prebuilt contract for NFTs, tokens, or marketplace directly from the thirdweb Explore page:
1. Go to the [thirdweb Explore page](https://thirdweb.com/explore)

2. Choose the type of contract you want to deploy from the available options: NFTs, tokens, marketplace, and more
3. Follow the on-screen prompts to configure and deploy your contract
For more information on different contracts available on Explore, check out [thirdweb’s documentation on prebuilt contracts](https://portal.thirdweb.com/contracts).
### Deploy Contract
[Deploy](https://portal.thirdweb.com/contracts/deploy/overview) is thirdweb's tool that allows you to easily deploy a smart contract to any EVM compatible network without configuring RPC URLs, exposing your private keys, writing scripts, and other additional setup such as verifying your contract.
1. To deploy your smart contract using deploy, navigate to the `contracts` directory of your project and execute the following command:
```bash
npx thirdweb deploy
```
Executing this command will trigger the following actions:
* Compiling all the contracts in the current directory
* Providing the option to select which contract(s) you wish to deploy
* Uploading your contract source code (ABI) to IPFS
2. When it is completed, it will open a dashboard interface to finish filling out the parameters
* `_name` - contract name
* `_symbol` - symbol or "ticker"
* `_royaltyRecipient` - wallet address to receive royalties from secondary sales
* `_royaltyBps` - basis points (bps) that will be given to the royalty recipient for each secondary sale, e.g. 500 = 5%
3. Select the desired Phron network.
4. Manage additional settings on your contract’s dashboard as needed such as uploading NFTs, configuring permissions, and more
For additional information on Deploy, please reference [thirdweb’s documentation](https://portal.thirdweb.com/contracts/deploy/overview).
### Create Application
thirdweb offers SDKs for a range of programming languages, such as React, React Native, TypeScript, and Unity. You'll start off by creating an application and then you can choose which SDK to use:
1. In your CLI run the following command:
```bash
npx thirdweb create --app
```
2. Input your preferences for the command line prompts:
1. Give your project a name
2. Choose your preferred framework: **Next.js**, **Vite**, or **React Native**. For this example, select **Vite**
3. Use the React or TypeScript SDK to interact with your application’s functions. This will be covered in the following section on interacting with a contract
#### Specify Client ID
Before you launch your dApp (locally or publicly deployed), you must have a thirdweb Client ID associated with your project. A thirdweb Client ID is synonymous with an API key. You can create a free API key by [signing into your thirdweb account, navigating to **Settings**, and clicking on **API Keys**](https://thirdweb.com/dashboard/settings/api-keys).
Press **Create API Key** then take the following steps:
1. Give your API key a name
2. Enter the allowed domains that the API key should accept requests from. It's recommended that you allow only necessary domains, but for development purposes, you can select **Allow all domains**
3. Press **Next** and confirm the prompt on the next page

> ### Note
>
> The respective name for your Client ID variable will vary with the framework you've chosen, e.g., Vite will be `VITE_TEMPLATE_CLIENT_ID`, Next.js will be `NEXT_PUBLIC_TEMPLATE_CLIENT_ID`, and React Native will be `EXPO_PUBLIC_THIRDWEB_CLIENT_ID`.
Finally, specify your Client ID (API Key) in your `.env` file. Your `.env` file must be located at the root directory of the project (e.g., not the `src` folder).
If you generated your thirdweb app with Vite, you'll have a `client.ts` file that looks like the below. As long you've created a `.env` file with your thirdweb API Key (Client ID) defined in `VITE_TEMPLATE_CLIENT_ID`, you can leave the `client.ts` as is and proceed to the next section.
client.ts
```typescript
import { createThirdwebClient } from 'thirdweb';
// Replace this with your client ID string.
// Refer to https://portal.thirdweb.com/typescript/v5/client on how to get a client ID
const clientId = import.meta.env.VITE_TEMPLATE_CLIENT_ID;
export const client = createThirdwebClient({
clientId: clientId,
});
```
> ### Note
>
> If you don't create a Client ID and specify is correctly in your `.env` file, you'll get a blank screen when trying to build the web app. There is no error message shown without digging into the console, so ensure you've set your Client ID correctly first and foremost.
#### Run Locally
To run your dApp locally for testing and debugging purposes, use the command:
```bash
yarn dev
```
The app will compile and specify the localhost and port number for you to visit in your browser.

#### Configure Chain
thirdweb offers a small number of chains from `@thirdweb/chains` and does not include Phron networks in that list, so you'll need to specify the network details including chain ID and RPC URL. You can create a custom chain with [`defineChain`](https://portal.thirdweb.com/references/typescript/v5/defineChain) as follows:
chains.ts
```javascript
import { defineChain } from 'thirdweb';
const phron = defineChain({
id: 7744,
rpc: 'https://testnet.phron.ai',
});
```
### thirdweb SDK
The following sections will provide an overview of fundamental methods of the thirdweb SDK and how to interact with them. Each code snippet will showcase the relevant import statements and demonstrate using the method in a typical scenario. This guide is intended to be a quick reference guide to the most common thirdweb methods that dApp developers will use. However, it does not include information on each and every thirdweb offering. For details on the entirety of thirdweb's offerings, be sure to visit the [thirdweb documentation site](https://portal.thirdweb.com/).
For a comprehensive, step-by-step guide to building a dApp with thirdweb be sure to check out Phron's thirdweb tutorial in the tutorials section. The following sections will cover everything from connecting wallets, to preparing transactions, and more.
#### Accounts and Wallets
thirdweb distinguishes between accounts and wallets in the SDK. In the eyes of the thirdweb SDK, an account always has a single blockchain address and can sign messages, transactions, and typed data, but it cannot be "connected" or "disconnected." In contrast, a wallet contains one or more accounts, can be connected or disconnected, and delegates the signing tasks to its accounts.
The below code snippet demonstrates how to initialize and connect a MetaMask wallet using the thirdweb SDK, then sign and send a transaction, retrieving the transaction hash. This process is applicable to any of the 300+ wallet connectors supported by the SDK.
initialize.ts
```typescript
import { sendTransaction } from 'thirdweb';
// MetaMask wallet used for example, the pattern is the same for all wallets
import { createWallet } from 'thirdweb/wallets';
// Initialize the wallet. thirdweb supports 300+ wallet connectors
const wallet = createWallet('io.metamask');
// Connect the wallet. This returns a promise that resolves to the connected account
const account = await wallet.connect({
// Pass the client you created with `createThirdwebClient()`
client,
});
// Sign and send a transaction with the account. Returns the transaction hash
const { transactionHash } = await sendTransaction({
// Assuming you have called `prepareTransaction()` or `prepareContractCall()` before, which returns the prepared transaction to send
transaction,
// Pass the account to sign the transaction with
account,
});
```
#### Get Contract
To connect to your contract, use the SDK’s [`getContract`](https://portal.thirdweb.com/references/typescript/v5/getContract) method. As an example, you could fetch data from an incrementer contract on Phron.
{% code overflow="wrap" %}
```typescript
import { getContract } from 'thirdweb';
import { client } from './client';
const myContract = getContract({
client,
chain: phron,
address: 0xa72f549a1a12b9b49f30a7f3aeb1f4e96389c5d8, // Incrementer contract address on Phron
abi: '[{"inputs":[],"name":"increment","outputs":[],"stateMutability":"nonpayable","type":"function"},{"inputs":[],"name":"number","outputs":[{"internalType":"uint256","name":"","type":"uint256"}],"stateMutability":"view","type":"function"},{"inputs":[],"name":"timestamp","outputs":[{"internalType":"uint256","name":"","type":"uint256"}],"stateMutability":"view","type":"function"}]';
});
```
{% endcode %}
#### Calling Contract Functions
To call a contract in the latest version of the SDK, you can use [`prepareContractCall`](https://portal.thirdweb.com/typescript/v5/transactions/prepare).
```typescript
import { prepareContractCall, toWei } from 'thirdweb';
const tx = prepareContractCall({
contract,
// Pass the method signature that you want to call
method: 'function mintTo(address to, uint256 amount)',
// Pass the params for that method.
// Their types are automatically inferred based on the method signature
params: ['0x123...', toWei('100')],
});
```
Returning to our incrementer contract, preparing a call to increment the contract looks like the following:
```typescript
import { prepareContractCall } from 'thirdweb';
const tx = prepareContractCall({
contract,
// Pass the method signature that you want to call
method: 'function increment()',
// Increment takes no params so we are leaving an empty array
params: [],
});
```
#### Preparing Raw Transactions
You can also prepare a transaction directly with encoded data. To do so, you'll use thirdweb's [`prepareTransaction` method](https://portal.thirdweb.com/typescript/v5/transactions/prepare) and specify the `to`, `value`, `chain`, and `client` values directly.
```typescript
import { prepareTransaction, toWei } from 'thirdweb';
const transaction = prepareTransaction({
// The account that will be the receiver
to: '0x456...',
// The value is the amount of ether you want to send with the transaction
value: toWei('1'),
// The chain to execute the transaction on. This assumes you already set up
// phron as a custom chain as shown in the configure chain section
chain: phron,
// Your thirdweb client
client,
});
```
#### Reading Contract State
Use the [`readContract` function](https://portal.thirdweb.com/typescript/v5/transactions/read) to call any read functions on your contract by passing in the Solidity method signature and any parameters.
```typescript
import { readContract } from 'thirdweb';
const balance = await readContract({
contract: contract,
method: 'function balanceOf(address) view returns (uint256)',
params: ['0x123...'],
});
```
For a function that takes no parameters, such as the number function that returns the current number stored in the incrementer contract, you simply need to provide the function name as follows:
```typescript
import { readContract } from 'thirdweb';
const number = await readContract({
contract: contract,
method: 'number',
params: [],
});
```
Did you know? With the [thirdweb CLI](https://portal.thirdweb.com/cli), you can easily and generate functions for all of the possible calls to a contract. To do so, run the following command in the command line:
```bash
npx thirdweb generate INSERT_CHAIN_ID/INSERT_CONTRACT_ADDRESS
```
Both the chain ID and the contract address are required. As an example, if you wanted to generate the functions for the incrementer contract on Phron , you would use the following command:
```bash
npx thirdweb generate 1287/0xa72f549a1a12b9b49f30a7f3aeb1f4e96389c5d8
```
The file generated with all of the corresponding methods will be placed in a directory labelled `thirdweb/CHAIN_ID/CONTRACT_ADDRESS`. In the example shown above, the output file is located at `thirdweb/1287/0xa72f549a1a12b9b49f30a7f3aeb1f4e96389c5d8.ts`. For more information, see the [thirdweb's docs on the CLI](https://portal.thirdweb.com/cli/generate).
#### Sending a Transaction
Every transaction sent using the SDK must first be prepared. This preparation process is synchronous and lightweight, requiring no network requests. Additionally, it provides type-safe definitions for your contract calls.
You can prepare a transaction as follows:
Prepare a transaction
```javascript
import { prepareTransaction, toWei } from 'thirdweb';
const transaction = prepareTransaction({
to: '0x1234567890123456789012345678901234567890',
chain: phron,
client: thirdwebClient,
value: toWei('1.0'),
gasPrice: 150n,
});
```
After the transaction is prepared, you can send it as follows:
Send a transaction
```javascript
import { sendTransaction } from 'thirdweb';
const { transactionHash } = await sendTransaction({
account,
transaction,
});
```
You can optionally use `sendAndConfirmTransaction` to wait for the transaction to be mined. This is relevant if you want to block the user from continuing until the transaction is confirmed.
Send and Confirm a Transaction
```javascript
import { sendAndConfirmTransaction } from 'thirdweb';
import { createWallet } from 'thirdweb/wallets';
const wallet = createWallet('io.metamask');
const account = await wallet.connect({ client });
const receipt = await sendAndConfirmTransaction({
transaction,
account,
});
```
#### Transaction Utilities
thirdweb provides a number of helpful utility methods surrounding preparing and sending transactions.
You can estimate the gas used by a transaction as follows:
Estimating gas
```javascript
import { estimateGas } from 'thirdweb';
const gasEstimate = await estimateGas({ transaction });
console.log('estmated gas used', gasEstimate);
```
You can estimate the gas cost in Ether and Wei as follows:
Estimating gas cost
```javascript
import { estimateGas } from 'thirdweb';
const gasCost = await estimateGasCost({ transaction });
console.log('cost in ether', gasCost.ether);
```
thirdweb also provides a handy way to simulate transactions and verify their integrity before actually submitting it to the blockchain. You can simulate a transaction as follows:
Simulate a transaction
```javascript
import { simulateTransaction } from 'thirdweb';
const result = await simulateTransaction({ transaction });
console.log('simulation result', result);
```
You can encode transaction data to act on later by taking the following steps:
Encode transaction data
```javascript
import { encode } from 'thirdweb';
const data = await encode(transaction);
console.log('encoded data', data);
```
#### ConnectButton
Perhaps the first and most important interaction users will have with your dApp is connecting their wallet. thirdweb provides an easy and highly customizable way for you to enable this. thirdweb provides a highly customizable [`ConnectButton`](https://portal.thirdweb.com/typescript/v5/react/components/ConnectButton) to tailor it to your desired wallets. The `ConnectButton` accepts an optional `wallets` parameter with an array of wallets. You can add or remove wallets from the `wallets` array to change the options available to users. thirdweb also offers a [`ConnectButton` Playground](https://thirdweb.com/dashboard/connect/playground) to customize and view changes for the `ConnectButton` in real-time, given the button's high degree of flexibility.
ConnectButton
```javascript
import { ConnectButton } from 'thirdweb/react';
import { createWallet, inAppWallet } from 'thirdweb/wallets';
const wallets = [
inAppWallet(),
createWallet('io.metamask'),
createWallet('com.coinbase.wallet'),
createWallet('me.rainbow'),
];
function Example() {
return (
);
}
```
### Deploy Application
As a reminder, you can build your example project locally by running:
```bash
yarn dev
```
To host your static web application on decentralized storage, run:
```bash
npx thirdweb deploy --app
```
By running this command, your application is built for production and stored using [Storage](https://portal.thirdweb.com/infrastructure/storage/overview), thirdweb's decentralized file management solution. The built application is uploaded to IPFS, a decentralized storage network, and a unique URL is generated for your application. This URL serves as a permanent hosting location for your application on the web.
If you have any further questions or encounter any issues during the process, please reach out to thirdweb support at [support.thirdweb.com](http://support.thirdweb.com/).
This tutorial is for educational purposes only. As such, any contracts or code created in this tutorial should not be used in production.The information presented herein has been provided by third parties and is made available solely for general information purposes. Phron does not endorse any project listed and described on the Phron Doc Website (). Phron does not warrant the accuracy, completeness or usefulness of this information. Any reliance you place on such information is strictly at your own risk. Phron disclaims all liability and responsibility arising from any reliance placed on this information by you or by anyone who may be informed of any of its contents. All statements and/or opinions expressed in these materials are solely the responsibility of the person or entity providing those materials and do not necessarily represent the opinion of Phron. The information should not be construed as professional or financial advice of any kind. Advice from a suitably qualified professional should always be sought in relation to any particular matter or circumstance. The information herein may link to or integrate with other websites operated or content provided by third parties, and such other websites may link to this website. Phron has no control over any such other websites or their content and will have no liability arising out of or related to such websites or their content. The existence of any such link does not constitute an endorsement of such websites, the content of the websites, or the operators of the websites. These links are being provided to you only as a convenience and you release and hold Phron harmless from any and all liability arising from your use of this information or the information provided by any third-party website or service.
# Waffle & Mars
## Using Waffle & Mars to Deploy to Phron
### Introduction
[Waffle](https://getwaffle.io/) is a library for compiling and testing smart contracts, and [Mars](https://github.com/TrueFiEng/Mars) is a deployment manager. Together, Waffle and Mars can be used to write, compile, test, and deploy Ethereum smart contracts. Since Phron is Ethereum compatible, Waffle and Mars can be used to deploy smart contracts to a Phron development node or the Phron TestNet.
Waffle uses minimal dependencies, has syntax that is easy to learn and extend, and provides fast execution times when compiling and testing smart contracts. Furthermore, it is [TypeScript](https://www.typescriptlang.org/) compatible and uses [Chai matchers](https://ethereum-waffle.readthedocs.io/en/latest/matchers.html) to make tests easy to read and write.
Mars provides a simple, TypeScript compatible framework for creating advanced deployment scripts and staying in sync with state changes. Mars focuses on infrastructure-as-code, allowing developers to specify how their smart contracts should be deployed and then using those specifications to automatically handle state changes and deployments.
In this guide, you'll be creating a TypeScript project to write, compile, and test a smart contract using Waffle, then deploy it on to the Phron TestNet using Mars.
### Checking Prerequisites
You will need to have the following:
* MetaMask installed and connected to Phron
* An account with funds. You can get DEV tokens for testing on Phron once every 24 hours from the [Phron Faucet](https://faucet.phron.ai/)
* To test out the examples in this guide on Phron, you will need to have your own endpoint and API key, which you can get from one of the supported Endpoint Providers
Once you've created an account you'll need to export the private key to be used in this guide.
### Create a TypeScript Project with Waffle & Mars
To get started, you'll create a TypeScript project and install and configure a few dependencies.
1. Create the project directory and change to it:
```bash
mkdir waffle-mars && cd waffle-mars
```
2. Initialize the project. Which will create a `package.json` in the directory:
```bash
npm init -y
```
3. Install the following dependencies:
```bash
npm install ethereum-waffle ethereum-mars ethers \
@openzeppelin/contracts typescript ts-node chai \
@types/chai mocha @types/mocha
```
* [Waffle](https://github.com/TrueFiEng/Waffle) - for writing, compiling, and testing smart contracts
* [Mars](https://github.com/TrueFiEng/Mars) - for deploying smart contracts to Phron
* [Ethers](https://github.com/ethers-io/ethers.js) - for interacting with Phron's Ethereum API
* [OpenZeppelin Contracts](https://github.com/OpenZeppelin/openzeppelin-contracts) - the contract you'll be creating will use OpenZeppelin's ERC-20 base implementation
* [TypeScript](https://github.com/microsoft/TypeScript) - the project will be a TypeScript project
* [TS Node](https://github.com/TypeStrong/ts-node) - for executing the deployment script you'll create later in this guide
* [Chai](https://github.com/chaijs/chai) - an assertion library used alongside Waffle for writing tests
* [@types/chai](https://github.com/DefinitelyTyped/DefinitelyTyped/tree/HEAD/types/chai) - contains the type definitions for chai
* [Mocha](https://github.com/mochajs/mocha) - a testing framework for writing tests alongside Waffle
* [@types/mocha](https://github.com/DefinitelyTyped/DefinitelyTyped/tree/HEAD/types/mocha) - contains the type definitions for mocha
4. Create a [TypeScript configuration](https://www.typescriptlang.org/docs/handbook/tsconfig-json.html) file:
```bash
touch tsconfig.json
```
5. Add a basic TypeScript configuration:
```typescript
{
"compilerOptions": {
"strict": true,
"target": "ES2019",
"moduleResolution": "node",
"resolveJsonModule": true,
"esModuleInterop": true,
"module": "CommonJS",
"composite": true,
"sourceMap": true,
"declaration": true,
"noEmit": true
}
}
```
Now, you should have a basic TypeScript project with the necessary dependencies to get started building with Waffle and Mars.
### Add a Contract
For this guide, you will create an ERC-20 contract that mints a specified amount of tokens to the contract creator. It's based on the OpenZeppelin ERC-20 template.
1. Create a directory to store your contracts and a file for the smart contract:
```bash
mkdir contracts && cd contracts && touch MyToken.sol
```
2. Add the following contract to `MyToken.sol`:
```solidity
pragma solidity ^0.8.0;
import "@openzeppelin/contracts/token/ERC20/ERC20.sol";
contract MyToken is ERC20 {
constructor() ERC20("MyToken", "MYTOK") {}
function initialize(uint initialSupply) public {
_mint(msg.sender, initialSupply);
}
}
```
In this contract, you are creating an ERC-20 token called MyToken with the symbol MYTOK, that allows you, as the contract creator, to mint as many MYTOKs as desired.
### Use Waffle to Compile and Test
#### Compile with Waffle
Now that you have written a smart contract, the next step is to use Waffle to compile it. Before diving into compiling your contract, you will need to configure Waffle:
1. Go back to the root project directory and create a `waffle.json` file to configure Waffle:
```bash
cd .. && touch waffle.json
```
2. Edit the `waffle.json` to specify compiler configurations, the directory containing your contracts, and more. For this example, we'll use `solcjs` and the Solidity version you used for the contract, which is `0.8.0`:
```json
{
"compilerType": "solcjs",
"compilerVersion": "0.8.0",
"compilerOptions": {
"optimizer": {
"enabled": true,
"runs": 20000
}
},
"sourceDirectory": "./contracts",
"outputDirectory": "./build",
"typechainEnabled": true
}
```
3. Add a script to run Waffle in the `package.json`:
```javascript
"scripts": {
"build": "waffle"
},
```
That is all you need to do to configure Waffle, now you're all set to compile the `MyToken` contract using the `build` script:
```bash
npm run build
```

After compiling your contracts, Waffle stores the JSON output in the `build` directory. Since the contract in this guide is based on OpenZeppelin's ERC-20 template, relevant ERC-20 JSON files will appear in the `build` directory too.
#### Test with Waffle
Before deploying your contract and sending it off into the wild, you should test it first. Waffle provides an advanced testing framework and has plenty of tools to help you with testing.
You'll be running tests against the Phron TestNet and will need the corresponding RPC URL to connect to it: `https://testnet.phron.ai`.
To configure your project for Phron, you will need to have your own endpoint and API key, which you can get from one of the supported Endpoint Providers.
Since you will be running tests against the TestNet, it might take a couple minutes to run all of the tests. If you want a more efficient testing experience, you can spin up a Phron development node using [`instant seal`](https://docs.moonbeam.network/builders/get-started/networks/moonbeam-dev/#node-options). Running a local Phron development node with the `instant seal` feature is similar to the quick and iterative experience you would get with [Hardhat Network](https://hardhat.org/hardhat-network/docs/overview).
1. Create a directory to contain your tests and a file to test your `MyToken` contract:
```bash
mkdir test && cd test && touch MyToken.test.ts
```
2. Open the `MyToken.test.ts` file and setup your test file to use Waffle's Solidity plugin and use Ethers custom JSON-RPC provider to connect to Phron:
```javascript
import { use, expect } from 'chai';
import { Provider } from '@ethersproject/providers';
import { solidity } from 'ethereum-waffle';
import { ethers, Wallet } from 'ethers';
import { MyToken, MyTokenFactory } from '../build/types';
// Tell Chai to use Waffle's Solidity plugin
use(solidity);
describe ('MyToken', () => {
// Use custom provider to connect to Phron
let provider: Provider = new ethers.providers.JsonRpcProvider(
'https://testnet.phron.ai'
);
let wallet: Wallet;
let walletTo: Wallet;
let token: MyToken;
beforeEach(async () => {
// Logic for setting up the wallet and deploying MyToken will go here
});
// Tests will go here
})
```
3. Before each test is run, you'll want to create wallets and connect them to the provider, use the wallets to deploy an instance of the `MyToken` contract, and then call the `initialize` function once with an initial supply of 10 tokens:
```javascript
beforeEach(async () => {
// This is for demo purposes only. Never store your private key in a JavaScript/TypeScript file
const privateKey = 'INSERT_PRIVATE_KEY'
// Create a wallet instance using your private key & connect it to the provider
wallet = new Wallet(privateKey).connect(provider);
// Create a random account to transfer tokens to & connect it to the provider
walletTo = Wallet.createRandom().connect(provider);
// Use your wallet to deploy the MyToken contract
token = await new MyTokenFactory(wallet).deploy();
// Mint 10 tokens to the contract owner, which is you
let contractTransaction = await token.initialize(10);
// Wait until the transaction is confirmed before running tests
await contractTransaction.wait();
});
```
4. Now you can create your first test. The first test will check your initial balance to ensure you received the initial supply of 10 tokens. However, to follow good testing practices, write a failing test first:
```javascript
it('Mints the correct initial balance', async () => {
expect(await token.balanceOf(wallet.address)).to.equal(1); // This should fail
});
```
5. Before you can run your first test, you'll need to go back to the root direction and add a `.mocharc.json` Mocha configuration file:
```
cd .. && touch .mocharc.json
```
6. Now edit the `.mocharc.json` file to configure Mocha:
```typescript
{
"require": "ts-node/register/transpile-only",
"timeout": 600000,
"extension": "test.ts"
}
```
7. You'll also need to add a script in the `package.json` to run your tests:
```json
"scripts": {
"build": "waffle",
"test": "mocha"
},
```
8. You're all set to run the tests, simply use the `test` script you just created and run:
```bash
npm run test
```
Please note that it could take a few minutes to process because the tests are running against Phron, but if all worked as expected, you should have one failing test.
9. Next, you can go back and edit the test to check for 10 tokens:
```javascript
it('Mints the correct initial balance', async () => {
expect(await token.balanceOf(wallet.address)).to.equal(10); // This should pass
});
```
10. If you run the tests again, you should now see one passing test:
```bash
npm run test
```
11. You've tested the ability to mint tokens, next you'll test the ability to transfer the minted tokens. If you want to write a failing test first again that is up to, however the final test should look like this:
it('Should transfer the correct amount of tokens to the destination account', async () => {
      // Send the destination wallet 7 tokens
      await (await token.transfer(walletTo.address, 7)).wait();

      // Expect the destination wallet to have received the 7 tokens
      expect(await token.balanceOf(walletTo.address)).to.equal(7);
    });
Congratulations, you should now have two passing tests! Altogether, your test file should look like this:
{% code overflow="wrap" %}
```jsx
import { use, expect } from 'chai';
import { Provider } from '@ethersproject/providers';
import { solidity } from 'ethereum-waffle';
import { ethers, Wallet } from 'ethers';
import { MyToken, MyTokenFactory } from '../build/types';
use(solidity);
describe('MyToken', () => {
let provider: Provider = new ethers.providers.JsonRpcProvider(
'https://testnet.phron.ai'
);
let wallet: Wallet;
let walletTo: Wallet;
let token: MyToken;
beforeEach(async () => {
// For demo purposes only. Never store your private key in a JavaScript/TypeScript file
const privateKey = 'INSERT_PRIVATE_KEY';
wallet = new Wallet(privateKey).connect(provider);
walletTo = Wallet.createRandom().connect(provider);
token = await new MyTokenFactory(wallet).deploy();
let contractTransaction = await token.initialize(10);
await contractTransaction.wait();
});
it('Mints the correct initial balance', async () => {
expect(await token.balanceOf(wallet.address)).to.equal(10);
});
it('Should transfer the correct amount of tokens to the destination account', async () => {
await (await token.transfer(walletTo.address, 7)).wait();
expect(await token.balanceOf(walletTo.address)).to.equal(7);
});
});
```
{% endcode %}
If you want to write more tests on your own, you could consider testing transfers from accounts without any funds or transfers from accounts without enough funds.
### Use Mars to Deploy to Phron
After you compile your contracts and before deployment, you will have to generate contract artifacts for Mars. Mars uses the contract artifacts for typechecks in deployments. Then you'll need to create a deployment script and deploy the `MyToken` smart contract.
Remember, you will be deploying to Phron and will need to use the TestNet RPC URL:
```url
https://testnet.phron.ai
```
To configure your project for Phron, you will need to have your own endpoint and API key, which you can get from one of the supported Endpoint Providers.
The deployment will be broken up into three sections: generate artifacts, create a deployment script, and deploy with Mars.
#### Generate Artifacts
Artifacts need to be generated for Mars so that typechecks are enabled within deployment scripts.
1. Update existing script to run Waffle in the `package.json` to include Mars:
```json
"scripts": {
"build": "waffle && mars",
"test": "mocha"
},
```
2. Generate the artifacts and create the `artifacts.ts` file needed for deployments:
```bash
npm run build
```

If you open the `build` directory, you should now see an `artifacts.ts` file containing the artifact data needed for deployments. To continue on with the deployment process, you'll need to write a deployment script. The deployment script will be used to tell Mars which contract to deploy, to what network, and which account is to be used to trigger the deployment.
#### Create a Deployment Script
Now you need to configure the deployment for the `MyToken` contract to the Phron TestNet.
In this step, you'll create the deployment script which will define how the contract should be deployed. Mars offers a `deploy` function that you can pass options to such as the private key of the account to deploy the contract, the network to deploy to, and more. Inside of the `deploy` function is where the contracts to be deployed are defined. Mars has a `contract` function that accepts the `name`, `artifact`, and `constructorArgs`. This function will be used to deploy the `MyToken` contract with an initial supply of 10 MYTOKs.
1. Create a `src` directory to contain your deployment scripts and create the script to deploy the `MyToken` contract:
```bash
mkdir src && cd src && touch deploy.ts
```
2. In `deploy.ts`, use Mars' `deploy` function to create a script to deploy to Phron using your account's private key:
import { deploy } from 'ethereum-mars';

   // For demo purposes only. Never store your private key in a JavaScript/TypeScript file
   const privateKey = 'INSERT_PRIVATE_KEY';
   deploy(
     { network: 'https://testnet.phron.ai', privateKey },
     (deployer) => {
       // Deployment logic will go here
     }
   );
3. Set up the `deploy` function to deploy the `MyToken` contract created in the previous steps:
import { deploy, contract } from 'ethereum-mars';
   import { MyToken } from '../build/artifacts';

   // For demo purposes only. Never store your private key in a JavaScript/TypeScript file
   const privateKey = 'INSERT_PRIVATE_KEY';
   deploy({ network: 'https://testnet.phron.ai', privateKey }, () => {
     contract('myToken', MyToken);
   });
4. Add a deploy script to the `scripts` object in the `package.json`:
```json
"scripts": {
"build": "waffle && mars",
"test": "mocha",
"deploy": "ts-node src/deploy.ts"
}
```
So far, you should have created a deployment script in `deploy.ts` that will deploy the `MyToken` contract to Phron, and added the ability to easily call the script and deploy the contract.
#### Deploy with Mars
You've configured the deployment, now it's time to actually deploy to Phron.
1. Deploy the contract using the script you just created:
```bash
npm run deploy
```
2. In your Terminal, Mars will prompt you to press `ENTER` to send your transaction

If successful, you should see details about your transaction including it's hash, the block it was included in, and it's address.

Congratulations! You've deployed a contract to Phron using Waffle and Mars!
### Example Project
If you want to see a completed example of a Waffle and Mars project on Phron, check out the phron-waffle-mars-example created by the team behind Waffle and Mars, EthWorks.
This tutorial is for educational purposes only. As such, any contracts or code created in this tutorial should not be used in production.The information presented herein has been provided by third parties and is made available solely for general information purposes. Phron does not endorse any project listed and described on the Phron Doc Website (). Phron does not warrant the accuracy, completeness or usefulness of this information. Any reliance you place on such information is strictly at your own risk. Phron disclaims all liability and responsibility arising from any reliance placed on this information by you or by anyone who may be informed of any of its contents. All statements and/or opinions expressed in these materials are solely the responsibility of the person or entity providing those materials and do not necessarily represent the opinion of Phron. The information should not be construed as professional or financial advice of any kind. Advice from a suitably qualified professional should always be sought in relation to any particular matter or circumstance. The information herein may link to or integrate with other websites operated or content provided by third parties, and such other websites may link to this website. Phron has no control over any such other websites or their content and will have no liability arising out of or related to such websites or their content. The existence of any such link does not constitute an endorsement of such websites, the content of the websites, or the operators of the websites. These links are being provided to you only as a convenience and you release and hold Phron harmless from any and all liability arising from your use of this information or the information provided by any third-party website or service.
# Verify Contracts
# PhronScan
## Verify Smart Contracts using PhronScan
### Introduction
Verifying smart contracts on a PhronScan is a great way to improve the transparency and security of deployed smart contracts on Phron. Users can directly view the source code for verified smart contracts, and for some block explorers, they can also directly interact with the contract's public methods through the PhronScan's interface.
This page will outline the steps for verifying smart contracts on Phron networks through block explorers.
### Deploying the Contract
In order to verify a smart contract on a PhronScan, the contract must first be deployed on the target network. This tutorial will be about deploying the smart contract to Phron.
You can check out this page for a tutorial on deploying smart contracts using Ethereum libraries on Phron. You may also use a developer tool such as Remix, Hardhat, or another tool if preferred, to deploy the smart contract to Phron.
This tutorial will use the same contract as the above deployment tutorial for the contract verification example.
The contract used is a simple incrementer, arbitrarily named `Incrementer.sol`. The Solidity code is the following:
```solidity
// SPDX-License-Identifier: MIT
pragma solidity ^0.8.0;
contract Incrementer {
uint256 public number;
constructor(uint256 _initialNumber) {
number = _initialNumber;
}
function increment(uint256 _value) public {
number = number + _value;
}
function reset() public {
number = 0;
}
}
```
#### Collecting Information for Contract Verification
You will need to collect some information related to the contract's compiler and deployment in order to verify it successfully.
1. Take note of the Solidity compiler version used to compile and deploy the contract. The Solidity compiler version can usually be selected or specified in the deployment tool used
2. Take note of any SPDX license identifier used at the beginning of the Solidity source file (this example uses an MIT license):
```solidity
// SPDX-License-Identifier: MIT
```
3. (Optional) If optimization is enabled during compilation, take note of the value of the optimization runs parameter
4. (Optional) If the contract constructor method accepts arguments, take note of the [ABI-encoded form](https://docs.soliditylang.org/en/develop/abi-spec.html) of the constructor arguments
5. After deployment, take note of the deployed contract address of the smart contract. The deployment address of the contract can be found either in the console output if using a command-line-based tool such as Hardhat, or an Ethereum library, or it can be copied from the GUI in tools such as Remix IDE


### Verify the Contract
The next step will be verifying the smart contract in an EVM-compatible explorer for the Phron network that you deployed to.
#### Phronscan
Take the following steps to verify the contract on Phronscan:
1. Go to the [PhronScan](https://testnet.phronscan.io).
2. Fill in the contract's deployed address in the first field, including the `0x` prefix
Search contract address
3. Click on contract tab
Click on contract
4. Then click on Verify & publish
Click on Verify & publish
5. Select the compiler type. For the current `Incrementer.sol` example, select **Solidity (Single file)**
6. After selecting the compiler type, select the compiler version used to compile the contract. If the compiler version used was a nightly commit, uncheck the box under the field to select the nightly version
7. Select the open-source license used. For the current `Incrementer.sol` example, select the option **MIT License (MIT)**. If there was none used, select **No License (None)**
8. Copy and paste the entirety of the contract's content into the text field labeled as such
9. (Optional) Select **Yes** for **Optimization** if it was enabled during compilation, and fill in the number of runs under **Misc Settings/Runs(Optimizer)**
10. (Optional) Add contract libraries and their addresses, if any were used in the contract
11. (Optional) Check any other optional fields that may apply to your contract, and fill them out accordingly
Click to Verify & publish
After a short wait, the result of verification will be displayed in the browser, and a success result page will display the contract's ABI-encoded constructor arguments, the contract name, bytecode, and ABI.
### Smart Contract Flattening
For verifying smart contracts that are made up of multiple files, the process is slightly different and requires some pre-processing to combine all the dependencies of the target smart contract into a single Solidity file.
This pre-processing is usually referred to as smart contract flattening. There are a number of tools that can be used to flatten a multi-part smart contract into a single Solidity file, such as [Hardhat's Flatten task](https://hardhat.org/hardhat-runner/docs/advanced/flattening). Please refer to the respective smart contract flattening tool's documentation for more detailed instructions on its usage.
After flattening the multi-part smart contract, it can be verified using the new flattened Solidity file on a PhronScan in the same way that a single-file smart contract is verified, as described in this tutorial.
# JSON-RPC APIs
# Standard Ethereum
## Supported Ethereum RPC Methods
### Introduction
Nevertheless, not all Ethereum JSON-RPC methods are supported; some of those supported return default values (those related to Ethereum's PoW consensus mechanism in particular). This guide provides a comprehensive list of supported Ethereum JSON-RPC methods on Phron. Developers can quickly reference this list to understand the available functionality for interfacing with Phron's Ethereum-compatible blockchain.
### Standard Ethereum JSON-RPC Methods
The basic JSON-RPC methods from the Ethereum API supported by Phron are:
* [**eth\_protocolVersion**](https://ethereum.org/en/developers/docs/apis/json-rpc/#eth_protocolversion) — returns `1` by default
* [**eth\_syncing**](https://ethereum.org/en/developers/docs/apis/json-rpc/#eth_syncing) — returns an object with data about the sync status or `false`
* [**eth\_hashrate**](https://ethereum.org/en/developers/docs/apis/json-rpc/#eth_hashrate) — returns `"0x0"` by default
* [**eth\_coinbase**](https://ethereum.org/en/developers/docs/apis/json-rpc/#eth_coinbase) — returns the latest block author. Not necessarily a finalized block
* [**eth\_mining**](https://ethereum.org/en/developers/docs/apis/json-rpc/#eth_mining) — returns `false` by default
* [**eth\_chainId**](https://ethereum.org/en/developers/docs/apis/json-rpc/#eth_chainid) — returns the chain ID used for signing at the current block
* [**eth\_gasPrice**](https://ethereum.org/en/developers/docs/apis/json-rpc/#eth_gasprice) — returns the base fee per unit of gas used. This is currently the minimum gas price for each network
* [**eth\_accounts**](https://ethereum.org/en/developers/docs/apis/json-rpc/#eth_accounts) — returns a list of addresses owned by the client
* [**eth\_blockNumber**](https://ethereum.org/en/developers/docs/apis/json-rpc/#eth_blocknumber) — returns the highest available block number
* [**eth\_getBalance**](https://ethereum.org/en/developers/docs/apis/json-rpc/#eth_getbalance) — returns the balance of the given address
* [**eth\_getStorageAt**](https://ethereum.org/en/developers/docs/apis/json-rpc/#eth_getstorageat) — returns the content of the storage at a given address
* [**eth\_getBlockByHash**](https://ethereum.org/en/developers/docs/apis/json-rpc/#eth_getblockbyhash) — returns information about the block of the given hash, including `baseFeePerGas` on post-London blocks
* [**eth\_getBlockByNumber**](https://ethereum.org/en/developers/docs/apis/json-rpc/#eth_getblockbynumber) — returns information about the block specified by block number, including `baseFeePerGas` on post-London blocks
* [**eth\_getBlockReceipts**](https://docs.alchemy.com/reference/eth-getblockreceipts) — returns all transaction receipts for a given block
* [**eth\_getTransactionCount**](https://ethereum.org/en/developers/docs/apis/json-rpc/#eth_gettransactioncount) — returns the number of transactions sent from the given address (nonce)
* [**eth\_getBlockTransactionCountByHash**](https://ethereum.org/en/developers/docs/apis/json-rpc/#eth_getblocktransactioncountbyhash) — returns the number of transactions in a block with a given block hash
* [**eth\_getBlockTransactionCountByNumber**](https://ethereum.org/en/developers/docs/apis/json-rpc/#eth_getblocktransactioncountbynumber) — returns the number of transactions in a block with a given block number
* [**eth\_getUncleCountByBlockHash**](https://ethereum.org/en/developers/docs/apis/json-rpc/#eth_getunclecountbyblockhash) — returns `"0x0"` by default
* [**eth\_getUncleCountByBlockNumber**](https://ethereum.org/en/developers/docs/apis/json-rpc/#eth_getunclecountbyblocknumber) — returns `"0x0"` by default
* [**eth\_getCode**](https://ethereum.org/en/developers/docs/apis/json-rpc/#eth_getcode) — returns the code at the given address at the given block number
* [**eth\_sendTransaction**](https://ethereum.org/en/developers/docs/apis/json-rpc/#eth_sendtransaction) — creates a new message call transaction or a contract creation, if the data field contains code. Returns the transaction hash or the zero hash if the transaction is not yet available
* [**eth\_sendRawTransaction**](https://ethereum.org/en/developers/docs/apis/json-rpc/#eth_sendrawtransaction) — creates a new message call transaction or a contract creation for signed transactions. Returns the transaction hash or the zero hash if the transaction is not yet available
* [**eth\_call**](https://ethereum.org/en/developers/docs/apis/json-rpc/#eth_call) — executes a new message call immediately without creating a transaction on the blockchain, returning the value of the executed call
* Phron supports the use of the optional *state override set* object. This address-to-state mapping object allows the user to specify some state to be ephemerally overridden before executing a call to `eth_call`. The state override set is commonly used for tasks like debugging smart contracts. Visit the [go-ethereum](https://geth.ethereum.org/docs/interacting-with-geth/rpc/ns-eth#:~:text=Object%20%2D%20State%20override%20set) documentation to learn more
* [**eth\_estimateGas**](https://ethereum.org/en/developers/docs/apis/json-rpc/#eth_estimategas) — returns an estimated amount of gas necessary for a given transaction to succeed. You can optionally specify a `gasPrice` or `maxFeePerGas` and `maxPriorityFeePerGas`
* [**eth\_maxPriorityFeePerGas**](https://docs.alchemy.com/reference/eth-maxpriorityfeepergas) - returns an estimate of how much priority fee, in Wei, is needed for inclusion in a block
* [**eth\_feeHistory**](https://docs.alchemy.com/reference/eth-feehistory) — returns `baseFeePerGas`, `gasUsedRatio`, `oldestBlock`, and `reward` for a specified range of up to 1024 blocks
* [**eth\_getTransactionByHash**](https://ethereum.org/en/developers/docs/apis/json-rpc/#eth_gettransactionbyhash) — returns the information about a transaction with a given hash. EIP-1559 transactions have `maxPriorityFeePerGas` and `maxFeePerGas` fields
* [**eth\_getTransactionByBlockHashAndIndex**](https://ethereum.org/en/developers/docs/apis/json-rpc/#eth_gettransactionbyblockhashandindex) — returns information about a transaction at a given block hash and a given index position. EIP-1559 transactions have `maxPriorityFeePerGas` and `maxFeePerGas` fields
* [**eth\_getTransactionByBlockNumberAndIndex**](https://ethereum.org/en/developers/docs/apis/json-rpc/#eth_gettransactionbyblocknumberandindex) — returns information about a transaction at a given block number and a given index position. EIP-1559 transactions have `maxPriorityFeePerGas` and `maxFeePerGas` fields
* [**eth\_getTransactionReceipt**](https://ethereum.org/en/developers/docs/apis/json-rpc/#eth_gettransactionreceipt) — returns the transaction receipt of a given transaction hash
* [**eth\_getUncleByBlockHashAndIndex**](https://ethereum.org/en/developers/docs/apis/json-rpc/#eth_getunclebyblockhashandindex) — returns `null` by default
* [**eth\_getUncleByBlockNumberAndIndex**](https://ethereum.org/en/developers/docs/apis/json-rpc/#eth_getunclebyblocknumberandindex) — returns `null` by default
* [**eth\_getLogs**](https://ethereum.org/en/developers/docs/apis/json-rpc/#eth_getlogs) — returns an array of all logs matching a given filter object
* [**eth\_newFilter**](https://ethereum.org/en/developers/docs/apis/json-rpc/#eth_newfilter) — creates a filter object based on the input provided. Returns a filter ID
* [**eth\_newBlockFilter**](https://ethereum.org/en/developers/docs/apis/json-rpc/#eth_newblockfilter) — creates a filter in the node to notify when a new block arrives. Returns a filter ID
* [**eth\_newPendingTransactionFilter**](https://ethereum.org/en/developers/docs/apis/json-rpc/#eth_newpendingtransactionfilter) - creates a filter in the node to notify when new pending transactions arrive. Returns a filter ID
* [**eth\_getFilterChanges**](https://ethereum.org/en/developers/docs/apis/json-rpc/#eth_getfilterchanges) — polling method for filters (see methods above). Returns an array of logs that occurred since the last poll
* [**eth\_getFilterLogs**](https://ethereum.org/en/developers/docs/apis/json-rpc/#eth_getfilterlogs) — returns an array of all the logs matching the filter with a given ID
* [**eth\_uninstallFilter**](https://ethereum.org/en/developers/docs/apis/json-rpc/#eth_uninstallfilter) — uninstall a filter with a given ID. It should be used when polling is no longer needed. Filters timeout when they are not requested using `eth_getFilterChanges` after some time
### Unsupported Ethereum JSON-RPC Methods
Phron does not support the following Ethereum API JSON-RPC methods:
* [**eth\_getProof**](https://docs.alchemy.com/reference/eth-getproof) - returns the account and storage values of the specified account including the Merkle-proof
* [**eth\_blobBaseFee**](https://www.quicknode.com/docs/ethereum/eth_blobBaseFee) - returns the expected base fee for blobs in the next block
* [**eth\_createAccessList**](https://docs.alchemy.com/reference/eth-createaccesslist) - creates an EIP-2930 type `accessList` based on a given transaction object
* [**eth\_sign**](https://ethereum.org/en/developers/docs/apis/json-rpc/#eth_sign) - allows the user to sign an arbitrary hash to be sent at a later time. Presents a [security risk](https://support.metamask.io/privacy-and-security/what-is-eth_sign-and-why-is-it-a-risk/) as the arbitrary hash can be fraudulently applied to other transactions
* [**eth\_signTransaction**](https://ethereum.org/en/developers/docs/apis/json-rpc/#eth_signtransaction) - allows the user to sign a transaction to be sent at a later time. It is rarely used due to associated security risks
# Non-standard Ethereum: Tracing
## Debug API & Trace Module
### Introduction
Geth's [debug](https://geth.ethereum.org/docs/interacting-with-geth/rpc/ns-debug) and [txpool](https://geth.ethereum.org/docs/interacting-with-geth/rpc/ns-txpool) APIs and OpenEthereum's [trace](https://openethereum.github.io/JSONRPC-trace-module) module provide non-standard RPC methods for deeper insight into transaction processing. Some of these non-standard RPC methods are supported as part of Phron's goal of providing a seamless Ethereum experience for developers. Supporting these RPC methods is an essential milestone because many projects like [The Graph](https://thegraph.com/) rely on them to index blockchain data.
This guide will cover the supported RPC methods available on Phron and how to invoke them using curl commands against a tracing node with the debug, txpool, and tracing flags enabled. You can access a tracing node in one of two ways: through a supported tracing RPC provider or by spinning up a tracing node of your own.
To view a list of tracing RPC providers, please check out the Network Endpoints page.
# Rust Contracts
## WELCOME TO PHRON
1. **DISCOVER the Phron Ecosystem**\
Step into the dynamic world of Phron, where cutting-edge projects, strategic alliances, and community-driven initiatives shape the future. This is your gateway to understanding the full potential of Phron—explore diverse applications and services that are pushing the boundaries of what's possible on our platform. Get inspired by how Phron is reshaping the blockchain space.
2. **Leverage Powerful Tools**\
Unlock the full power of Phron with a comprehensive suite of tools designed for seamless integration and interaction. Whether you're a developer or a business looking to harness Phron's capabilities, this section equips you with all the resources you need to integrate Phron technology into your projects and unlock new possibilities. Tap into Phron's potential and make it yours.
3. **BUILD on Phron**\
Turn your vision into reality on the Phron platform. Learn how to create, deploy, and manage your own decentralized applications (dApps) and smart contracts with ease. Access a wealth of tutorials, in-depth guides, and developer documentation designed to make the process smooth and efficient. Build innovative, scalable solutions with best practices and the power of Phron's network.
4. **Explore Protocol Details**\
Curious about what makes Phron tick? Dive deep into the technical backbone of the Phron protocol. Explore comprehensive insights on our consensus mechanism, state-of-the-art security, and next-gen scalability solutions. This is where you uncover what sets Phron apart—making it a secure, high-performance network for the next wave of blockchain innovation.
5. **Got Questions? Check Out the FAQ**\
New to Phron or just looking for quick answers? Our FAQ section has you covered. From beginner queries to expert-level details, you’ll find answers that make your experience smoother. Get the information you need, fast, and keep your journey with Phron moving forward.
# Phron smart contracts basics
Join us on the Phron Testnet to explore smart contract functionalities—this guide will walk you through setting up, deploying, testing, and accessing tools to build secure and scalable dApps.
**This brief tutorial will introduce you to the basics of smart contract functionality on the Phron Testnet. In the following sections, we'll guide you through setting up your Testnet account, preparing your computer for smart contract development, writing, compiling, and deploying your contracts, and finally, interacting with your deployed smart contracts.**
*Note: Smart contracts are now also live on the Phron Mainnet.*
# Setting up a Testnet account
All you need to know about navigating the Testnet can be found here as we go over the two crucial components necessary to take advantage of this test environment.
**To set up your Phron Testnet account, you’ll need two key components:**
1. [**Testnet Wallet/Explorer:**](https://phron.ai/wallet) This is where you can create your account, deploy smart contracts, and interact with them.
2. [**Testnet Faucet:**](https://faucet.phron.ai/) Here, you can receive free TPHR tokens, which are necessary for interacting with the Phron Testnet and experimenting with smart contract development.
**The steps are straightforward:**
1. **Create an Account:** Open the "Accounts" tab in the Testnet wallet and follow the on-screen instructions to add a new account.
2. **Receive Testnet Tokens:** Use the [Testnet Faucet](https://faucet.phron.ai/) to get free TPHR tokens. Simply copy your new account address and paste it into the Faucet. Your TPHR tokens will be available almost instantly—likely before you even switch back to the explorer to check!
# Installing required tools
Before running your first smart contract on Phron, you will first need to prepare your computer for development in Rust and ink!. Here's a handy guide to get you started.
The first thing you need to do before you can deploy your first smart contract on the Phron Testnet is to prepare your computer for development in Rust and ink!.
## Rust
This guide uses [https://rustup.rs](https://rustup.rs/) installer and the `rustup` tool to manage the Rust toolchain. It's the default way of installing Rust and we highly recommend doing it that way. However, if you prefer a different method, please check the "Other installation methods" section on the official [Rust website](https://www.rust-lang.org/tools/install).
To install and configure `rustup` enter the following commands in your shell:
```bash
curl --proto '=https' --tlsv1.2 -sSf https://sh.rustup.rs | sh
source ~/.cargo/env
```
Now you have the latest stable version of Rust installed on your computer. For the development of smart contracts you will need a slightly more recent `nightly` version, together with some additional components:
```bash
rustup toolchain install nightly
rustup component add rust-src --toolchain nightly
rustup target add wasm32-unknown-unknown --toolchain nightly
```
Rust comes with its native package manager `cargo` which is also used for compiling Rust code. Make sure `cargo` is installed correctly and visible in your shell environment:
```bash
cargo --help
```
## ink!
ink! is an [Embedded Domain Specific Language](https://wiki.haskell.org/Embedded_domain_specific_language) (EDSL) that can be used to write WASM smart contracts in Rust. In other words, ink! is a collection of "add-ons" on top of Rust that modify the behavior of the language to produce, instead of regular binary code that can be executed by your computer, special WASM code compatible with Substrate-based smart contracts execution environment. Ultimately, every ink! smart contract is just a normal Rust program with a tiny bit of additional ink!-specific headers called "macros".
To start using ink! you first need to install the `binaryen` package, which is used to optimize the WebAssembly bytecode of the contract. Most likely `binaryen` is available from your default package manager:
```sh
# For Ubuntu or Debian users:
sudo apt install binaryen
# For MacOS users:
brew install binaryen
# For Arch or Manjaro users:
pacman -S binaryen
```
You can also directly download a [binary release](https://github.com/WebAssembly/binaryen/releases).
With `binaryen` present you can install `cargo contract`:
```bash
cargo install --force --locked cargo-contract
```
`cargo contract` is an add-on to `cargo` that extends it with commands helpful in the development of smart contracts. You can check what can be done with it by invoking `cargo contract --help`. We will very soon use it to create our very first ink! smart contract.
# Creating your first contract
As now your machine is ready for development, it's time we build our first smart contract. The example contract we are going to develop in this tutorial is a simplified version of the ERC20 token.
{% hint style="info" %}
Boxes marked like this contain some basic information about the Rust programming language. If you are familiar with Rust, please feel free to skip those.
{% endhint %}
{% hint style="warning" %}
Boxes marked like this contain general remarks about smart contract development in ink!
While not strictly necessary for completing this tutorial, they may prove useful down the line.
{% endhint %}
## Introduction
With all the important tools in place, you are now ready to develop your first ink! smart contract!
The example contract we are going to build in this tutorial is a much simpler version of [ERC20](https://eips.ethereum.org/EIPS/eip-20) token. Our contract, when instantiated, will create a pool with a new type of fungible token that can be transferred between accounts. The contract will hold a registry of accounts with their balances and provide methods to query balances and transfer tokens.
{% hint style="warning" %}
Note that the token we are creating has nothing to do with the chain's native currency! To that end, the chain's internal mechanisms won't ensure the correctness of transactions: it's all on you, the Creator of the contract, to make sure that the logic makes sense.
{% endhint %}
## Contract creation
Let's start with generating a contract template with `cargo contract`:
```bash
cargo contract new mytoken
cd mytoken
```
This command will create a new directory `mytoken` with the following files inside:
* `lib.rs` - a Rust source file containing your contract's code
* `Cargo.toml` - a manifest file explaining to `cargo` how to build the contract (in this tutorial we won't need to modify it)
* `.gitignore` - in case you decide to use `git` to version control your contract
We are going to be working only with `lib.rs`, the remaining two files can be left as they are. If you look inside `lib.rs` you're going to find the simplest hello-world contract - a flipper, which holds a single boolean value and allows flipping it. You are encouraged to take a look at the code, but don't worry if you find some parts mysterious. We're going to modify the code step by step and explain everything along the way.
## Implementation
A smart contract written in ink! is in fact just a regular Rust code that makes use of ink! macros (lines that look like `#[ink...]`). The role of these macros is to modify the compilation process to produce, instead of a normal program that can be run on your computer, a WASM smart contract that can be deployed to the Phron blockchain. On top of the file, you will need to include a config macro:
```rust
#![cfg_attr(not(feature = "std"), no_std, no_main)]
```
This scary looking macro basically instructs the compiler to not include the standard library (ink! will use its own set of primitives suited for smart contract development). It also allows to disable emitting the `main` symbol. The rest of the file contains a definition of a module, prefixed with the main ink! macro:
```rust
#[ink::contract]
mod mytoken {
//...
}
```
This macro tells ink! that module `mytoken` is actually a definition of a smart contract and that ink! should look inside that module for various components of a contract. It also gives you some handy type aliases like `Balance` and `Account`. Additionally, it enforces some invariants that we don't really need to worry about now:
* a contract needs to have exactly one struct marked as `#[ink::storage]`
* a contract needs to have at least one function marked as `#[ink::constructor]`
{% hint style="info" %}
Rust modules can be thought of as collections of types and functions, grouping them in a single large scope.
{% endhint %}
### **Storage**
The first component is the contract storage. It contains data that is stored on the blockchain and holds the state of the contract. In our case, this is going to be a mapping between users and the number of tokens they own, together with a single number holding the total supply or our new token. That data needs to be enclosed in a single Rust `struct` that is prefixed with the corresponding ink! storage macro:
```rust
#[ink::contract]
mod mytoken {
use ink::storage::Mapping;
#[ink(storage)]
#[derive(Default)]
pub struct Mytoken {
total_supply: Balance,
balances: Mapping,
}
}
```
{% hint style="info" %}
Here we are declaring a Rust `struct` that will be instantiated as follows:
```rust
let my_token = Mytoken {
total_supply: somevalue1,
balances: somevalue2,
}
```
And its fields will be accessed like `my_token.total_supply`.
There exists a handy shortcut where instead of writing: `Mytoken { total_supply: total_supply, balances: balances }` you can write `Mytoken { total_supply, balances }` (assuming `total_supply` and `balances` are variables that exist in your code).
{% endhint %}
Here we are using a `Mapping` data structure provided by the `ink::storage` crate. Please note that when writing ink! smart contracts you cannot use data structures from the Rust standard library. Fortunately, ink! provides a [handy replacement](https://ink.substrate.io/datastructures/mapping) for that in a form of key-value map optimized for being stored on-chain.
{% hint style="warning" %}
You need to be quite conservative when choosing what to store in this struct, as it will incur some fees (in case of Phron these are very small but it's still worth being aware what you allocate). For example, storing a mapping between addresses and balances is fine. However, if your contract handles images, you will probably want to store these off-chain and only commit hashes to the contract's storage.
{% endhint %}
Note that we also instruct ink! to create an implementation of the `Default` trait for us. In our case, it will allow the compiler to initialize the `total_supply` field to 0 (the `Default` value for a `Balance`) and the `balances` to an empty `Mapping` (which incidentally is the corresponding `Default` implementation).
### **Constructor**
The next step is implementing a constructor of our contract. It needs to be placed inside an `impl` block for our newly defined `struct Mytoken` and again prefixed with the right ink! macro:
{% hint style="warning" %}
A contract can have an arbitrary non-zero number of constructors, as long as each of them is marked with the `#[ink(constructor)]` macro.
{% endhint %}
```rust
#[ink::contract]
mod mytoken {
// ... (storage definition)
impl Mytoken {
#[ink(constructor)]
pub fn new(total_supply: Balance) -> Self {
let mut balances = Mapping::default();
let caller = Self::env().caller();
balances.insert(caller, &total_supply);
Self {
total_supply,
balances,
}
}
}
}
```
Our constructor takes a single argument: the initial supply of our newly created token, and deposits all that supply to the account of the contract creator (the account which calls the constructor).
The contract's constructor is very similar to a regular Rust `struct` contructor. Note that we are first creating an empty `Mapping` by invoking the `Default::default()` function and only then inserting the first entry, assigning all of the supply to the caller of the constructor.
We can use the `Self::env().caller()` method to access the address of an account that called our contract. In context of the constructor this will be the contract's creator/owner.
{% hint style="info" %}
The `impl` block will contain the methods operating on a struct of the same name (in our case: `Mytoken`). In some languages you'd write those methods in the class/struct body. Rust chooses to separate the definition and implementation for some added flexibility it provides.
Additionally, note that in Rust we write single line comments as a double-slash (`//`).
{% endhint %}
### **Messages**
Just like our contract constructor defined above is in fact a regular Rust constructor prefixed with an ink! macro, the callable methods of our contract (called **messages** by ink!) are normal Rust methods annotated with another ink! macro:
```rust
#[ink::contract]
mod mytoken {
// ... (storage definition)
impl Mytoken {
// ... (constructor definition)
#[ink(message)]
pub fn total_supply(&self) -> Balance {
self.total_supply
}
#[ink(message)]
pub fn balance_of(&self, account: AccountId) -> Balance {
self.balances.get(&account).unwrap_or_default()
}
}
}
```
{% hint style="warning" %}
The methods marked by `#[ink(message)]` need to be declared as public (`pub fn`).
{% endhint %}
Here we defined two methods for accessing the storage of our contract: reading the total supply and the number of tokens held by a particular account. These methods are read-only, they don't modify the contract storage and can be called without submitting a transaction to the blockchain.
The `balance_of` method first retrieves a value from the `balances` mapping for a given `account`. The result comes wrapped in an `Option` struct: we use the `unwrap_or_default()` method to either retrieve the actual value or a default for the `Balance` type (which conveniently is 0).
{% hint style="info" %}
We use the `self` keyword to access the instance of the struct a given method is called on (some languages choose to use the `this` keyword with the same semantics).
Functions in Rust are declared using the `fn` keyword, followed by the function's name, a list of its arguments along with their types (`arg: Type`) and the return type after an arrow. Note that you don't have to use the `return` keyword if you simply want to return the last line.
Nota bene: the code becomes arguably more elegant if you don't overuse the short-circuiting `return` statement.
The `pub` keyword marks a given function as public, i.e. accessible from outside the module where it's declared.
{% endhint %}
### **Errors**
Before we look at the `transfer` function, we need to learn Rust's idiomatic way of handling errors. In contrast to some languages, Rust chooses to forgo the notion of exception in favor of algebraic error handling. Each method that can potentially fail will have a `Result` type, which is defined as the following
```rust
pub enum Result {
Ok(val: T), // T is the expected type of the computation
Err(msg: E), // E is an error type of your choice
}
```
{% hint style="info" %}
If you're not familiar with Rust's generic types, here we can say that `Result` is a type with type parameters `T` and `E` (which are basically placeholders for types). Later in your code you can instantiate the `Result` with any types as `T` and `E`, for example: `Result`: in this case the `val` will be an unsigned, 128-bit integer and the `msg` will be a string. Note that for each instantiation, you will be required to stick to the choice of `T` and `E`. However, in any place you are creating an instance of this type, you can choose any types you please (it should be clear once we see the usage examples).
{% endhint %}
In our contract, we will define a custom `Error` struct that we'll use as the `Err` part of the `Result`:
```rust
#[derive(Debug, PartialEq, Eq, scale::Encode, scale::Decode)]
#[cfg_attr(feature = "std", derive(scale_info::TypeInfo))]
pub enum Error {
InsufficientBalance,
}
```
In this introductory tutorial, please don't worry about the scary macros: we will describe them in detail in later tutorial. For now, it's enough to copy them over 😊 In the `transfer` implementation below you'll see an example of using this method in practice.
{% hint style="info" %}
If you are not familiar with Rust's `enum`s, here we are defining an `Error` type with just one variant (or constructor) that takes no arguments: `InsufficientBalance`. When instantiating this error, you will write `Error::InsufficientBalance` and its type will be `Error` (e.g. if you need to specify that in a type signature of a function).
{% endhint %}
The last piece we need is a method for transferring tokens between accounts:
{% code overflow="wrap" %}
```rust
mod mytoken {
// ...
impl Mytoken {
// ... constructor definition
// ... error definition
#[ink(message)]
pub fn transfer(&mut self, to: AccountId, value: Balance) -> Result<(), Error> {
let from = self.env().caller();
let from_balance = self.balance_of(from);
if from_balance < value {
return Err(Error::InsufficientBalance);
}
self.balances.insert(from, &(from_balance - value));
let to_balance = self.balance_of(to);
self.balances.insert(to, &(to_balance + value));
Ok(())
}
}
}
```
{% endcode %}
The method can be called by any user to transfer some `amount`of their tokens to their chosen `recipient`. If the user tries to transfer more tokens than they own, the method exits without performing any changes. Note that inside `transfer` method we make use of `balance_of` method we previously defined.
The most important difference between this and our previous methods is the fact that `transfer` modifies the contract storage. This fact needs to be indicated by using `&mut self` instead of `&self` as the first argument. This requirement is enforced by the compiler - if you happen to forget `mut`, your contract simply won't build and the compiler will give you a suggestion to use `mut`. So no need to worry about deploying a buggy contract.
{% hint style="info" %}
To build on our previous explanation of `enum`s, note that we are declaring the return type to be `Result<(), Error>`.
Our `Ok` variant contains a `()`, which is roughly the equivalent of `void` in C(++) and 'no value returned' in plain English.
The `Err` variant needs to have our previously-defined `Error` type inside, so when we return it, we instantiate it as `Err(Error::InsufficientBalance)`.
{% endhint %}
{% hint style="info" %}
For the purpose of this tutorial, we can assume that the references (`&`) work very similarly to languages like C++: instead of copying the value or giving it away, you're only 'lending it out' to some other function. As you will later see, the lending/borrowing intuition is actually very well formalised in the Rust language.
To denote that the borrower may make some changes to the value it temporarily acquires, we need to mark the reference as `&mut`.
Fortunately, as mentioned above, Rust's compiler offers very helpful tips on how to resolve issues in this area: it is likely they will be enough to create a contract that correctly compiles. If you want to read more on this topic, please consult [The Rust Book](https://doc.rust-lang.org/book/ch04-02-references-and-borrowing.html).
{% endhint %}
### **Tests**
Like every other program, our smart contract should be tested. This part of the development process is also very similar to how it's done in regular Rust. The tests are performed off-chain and ink! provides a handful of useful tools that help to simulate the on-chain environment in which our contract will live in future.
Here we demonstrate a very minimal test suite with a basic sanity check of each implemented method. The following code should be placed in the same `lib.rs` file as the contract:
```rust
#[cfg(test)]
mod tests {
use super::*;
#[ink::test]
fn total_supply_works() {
let mytoken = Mytoken::new(100);
assert_eq!(mytoken.total_supply(), 100);
}
#[ink::test]
fn balance_of_works() {
let mytoken = Mytoken::new(100);
let accounts =
ink::env::test::default_accounts::();
assert_eq!(mytoken.balance_of(accounts.alice), 100);
assert_eq!(mytoken.balance_of(accounts.bob), 0);
}
#[ink::test]
fn transfer_works() {
let mut mytoken = Mytoken::new(100);
let accounts =
ink::env::test::default_accounts::();
assert_eq!(mytoken.balance_of(accounts.bob), 0);
assert_eq!(mytoken.transfer(accounts.bob, 10), Ok(()));
assert_eq!(mytoken.balance_of(accounts.bob), 10);
}
}
```
We will not go into details of this code as it should be pretty self-explanatory after implementing the contract above.
The test suite can be run by invoking `cargo test` in the terminal while inside the `mytoken` folder:
{% code overflow="wrap" %}
```bash
cargo test
Compiling mytoken v0.1.0 (/home/user/ink/mytoken)
Finished test [unoptimized + debuginfo] target(s) in 1.08s
Running unittests lib.rs (target/debug/deps/mytoken-668aad4b5e4b8a01)
running 3 tests
test tests::balance_of_works ... ok
test tests::total_supply_works ... ok
test tests::transfer_works ... ok
test result: ok. 3 passed; 0 failed; 0 ignored; 0 measured; 0 filtered out; finished in 0.00s
```
{% endcode %}
{% hint style="warning" %}
The 4.0 version of ink! introduced end-to-end tests to the smart contract development flow: we are going to cover that in a later tutorial as a recommended additional way of ensuring your contract's correctness.
{% endhint %}
### **Summary**
Finally, let's combine all the pieces of our contract into the final version. We can also add some doc comments (`///...`) to describe what these pieces do: here they are omitted for the sake of brevity but it is recommended to include them. This information will be visible to the users interacting with our contract through the Contracts UI.
{% code title="mytoken/lib.rs" overflow="wrap" fullWidth="false" %}
```rust
#![cfg_attr(not(feature = "std"), no_std, no_main)]
#[ink::contract]
mod mytoken {
use ink::storage::Mapping;
#[ink(storage)]
#[derive(Default)]
pub struct Mytoken {
total_supply: Balance,
balances: Mapping,
}
#[derive(Debug, PartialEq, Eq, scale::Encode, scale::Decode)]
#[cfg_attr(feature = "std", derive(scale_info::TypeInfo))]
pub enum Error {
InsufficientBalance,
}
impl Mytoken {
#[ink(constructor)]
pub fn new(total_supply: Balance) -> Self {
let mut balances = Mapping::default();
let caller = Self::env().caller();
balances.insert(caller, &total_supply);
Self {
total_supply,
balances,
}
}
#[ink(message)]
pub fn total_supply(&self) -> Balance {
self.total_supply
}
#[ink(message)]
pub fn balance_of(&self, owner: AccountId) -> Balance {
self.balances.get(owner).unwrap_or_default()
}
#[ink(message)]
pub fn transfer(&mut self, to: AccountId, value: Balance) -> Result<(), Error> {
let from = self.env().caller();
let from_balance = self.balance_of(from);
if from_balance < value {
return Err(Error::InsufficientBalance);
}
self.balances.insert(from, &(from_balance - value));
let to_balance = self.balance_of(to);
self.balances.insert(to, &(to_balance + value));
Ok(())
}
}
#[cfg(test)]
mod tests {
use super::*;
#[ink::test]
fn total_supply_works() {
let mytoken = Mytoken::new(100);
assert_eq!(mytoken.total_supply(), 100);
}
#[ink::test]
fn balance_of_works() {
let mytoken = Mytoken::new(100);
let accounts =
ink::env::test::default_accounts::();
assert_eq!(mytoken.balance_of(accounts.alice), 100);
assert_eq!(mytoken.balance_of(accounts.bob), 0);
}
#[ink::test]
fn transfer_works() {
let mut mytoken = Mytoken::new(100);
let accounts =
ink::env::test::default_accounts::();
assert_eq!(mytoken.balance_of(accounts.bob), 0);
assert_eq!(mytoken.transfer(accounts.bob, 10), Ok(()));
assert_eq!(mytoken.balance_of(accounts.bob), 10);
}
}
}
```
{% endcode %}
### Compiling
Now it's time to build our contract:
```bash
cargo +nightly contract build --release
```
The resulting files will be placed in `mytoken/target/ink/` folder. If the compilation is successful you will find there the following 3 files:
* `mytoken.wasm` is a binary WASM file with the compiled contract
* `metadata.json` containing our contracts ABI (Application Binary Interface)
* `mytoken.contract` which bundles the above two for more convenient interaction with the chain explorer
We are now ready to deploy our `mytoken` contract to Phron Testnet!
---
[Next Page](/llms-full.txt/1)